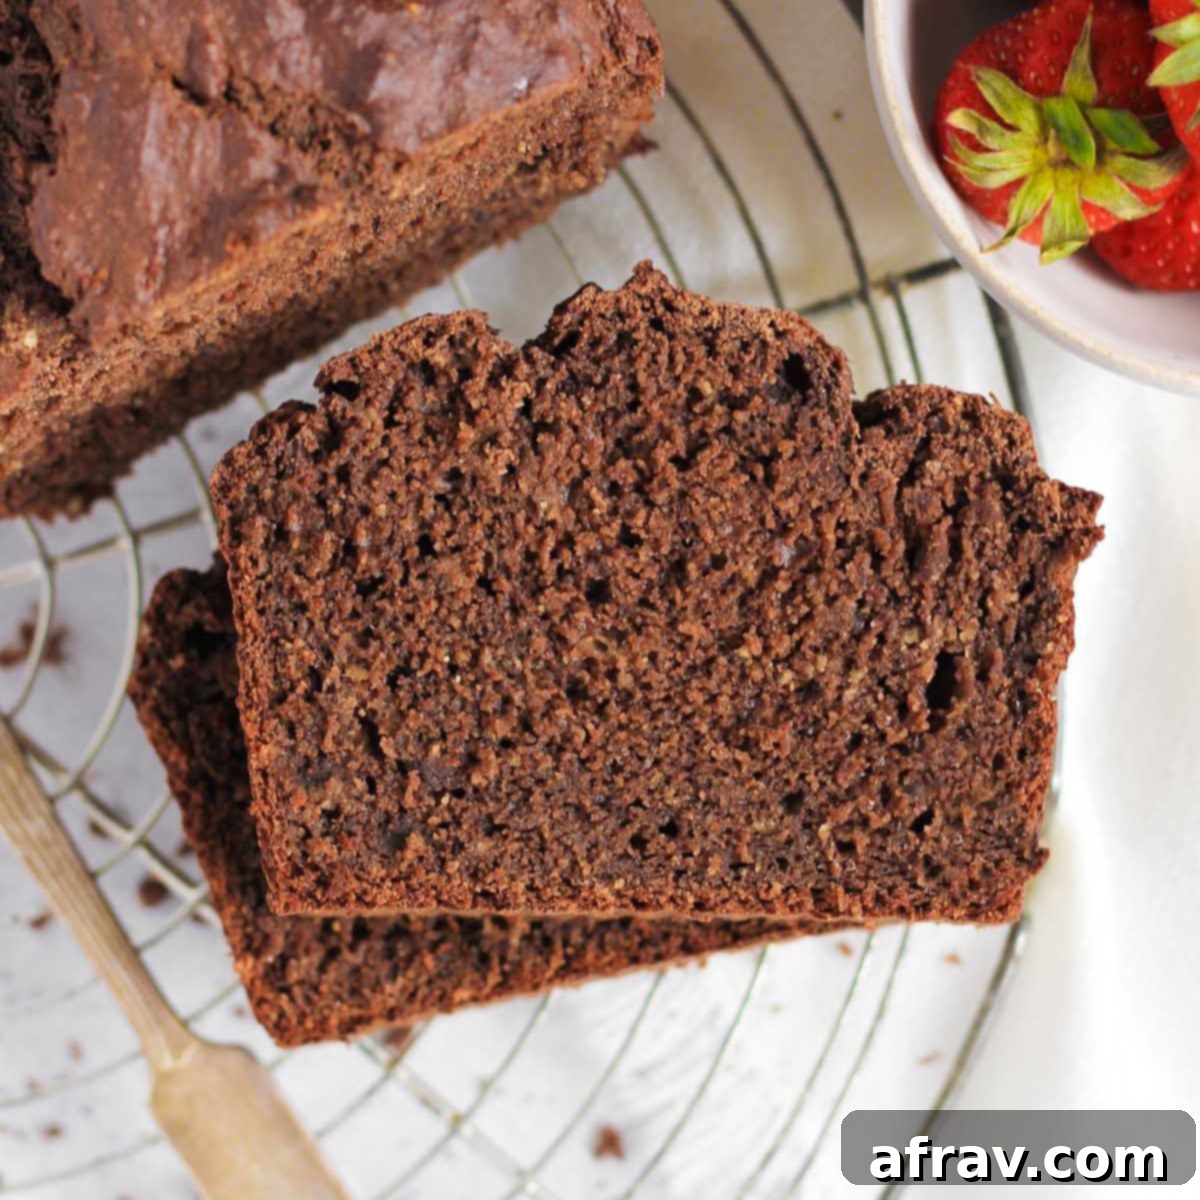
Decadent Chocolate Protein Banana Bread: A Healthy, Gluten-Free & Dairy-Free Treat
Satisfy your sweet tooth and fuel your body with this exceptionally flavorful banana bread, generously infused with rich chocolatey goodness and a powerful protein boost. This Chocolate Protein Banana Bread offers a truly delicious and nutritious twist on classic banana bread, elevating it to a wholesome, guilt-free indulgence. Crafted with 100% whole grains, naturally sweetened, and entirely gluten-free with an optional dairy-free modification, it’s a perfect addition to any healthy lifestyle.
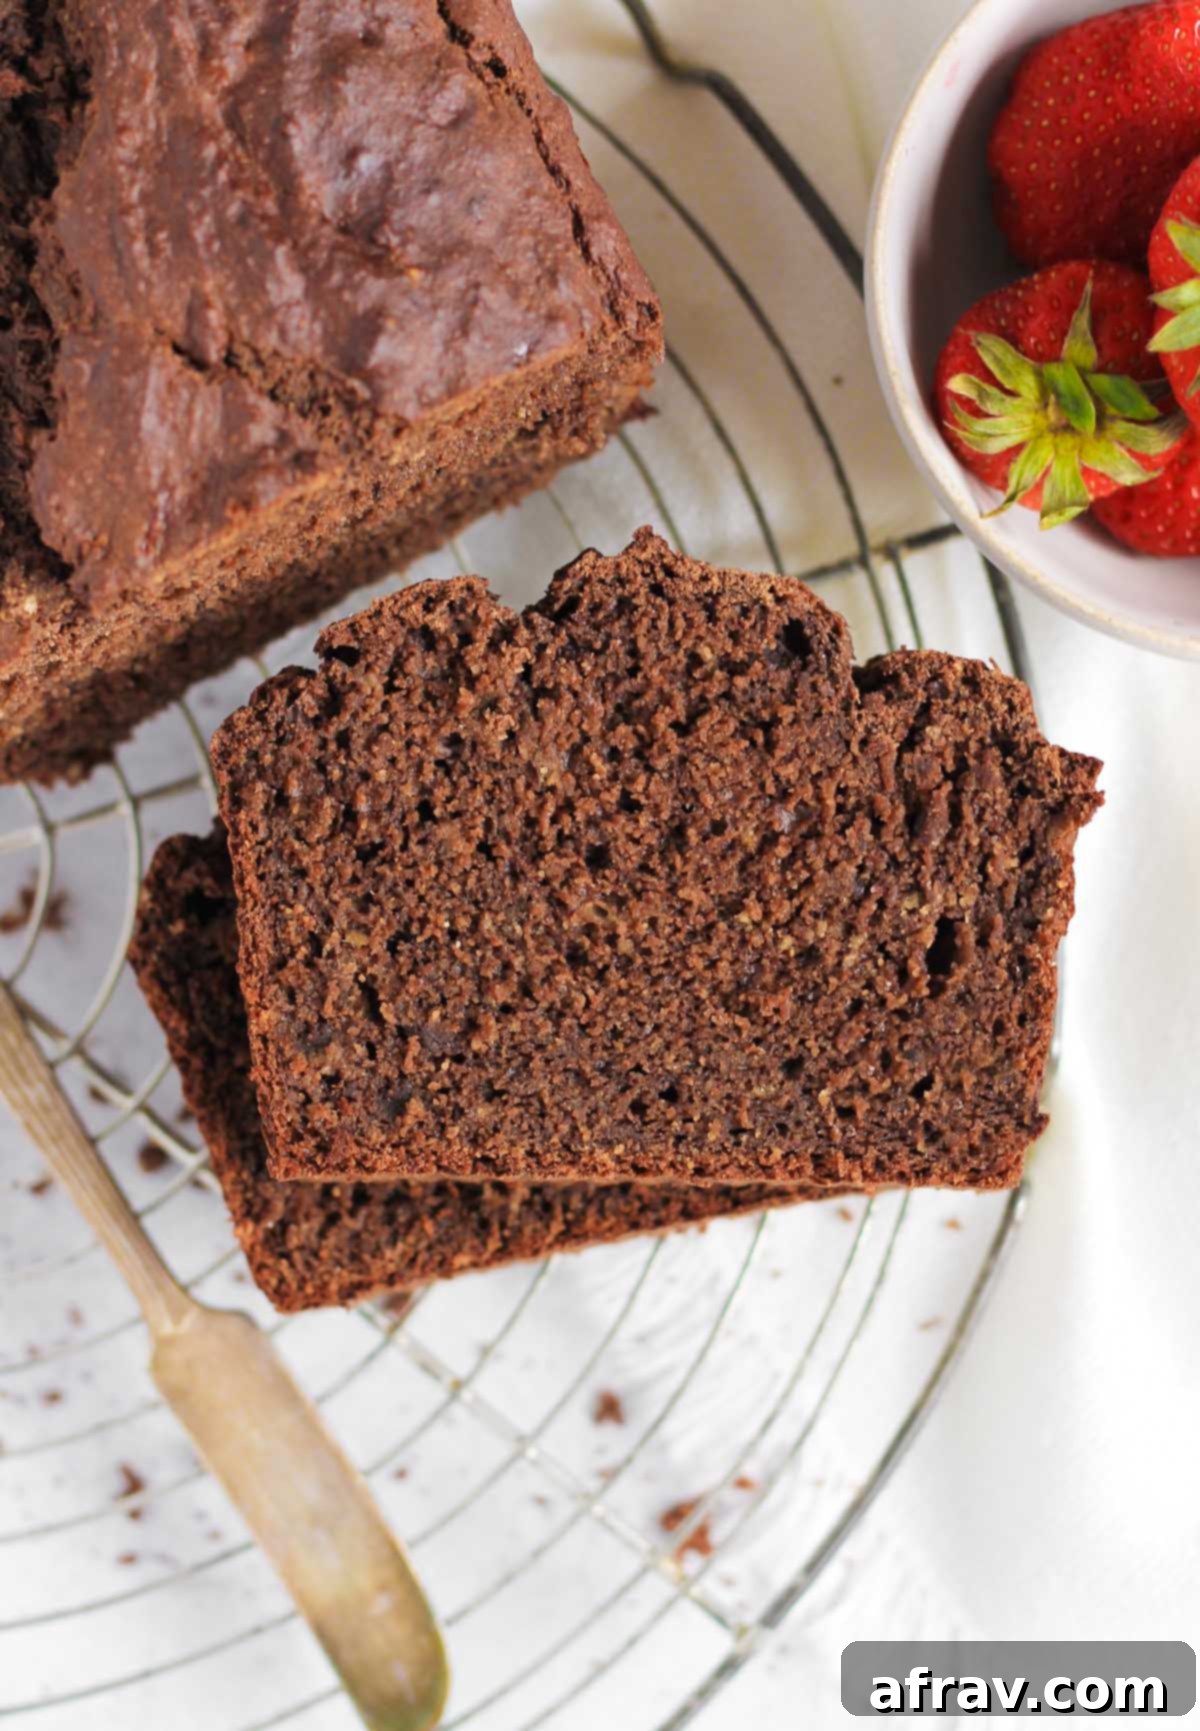
Forget everything you thought you knew about traditional banana bread and make room for this incredible chocolate protein banana bread! It captures all the beloved moistness and sweet aroma of classic banana bread, but with the delightful addition of rich chocolate and a significant protein boost. Each delightful slice provides nearly 10 grams of protein, making it an excellent choice for a satisfying snack or a healthy breakfast. (If you love protein-packed treats, don’t miss my protein banana muffins, which boast 9 grams of protein per muffin!)
If your kitchen counter is graced with a few overly ripe bananas, this recipe is precisely what you need. I particularly cherish this bread because it’s made with exclusively whole grains and sweetened minimally with natural sugars. This means you can wholeheartedly feel good about serving it to yourself and your loved ones, knowing they’re getting a treat that’s both delicious and genuinely good for them. It’s the ideal way to enjoy a comforting baked good without compromising your health goals.
For those seeking more wholesome, protein-rich culinary adventures, be sure to explore these other fantastic recipes: no-bake chocolate protein bars, chocolate protein pancakes, protein powder overnight oats, oven-roasted garbanzo beans, dairy-free vegetable frittata, and blueberry chia overnight oats.
Why This Recipe Works: Your New Favorite Healthy Treat!
This Chocolate Protein Banana Bread isn’t just another recipe; it’s a testament to how wholesome ingredients can create something truly extraordinary and satisfying. Here’s why this particular recipe stands out:
- Packed with Whole Grains – Unlike many traditional banana bread recipes that rely on refined flours, this recipe is meticulously crafted using 100% oat flour. This means you’re benefiting from all the incredible nutrients, fiber, and sustained energy that whole grains provide. Oat flour contributes to a healthier gut and helps keep you feeling fuller for longer.
- Refined Sugar-Free Goodness – We believe in natural sweetness! This bread is minimally sweetened with a touch of coconut sugar, a fantastic alternative to refined white sugar. Coconut sugar boasts a lower glycemic index, which means it causes a slower, more gradual rise in blood sugar compared to conventional sugars. This helps prevent energy crashes and supports overall metabolic health.
- Gluten-Free and Dairy-Free Friendly – Designed with dietary sensitivities in mind, this recipe uses inherently gluten-free ingredients (with the important note to use certified gluten-free oat flour if necessary). Furthermore, by opting for coconut oil and plant-based milk, it’s effortlessly dairy-free, making it accessible and enjoyable for a wider range of eaters without sacrificing taste or texture.
- Perfect for Any Time of Day – Whether you need a quick, energizing start to your morning, a satisfying mid-afternoon pick-me-up, or a nutritious post-workout recovery snack, this bread is incredibly versatile. Just like my popular banana muffins and gluten-free pumpkin bread, these slices are conveniently portable and offer a guilt-free indulgence that fits seamlessly into your busy schedule.
Essential Ingredients for Your Chocolate Protein Banana Bread
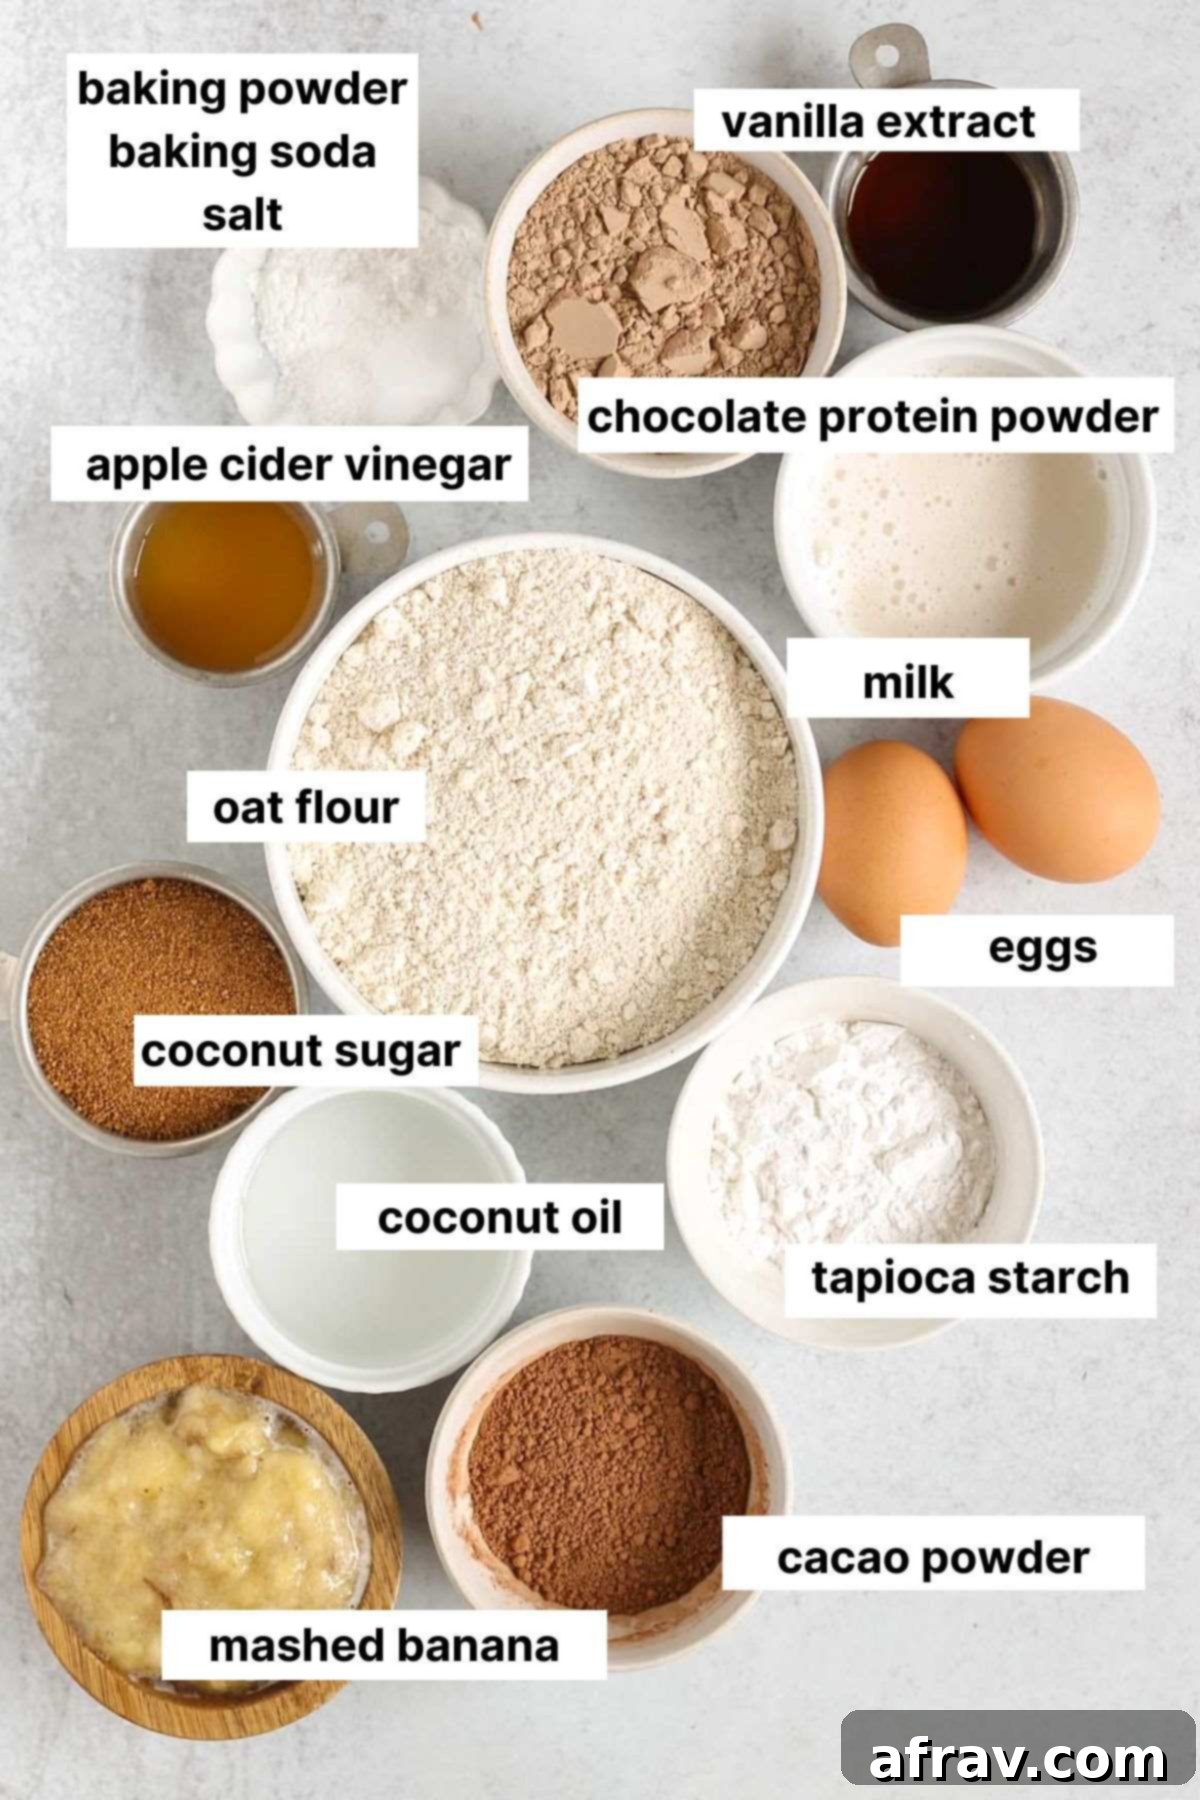
A complete list of ingredients and precise amounts can be found in the recipe card below. Here are some specific notes and tips to help you select the best ingredients for this recipe, ensuring optimal flavor and texture.
- Oat Flour – This is our star whole grain flour. For a truly gluten-free bread, it’s crucial to use certified gluten-free oat flour, as oats can be cross-contaminated with gluten during processing. While store-bought oat flour works perfectly, I highly recommend making your own oat flour from rolled oats. It’s incredibly simple, significantly more cost-effective, and gives you complete control over the freshness.
- Tapioca Starch (or Arrowroot Starch) – In gluten-free baking, a binder is essential to provide structure and a pleasant texture since gluten is absent. Tapioca starch (or arrowroot starch/powder, which is an excellent substitute) acts as this binder, helping to create a moist crumb and prevent the bread from becoming too crumbly.
- Apple Cider Vinegar – This might seem like an unusual addition, but it plays a vital role in our gluten-free recipe! Apple cider vinegar reacts with the baking powder and baking soda, creating tiny air bubbles that help the bread rise beautifully without the need for gluten. Fresh lemon juice can also be used as an effective alternative.
- Coconut Oil – Chosen for its rich flavor and as a dairy-free fat source, melted coconut oil contributes to the bread’s moisture and tender crumb. If you don’t require the recipe to be dairy-free, you can certainly substitute an equal amount of melted unsalted butter.
- Cacao Powder – For that deep, intense chocolate flavor and added nutritional benefits, I prefer using cacao powder. Cacao is less processed than conventional cocoa powder, retaining more of its natural antioxidants and nutrients. However, if cacao isn’t available, high-quality unsweetened cocoa powder can be used interchangeably, though the flavor might be slightly less intense.
- Ripe Bananas – The riper the better! Look for bananas with plenty of brown spots or even fully browned skins. These bananas are naturally sweeter and softer, providing the best flavor and moisture for your bread.
- Chocolate Protein Powder – Your choice of chocolate protein powder will significantly impact the flavor and protein content. Select a brand you enjoy the taste of, as some can be chalky or artificial. (See the section below for more detailed recommendations!)
How to Make Chocolate Protein Banana Bread: A Simple Step-by-Step Guide
Creating this delicious and healthy chocolate protein banana bread is surprisingly simple, even for novice bakers. Follow these straightforward steps for a perfect loaf every time:
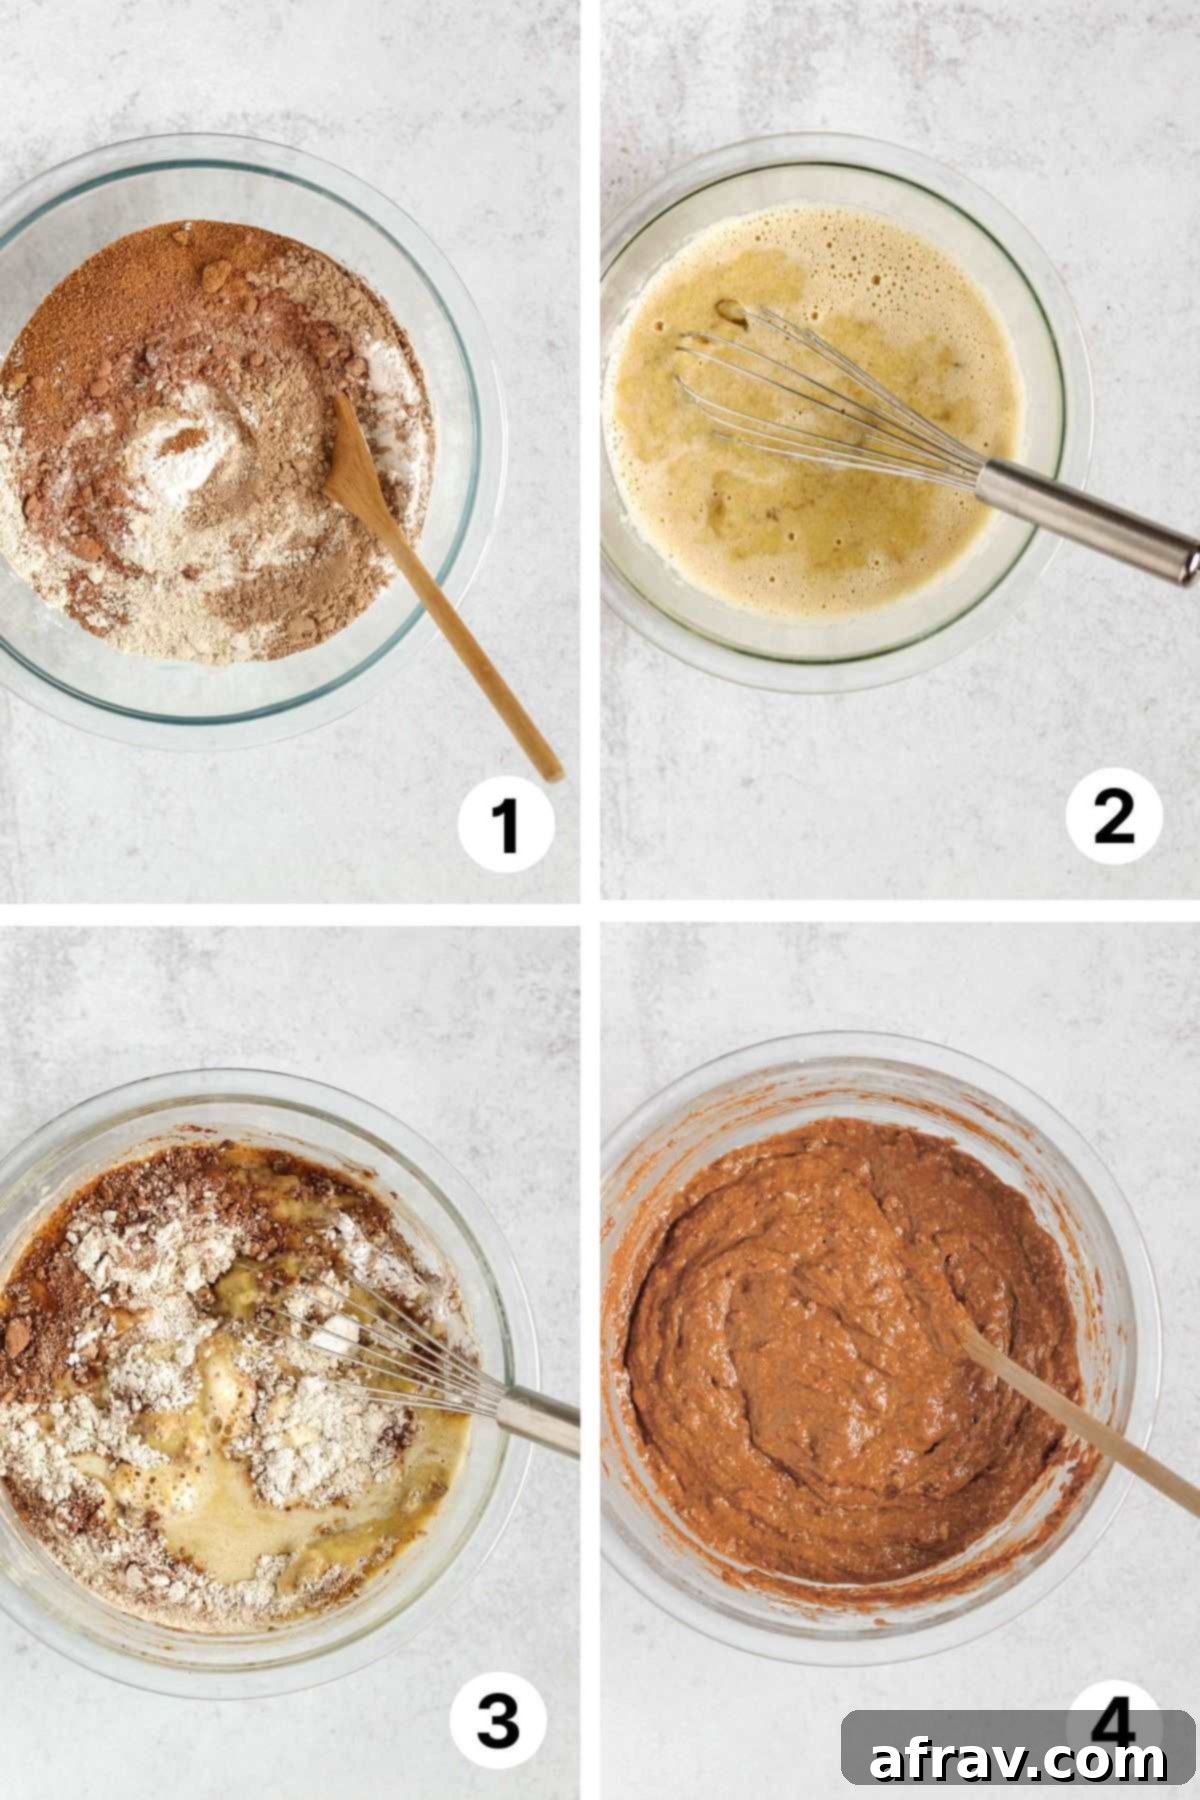
- Step 1: Combine the Dry Ingredients. In a large mixing bowl, whisk together your oat flour, chocolate protein powder, cacao powder, tapioca starch, coconut sugar, baking powder, baking soda, and fine sea salt. Ensure all ingredients are thoroughly combined and there are no lumps, especially from the powders. This even distribution helps the bread rise uniformly.
- Step 2: Whisk the Wet Ingredients. In a separate, smaller mixing bowl, combine your mashed ripe banana, vanilla extract, apple cider vinegar, melted coconut oil, room temperature eggs, and milk (dairy or non-dairy). Whisk vigorously until the mixture is smooth and well-integrated. The room temperature eggs are crucial for better emulsification and a lighter texture.
- Step 3: Gently Combine Wet and Dry. Pour the wet ingredient mixture into the large bowl containing the dry ingredients.
- Step 4: Mix Thoroughly (But Don’t Overmix!). Using a spatula or wooden spoon, gently fold the wet into the dry ingredients. Mix just until all streaks of flour have disappeared and the batter is uniformly moistened. Overmixing can develop toughness in baked goods, even gluten-free ones, so stop as soon as it’s combined. The batter will be thick.
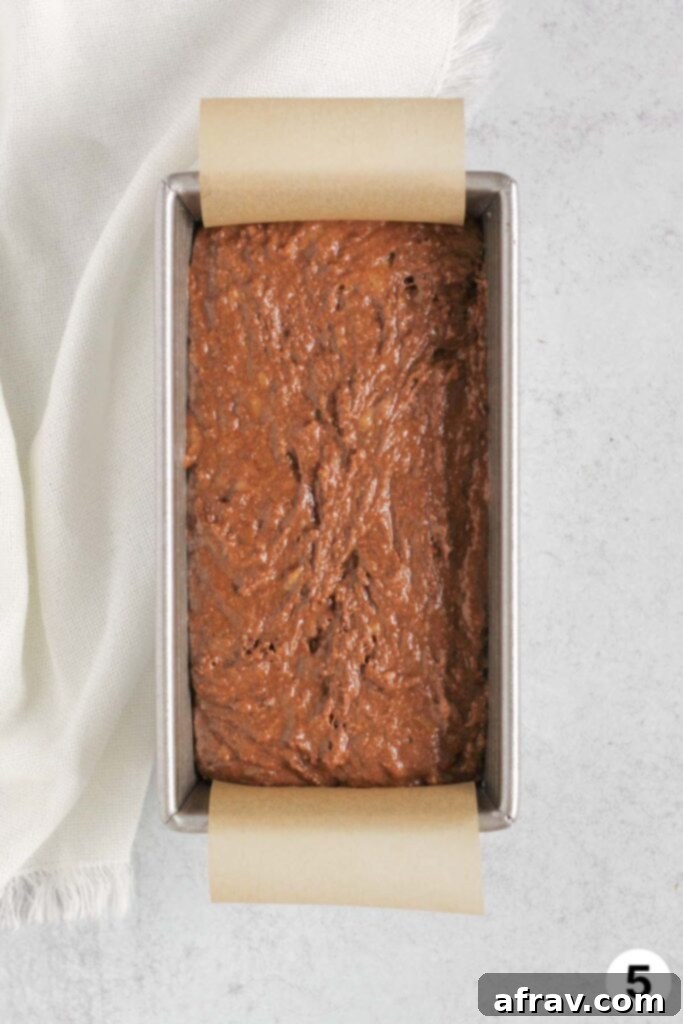
- Step 5: Prepare for Baking. Line a standard 9×5 inch loaf pan with parchment paper, allowing an ample amount to hang over the long ends. This creates “handles” that will make it incredibly easy to lift the baked bread out of the pan. Lightly grease any exposed parts of the pan. Pour the thick batter evenly into the prepared loaf pan, smoothing the top with your spatula.
- Step 6: Bake to Perfection. Place the loaf pan in your preheated oven at 350-degrees F (175°C) and bake for approximately 48-53 minutes. The bread is done when a knife or wooden skewer inserted into the very center comes out clean, with no wet batter clinging to it. If the top starts to brown too quickly, you can loosely tent it with aluminum foil for the last 10-15 minutes of baking.
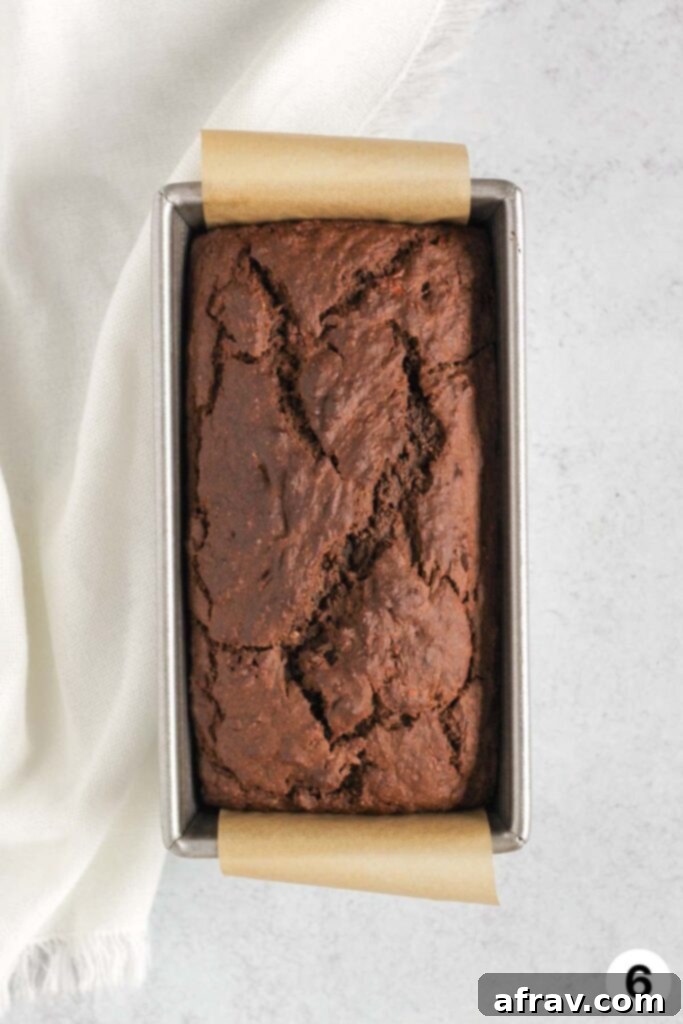
Once baked, allow the bread to cool slightly in the loaf pan for about 15 minutes. This crucial step helps the bread set and firm up before handling. Then, gently pull on the extra parchment paper handles to carefully lift the entire bread loaf out of the pan and transfer it to a wire cooling rack.
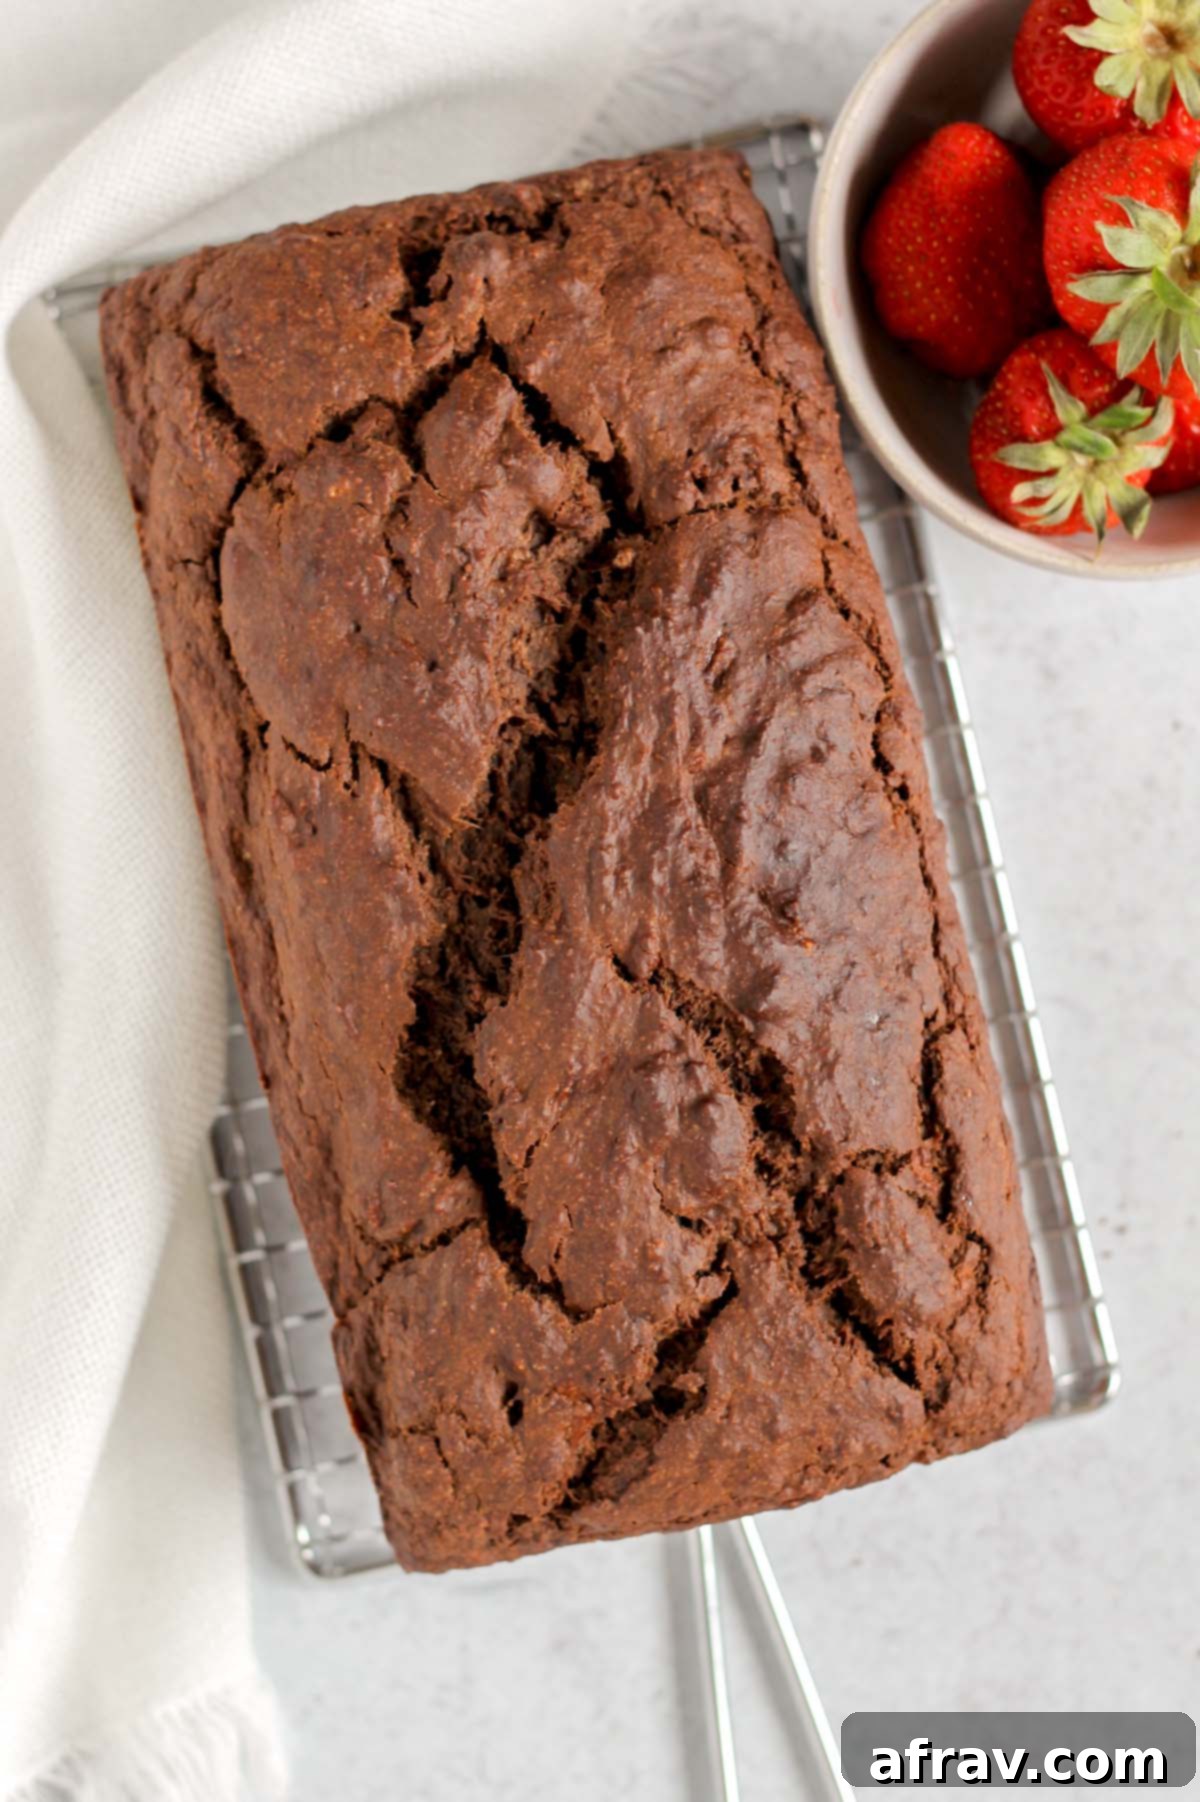
It’s important to allow the bread to cool completely to room temperature on the wire rack before attempting to slice it. While it might be tempting to dig in immediately, the bread continues to set and develop its final texture as it cools. Slicing it too soon can result in a crumbly or dense texture, especially with gluten-free baked goods.
Choosing the Best Protein Powder for Your Banana Bread
The market is saturated with countless protein powders, and let’s be honest, many of them can be chalky, have an artificial aftertaste, or simply don’t deliver on flavor. However, the good news is that almost any protein powder you prefer should work technically in this recipe. If you already have a favorite that you enjoy the taste of, I highly recommend sticking with that one to ensure you’ll love the final result.
If you’re on the hunt for a new, high-quality protein powder that truly tastes great, I cannot recommend Truvani Chocolate Protein Powder enough. It stands out because it’s crafted with incredibly simple, clean ingredients, free from a multitude of unnecessary additives and “junk.” In my personal experience, it offers the best taste profile of any protein powder I’ve tried, blending seamlessly into recipes without any unpleasant notes.
Beyond Truvani, I’ve also heard excellent feedback about Sprout Living protein powder (though I haven’t personally tried it yet). For those who are fans of established brands, Garden of Life chocolate protein has always been a reliable choice in the vegan protein powder category. If you’re specifically looking for a high-quality whey protein, I would again point towards Garden of Life’s whey protein, which prides itself on simple, organic ingredients sourced from pasture-raised/grass-fed cows.
Clean Food Tip for Protein Powder Selection: When choosing any protein powder, make informed decisions by scrutinizing the label. Here’s what to look for to ensure you’re getting a truly clean product:
- Organic Certification: Opt for organic whenever possible to avoid synthetic pesticides, herbicides, and genetically modified (GMO) ingredients. This ensures a purer product from source to scoop.
- Low in Added Sugars: Many protein powders are loaded with hidden sugars or artificial sweeteners. Look for brands with minimal added sugars to keep your intake in check and focus on natural sweetness.
- No Artificial Flavors (or “Natural Flavors”): Artificial flavors can often mask lower-quality ingredients or introduce unwanted chemicals. Even “natural flavors” can be derived from complex, highly processed sources. Simpler is always better for truly clean eating.
- Avoid Soy Protein Concentrate or Isolate: Soy protein, especially in concentrated or isolated forms, can be highly processed and may pose concerns for some individuals. Look for alternatives like pea, rice, or grass-fed whey.
- Sweeteners to Consider: While a minimal amount of stevia leaf extract (not artificial stevia) is generally acceptable, and organic erythritol in very small doses is usually fine, always be mindful of the overall sweetener content and your personal tolerance.
Storing Your Chocolate Protein Banana Bread for Maximum Freshness
Proper storage is key to enjoying your homemade chocolate protein banana bread for days to come. Here’s how to keep it fresh and delicious:
- At Room Temperature: Always allow the bread to cool completely to room temperature before storing. Once cooled, place the entire loaf or individual slices in an airtight container. It will maintain its freshness and delightful texture for up to 48 hours when stored this way. Avoid direct sunlight or warm areas.
- In the Refrigerator: To extend the shelf life of your banana bread, you can store it in an airtight container in the refrigerator for up to 5-7 days. While refrigeration can sometimes alter the texture slightly, a quick warm-up in the microwave for 15-30 seconds per slice will bring it back to a wonderfully soft, moist, and delicious state, making it feel freshly baked again.
- Freezing for Long-Term Enjoyment: This bread freezes exceptionally well, making it perfect for meal prep or saving for future cravings. I highly recommend slicing the bread into individual portions before freezing. Wrap each slice tightly in plastic wrap, then place the wrapped slices into a freezer-safe bag or airtight container. This allows you to thaw just one slice at a time whenever needed. The bread will retain its quality in the freezer for up to 2 months. Thaw individual slices at room temperature or gently warm them in the microwave.
Expert Tips & Notes for the Perfect Loaf
Achieving the best possible chocolate protein banana bread is easy with these insider tips:
Embrace Very Ripe Bananas: The secret to truly flavorful and naturally sweet banana bread lies in using very ripe bananas. Look for bananas with plenty of brown spots or even a fully browned peel. These bananas are not only sweeter but also softer and easier to mash, imparting a much more intense banana flavor and contributing to the bread’s moistness.
Go Double Chocolate: For the ultimate chocolate lover, transform this into a double chocolate banana bread! Simply fold in 1 cup of your favorite chocolate chips (dark, semi-sweet, or even dairy-free) into the batter just before pouring it into the loaf pan and baking. This adds an extra layer of gooey, melty chocolate in every bite.
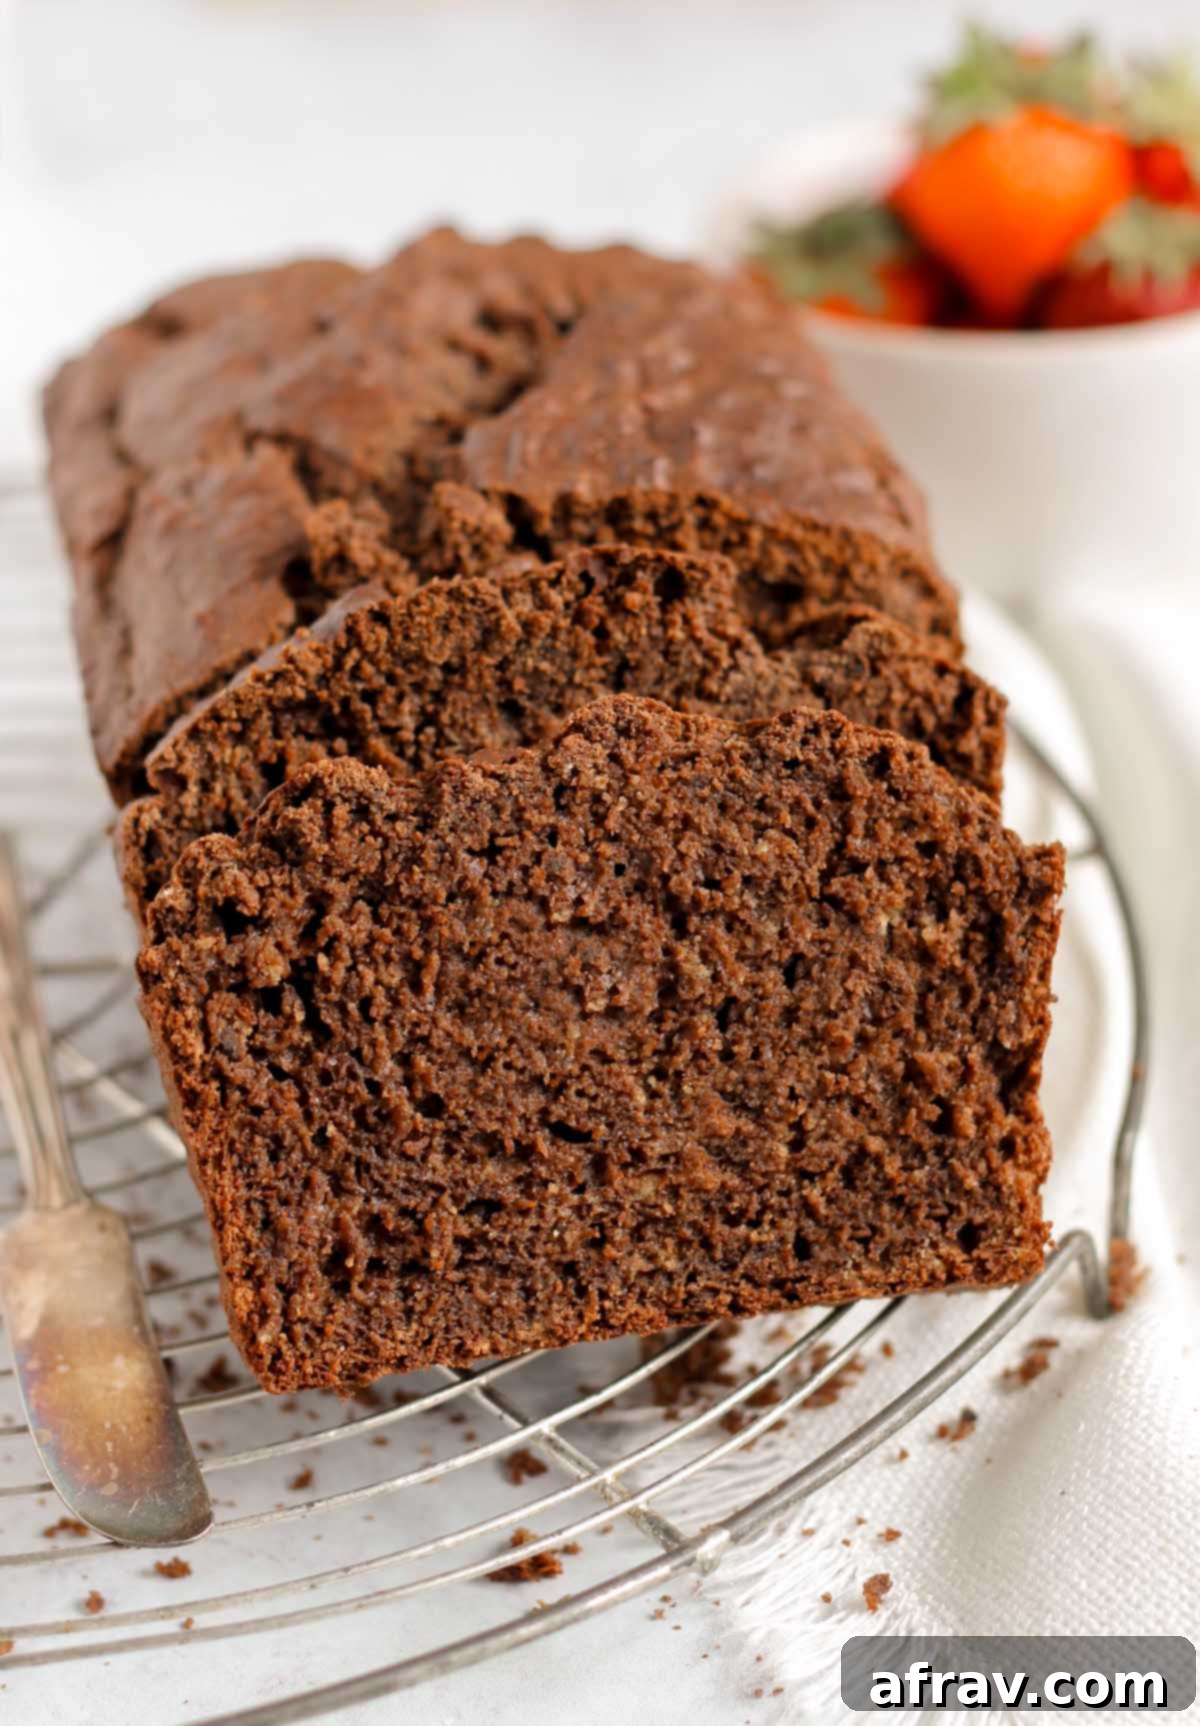
Patience is Key for Slicing: It’s absolutely crucial to allow the bread to fully cool before slicing. Oat flour baked goods, like this banana bread, are notoriously fragile when they are still warm. Cutting into a warm loaf can cause it to crumble or compress. Once cooled, it will firm up and slice beautifully. Additionally, for the best structural integrity, slice into thicker slices. If you desire smaller pieces, you can always slice each thick piece in half horizontally or vertically.
Homemade Oat Flour Advantage: You have the option to use either store-bought oat flour or to make your own oat flour. I enthusiastically recommend making your own! It’s significantly more cost-effective, incredibly easy to prepare with a blender or food processor, and ensures maximum freshness for your bake.
Certified Gluten-Free Oats are Essential: For those who truly need this bread to be 100% gluten-free due to Celiac disease or severe gluten sensitivity, it is vital to use certified gluten-free oat flour. While oats are naturally gluten-free, they are often processed in facilities that also handle wheat, barley, and rye, leading to cross-contamination. Certified gluten-free oats guarantee they meet strict standards for gluten absence.
Common Questions About This Recipe
Absolutely! With approximately 9 grams of protein per slice, this chocolate protein banana bread is indeed a decent and convenient source of protein. It’s an excellent option when you’re seeking a quick bread recipe that not only satisfies your cravings but also offers valuable added nutrients and a significant protein boost to support your energy levels and muscle health.
I have exclusively tested this recipe with oat flour, and as such, I cannot guarantee the success or comparable results if you substitute a different type of flour. This recipe is specifically formulated for oat flour, which has unique properties. Additionally, I’ve incorporated tapioca starch and apple cider vinegar to compensate for oat flour’s lack of gluten, aiding in the bread’s texture and rise. Substituting a different flour would likely alter the delicate balance of these ingredients and may lead to an entirely different outcome.
While I haven’t personally tested this specific recipe as muffins, I am confident that it would work beautifully! To adapt the recipe for muffins, simply line a 12-cup muffin tin with paper liners. Distribute the batter evenly among the 12 muffin cups, filling each about two-thirds full. Bake at the same temperature of 350-degrees F (175°C) but reduce the baking time to approximately 20-25 minutes, or until a toothpick inserted into the center of a muffin comes out clean. Keep an eye on them as baking times can vary between ovens and muffin tin materials.
Explore More Delicious Gluten-Free Baked Goods
If you loved this chocolate protein banana bread, you’ll surely enjoy these other fantastic gluten-free treats:
- Fluffy Almond Flour Blackberry Muffins
- Gluten-free Chocolate Chip Pumpkin Bread
- Almond Flour Blueberry Lemon Bread
- Gluten-free Banana Bread Muffins
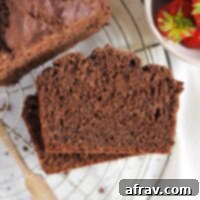
Chocolate Protein Banana Bread
Print
Pin
Rate
Save This Recipe For Later!
We’ll email this post to you, so you can come back to it later. Plus, enjoy weekly clean eating recipes as a bonus.
Equipment
-
2 mixing bowls
-
1 9×5 loaf pan
Ingredients
- 2 cups oat flour (certified gluten free if needed)
- ¼ cup chocolate protein powder
- 2 tbsp. cacao powder
- 2 tbsp. tapioca starch (or arrowroot starch)
- ¼ cup coconut sugar
- 1 tsp. baking powder
- ¼ tsp. baking soda
- ¼ tsp. fine sea salt
- ½ cup mashed ripe banana
- 1 tsp. vanilla extract
- ½ tbsp. apple cider vinegar
- 2 tbsp. coconut oil, melted
- 2 eggs room temp
- ¼ cup milk (dairy or non-dairy will work)
Instructions
-
Preheat your oven to 350-degrees F (175°C). Prepare your 9×5 inch loaf pan by greasing it lightly, then lining it with parchment paper. Ensure there’s enough parchment paper hanging over the long ends to act as “handles” later. Set this prepared pan aside.
-
In a large mixing bowl, combine all the dry ingredients: oat flour, chocolate protein powder, cacao powder, tapioca starch, coconut sugar, baking powder, baking soda, and fine sea salt. Whisk these ingredients together thoroughly until they are uniformly combined and free of any visible lumps. This ensures even distribution throughout your bread.
-
In a separate, medium-sized bowl, whisk together the wet ingredients: mashed ripe banana, vanilla extract, apple cider vinegar, melted coconut oil, room temperature eggs, and your choice of milk (dairy or non-dairy). Whisk well until the mixture is smooth and cohesive.
-
Pour the whisked wet ingredients into the large bowl containing the dry ingredients. Using a spatula, mix them together until they are just combined. It is crucial not to overmix the batter, as this can lead to a tougher texture in your finished bread. Mix only until no dry flour streaks remain.
-
Transfer the batter into your prepared loaf pan, spreading it evenly. Bake for approximately 48-53 minutes, or until a knife or wooden skewer inserted into the center of the loaf comes out completely clean. Let the bread cool in the pan for about 15 minutes before proceeding.
-
After cooling in the pan, use the overhanging parchment paper to gently lift the entire loaf out of the pan and transfer it to a wire cooling rack. Allow the bread to cool completely to room temperature before slicing. This step is essential for the bread to set properly and prevent crumbling. Once fully cooled, slice, serve, and enjoy!
Notes
- Using room temperature eggs is a small but significant detail that helps the bread rise more effectively and results in a lighter, more uniform crumb. If your eggs are cold from the fridge, you can quickly bring them to room temperature by placing them in a bowl of warm (not hot) water for about a minute or two.
- When slicing, especially with oat flour-based recipes, aim for thicker slices. Oat flour bread tends to be more delicate and fragile than traditional wheat breads. Cutting it into thicker slices provides more structural integrity, helping the bread hold together beautifully. If you prefer smaller pieces, you can always slice a thick piece in half once it’s on your plate.
Nutrition
