Delicious Homemade Pumpkin Banana Waffles: Your Perfect Fall Breakfast
There’s a special kind of joy that comes from making breakfast from scratch, and it all starts with the right tools. I’d been dreaming of owning a waffle iron for what felt like ages, and the moment I finally got one, I was itching to dive into the world of homemade waffles. With autumn in full swing, my thoughts naturally turned to cozy, spiced flavors. That’s how these delightful pumpkin waffles came to be, but with a unique and delicious twist: the addition of ripe bananas. Not only am I a big fan of bananas, but they also bring a wonderful natural sweetness to the batter, meaning I can drastically reduce (or even eliminate) added sugars. The result is a lighter, fluffier, and more wholesome waffle that truly captures the essence of fall.

Why Every Kitchen Needs a Waffle Maker
If you’ve been on the fence about getting a waffle maker, let me tell you, it’s a game-changer! It opens up a world of breakfast possibilities, far beyond just classic waffles. I personally use this Cuisinart waffle iron, and while it’s a pretty basic model, it performs flawlessly every time. You might come across some reviews mentioning waffles sticking or difficulty getting them just right, but I’ve honestly had zero issues. My secret? A light grease of the iron once for the entire batch, and every single waffle comes out perfectly golden and easily released. It makes me wonder what those less favorable reviews are talking about! Whether you opt for a classic round waffle maker like mine or a fancier Belgian-style one, the joy of fresh, hot waffles is undeniable.
The Magic Duo: Pumpkin and Banana
Combining pumpkin and banana in a waffle recipe is a stroke of culinary genius, especially when you’re looking for wholesome, comforting flavors. Pumpkin, a star of the autumn season, brings its earthy, slightly sweet notes and a beautiful orange hue, along with a boost of vitamins and fiber. But the real secret weapon here is the ripe banana. As bananas ripen, their starches convert to sugars, offering a natural sweetness that significantly reduces the need for refined sugar in the recipe. This not only makes these waffles healthier but also enhances their moistness and tender texture. Together, pumpkin and banana create a harmonious flavor profile that’s both nostalgic and incredibly satisfying, making these waffles an instant fall favorite that your family will ask for again and again.
Essential Tips for Waffle Perfection Every Time
Achieving perfectly crisp yet fluffy waffles is simpler than you might think with a few key techniques:
- Don’t Overmix the Batter: This is arguably the most crucial tip for any baked good, especially waffles. Overmixing develops the gluten in the flour too much, leading to tough, chewy waffles rather than the light and airy texture we all crave. Mix just until the wet and dry ingredients are combined, even if there are a few small lumps.
- For a Super Crispy Exterior: If you love that satisfying crunch, don’t eat your waffles straight off the iron. Let them cool slightly on a wire rack for a minute or two to allow steam to escape, then pop them into a toaster on a low setting for another minute. This trick works wonders for achieving an incredibly crispy outside while maintaining a soft interior.
- Warm Your Wet Ingredients: When using ingredients like coconut oil, which solidifies at cooler temperatures, ensure your milk (and eggs, if possible) are at least room temperature. If cold milk hits melted coconut oil, the oil will seize up and create small solid chunks in your batter, making it difficult to mix evenly. A quick zap in the microwave for the milk can prevent this.
- Preheat Your Waffle Iron Properly: Always let your waffle iron fully preheat before pouring in the batter. Most waffle makers have an indicator light that tells you when it’s ready. A properly heated iron ensures an even cook and prevents sticking.
- Grease Lightly (If Needed): While some modern waffle irons boast non-stick surfaces, a very light brush of oil or cooking spray can guarantee easy release, especially for the first waffle. As mentioned, for my Cuisinart, one light greasing for the whole batch is usually enough.
- Don’t Overfill: Resist the urge to pour too much batter. Most standard waffle irons need about ½ to ¾ cup of batter per waffle. Overfilling will cause batter to spill out the sides, creating a mess and potentially unevenly cooked waffles.
- Patience is a Virtue: Let the waffle cook until the steam coming from the sides of the iron significantly reduces or stops, and the indicator light (if your model has one) signals it’s done. Opening the iron too early can tear the waffle.
Meal Prepping Made Easy: Freeze for Future Feasts
One of the best things about making a big batch of these pumpkin banana waffles is how wonderfully they freeze and reheat, making them perfect for meal prep. Imagine having a wholesome, homemade breakfast ready to go on busy weekday mornings! To freeze, allow the freshly cooked waffles to cool completely on a wire rack. This is crucial to prevent sogginess. Once cooled, you can flash-freeze them in a single layer on a baking sheet until firm, then transfer them to an airtight freezer bag or container. They’ll keep well for up to 2-3 months.
When you’re ready to enjoy them, simply pop a frozen waffle directly into your toaster or toaster oven until heated through and crispy. They taste almost as good as fresh, and they’re a fantastic, nutritious option for quick breakfasts or even as a fun “breakfast for lunch” treat, which my girls absolutely adore!
Serving Suggestions and Delicious Variations
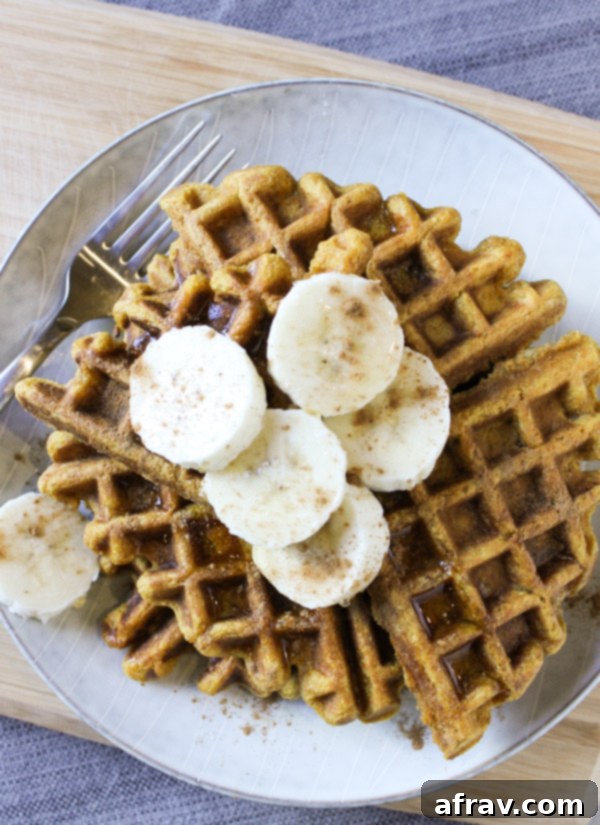
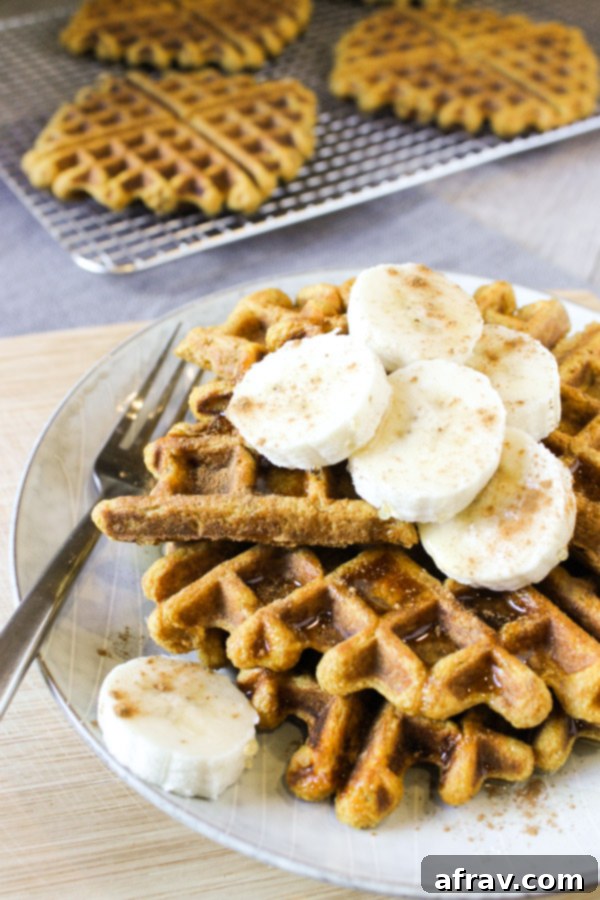
While these pumpkin banana waffles are phenomenal on their own, a few simple toppings can elevate them even further. A classic drizzle of maple syrup is always a winner. Beyond that, a dollop of whipped cream, a sprinkle of ground cinnamon (as shown in the photos – seriously amazing!), or additional slices of fresh banana can enhance the experience. Don’t hesitate to get creative! You could also add a handful of chocolate chips or chopped walnuts to the batter for extra texture and flavor. For dietary adaptations, feel free to experiment with a gluten-free flour blend for a gluten-free version, or use your favorite non-dairy milk to make them completely dairy-free. These waffles are incredibly versatile and are sure to become a staple in your kitchen.

Pumpkin Banana Waffles
Print
Pin
Rate
Save This Recipe For Later!
We’ll email this post to you, so you can come back to it later. Plus, enjoy weekly clean eating recipes as a bonus.
Ingredients
- 2 cups white whole wheat flour
- ½ tsp. salt
- 2 tsp. baking powder
- 1 tsp. baking soda
- 1 tsp. cinnamon
- ¼ tsp. nutmeg
- 2 eggs
- 1 ¼ cup milk of choice
- ⅓ cup coconut oil, melted
- 1 tsp. vanilla
- 1 can pumpkin puree (not pie filling)
- 1 small/medium ripe banana, mashed
Instructions
-
Turn waffle iron on to medium-high heat and allow it to fully preheat.
-
In a large bowl, mix all of the dry ingredients (flour through nutmeg) thoroughly.
-
In a separate medium bowl, combine the remaining wet ingredients (eggs, milk, melted coconut oil, vanilla, pumpkin puree, and mashed banana). Whisk until well combined.
-
Pour the wet mixture into the dry ingredients. Mix gently until just combined. Be careful not to overmix, as this can negatively affect the texture of the waffles. A few small lumps are perfectly fine.
-
Once your waffle iron is preheated (and greased if necessary), use a ½ cup measuring cup to pour the batter onto the waffle maker. Close the lid and cook according to your waffle iron’s instructions or until golden brown and steam subsides.
-
Remove the cooked waffle and place it on a wire rack while you continue cooking the remaining batter. Repeat this process until all waffles are made.
Notes
- To prevent the coconut oil from solidifying again after it’s added to the other wet ingredients, ensure your milk (and eggs) are warmed to at least room temperature. If the other ingredients are too cold, the coconut oil will solidify into small chunks.
- Do not overmix the batter, or the texture of the waffles will be affected, making them tough instead of fluffy.
- For a super crispy outside, allow the cooked waffle to cool slightly on a wire rack, then place it in a toaster for a minute or two before eating. This helps to crisp up the exterior.
- These waffles are great for freezing! Once completely cooled, store them in an airtight freezer bag for a quick and easy breakfast later. Reheat directly from frozen in a toaster or toaster oven.
Nutrition
