Easy Butternut Squash Bread Recipe: Moist Loaf with Crumb Topping & Maple Glaze
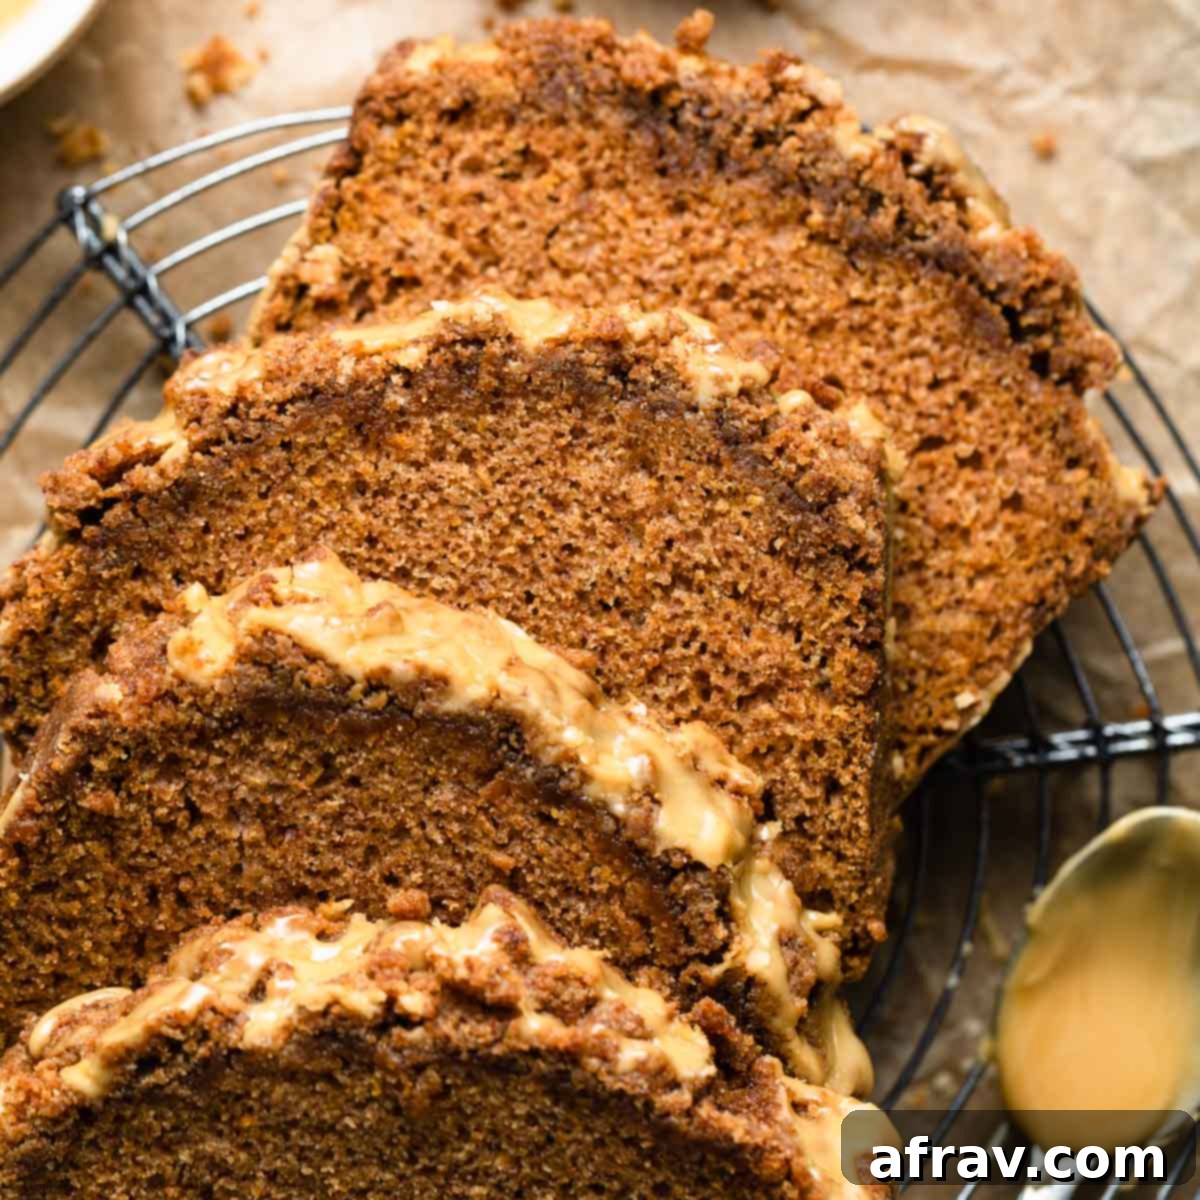
Move over, pumpkin! This **Butternut Squash Bread** is a truly sensational and flavorful twist on traditional fall quick breads. Crafted with a silky, homemade butternut squash puree, this moist and tender loaf is elevated by a rich, buttery crumb topping and a luscious, easy-to-make maple glaze. Each slice promises a delightful texture and an aromatic burst of warming spices like cinnamon and ginger, making it the ultimate cozy treat for autumn.
While pumpkin bread often takes center stage during the cooler months, it’s time to let butternut squash shine! Our recipe delivers a beautifully moist and wonderfully fluffy bread, brimming with all those comforting, earthy, and sweet fall flavors you crave. It’s not just a substitute; it’s a star in its own right, offering a slightly sweeter and nuttier profile than its pumpkin counterpart.
Don’t misunderstand, my affection for all things pumpkin remains strong! Beloved recipes like this healthy pumpkin bread and the decadent pumpkin bundt cake (with its mesmerizing chocolate swirl) are always on heavy rotation during the autumn baking season. However, I’ve been captivated by the versatility and subtle sweetness of butternut squash lately, which has led to the creation of this exquisite butternut squash loaf!
One of the beauties of this quick bread is its balanced sweetness. The bread itself is designed to be moderately sweet, allowing the natural flavor of the squash and spices to shine. The real indulgence comes from the glorious crumb topping and the delicate maple glaze, which together provide the perfect amount of sugary delight. If you prefer your quick breads with less added sugar, you can simply bake the loaf without the streusel topping for a more subtle treat.
However, for those who truly appreciate a sweet finish, I wholeheartedly recommend embracing both the crispy, buttery, sugary streusel topping and the luscious maple glaze. They add an irresistible layer of texture and flavor that makes this butternut squash bread truly unforgettable.
Why You’ll Fall in Love with This Butternut Squash Bread Recipe
This isn’t just another quick bread; it’s a delightful experience waiting to happen. Here’s why this butternut squash bread will quickly become a cherished part of your fall baking repertoire:
- Wonderfully Dairy-Free & Adaptable: This recipe thoughtfully calls for almond milk and vegan butter, making it an excellent choice for anyone with dairy sensitivities or those following a plant-based diet. The best part? If dairy isn’t a concern for you, these ingredients can be effortlessly swapped for conventional dairy milk and butter without compromising on taste or texture, offering incredible flexibility for every baker.
- The Irresistible Streusel Crumb Topping: A true highlight, this sweet and buttery streusel bakes directly onto the top of the bread, creating a beautifully crispy, golden layer. It provides a delightful textural contrast and an extra burst of sweetness that pairs absolutely perfectly with a generous drizzle of the smooth maple icing sugar glaze. It’s the crowning glory of this loaf!
- No Electric Mixer Needed: Forget the hassle of lugging out heavy stand mixers or hand mixers! This recipe is designed for simplicity, requiring only a few basic kitchen tools like bowls, a whisk, and a spatula. It’s perfect for a relaxing afternoon of baking, proving that exceptional flavor doesn’t require complex equipment.
- Perfect for Fall Flavors: Infused with generous amounts of cinnamon and ginger, this bread embodies the very essence of autumn. It’s a comforting and aromatic loaf that will fill your home with the inviting scents of the season.
- Moist and Tender Texture: Thanks to the inclusion of homemade butternut squash puree, this bread boasts an incredibly soft, moist, and tender crumb that practically melts in your mouth. It stays fresh and delicious for days, making it perfect for meal prep or sharing.
Essential Ingredient Insights for Your Butternut Squash Bread
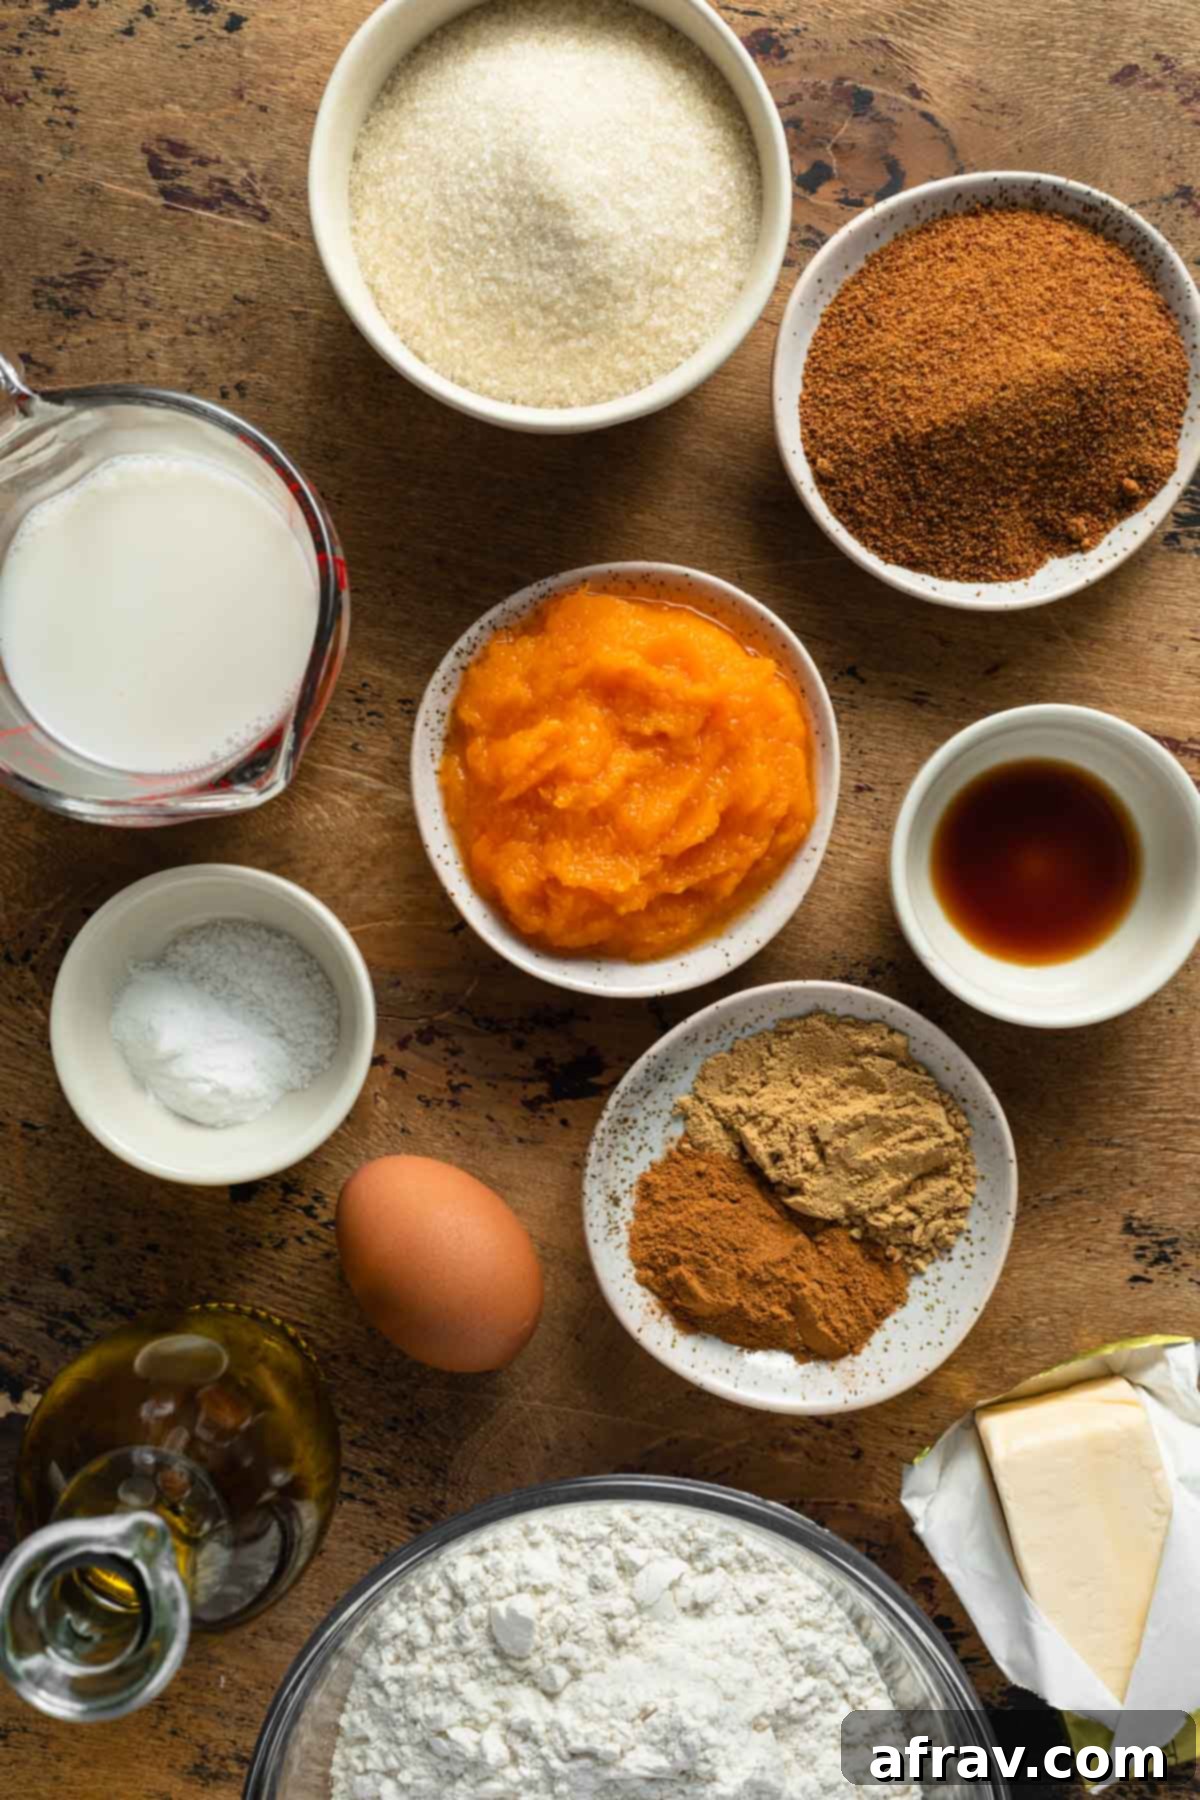
Understanding the role of each ingredient is key to achieving the perfect butternut squash bread. Here’s a closer look at some of the stars of this recipe:
- Butternut Squash Puree: You’ll need approximately 1/2 cup of butternut squash puree. This humble ingredient is the secret to the bread’s incredibly soft and tender texture, while also imparting its distinct, subtle sweetness and beautiful golden hue. While homemade puree (instructions provided below) is super easy to make and offers the best fresh flavor and consistency control, ensure it’s mashed very well and not excessively watery. Excess moisture can make your bread dense.
- Flour: For this delightful loaf cake, I opted for all-purpose white flour. The reason? It allows the vibrant, natural color of the butternut squash to truly shine through, resulting in a visually appealing bread. If you prefer the hearty texture and nutritional benefits of whole wheat flour, you can certainly substitute it. However, because whole wheat flour is more absorbent, I recommend reducing the total amount by 1/4 cup to maintain the ideal moisture balance.
- Warming Spices: We are truly embracing the cozy, autumnal essence in this recipe by going generous on the ground cinnamon and ginger. These aromatic spices are incorporated into both the bread batter and the irresistible crumb topping, ensuring a rich, warming flavor profile in every bite. For the most vibrant and fragrant results, always make sure your ground spices are fresh – older spices can lose their potency.
- Butter for the Crumb Topping: A quarter cup of cold, cubed butter is crucial for creating that perfectly crumbly streusel topping. Using cold butter helps achieve distinct, buttery crumbs that bake up beautifully crisp. I used a high-quality vegan butter to keep the recipe dairy-free, but if you don’t need a dairy-free bread, feel free to use your preferred dairy butter. The key is to keep it cold!
- Sweeteners: This recipe uses a combination of cane sugar in the bread and coconut sugar in the crumb topping. Cane sugar provides a clean sweetness that complements the squash, while coconut sugar adds a subtle caramel note to the streusel. Both can be substituted with granulated sugar or brown sugar respectively, offering flexibility based on what you have on hand.
- Almond Milk & Olive Oil: Unsweetened almond milk contributes to the moist texture and keeps the recipe dairy-free, while extra virgin olive oil provides healthy fats and ensures a tender crumb. Ensure both are at room temperature for optimal mixing.
- Egg: A large egg acts as a binder, adding structure and richness to the bread. Bringing it to room temperature helps it emulsify better with other ingredients.
Mastering Homemade Butternut Squash Puree
Creating your own butternut squash puree is incredibly simple and yields a fresher, more flavorful result for your bread. Here’s how to do it with ease:
- Preparation: Begin by preheating your oven to 375°F (190°C). Line a rimmed baking sheet or a roasting pan with parchment paper to prevent sticking and make cleanup a breeze.
- Squash Prep: Carefully cut a butternut squash in half lengthwise. A sharp, sturdy knife is essential here. Use a spoon to scoop out all the seeds and fibrous strands. Don’t discard the seeds – you can roast them just like these air fryer pumpkin seeds for a tasty snack!
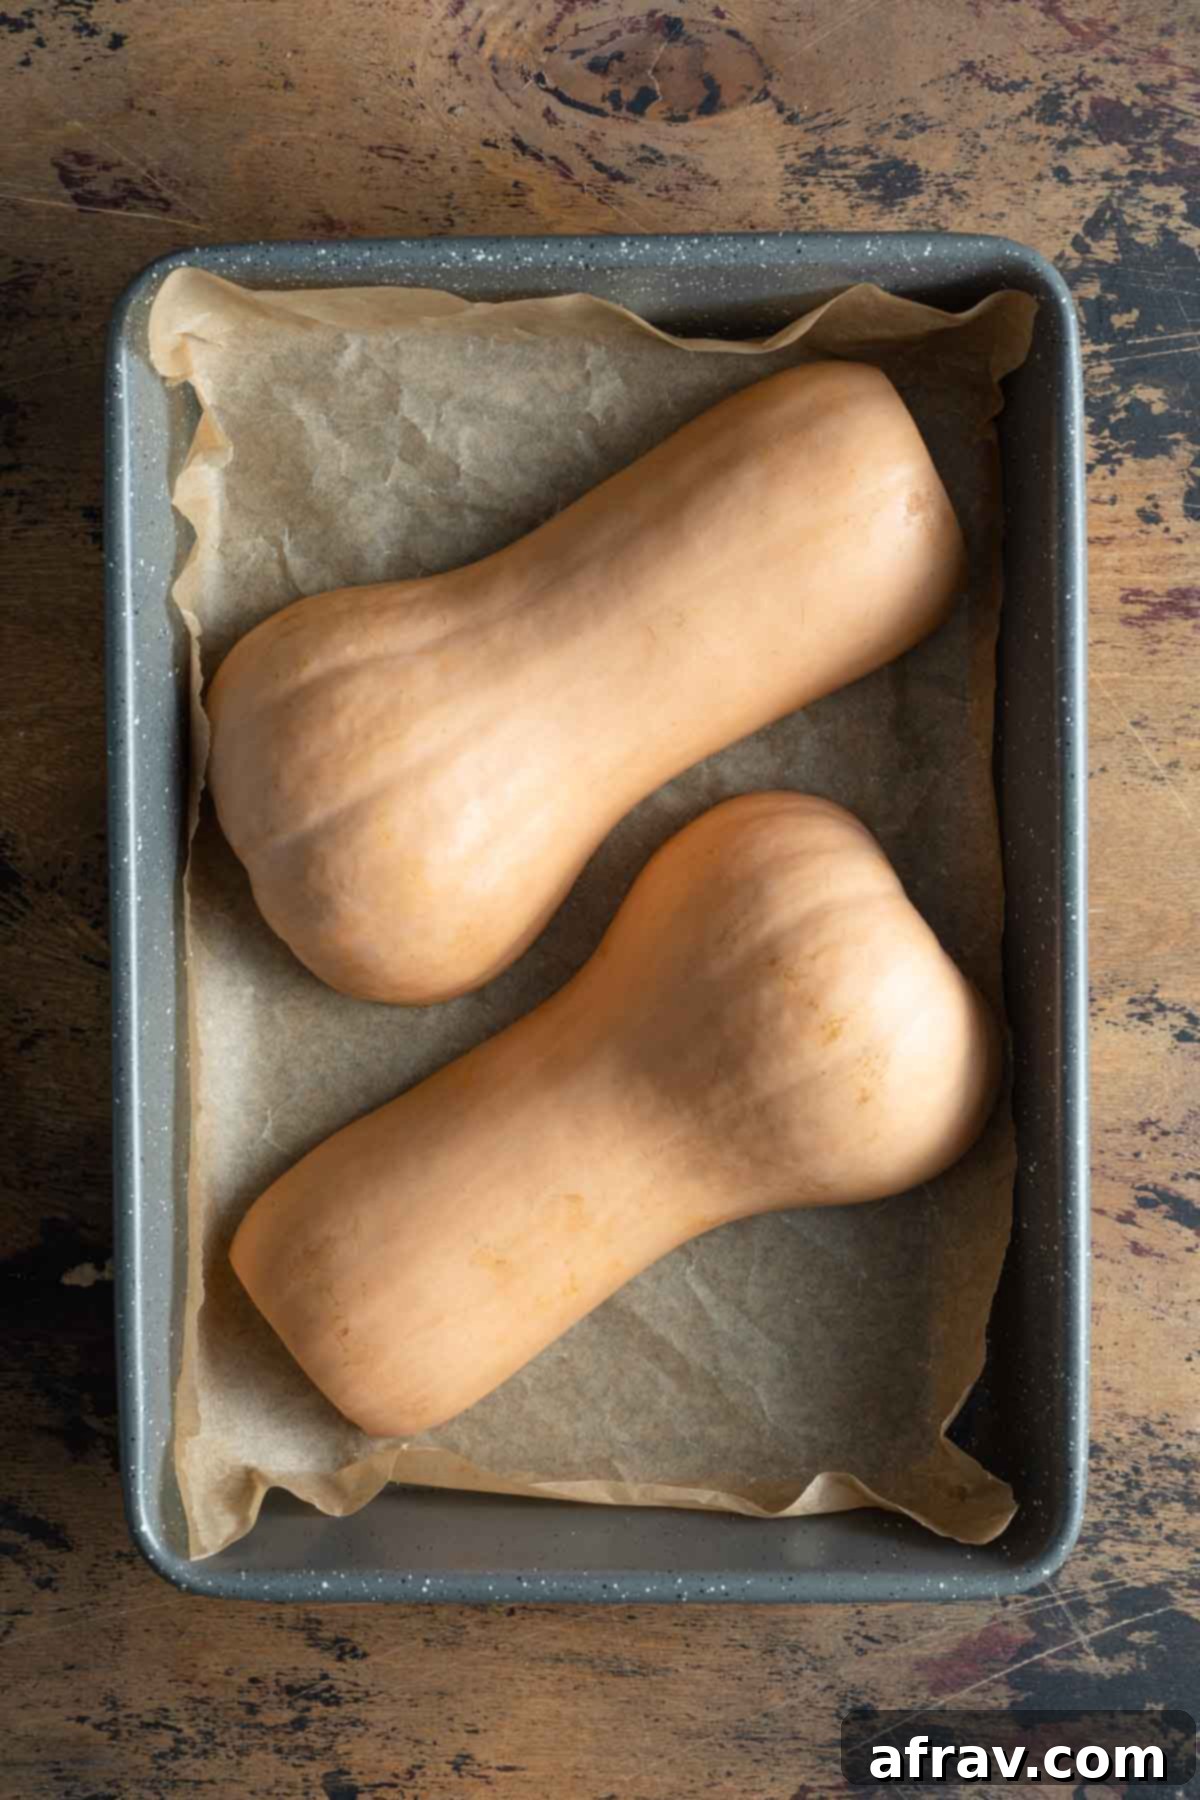
- Roasting: Place the two squash halves, cut-side down, onto your prepared baking sheet. Roasting them cut-side down helps steam the flesh while allowing the skin to brown slightly, intensifying the squash’s natural sweetness.
- Bake Until Tender: Roast for approximately 35-45 minutes, or until the flesh is incredibly tender and can be easily pierced with a knife or fork. The exact time will depend on the size of your squash.
- Cooling & Mashing: Once roasted, remove the squash from the oven and let it cool sufficiently so it’s comfortable to handle. Using a spoon, scoop the soft, sweet flesh out of the skin and transfer it into a bowl. Mash it thoroughly with a fork or a potato masher until you achieve a smooth puree. For an even silkier texture, you can briefly blend it in a food processor.
- Storage: Any leftover puree can be stored in an airtight container in the fridge for 3-4 days, or frozen for longer storage, ready for your next baking adventure or savory dish!
Crafting the Perfect Crumb Topping (Streusel)
The buttery crumb topping is a highlight of this butternut squash bread. Achieving that ideal crumbly texture is easy with these steps:
- Combine Dry Ingredients: In a medium-sized bowl, whisk together the all-purpose flour, coconut sugar, ground cinnamon, and ground ginger. Ensure they are well combined for an even distribution of flavor.
- Incorporate Cold Butter: Add the cold, cubed vegan butter (or dairy butter, if preferred) to the dry mixture. The key here is to use *cold* butter; this helps create distinct, crisp crumbs rather than a uniform paste.
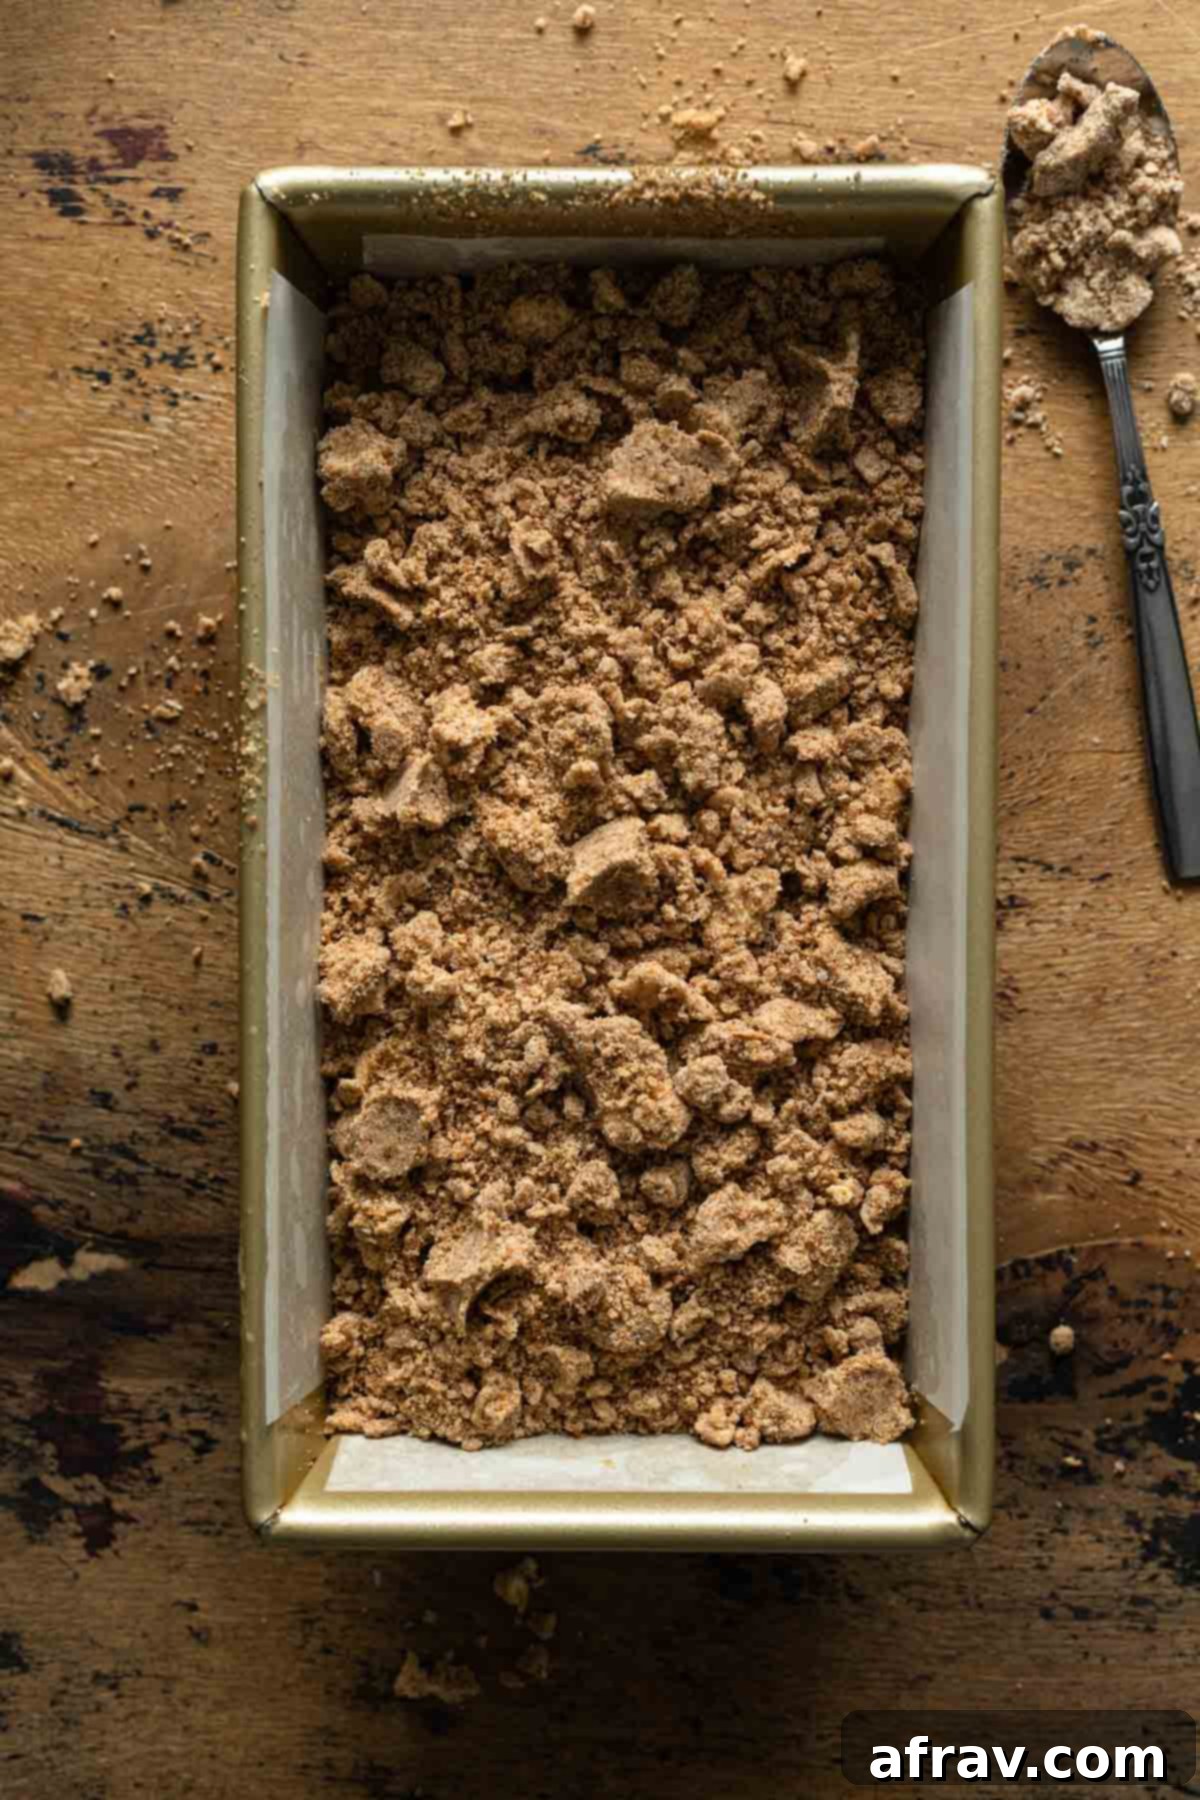
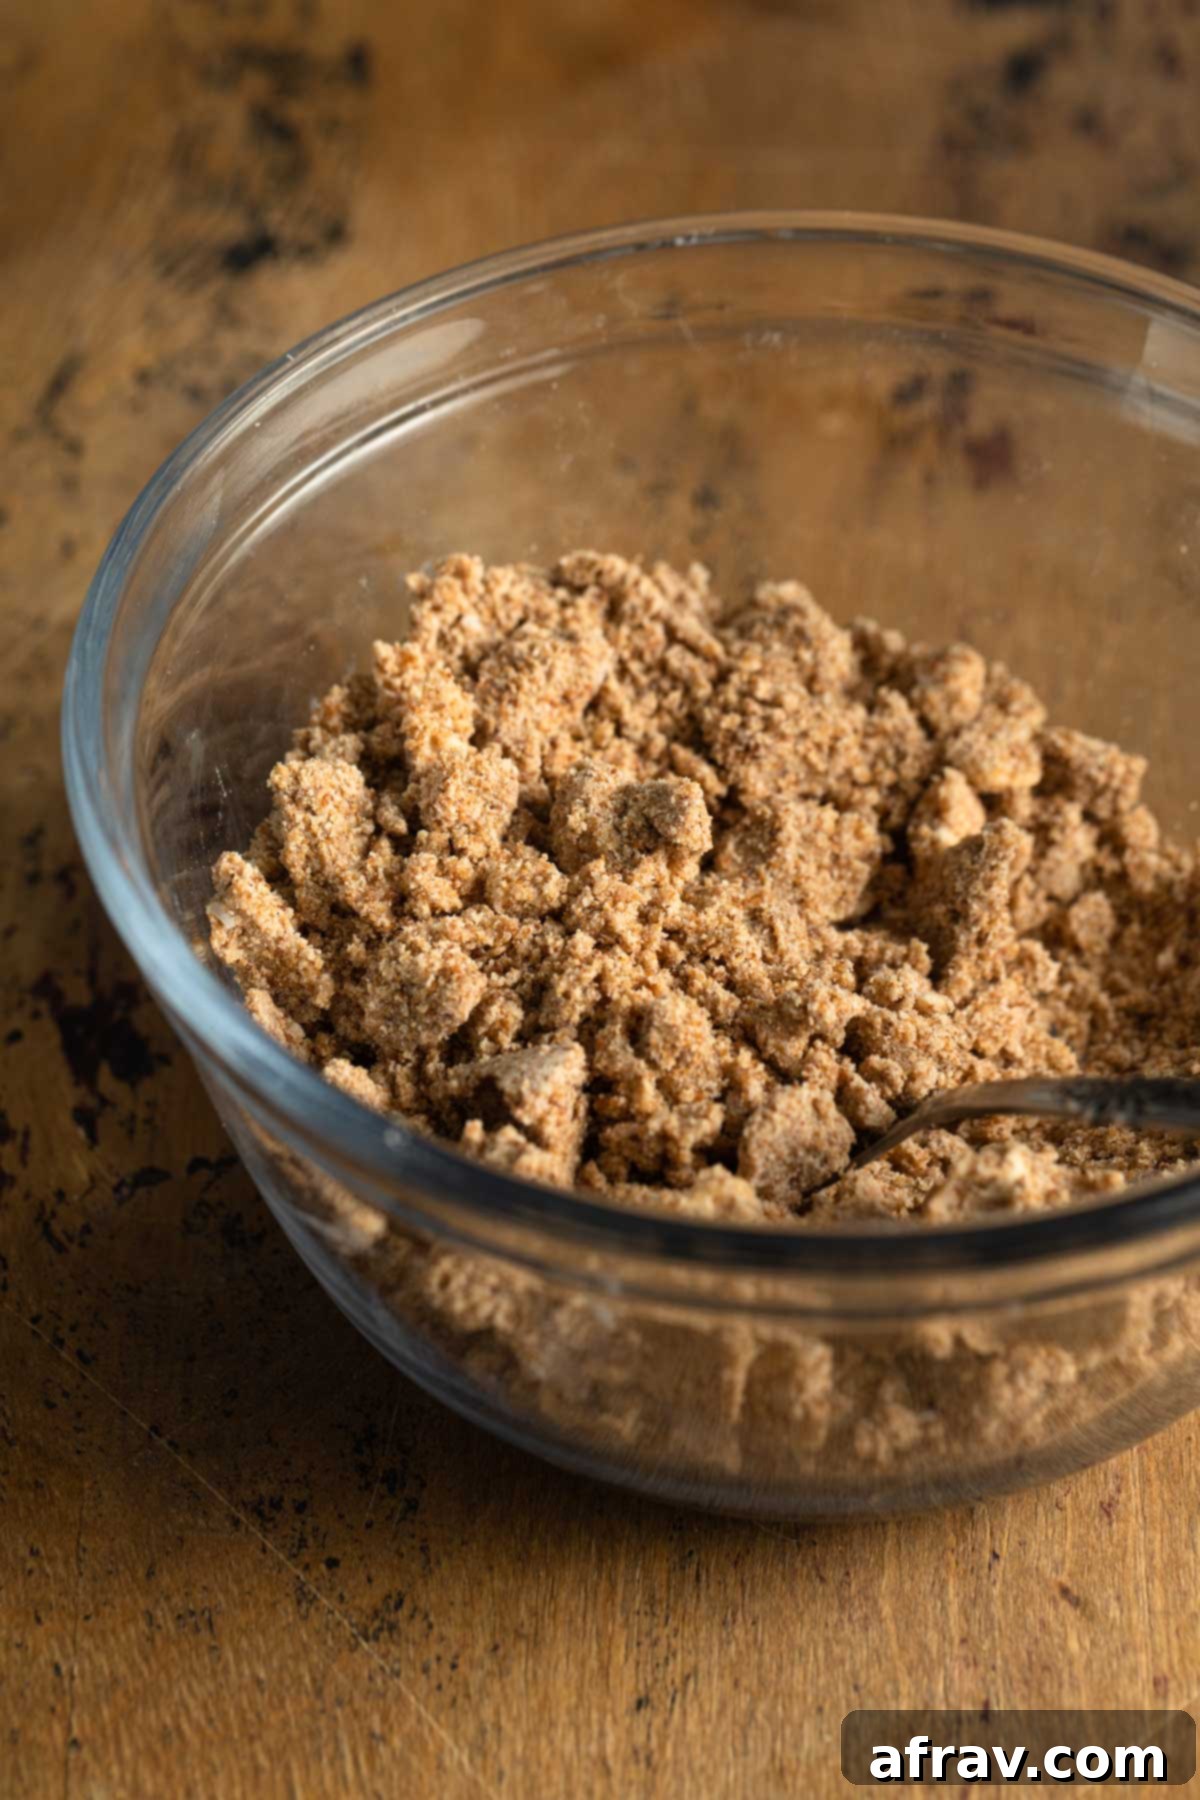
- Create the Crumbs: Using a fork or your fingertips, work the butter into the flour mixture. Press and rub the butter until the mixture resembles coarse crumbs, with small pea-sized pieces of butter still visible throughout. If the mixture seems too uniform, gently press some of the flour and butter together with your fingertips to form larger crumbs.
- Chill for Best Results: Once your streusel is perfectly crumbly, place the bowl in the refrigerator while you prepare the bread batter. Chilling the topping ensures the butter remains cold and firm, which prevents it from melting too quickly in the oven and helps achieve that wonderfully crispy texture.
Baking Your Delightful Butternut Squash Bread
Here’s a step-by-step guide to assembling and baking your incredibly moist and flavorful butternut squash bread:
- Preheat Oven & Prep Pan: Start by preheating your oven to 325°F (160°C). Grease a standard loaf pan (8.5 x 4.5 inches or 9 x 5 inches) and then line it with parchment paper, leaving an overhang on the longer sides. This overhang acts as “handles” to easily lift the baked loaf from the pan.
- Combine Dry Ingredients: In a large mixing bowl, sift together the all-purpose white flour, ground cinnamon, ground ginger, baking soda, and kosher salt. Sifting helps aerate the flour and ensures there are no lumps, leading to a lighter bread.
- Whisk Wet Ingredients: In a separate large bowl, thoroughly whisk together the cane sugar, room temperature unsweetened almond milk, and extra virgin olive oil until well combined. Next, whisk in the room temperature butternut squash puree, followed by the large egg and vanilla extract until the mixture is smooth and uniform.
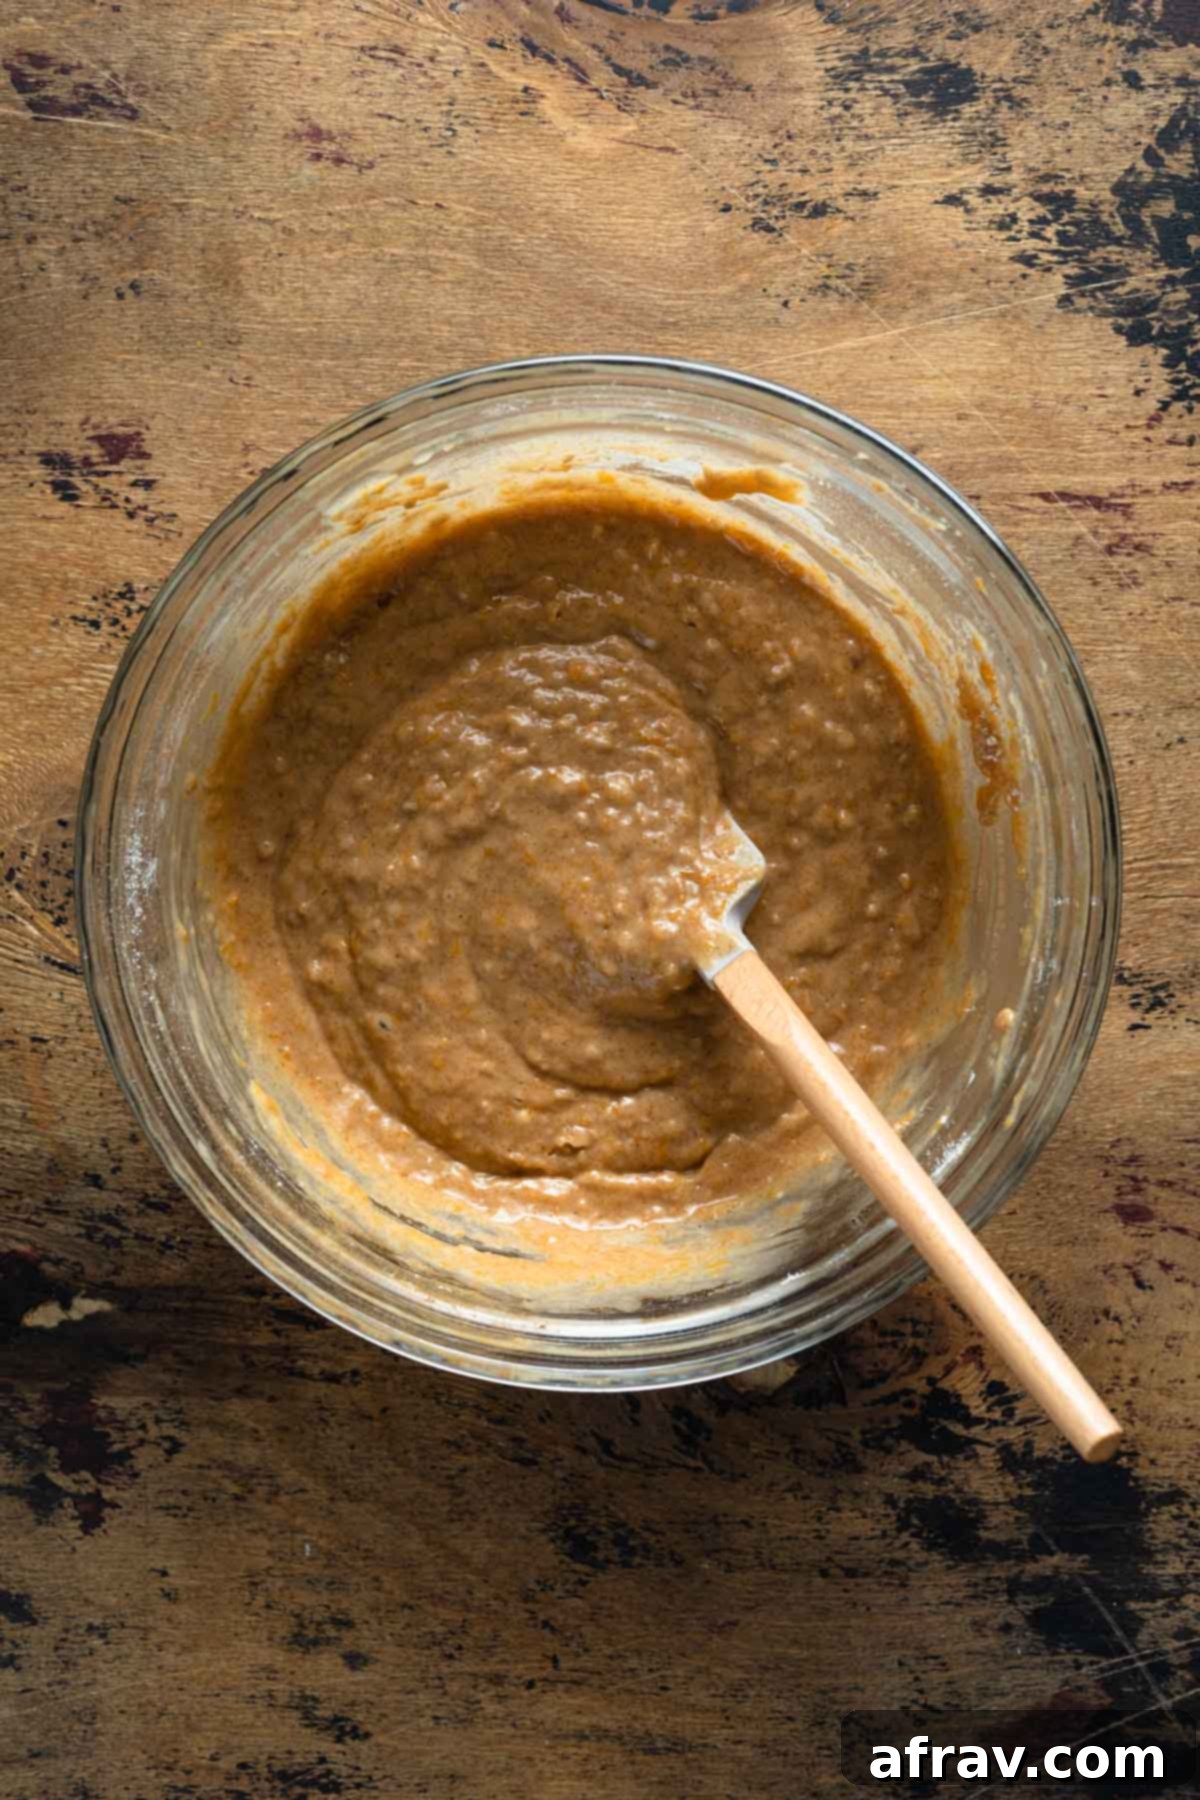
- Gently Combine Wet & Dry: Gradually add the dry ingredients to the wet mixture. Using a spatula or wooden spoon, stir until they are *just* combined. It’s crucial not to overmix the batter; overmixing can develop the gluten in the flour, resulting in a dense, tough, or gummy bread. A few small lumps are perfectly fine!
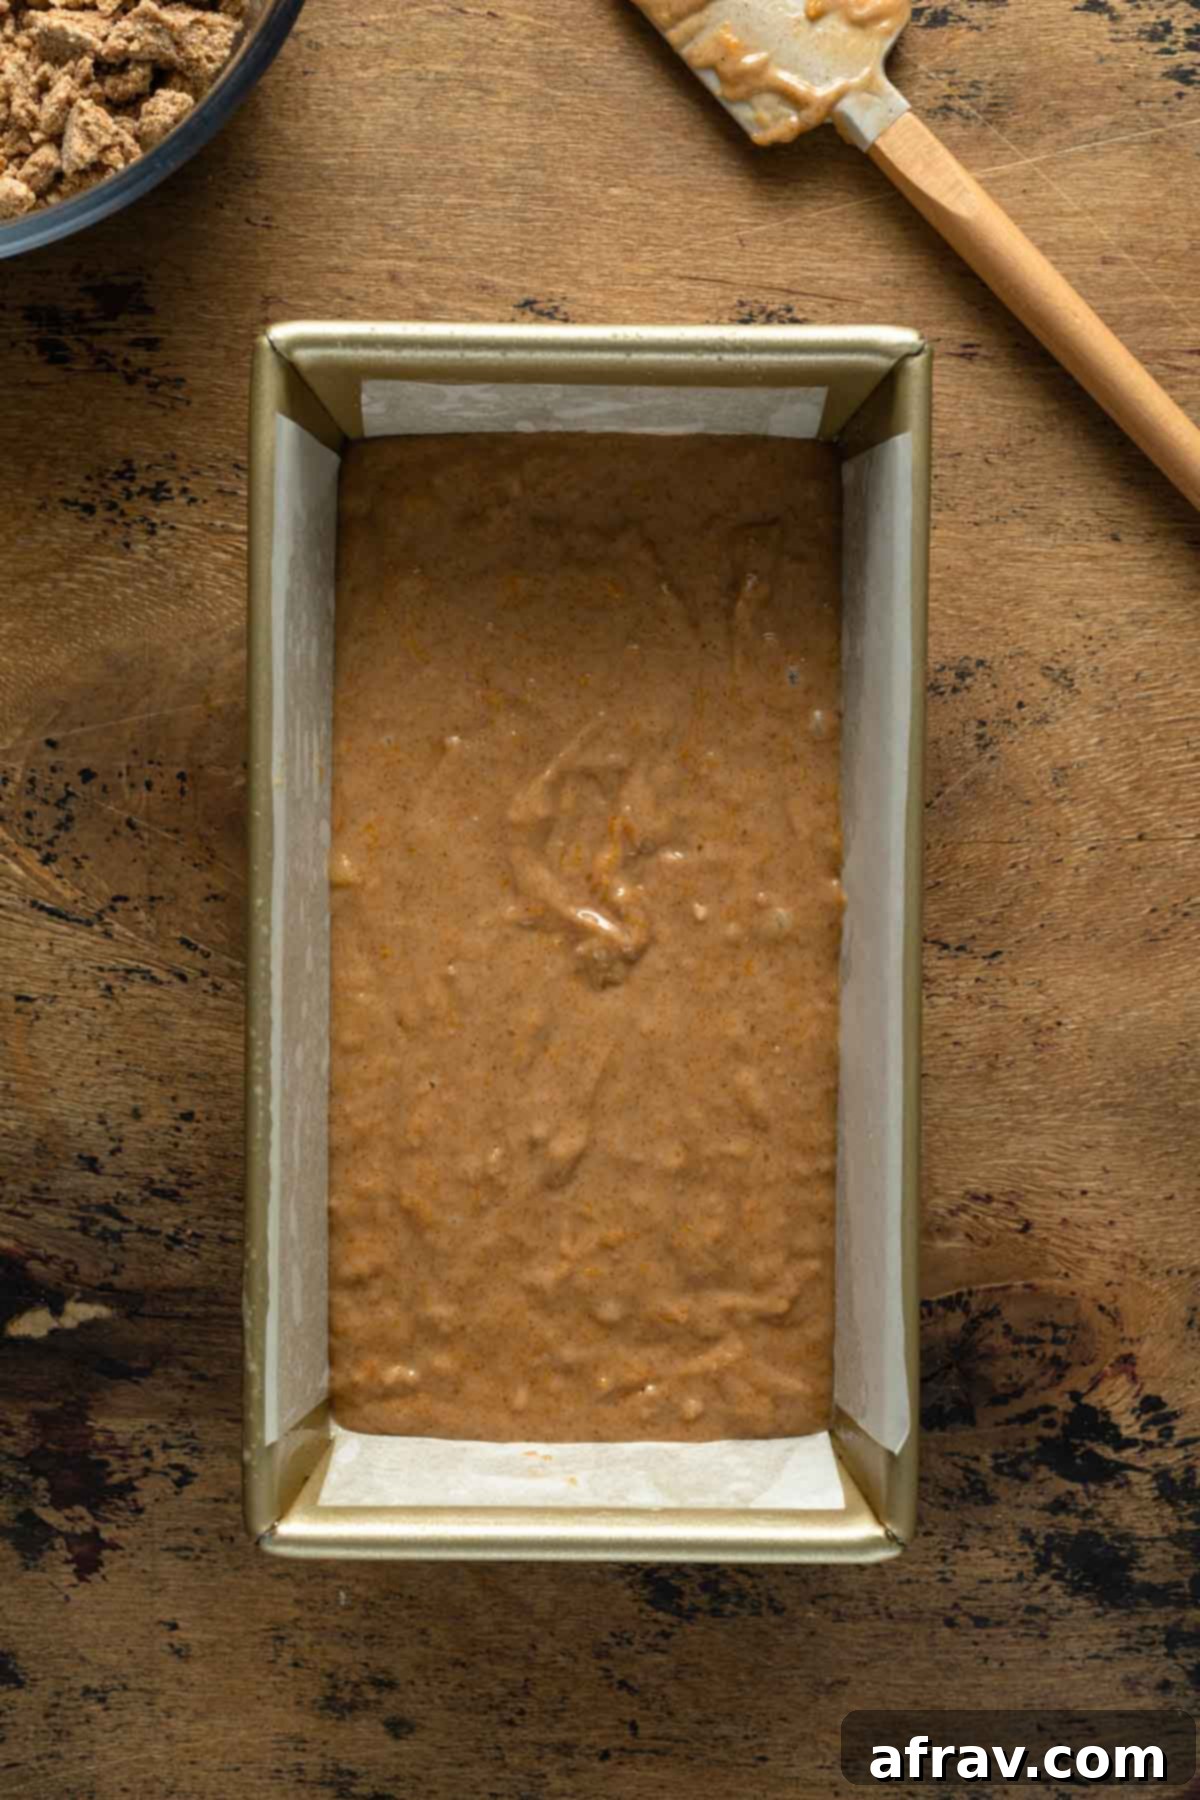
- Fill Pan & Remove Air Bubbles: Pour the prepared batter evenly into your parchment-lined loaf pan. To help release any large air bubbles trapped in the batter (which can cause large holes or “tunnels” in your bread), gently tap the bottom of the pan several times on your countertop.
- Add Crumb Topping: Generously sprinkle the chilled crumb topping evenly over the surface of the batter in the loaf pan.
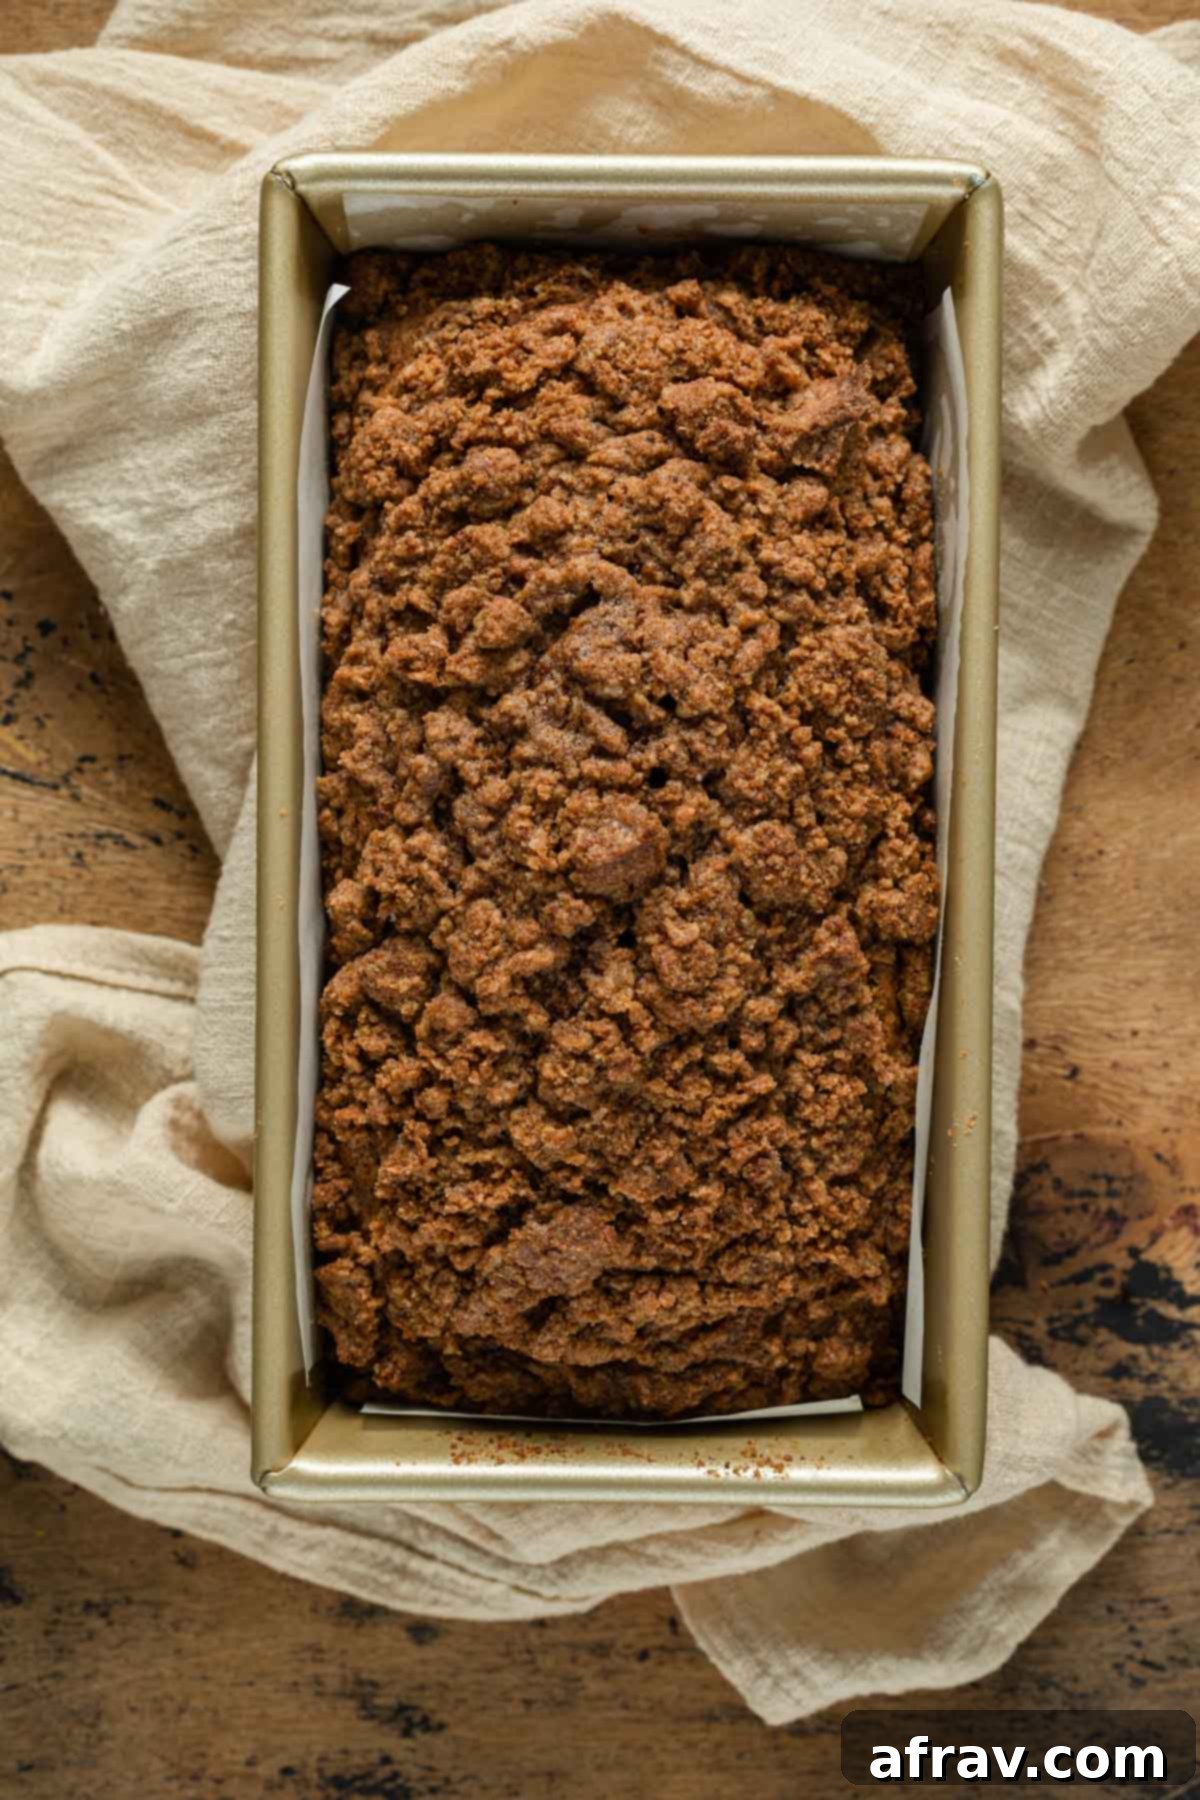
- Bake to Perfection: Transfer the loaf pan to the preheated oven and bake for 55-60 minutes. Baking times can vary, so always check for doneness. Insert a toothpick into the center of the bread; if it comes out clean or with only a few moist crumbs attached, your bread is ready. If using a 9×5 inch pan, reduce baking time by 5-8 minutes.
- Cooling: Allow the bread to cool in the pan for about 15 minutes. This helps it firm up before you attempt to remove it. Then, using the parchment paper overhangs, carefully lift the bread out of the pan and transfer it to a wire rack to cool completely. Complete cooling is essential before glazing.
- Prepare Maple Glaze: While the bread cools, in a small bowl, whisk together the powdered sugar and maple syrup until you achieve a smooth, pourable glaze. If it’s too thick, add a tiny bit more maple syrup or milk; if too thin, add a little more powdered sugar.
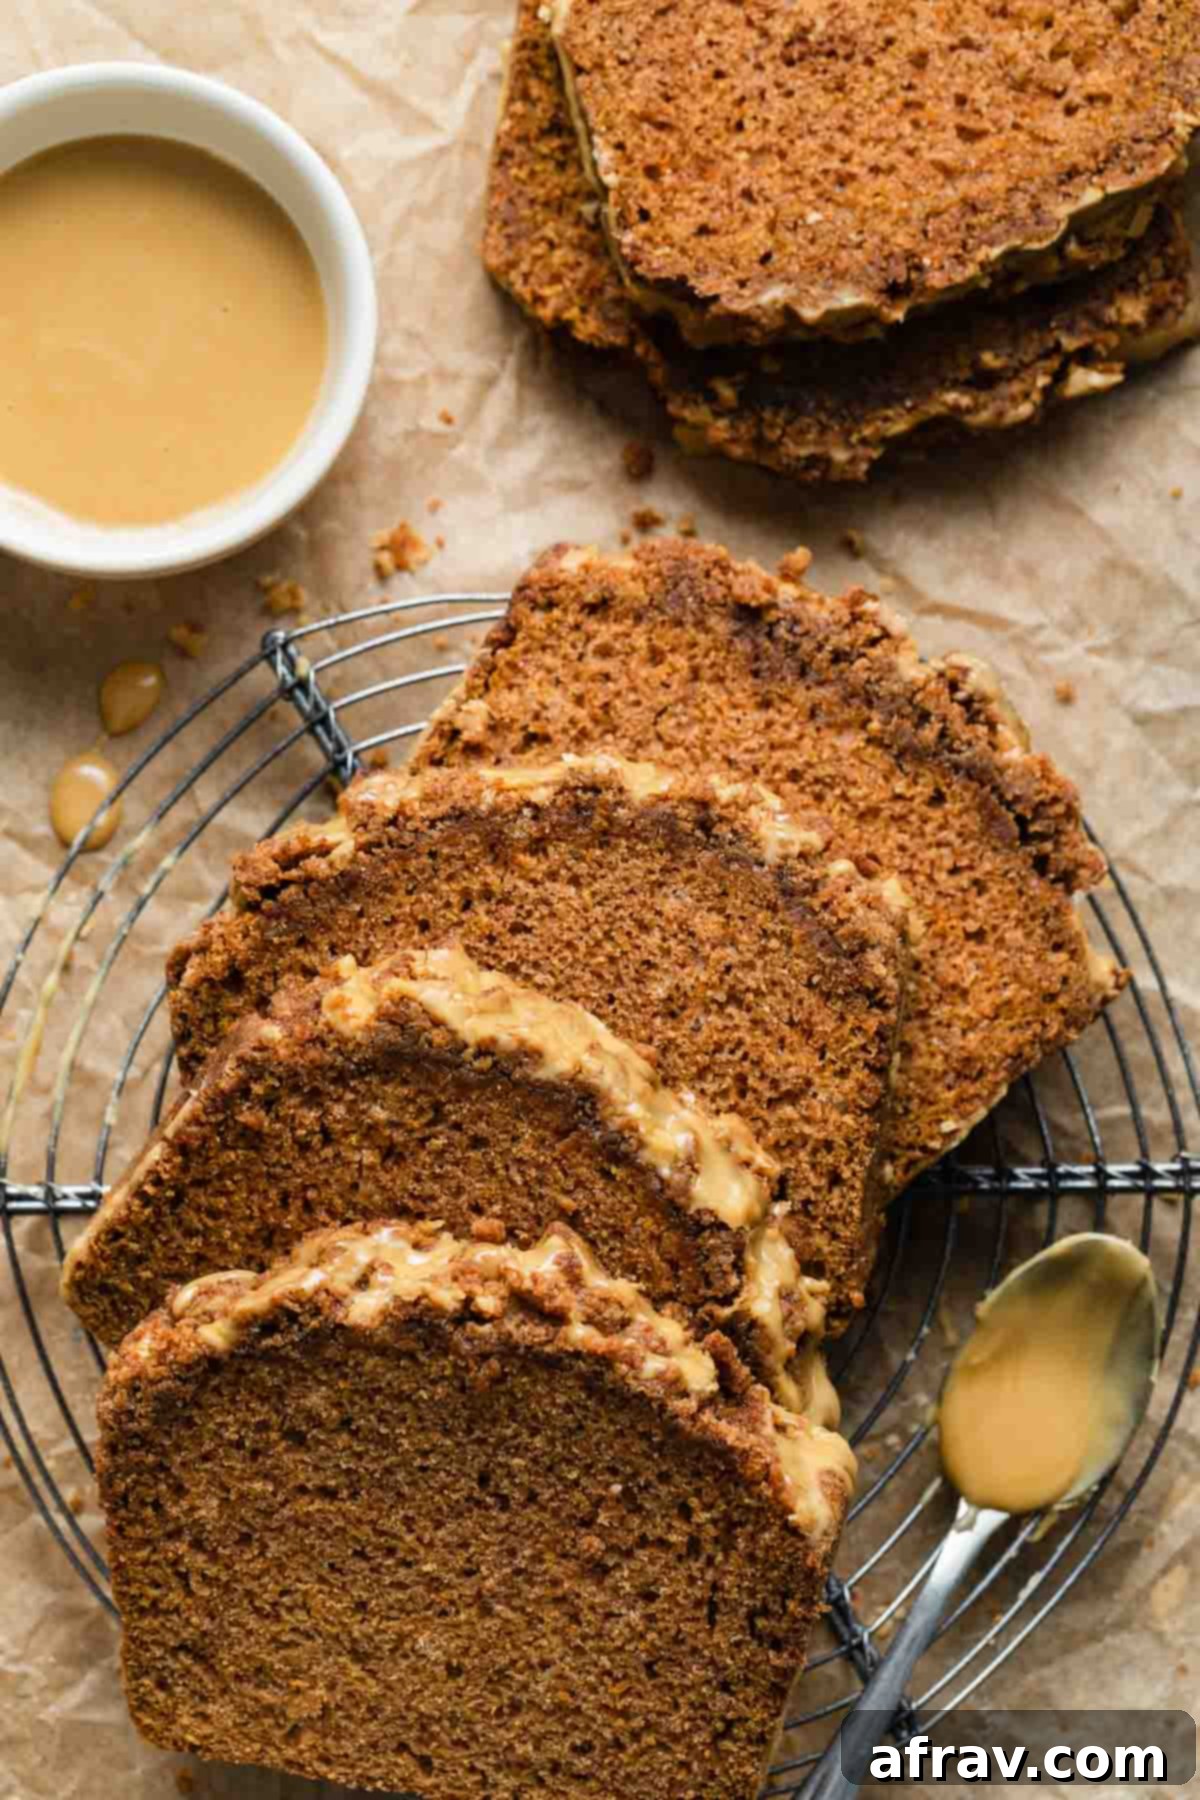
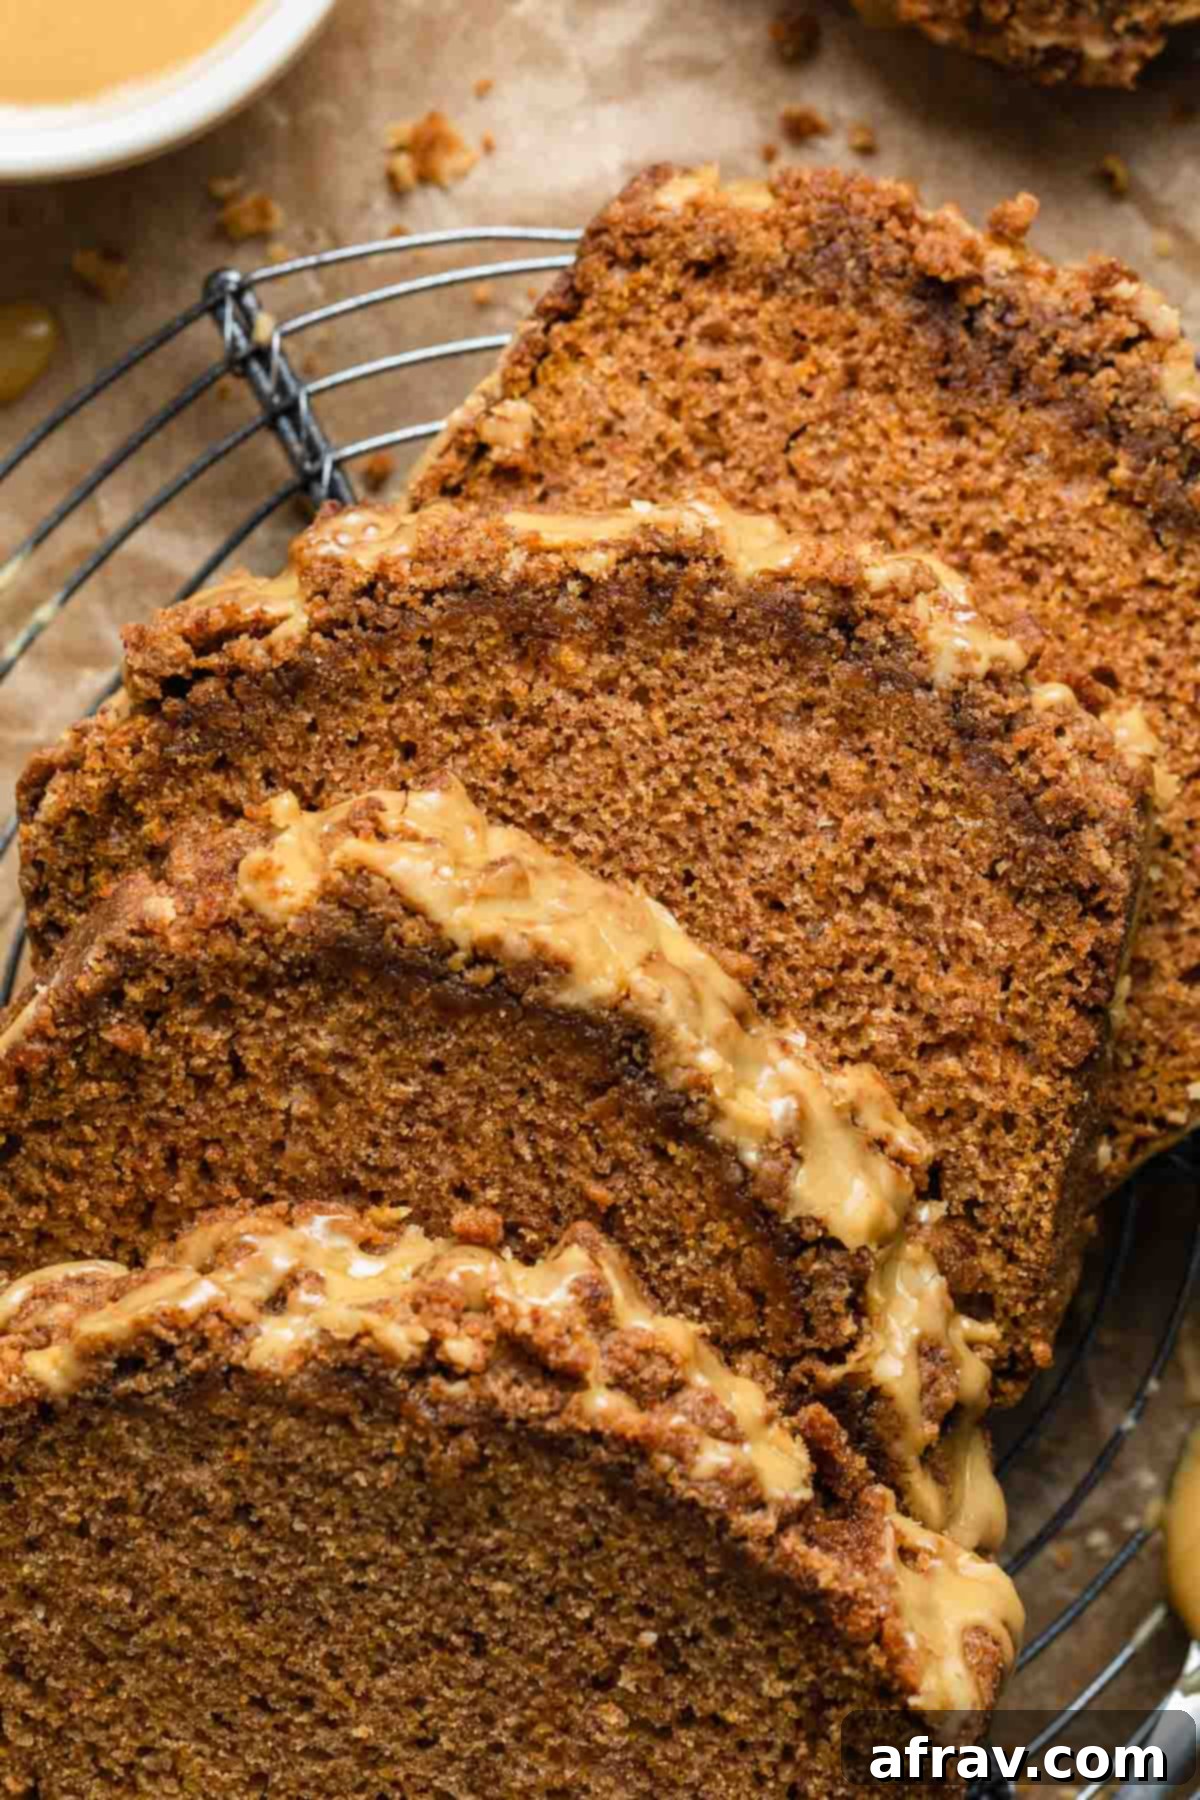
- Glaze & Serve: Once the butternut squash bread is completely cool (this prevents the glaze from melting and soaking into the bread), drizzle the maple glaze generously over the top. Slice and serve this delightful autumn treat!
Flexible Recipe Substitutions for Your Baking Needs
This butternut squash bread recipe is incredibly versatile, allowing for various substitutions to fit your dietary needs or ingredient availability:
- Pumpkin Puree for Butternut Squash: If butternut squash isn’t readily available, or if you simply prefer it, you can easily substitute an equal amount of pumpkin puree for the butternut squash puree. The flavor profile will be slightly different but equally delicious and autumnal.
- Dairy Alternatives: As mentioned, this recipe is designed to be dairy-free using almond milk and vegan butter. However, if you don’t require it to be dairy-free, feel free to use regular dairy milk and unsalted butter in the same quantities.
- Sugar Swaps: For the crumb topping, if you don’t have coconut sugar, light or dark brown sugar makes an excellent substitute, adding a similar depth of flavor. In the bread batter, granulated sugar can be used in place of cane sugar without affecting the outcome.
- Expand Your Spice Rack: While cinnamon and ginger are the stars, feel free to experiment with other warming fall spices. A pinch of ground nutmeg, allspice, or cloves can add an extra layer of complexity. You could even use a pre-made pumpkin spice blend or chai spice blend for a different twist.
- Whole Wheat Flour Option: If you’re looking for a healthier alternative, whole wheat flour can be used. Just remember that whole wheat flour is more absorbent than all-purpose white flour, so I recommend reducing the total amount by 1/4 cup to maintain the bread’s moist texture.
- Add-ins: While not explicitly in the original recipe, feel free to fold in 1/2 to 1 cup of chocolate chips, chopped nuts (like walnuts or pecans), or dried cranberries into the batter for added texture and flavor.
Achieving a Perfect Crumb: How to Avoid Holes or Tunnelling in Your Bread
Nobody wants a quick bread riddled with large air pockets or “tunnels.” These common issues are usually a sign of overmixing or inconsistent batter. Here are a few key tips that consistently work for me to minimize large holes and ensure a beautifully even crumb in quick breads and cakes:
- Bring Ingredients to Room Temperature: This is a crucial step! Ensure all cold ingredients, such as milk, eggs, and squash puree, are brought to room temperature before mixing. Room temperature ingredients emulsify more easily and create a smoother, more uniform batter, which helps prevent uneven pockets of air.
- Avoid Overmixing the Batter: Once you add the dry ingredients to the wet, mix just until they are combined. Fold the dry ingredients in gently with a spatula until no streaks of dry flour remain. Overmixing develops the gluten in the flour, leading to a tough, chewy texture and often causes large air pockets or tunnels as the gluten contracts during baking. A few small lumps are perfectly acceptable!
- Tap the Pan: After pouring the batter into the prepared loaf pan, gently tap the bottom of the pan several times on your countertop. This simple action helps to release any large air bubbles that may be trapped within the batter, settling it and promoting a more even rise and crumb structure.
Storage and Freezing Guidelines
To ensure your delicious butternut squash bread stays fresh and enjoyable for as long as possible, follow these storage and freezing recommendations:
- Room Temperature Storage: Once your bread has cooled completely (this is important!), store it in an airtight container at room temperature. It will remain wonderfully tender and moist for 3-4 days. Do note that the crispy crumb topping may start to soften slightly after a couple of days, but the bread itself will still be delicious.
- Refrigeration: If you wish to extend the shelf life of your bread beyond a few days, you can store it in an airtight container in the fridge for up to a week. The cooler temperature helps preserve freshness, though it may slightly alter the texture of the crumb topping.
- Freezing for Long-Term Enjoyment: This bread freezes exceptionally well! To freeze, first ensure the loaf is completely cooled. Then, wrap it tightly in several layers of plastic wrap, followed by a layer of aluminum foil, or place it in a resealable freezer bag. Properly wrapped, it can last for up to 3 months in the freezer without freezer burn.
- Defrosting: To enjoy your frozen bread, simply remove it from the freezer and let it thaw at room temperature for several hours while still wrapped. This helps retain moisture. Once defrosted, the crumb topping might be a little soft, but the bread’s flavor and tenderness will still be fantastic. You can gently warm slices in a toaster oven for a refreshed crust.
Frequently Asked Questions (FAQs)
Absolutely! If you prefer a simpler loaf or want to reduce the overall sweetness, you can certainly bake this bread without the streusel topping. Just be sure to reduce the baking time by about 5-10 minutes, as the topping acts as an insulator.
I achieved excellent results using an 8.5 x 4.5-inch loaf pan for this recipe, which yields a tall, beautiful loaf. If you have a slightly larger 9 x 5-inch pan, it will work perfectly, but you should expect the bread to be a little shorter and may need to reduce the baking time by approximately 5-8 minutes.
Yes, you can absolutely use canned butternut squash puree as a convenient alternative to homemade puree. Ensure you choose 100% pure butternut squash (not pie filling) and drain any excess liquid if it appears very watery, as homemade puree tends to be thicker.
Yes, for an extra layer of texture and flavor, you can fold in 1/2 to 1 cup of chopped nuts (such as walnuts or pecans) or chocolate chips (dark, milk, or white) into the batter just before pouring it into the loaf pan.
Key Recipe Tips for Butternut Squash Bread Success
Achieving the best possible butternut squash bread involves paying attention to a few crucial details. These tips will help ensure your loaf turns out perfectly moist, tender, and delicious every time:
- Choose the Right Loaf Pan: The material and color of your loaf pan can impact baking. Dark metal pans tend to absorb more heat, causing the bottom and sides of your bread to brown more quickly than lighter-colored pans. To minimize over-browning and ensure even baking, I highly recommend lining any pan with parchment paper.
- Use Parchment Paper Wisely: To prevent sticking and make for effortless removal of your baked loaf, lightly spray your cake or loaf pan with non-stick spray, then line it with overhanging parchment paper. Ensure there’s enough paper extending beyond the sides to create “handles” that you can easily grab to lift the entire loaf out once baked.
- Room Temperature Ingredients are Non-Negotiable: This is a golden rule in baking! Ensuring all your cold ingredients (like milk, eggs, and squash puree) are at room temperature is vital. They emulsify much more effectively with other ingredients, creating a smooth, cohesive batter. Cold ingredients can cause the batter to seize, leading to uneven mixing and potentially affecting the bread’s final texture.
- Measure Flour Accurately: Precision in measuring flour prevents a dry, dense bread. The most accurate method for quick breads is the “spoon and level” technique: lightly spoon flour into your measuring cup until it’s overflowing, then use a straight edge (like the back of a knife) to level off the excess. Avoid scooping directly from the bag, as this compacts the flour and results in using too much.
- Do NOT Overmix the Batter: This is perhaps the most critical tip for quick breads. Once you’ve added the dry ingredients to the wet, stir only until they are just combined and no streaks of dry flour remain. Over-mixing develops gluten, which can lead to a dense, tough, or gummy texture, and often creates unwanted tunnels in your loaf. A few small lumps are perfectly acceptable and even desirable for a tender crumb.
- Refrigerate the Crumb Topping (Streusel): The secret to a perfect crumbly streusel is maintaining cold, distinct pieces of butter. If your butter gets too warm and soft, the topping won’t achieve that delightful crispness. For the best results, always make the streusel first and place it in the fridge to keep those buttery bits firm and cold while you prepare the bread batter.
- Cool Bread Completely Before Glazing: Patience is a virtue when it comes to glazing! Wait until the butternut squash bread is completely cool to the touch before drizzling on the maple glaze. If the bread is still warm, the glaze will melt, thin out, and soak into the bread, rather than forming a beautiful, distinct layer on top. Additionally, slicing warm bread with streusel can cause the topping to crumble and fall off.
- Always Perform the Toothpick Test: Oven temperatures can vary significantly, so relying solely on baking time isn’t always enough. I always test loaf cakes and quick breads for doneness by inserting a wooden toothpick into the very center. If it comes out clean (or with just a few moist crumbs attached, but no wet batter), your loaf is perfectly baked and ready to come out of the oven.
Explore More Butternut Squash Delights
If you’ve fallen in love with the versatility of butternut squash after making this bread, be sure to check out these other fantastic recipes:
- Butternut Squash Quiche with Spinach and Prosciutto: A savory and satisfying meal perfect for brunch or dinner.
- Air Fryer Butternut Squash: A quick and easy side dish that makes perfectly tender and caramelized squash.
- Roasted Red Pepper and Butternut Squash Soup: A comforting, creamy, and flavorful soup ideal for chilly evenings.
If you make this scrumptious butternut squash bread, I would absolutely love to hear your thoughts and see your creations! Please share your feedback in the comments section below.
HUNGRY FOR MORE? Follow Crumb Top Baking on Instagram, Pinterest and Facebook!
Print

Butternut Squash Bread with Crumb Topping
5 Stars 4 Stars 3 Stars 2 Stars 1 Star
5 from 1 review
Author: Leanne
Prep Time: 20 minutes
Cooling Time: 3 hours
Cook Time: 1 hour 40 minutes
Total Time: 5 hours (includes full cooling for best glaze)
Yield: 10 generous slices
Category: Dessert, Quick Bread, Breakfast
Method: Bake
Cuisine: American
Description
This Easy Butternut Squash Bread is a delightful twist on classic fall quick breads. Made with velvety homemade butternut squash puree, it features an irresistible buttery streusel crumb topping and is finished with a simple, sweet maple glaze. Experience the perfect blend of soft, tender texture and warming autumn spices like cinnamon and ginger in every single moist bite. Ideal for breakfast, a snack, or dessert!
Ingredients
For the Butternut Squash Puree:
- 1 small butternut squash (yields more than 1/2 cup, extra can be used for other recipes)
For the Buttery Crumb Topping (Streusel):
- 1/2 cup all-purpose white flour (spooned and leveled)
- 1/3 cup coconut sugar (or brown sugar)
- 1/2 teaspoon ground cinnamon
- 1/4 teaspoon ground ginger
- 1/4 cup vegan butter (cold and cubed, or dairy butter if not dairy-free)
For the Moist Butternut Squash Bread:
- 1 3/4 cup all-purpose white flour (spooned and leveled; reduce to 1 1/2 cups if using whole wheat flour)
- 2 teaspoons ground cinnamon
- 2 teaspoons ground ginger
- 1 teaspoon baking soda
- 1/2 teaspoon kosher salt
- 3/4 cup cane sugar (or granulated sugar)
- 1/2 cup unsweetened almond milk (room temperature, or dairy milk)
- 1/4 cup extra virgin olive oil (or other neutral oil like canola or vegetable oil)
- 1/2 cup butternut squash puree (room temperature, homemade or canned)
- 1 large egg (room temperature)
- 1 teaspoon vanilla extract
For the Easy Maple Glaze:
- 4 tablespoons powdered sugar (icing sugar)
- 2 tablespoons pure maple syrup
Instructions
Part 1: Make Butternut Squash Puree (If Making Homemade)
- Preheat your oven to 375°F (190°C) and line a rimmed baking sheet or roasting pan with parchment paper.
- Carefully cut the butternut squash in half lengthwise, scoop out all the seeds and fibrous strands, then place the two halves cut-side down on the prepared baking sheet.
- Roast the squash for 35-45 minutes, or until the flesh is very tender and a knife easily pierces it.
- Remove from the oven and let it cool just enough so you can handle it comfortably.
- Using a spoon, scoop the soft flesh out of the skin into a bowl and mash thoroughly with a fork until smooth.
- Store any unused puree in the fridge in an airtight container for 3-4 days, or freeze for longer. You will only need 1/2 cup for this recipe.
Part 2: Prepare the Buttery Crumb Topping
- In a medium-sized bowl, whisk together the 1/2 cup all-purpose flour, 1/3 cup coconut sugar, 1/2 teaspoon ground cinnamon, and 1/4 teaspoon ground ginger.
- Add in the 1/4 cup cold, cubed vegan butter. Using a fork or your fingertips, work the butter into the dry ingredients until the mixture becomes crumbly with visible pieces of butter throughout. If needed, gently press the flour and butter together to form larger crumbs.
- Place the bowl with the crumb topping in the fridge to keep it cold while you prepare the bread batter. This is key for a crisp topping!
Part 3: Assemble and Bake the Butternut Squash Bread
- Preheat your oven to a lower 325°F (160°C). Grease a standard loaf pan (8.5 x 4.5 inches or 9 x 5 inches) and line it with parchment paper, leaving generous overhangs on the longer sides.
- In a large bowl, sift together the 1 3/4 cups all-purpose flour, 2 teaspoons ground cinnamon, 2 teaspoons ground ginger, 1 teaspoon baking soda, and 1/2 teaspoon kosher salt.
- In a separate large bowl, whisk together the 3/4 cup cane sugar, 1/2 cup room temperature unsweetened almond milk, and 1/4 cup extra virgin olive oil. Next, whisk in the 1/2 cup room temperature butternut squash puree, followed by the 1 large room temperature egg, and 1 teaspoon vanilla extract until smooth.
- Gradually add the sifted dry ingredients to the wet mixture. Stir gently with a spatula until just combined. Be very careful not to overmix; a few small lumps are fine.
- Pour the batter evenly into your prepared loaf pan. Gently tap the bottom of the pan several times on the countertop to release any large air bubbles and ensure an even crumb.
- Evenly sprinkle the chilled crumb topping over the surface of the batter. Bake for 55-60 minutes, or until a toothpick inserted into the center of the bread comes out clean or with only a few moist crumbs attached. (If using a 9×5 pan, start checking at 50 minutes.)
- Let the bread cool in the pan for 15 minutes before using the parchment paper overhangs to carefully lift it out and transfer it to a wire rack to cool completely. This full cooling is crucial before glazing.
- While the bread cools, prepare the maple glaze: In a small bowl, stir together the 4 tablespoons powdered sugar and 2 tablespoons pure maple syrup until smooth and pourable.
- Once the butternut squash bread is completely cooled, drizzle the maple glaze generously over the top. Slice and serve your delicious autumn loaf!
Notes
- Even a small butternut squash will yield more than 1/2 cup of puree. You can always double this recipe for two loaves, or save the extra puree for another delicious recipe like soup or a smoothie.
- To achieve a light and tender crumb, avoid overmixing the bread batter. Over-mixing can develop gluten, leading to a dense or gummy texture in your quick bread. Mix just until ingredients are combined.
- For the dairy-free crumb topping, I used Earth Balance vegan buttery sticks, which work beautifully. If you don’t need the bread to be dairy-free, you can easily substitute with regular dairy butter.
- Feel free to substitute granulated sugar for the cane sugar in the bread batter, and brown sugar for the coconut sugar in the crumb topping for similar delicious results.
- Always refrigerate the crumb topping while you prepare the bread batter. Keeping the streusel pieces firm and cold ensures they create that desired crisp, buttery texture during baking.
- Gently tapping the bottom of the loaf pan on the counter after adding the batter helps release large air bubbles, significantly minimizing the chances of large holes or “tunnels” in your finished bread.
- It is essential to wait until the bread is cooled completely before applying the maple glaze. If the bread is warm, the glaze will melt and be absorbed, rather than setting nicely on top.
- For more detailed advice, ingredient explanations, and helpful baking tips, be sure to read the sections above the recipe card. These provide valuable insights for making this recipe a resounding success!
