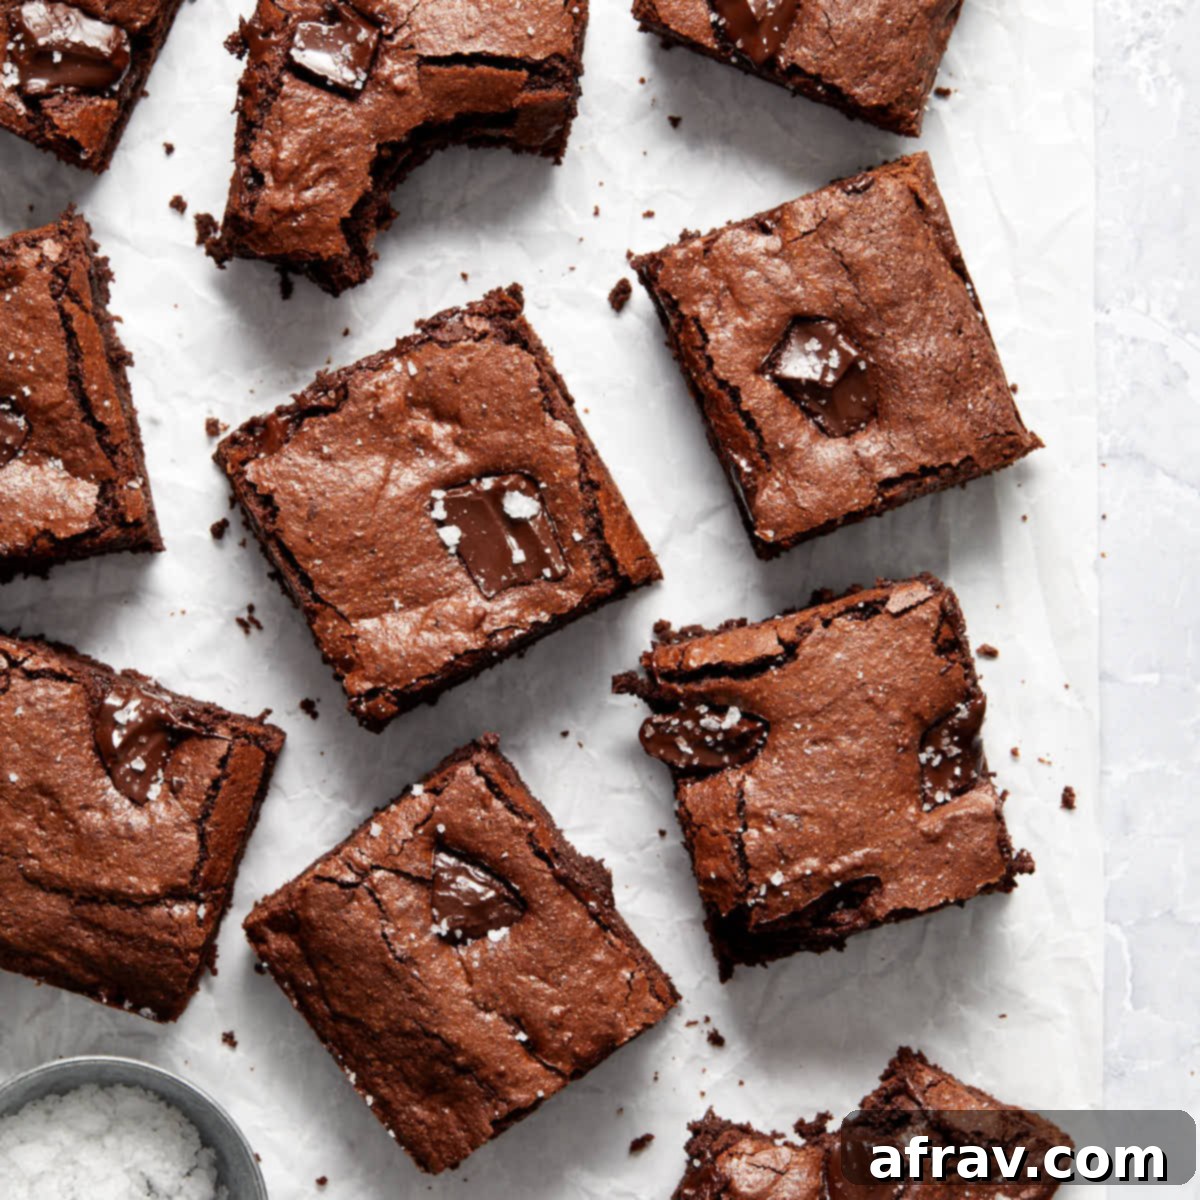
Master the Art of Fudgy Gluten-Free Oat Flour Brownies: Your Ultimate Recipe Guide
Are you searching for that perfect, melt-in-your-mouth brownie experience but need a gluten-free option? Look no further! These **Gluten-Free Oat Flour Brownies** are a revelation, offering a dense, intensely fudgy texture combined with the deep, luxurious flavor of melted dark chocolate, generous chopped chocolate, and rich cocoa powder. The secret to their naturally gluten-free status lies in the use of versatile oat flour. Whether you prefer the convenience of a store-bought brand or the satisfaction of grinding your own, this recipe has been thoroughly tested with both, guaranteeing delicious, consistent results every time.
Some bakers might worry about oat flour making baked goods crumbly, but rest assured, these brownies are anything but! Each square promises a remarkably chocolatey, moist, and undeniably fudgy bite. We even enhance the experience by folding in extra dark chocolate chunks, ensuring pockets of gooey, melted goodness throughout the batter. Prepare yourself for a gluten-free brownie recipe that not only meets but exceeds expectations, quickly becoming a staple in your baking repertoire!
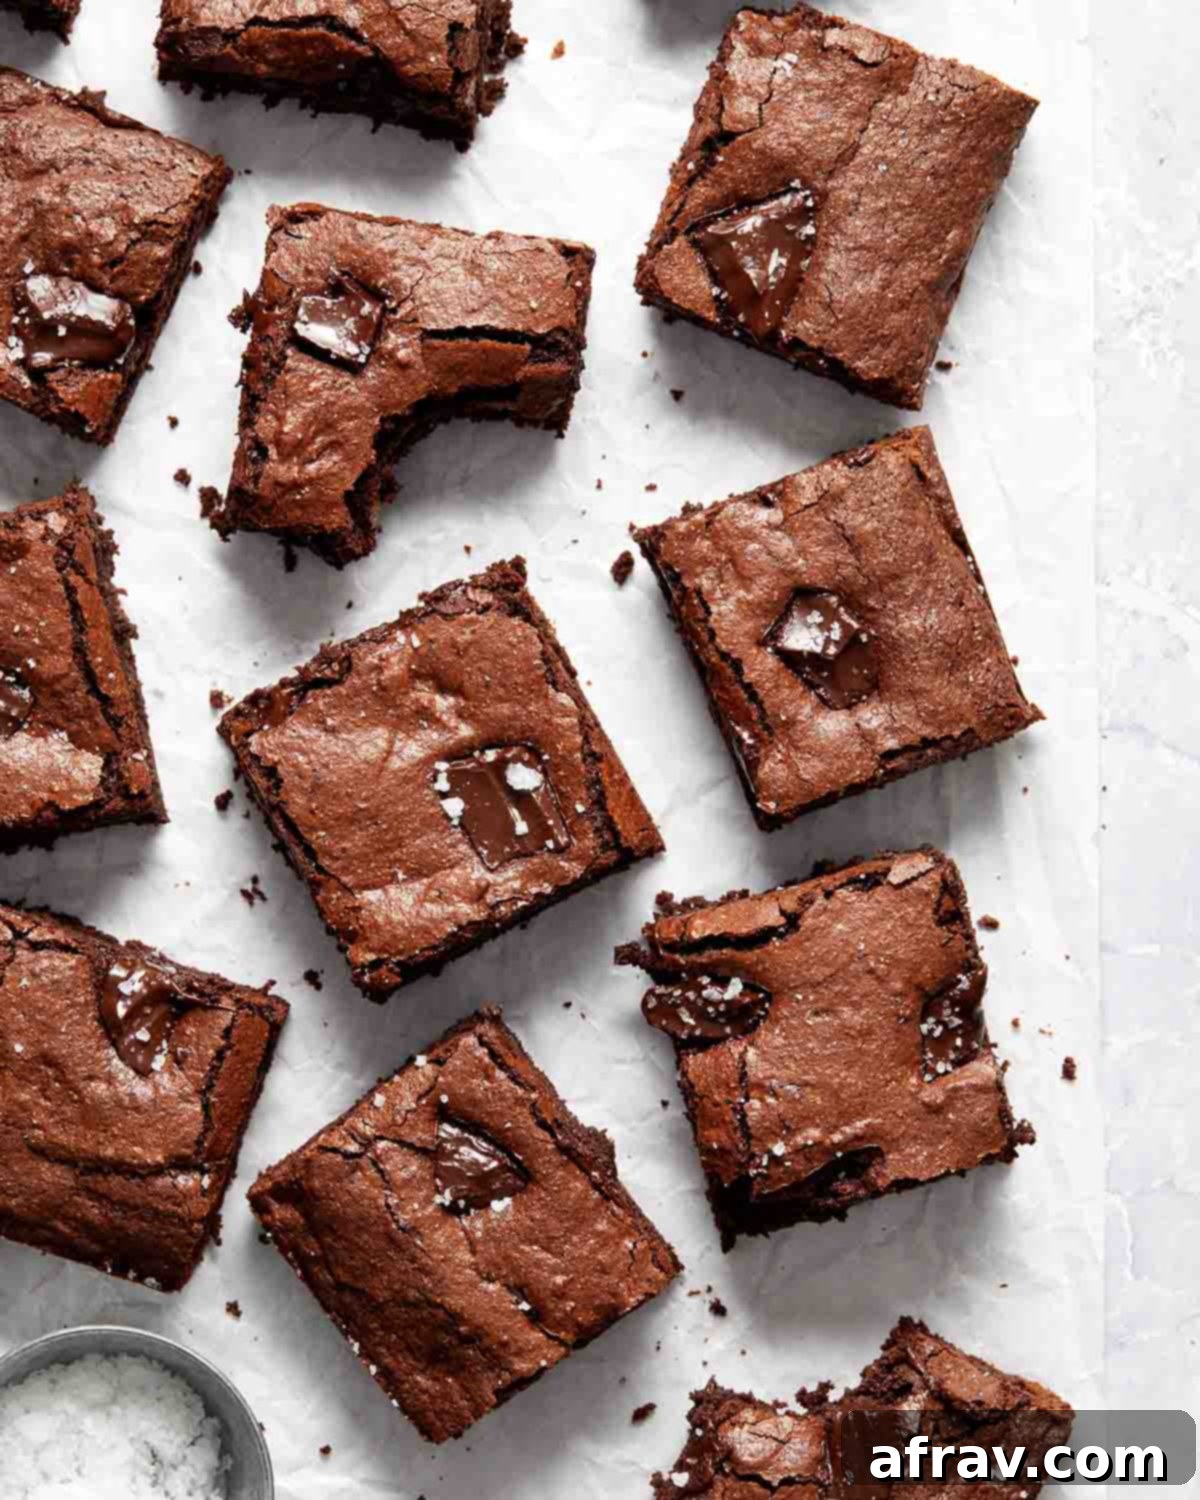
Understanding Oat Flour: Your Gluten-Free Baking Secret Weapon
Oat flour is simply whole grain flour crafted by finely grinding rolled oats. It’s a fantastic ingredient, known for its distinctively sweet and nutty flavor profile. Beyond taste, oat flour is celebrated for its ability to impart a wonderfully moist and tender crumb to baked goods, making it an excellent choice for everything from cookies to cakes, and especially these fudgy brownies. Crucially, it’s naturally gluten-free, providing a superb alternative for those with gluten sensitivities, provided you opt for oats labeled as “certified gluten-free” to prevent cross-contamination.
If you’re new to baking with oat flour, these brownies offer the perfect opportunity to dive in. You’ll find it increasingly common in most grocery stores, typically in the baking aisle or specialty flour section. However, if you’re keen on a DIY approach, making homemade oat flour is incredibly straightforward. All you need are certified gluten-free rolled oats and a powerful blender or food processor. Simply pulse and blend the oats until they transform into a fine, powdery consistency, akin to traditional wheat flour. This simple process allows you complete control over the fineness and freshness of your flour.
The inclusion of oat flour in this brownie recipe not only ensures they are accessible to a wider audience but also enriches them with a subtle depth of flavor and an irresistibly soft, chewy texture that’s hard to achieve with other flours. Once you experience the delightful results of baking with oat flour, you might find yourself exploring its potential in many more recipes. For instance, after perfecting these brownies, you’ll definitely want to try these delicious oat flour cookies with their enticing combination of chocolate chips and peanut butter!
Five Irresistible Reasons to Love These Oat Flour Brownies
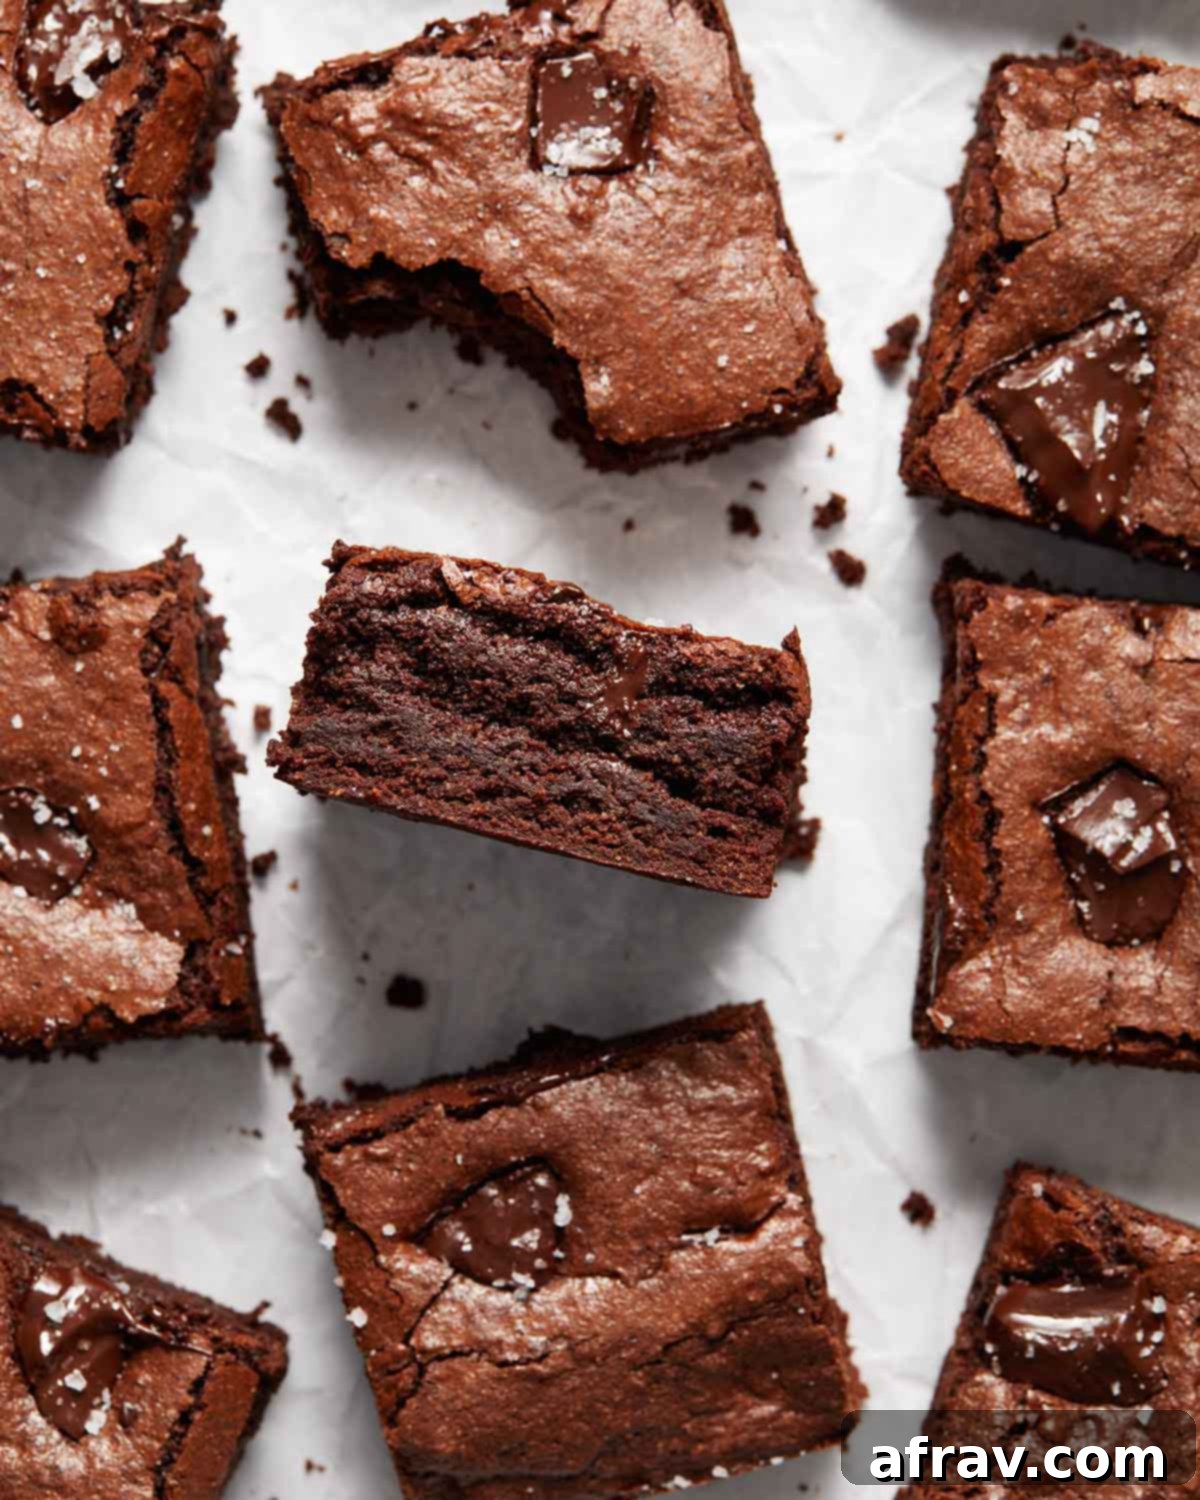
- Unrivaled Richness and Intense Chocolate Flavor: These aren’t just any chocolate brownies; they are a celebration of deep, luxurious chocolate. We achieve this profound flavor through a masterful blend of rich Dutch-processed cocoa and high-quality extra dark chocolate, both melted into the batter and folded in as luscious chunks. The result is an intensely satisfying, decadent treat with chocolate in every single bite.
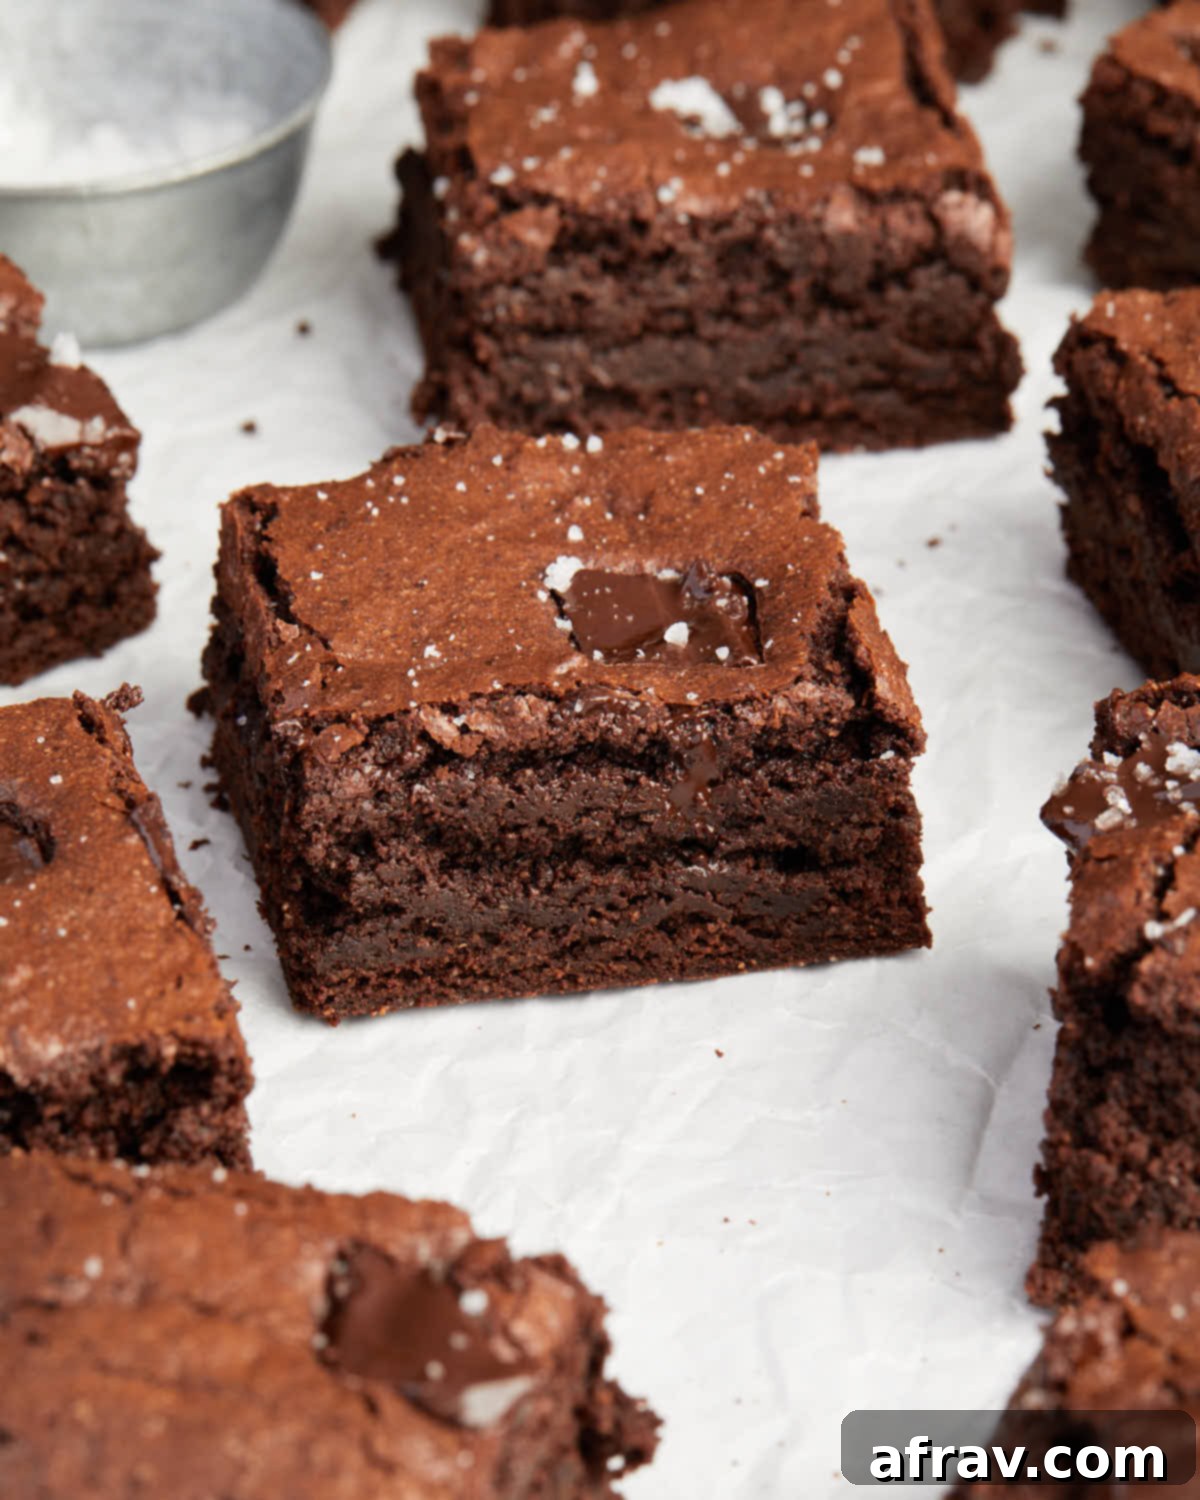
- Perfectly Fudgy, Moist, and Chewy Texture: Forget dry or crumbly gluten-free baked goods. Oat flour naturally contributes a tender, moist quality to these brownies. When combined with the precise balance of fats and sugars, it creates an incredibly dense, gooey, and irresistibly fudgy texture that truly melts in your mouth and leaves a delightful chew.
- Versatile for Any Occasion: While these brownies are a showstopper on their own, they are incredibly versatile. Serve them warm with a generous scoop of vanilla bean ice cream, a drizzle of homemade caramel or hot fudge, or simply dusted with a touch of flaky sea salt for an elevated gourmet touch. They’re perfect for dessert, a snack, or any special gathering.
- Effortless and Accessible Baking: We believe great baking should be enjoyable and accessible. This recipe has been meticulously tested and perfected using both readily available store-bought oat flour and homemade versions. This flexibility means you can confidently bake these brownies regardless of your preferred source for oat flour, ensuring consistent and delicious results without any fuss.
- Naturally Gluten-Free Goodness: For those navigating gluten sensitivities, dietary restrictions, or simply seeking healthier alternatives, these brownies offer a guilt-free indulgence. Enjoy a classic dessert with the peace of mind that comes from using naturally gluten-free ingredients, ensuring everyone can savor this chocolatey delight.
A Closer Look at the Key Ingredients
Understanding the role of each ingredient is essential for baking truly exceptional brownies. Below, we’ll dive into the specifics of what makes these oat flour brownies so special. For exact quantities, please refer to the detailed recipe card found at the end of this post.
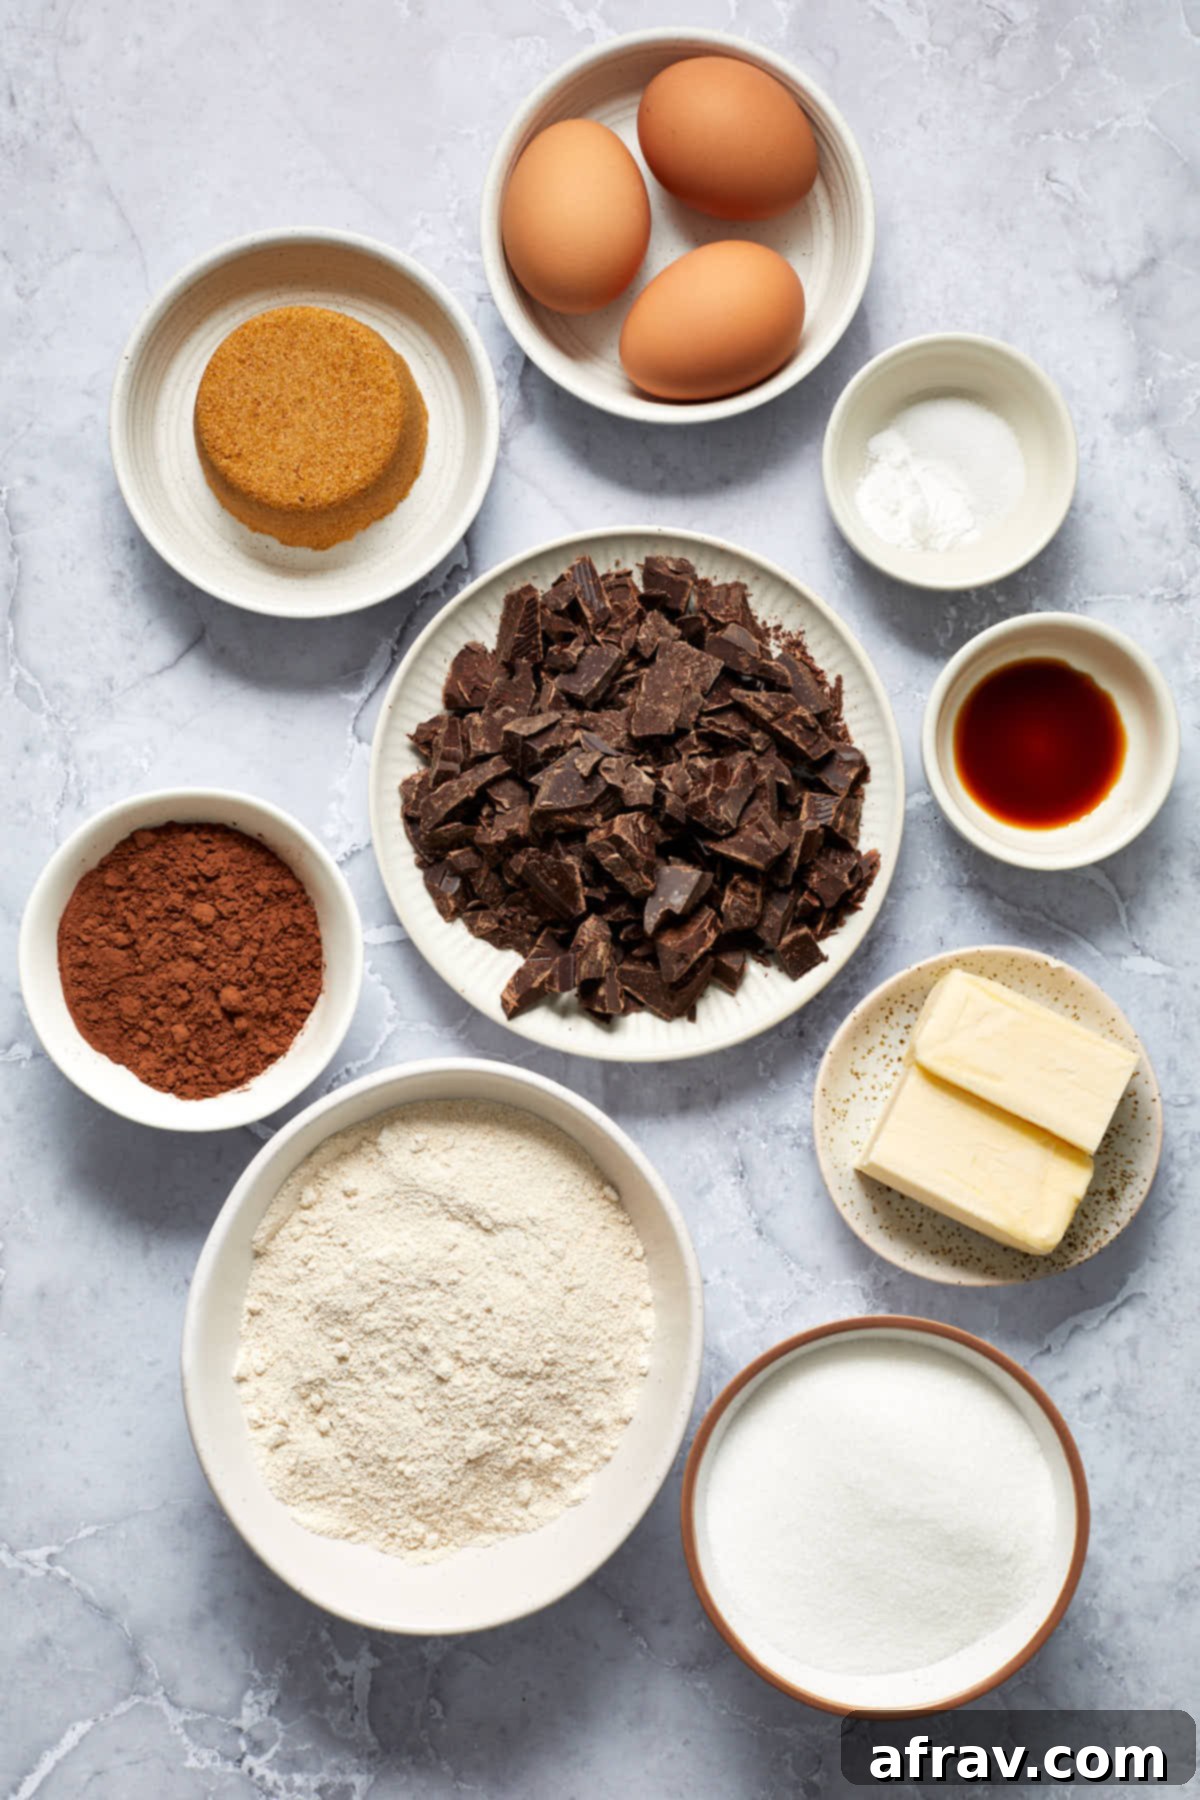
- Oat Flour: As the star ingredient for our gluten-free base, the quality of your oat flour is paramount. You must use **finely ground oat flour**. A coarser grind can lead to a slightly grainy or less cohesive brownie. While various store-bought brands offer different levels of fineness, I’ve found that grinding Quaker Oats at home produces excellent results. If you choose to make your own, ensure your blender or food processor truly pulverizes the oats into a super fine powder, almost like confectioners’ sugar. Crucially, always select *certified gluten-free* oat flour (or oats) to guarantee your brownies are safe for those with celiac disease or severe gluten intolerance.
- Dark Chocolate: This recipe leverages dark chocolate in two powerful ways. First, a significant portion (6 ounces) is melted with butter to form the rich foundation of our batter. For an ultra-rich and sophisticated flavor, aim for extra dark chocolate with at least 70% cacao content. Using a high-quality chocolate not only enhances the taste but also contributes significantly to the incredibly fudgy texture. Second, an additional 3 ounces of **chopped dark chocolate** is folded into the batter; these luscious pockets of melting chocolate are what truly elevate the fudginess and provide bursts of chocolate in every bite. Always verify your chosen dark chocolate is gluten-free.
- Sugars (Granulated and Dark Brown): Our recipe utilizes a thoughtful combination of both granulated (white) sugar and dark brown sugar. Granulated sugar is key to developing that delightful, thin, and slightly crackly crust on top of your brownies, a hallmark of a perfect batch. Dark brown sugar, with its molasses content, adds essential moisture, contributing to the brownies’ chewiness and creating a deeper, more complex caramel-like flavor that beautifully complements the rich chocolate.
- Dutch-Processed Cocoa Powder: For an intense, profound chocolate flavor and a remarkably dark, alluring color, Dutch-processed cocoa is indispensable in this recipe. Unlike natural cocoa powder (which is acidic), Dutch-processed cocoa has been treated with an alkali, neutralizing its acidity. This process results in a smoother, less bitter, and more mellow chocolate taste, alongside a richer, darker hue. It reacts differently with leavening agents, which is why we rely on baking powder for the slight lift needed.
- Unsalted Butter: Butter is fundamental for creating a truly rich, flavorful, and incredibly fudgy brownie. Using unsalted butter allows you to precisely control the overall salt content in the recipe, ensuring perfect flavor balance.
- Large Eggs (Room Temperature): Eggs serve multiple critical functions: they provide structure, add richness, and bind the ingredients together, contributing to the brownies’ moisture. The importance of using **room temperature eggs** cannot be overstated. They emulsify much more effectively and smoothly with the melted chocolate and butter mixture, leading to a homogenous, velvety batter and a superior, uniform texture in your finished brownies.
- Vanilla Extract: Though seemingly a small addition, high-quality vanilla extract is a powerful flavor enhancer. It doesn’t just add its own sweet aroma; it dramatically deepens and rounds out the intense chocolate flavors, adding a layer of warmth and complexity that makes the brownies truly exceptional.
- Baking Powder & Fine Sea Salt: A touch of baking powder provides just enough lift to prevent these dense brownies from becoming too heavy, ensuring a pleasant chew. Fine sea salt is crucial for balancing the sweetness of the sugars and, most importantly, for intensifying and highlighting the complex flavors of the dark chocolate. A final sprinkle of flaky sea salt after baking is optional but highly recommended for an additional textural and flavor contrast.
Baking Gluten-Free Oat Flour Brownies: A Simple Step-by-Step Guide
You’ll be pleasantly surprised at how straightforward it is to create these incredible gluten-free brownies with oat flour. The process mirrors most traditional brownie recipes, requiring no special equipment, no complicated techniques, and certainly no exotic ingredients – just a simple path to deliciously fudgy results!
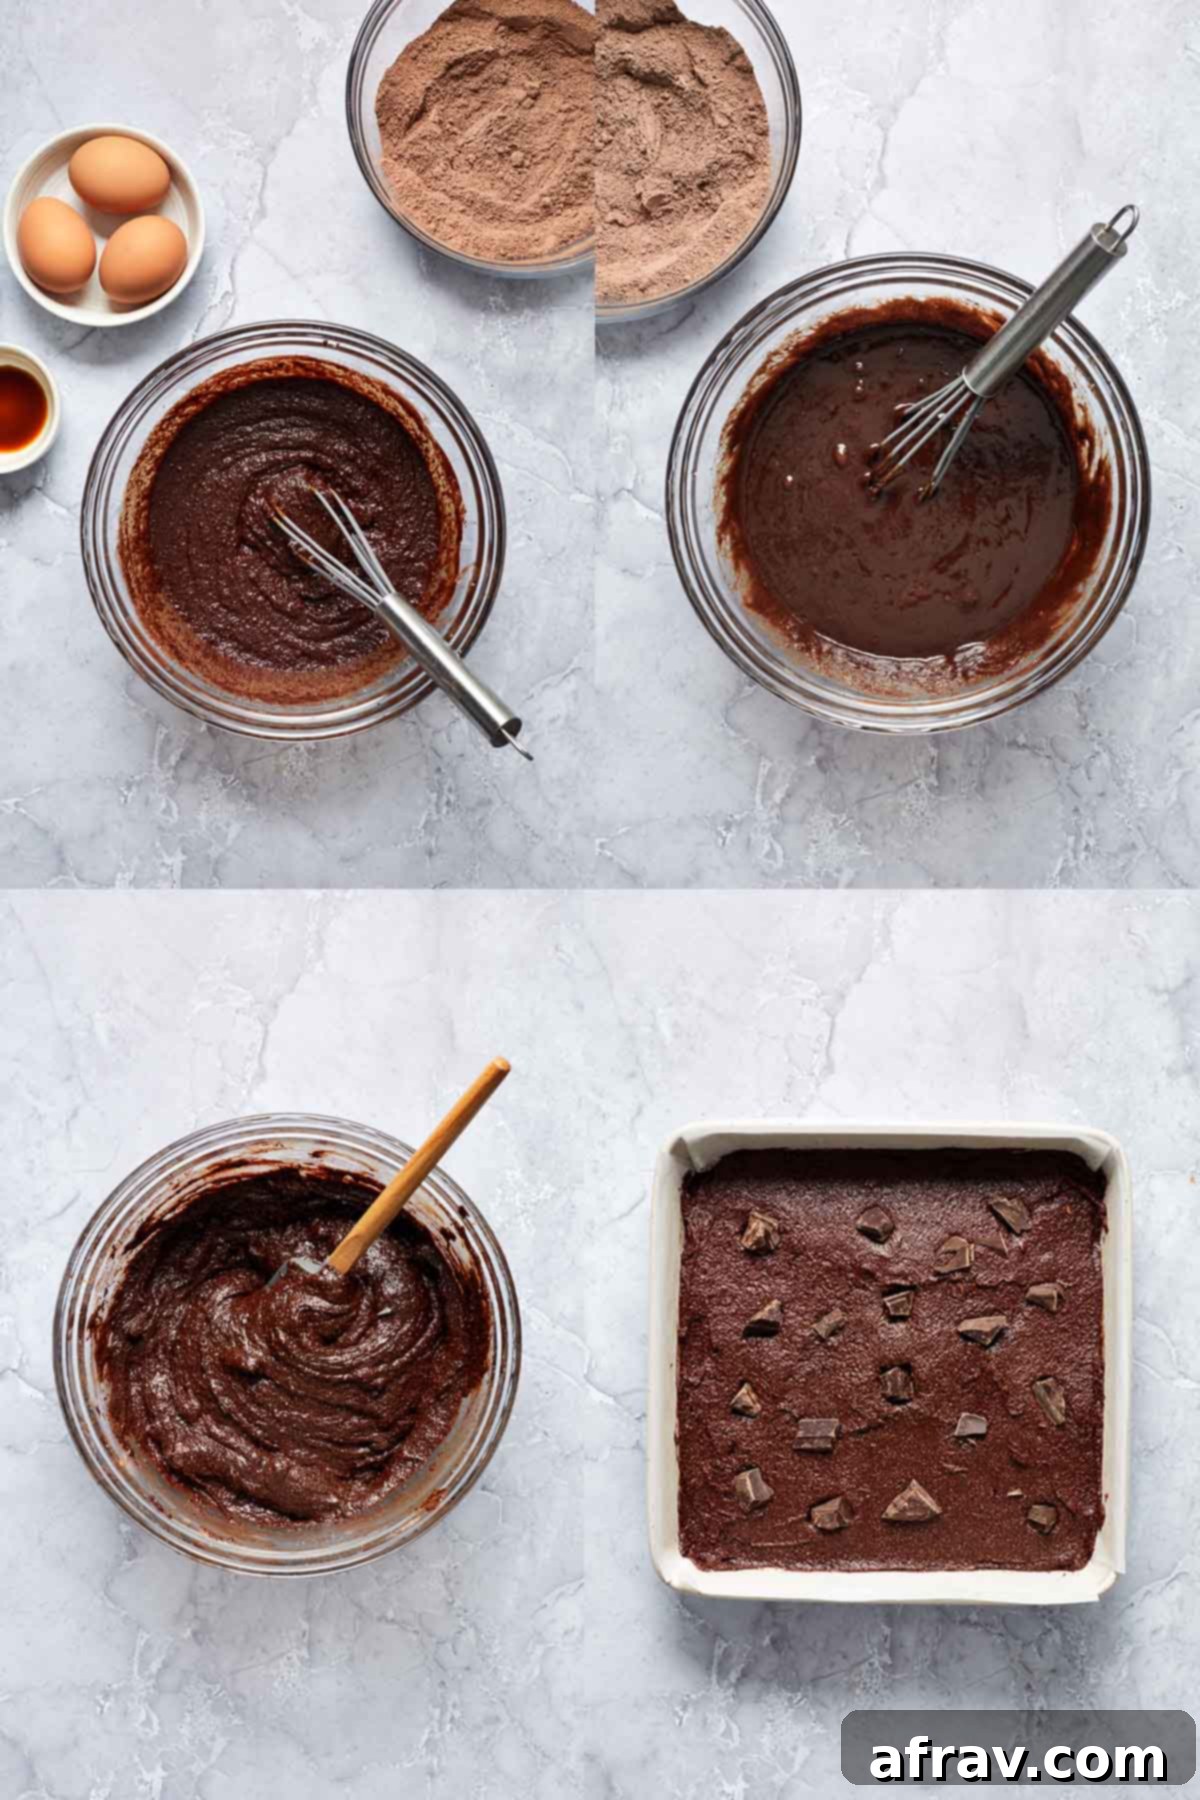
- Prepare Your Dry Ingredients: In a medium-sized mixing bowl, thoroughly whisk together the certified gluten-free oat flour, Dutch-processed cocoa powder, baking powder, and fine sea salt until they are uniformly combined. For a truly smooth batter and to avoid any lumps, especially if your cocoa or oat flour tends to clump, it’s advisable to sift these dry ingredients together. Set this bowl aside for later.
- Melt Chocolate and Butter: Take a large, microwave-safe bowl and add the 6 ounces (170g) of chopped extra dark chocolate along with the unsalted butter. Melt this mixture in your microwave using 30-second intervals, making sure to stir vigorously after each interval. Continue until the chocolate and butter are completely melted and the mixture is smooth, glossy, and fully combined. As an alternative, you can achieve this by gently melting the ingredients together using a double boiler set over simmering water on your stovetop.
- Integrate Sugars and Eggs: Once your chocolate-butter mixture is perfectly smooth, whisk in both the granulated sugar and the dark brown sugar until they are well incorporated. Now, this is a crucial step: allow the mixture to cool for approximately 5 minutes. This cooling period is vital to prevent the eggs from cooking or scrambling when they are added. After cooling, whisk in the three large, room temperature eggs, one at a time, ensuring that each egg is fully absorbed into the mixture before adding the next. Finally, whisk in the vanilla extract, which will enhance the chocolate flavors.
- Combine Wet and Dry Mixtures: Carefully add the prepared dry ingredients (the flour, cocoa, baking powder, and salt mixture) into your wet chocolate mixture. Using a spatula or a wooden spoon, stir gently until the ingredients are just combined. The batter will be noticeably thick and rich. The key here is not to overmix; excessive stirring, even with gluten-free flour, can lead to a tougher, less tender brownie texture. Ensure all dry streaks are gone, but stop mixing as soon as that’s achieved.
- Fold in Additional Chocolate Chunks: Take the remaining 3 ounces (85g) of chopped extra dark chocolate and gently fold them into the brownie batter. Make sure they are evenly distributed. It’s a good idea to reserve a small amount of these chocolate chunks to sprinkle over the top of the batter before it goes into the oven; this creates an appealing visual and an extra layer of chocolatey goodness.
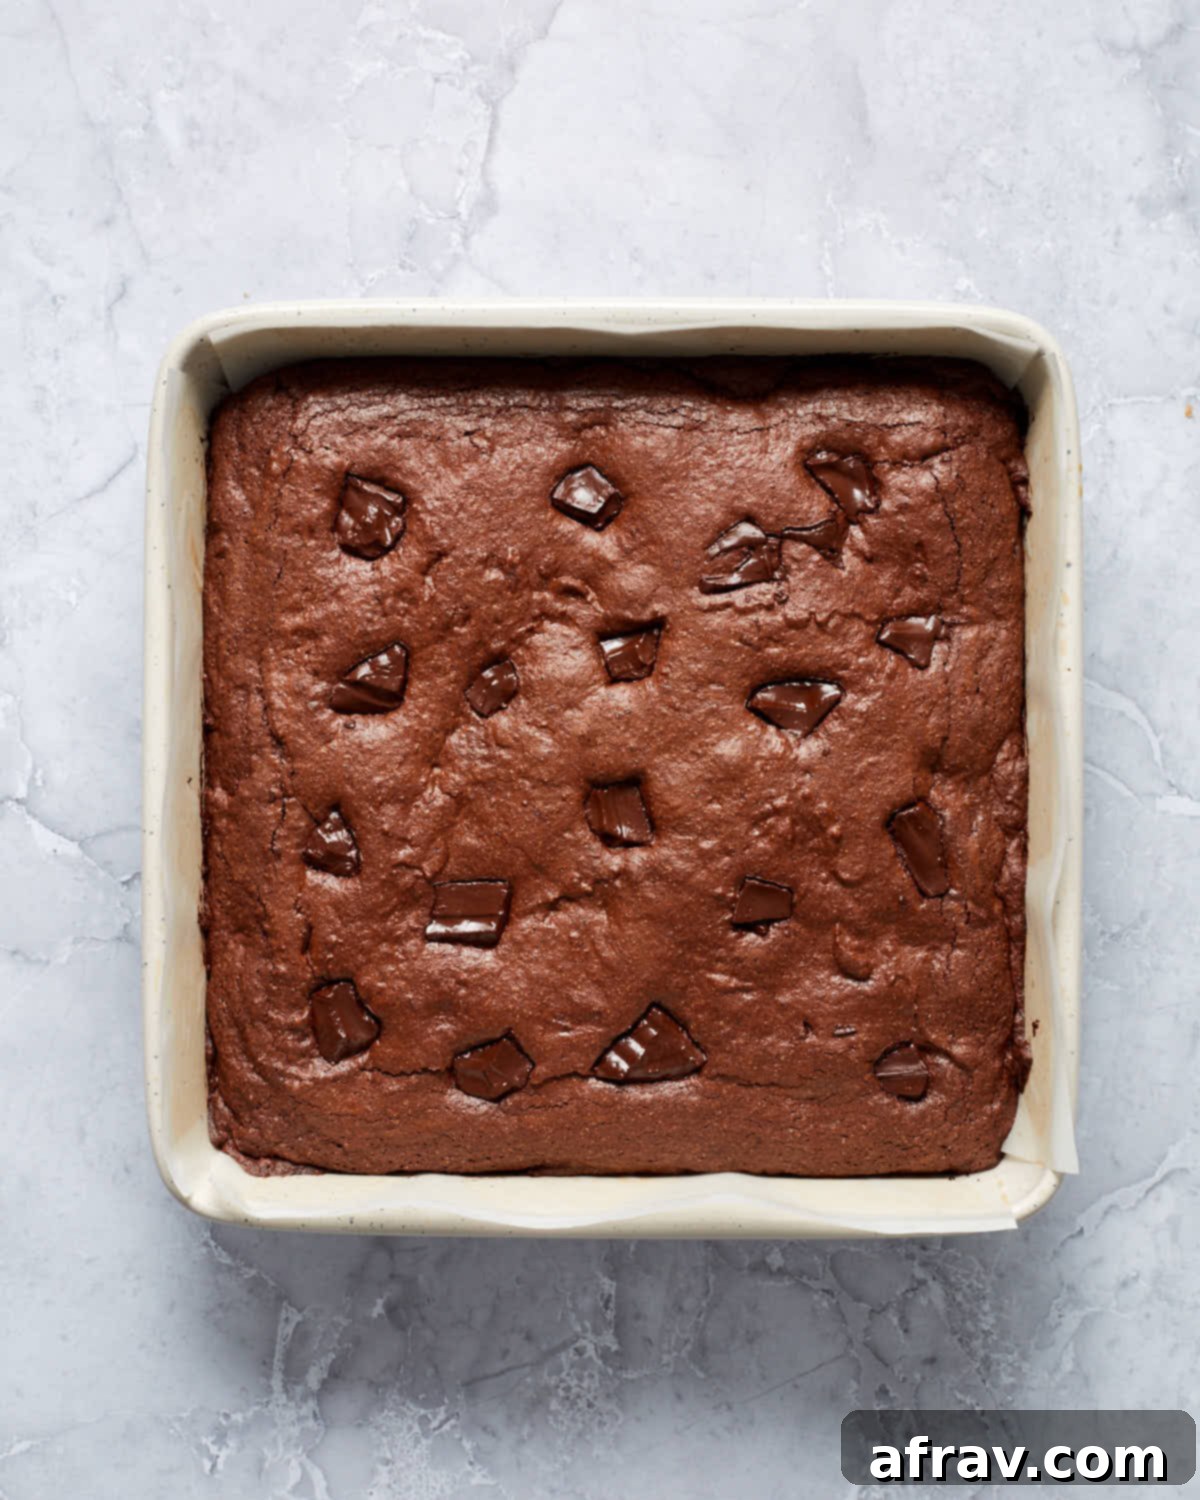
- Bake to Fudgy Perfection: Evenly spread the thick brownie batter into your prepared 9-inch square baking pan (which should be greased and lined with parchment paper, leaving an overhang for easy removal). Sprinkle the reserved chopped chocolate over the top. Bake in your preheated oven at 350°F (175°C) for 28-32 minutes. To test for doneness, insert a toothpick into the center of the brownies. It should come out with moist crumbs attached, but not wet batter. A few gooey crumbs indicate the perfect fudgy consistency; a completely clean toothpick often means they are overbaked and might be drier.
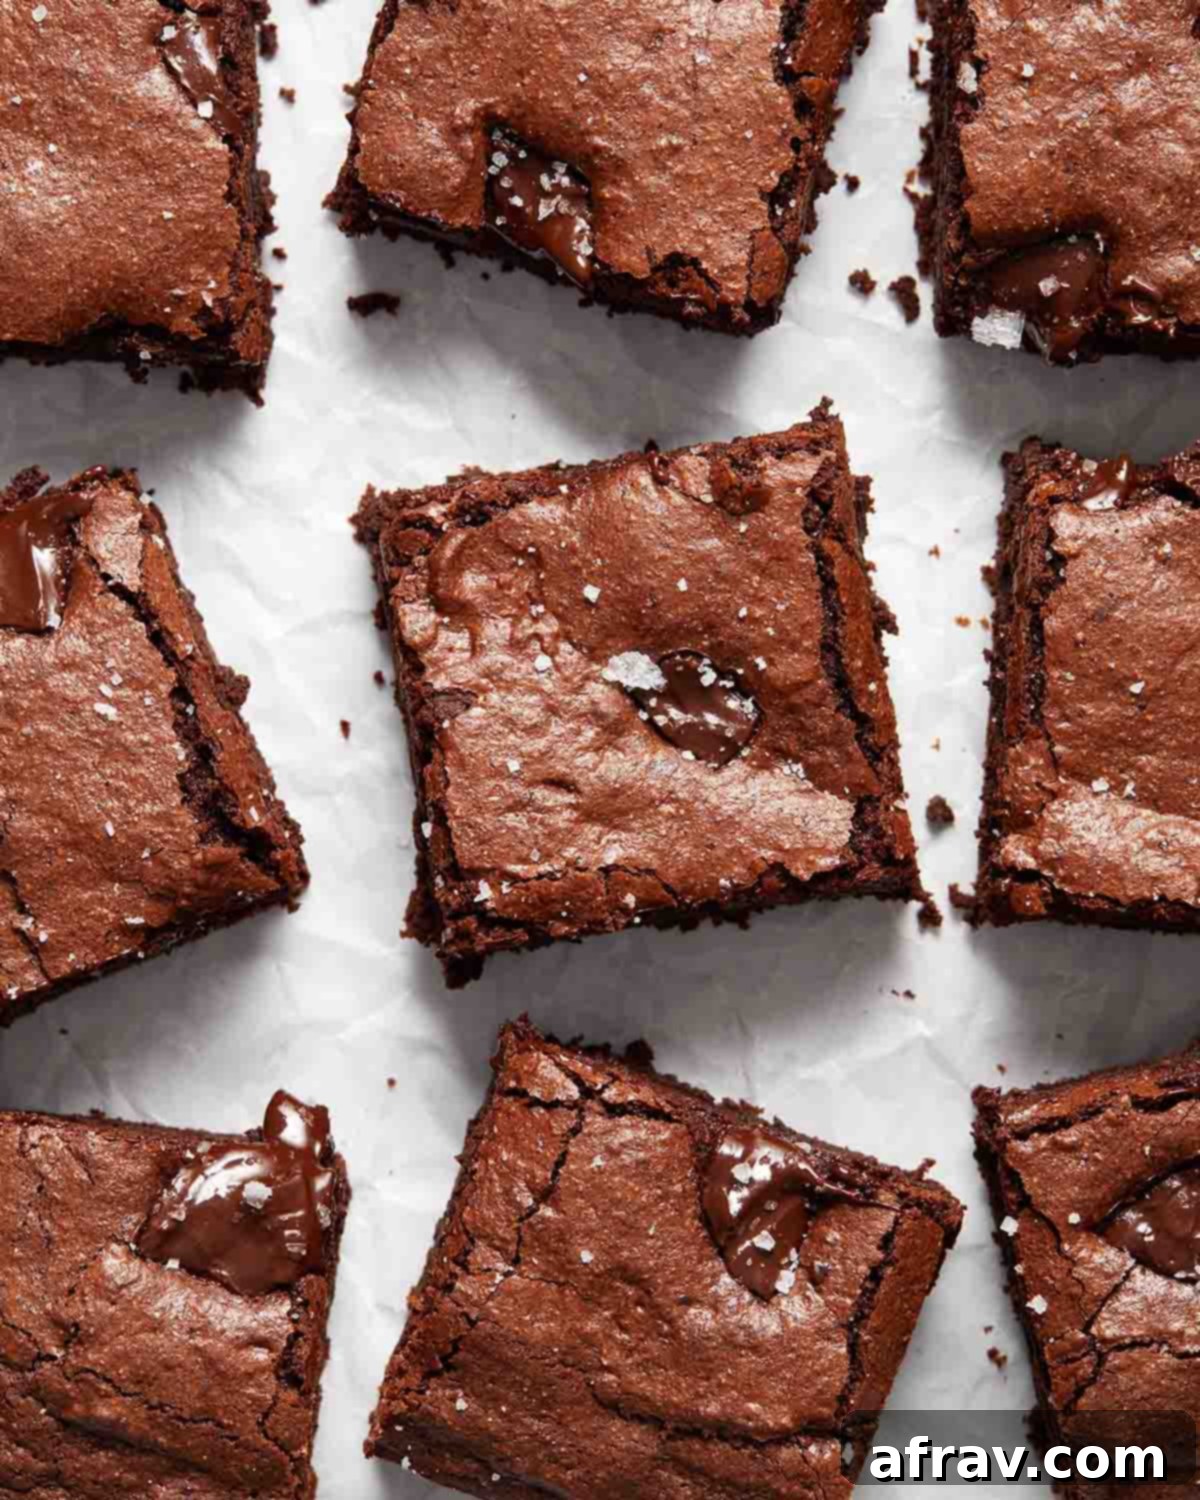
- The Finishing Touch: Sea Salt: Immediately after removing the brownies from the oven, while they are still warm, sprinkle a little flaky sea salt over the entire surface (this step is optional but highly recommended!). The salt adds a delightful contrast, cutting through the richness and intensifying the chocolate flavor.
- Cool Completely Before Slicing: This is arguably the most challenging but absolutely essential step for achieving neat, perfectly set, and fudgy brownies. Allow the brownies to cool completely in the pan on a wire rack for at least 2-3 hours. Ideally, for super clean cuts and maximum fudginess, you can even chill them in the refrigerator for an hour or two (or even overnight). Cutting them while warm will result in a messy, crumbly experience, whereas cooled brownies will yield perfect, dense, and delectable squares. Enjoy your homemade masterpiece!
Storing Your Oat Flour Brownies for Lasting Freshness
To keep your oat flour brownies at their absolute fudgiest and most tender, store them in an airtight container at room temperature for 1-2 days. This environment helps maintain their soft, decadent texture.
If you need to extend their shelf life, the refrigerator is a good option, where they will last for 3-5 days. Be aware that chilling will cause the brownies to firm up slightly, resulting in a denser, chewier texture. If you prefer a softer brownie after refrigeration, simply let them come to room temperature for 15-30 minutes before serving, or gently warm individual squares in the microwave for a few seconds to restore some of their warmth and gooeyness.
These fudgy brownies are also excellent for freezing! Once completely cooled and cut into squares, place them in a single layer in a freezer-safe airtight container, or wrap individual squares tightly in plastic wrap before transferring them to a freezer bag or container. They can be stored in the freezer for up to one month without significant loss of quality. To enjoy, simply thaw them at room temperature for a few hours, or warm gently in the microwave for a quick, comforting treat.
Oat Flour Brownies: Frequently Asked Questions
Yes, oats themselves are inherently gluten-free. However, the primary concern for individuals with celiac disease or severe gluten sensitivity is cross-contamination. This can occur if oats are processed or packaged in facilities that also handle gluten-containing grains like wheat, barley, or rye. To ensure your brownies are truly safe and gluten-free, always purchase oat flour (or whole oats for grinding) that is explicitly labeled as “certified gluten-free.”
This recipe has been carefully developed and tested to achieve its unique fudgy texture with oat flour. While you can substitute 140 grams (approximately 1 1/8 to 1 1/4 cups, depending on how it’s measured) of all-purpose white flour, be aware that the brownies will no longer be gluten-free. Furthermore, using wheat flour will alter the texture slightly, likely resulting in a chewier brownie due to the development of gluten.
Absolutely! I’ve successfully made this recipe using both store-bought and homemade oat flour. The critical factor for homemade oat flour is to ensure it is incredibly finely ground. To achieve the best flour-like consistency, a high-powered blender or a food processor is highly recommended. For the smoothest possible brownies, you might also consider sifting your homemade oat flour to remove any larger, unground oat particles.
For the specific rich, deep chocolate flavor and dark color of these brownies, Dutch-processed cocoa powder is strongly preferred. It is less acidic and has a smoother, more intense chocolate taste compared to natural cocoa. Natural cocoa is acidic and reacts differently with leavening agents, and using it may result in a different flavor profile and potentially a slightly different texture. This recipe has not been tested with natural cocoa powder.
Yes, you certainly can! Using an 8-inch square pan will produce thicker brownies. If you opt for the smaller pan, you will need to increase the baking time by approximately 5-10 minutes. Always rely on the toothpick test (aiming for moist crumbs) to determine when they are perfectly baked to your desired level of fudginess.
If your oat flour brownies are crumbly, there are usually a few culprits. Firstly, the oat flour might not have been finely ground enough; coarser flour can absorb liquids differently. Secondly, overmixing the batter can lead to a tougher, crumbly texture. Lastly, overbaking is a common cause of dry, crumbly brownies. Ensure you follow the toothpick test carefully: a few moist crumbs indicate a perfect fudgy center, not a completely clean toothpick.
These oat flour brownies provide a fantastic base for creativity! Feel free to customize them by folding in various mix-ins with the chopped dark chocolate. Popular options include chocolate chips (milk, white, or semi-sweet), toasted chopped nuts (such as walnuts, pecans, or almonds), a swirl of peanut butter or hazelnut spread, or even a sprinkle of dried fruits like cranberries or raspberries. If you add substantial wet ingredients, slight adjustments to baking time may be needed.
Essential Recipe Tips for Perfect Oat Flour Brownies Every Time
- Embrace Weighted Measurements for Precision: For consistently perfect baking results, especially with gluten-free recipes, using a kitchen scale for weighted measurements (grams) is highly recommended. If you’re using cup measurements, particularly for flour and cocoa, always employ the “spoon and level” method: gently spoon the ingredient into your measuring cup until it overflows, then level it off with a straight edge. Scooping directly from the bag can compact ingredients, leading to significantly more flour or cocoa than intended, which will inevitably alter your brownie’s final texture.
- Mastering Gentle Chocolate Melting: When melting the dark chocolate and butter, whether in the microwave or using a double boiler, patience is your best friend. For microwave melting, use short, 30-second intervals, stirring thoroughly after each one. Chocolate can scorch very easily, so a low and slow approach is crucial to achieve a perfectly smooth, glossy, and unburnt mixture.
- Crucial Cooling Before Adding Eggs: After whisking the sugars into the melted chocolate and butter mixture, it is absolutely vital to allow this mixture to cool down for about 5 minutes. Adding eggs to a hot mixture will cause them to scramble, which will ruin your batter. The mixture should be warm to the touch, but never hot, before the eggs are incorporated.
- The Importance of Room Temperature Eggs: Always aim to use room temperature eggs. Eggs at room temperature emulsify far more effectively and smoothly with the fats and sugars in the batter. This leads to a more homogenous, velvety batter and contributes significantly to a superior, uniform texture and an incredibly fudgy brownie. If you forget to take them out in advance, simply place them in a bowl of warm (not hot) water for 5-10 minutes.
- Verify All Gluten-Free Ingredients: Even though oats are naturally gluten-free, cross-contamination can occur during processing. For a truly gluten-free treat suitable for those with sensitivities, always ensure that your oat flour, dark chocolate, and cocoa powder are explicitly labeled as “certified gluten-free.” This small step provides peace of mind and ensures a safe dessert.
- Creative Variations and Mix-Ins: While the chopped dark chocolate folded into the batter is wonderful, don’t hesitate to get creative! You can omit it entirely for a simpler brownie, or swap it for other delicious mix-ins. Consider chocolate chips (milk, white, or semi-sweet), toasted chopped nuts (like walnuts, pecans, or almonds), a swirl of peanut butter, or even a sprinkle of dried fruit. If you decide to leave out the added chocolate chunks, you might find your brownies bake 1-2 minutes faster, so adjust your baking time accordingly.
- Patience for the Perfect Cut: Cool Completely: This is arguably the most challenging but essential tip for achieving neat, perfectly set, and wonderfully fudgy brownies. Allowing the brownies to cool completely in the pan, ideally for at least 2-3 hours (or even chilling them in the refrigerator overnight for exceptionally clean cuts), gives them ample time to set up properly. Attempting to cut them while warm will inevitably result in a messy, crumbly experience, whereas fully cooled brownies will yield perfect, dense, and distinctly fudgy squares.
- The Perfect Doneness Test for Fudginess: When testing for doneness with a toothpick, aim for moist crumbs to be attached when you pull it out from the center of the brownies. This indicates a perfectly fudgy, slightly underbaked center. If the toothpick comes out with wet batter, they need more time. If it comes out completely clean, your brownies are likely overbaked and might be drier or cakier than desired.
Craving More Delicious Brownie Recipes?
If these fudgy oat flour brownies have captured your heart, we invite you to explore more delightful brownie recipes from our collection. Each one offers a unique twist on this beloved classic:
- Decadent Raspberry Swirl Brownies
- Rich & Nutty Tahini Brownies
- Perfectly Balanced Salted Almond Butter Brownies
- Festive Peppermint Mocha Fudge Brownies
We truly hope you enjoy baking and savoring every single bite of these incredible oat flour brownies! If you make this recipe, we’d be absolutely thrilled to hear your thoughts and see your creations. Please feel free to share your feedback in the comments section below – your input helps our community of bakers!
HUNGRY FOR MORE? Follow Crumb Top Baking on Instagram, Pinterest and Facebook!
Print

Oat Flour Brownies
5 Stars 4 Stars 3 Stars 2 Stars 1 Star
No reviews
Author: Leanne
Prep Time: 15 minutes
Cook Time: 30 minutes
Total Time: 45 minutes
Yield: 16 brownies
Category: Dessert
Method: Bake
Cuisine: American, Canadian
Diet: Gluten Free
Description
These gluten-free Oat Flour Brownies are dense and fudgy with melted dark chocolate, chopped chocolate and cocoa powder. They’re naturally gluten-free and you can use store-bought or homemade oat flour.
Ingredients
- 1 1/3 cup (140g) certified gluten-free oat flour
- 1/3 cup (35g) Dutch-processed cocoa
- 1/2 teaspoon baking powder
- 1/2 teaspoon fine sea salt
- 6 ounces (170g) extra dark chocolate (70% cacao), chopped
- 1/2 cup (113g) unsalted butter
- 1 cup (210g) granulated sugar
- 1/2 cup (105g) dark brown sugar, packed
- 3 large eggs, room temperature
- 1 teaspoon vanilla extract
- 3 ounces (85g) extra dark chocolate, chopped
- flaky sea salt, optional
Instructions
- Preheat your oven to 350°F (175°C). Prepare a 9-inch square baking pan by lightly greasing it, then lining it with parchment paper, ensuring there’s an overhang on two sides. This overhang will act as a sling, making it much easier to remove the cooled brownies from the pan later.
- In a medium-sized bowl, thoroughly whisk together the certified gluten-free oat flour, Dutch-processed cocoa powder, baking powder, and fine sea salt until all the dry ingredients are uniformly combined. For the smoothest possible batter and to eliminate any potential lumps, particularly with cocoa or homemade oat flour, I highly recommend sifting these dry ingredients together. Once prepared, set this bowl aside.
- In a large, microwave-safe bowl, combine the 6 ounces (170g) of chopped extra dark chocolate with the unsalted butter. Begin to melt this mixture in the microwave using short, 30-second intervals. After each interval, stir the mixture vigorously. Continue this process until the chocolate and butter are completely melted, smooth, and beautifully glossy. As a classic alternative, you can also gently melt these ingredients together in a heatproof bowl set over a saucepan of simmering water (a double boiler), stirring until combined.
- Once your chocolate-butter mixture is perfectly smooth, whisk in both the granulated sugar and the dark brown sugar until they are well incorporated. Now, for a crucial step: allow this mixture to cool for approximately 5 minutes. This cooling period is vital to ensure that when you add the eggs, they don’t scramble. After cooling, whisk in the three large, room temperature eggs, one at a time, ensuring that each egg is fully absorbed and integrated into the mixture before you add the next. Finish by whisking in the vanilla extract, which will beautifully enhance the chocolate flavors.
- Carefully add the previously prepared dry ingredients (the whisked oat flour, cocoa, baking powder, and salt mixture) into the wet chocolate mixture. Using a spatula or a wooden spoon, gently stir the ingredients together until they are just combined. Avoid the temptation to overmix the batter; even with gluten-free flour, overmixing can lead to a less tender and potentially tougher brownie texture. Stop stirring as soon as all dry streaks have disappeared. The batter will be quite thick and luscious.
- Gently fold in the remaining 3 ounces (85g) of chopped extra dark chocolate into the brownie batter, ensuring the chunks are evenly distributed throughout. These additional chocolate pieces will melt beautifully during baking, creating delightful pockets of gooey chocolate that are key to an ultra-fudgy brownie. Remember to reserve a small amount of these chopped chocolate pieces to sprinkle over the top of the batter just before it goes into the oven.
- Evenly spread the thick, rich brownie batter into your prepared 9-inch square baking pan. Once smoothed, sprinkle the reserved chopped chocolate pieces over the entire surface of the batter.
- Bake the brownies in your preheated oven for 28-32 minutes. The most reliable way to check for doneness for fudgy brownies is the toothpick test: insert a toothpick into the center of the pan. It should come out with moist crumbs attached – not wet batter, but definitely not completely clean. A few gooey crumbs signify that perfect, fudgy, slightly underbaked center that makes these brownies so irresistible. If it’s completely clean, it’s likely overbaked and might be drier.
- Immediately after removing the brownies from the oven, and while they are still warm, sprinkle a little flaky sea salt evenly over the top surface. This step is optional but highly recommended, as the salt provides a wonderful contrast, balancing the sweetness and intensely enhancing the deep chocolate flavors.
- This is arguably the hardest step: allow the brownies to cool completely in the pan on a wire rack before you even think about cutting them into squares. This patience is paramount! Cooling completely, ideally for at least 2-3 hours (or even chilling them in the refrigerator overnight for the cleanest, fudgiest cuts), allows the brownies to set up properly. Attempting to cut them while warm will likely result in a messy, crumbly experience. Once fully cooled, carefully lift the parchment paper to remove the entire slab of brownies, then cut them into perfect, dense, and fudgy squares. Enjoy your homemade masterpiece!
Notes
- For the absolute best texture in your brownies, always ensure your oat flour is very finely ground. This applies whether you are using a store-bought brand or grinding your own oats at home. Sifting homemade oat flour can help you achieve this desired fineness and a smoother batter.
- If you prefer not to use a microwave for melting, a double boiler setup on the stovetop is an excellent alternative. It provides a gentle, controlled heat that ensures the chocolate and butter melt smoothly and evenly without burning.
- Accuracy is a baker’s best friend, especially in gluten-free recipes. We strongly recommend using a kitchen scale for the most precise weighted measurements (grams) provided in the recipe. If you are using cup measurements, always remember to employ the “spoon and level” technique for flour and cocoa to prevent over-measurement, which can significantly alter the brownie’s texture.
- To prevent your eggs from scrambling and to ensure they incorporate seamlessly into the batter, it is crucial to allow the melted chocolate mixture to cool for about 5 minutes before you add the room temperature eggs. This step contributes to a smooth emulsion and a better final texture.
- For truly gluten-free brownies, always be diligent about using ingredients that are explicitly labeled as “certified gluten-free.” This includes your oat flour, as well as your chocolate and cocoa powder, to completely avoid any risk of cross-contamination for those with sensitivities.
- We’ve packed this article with detailed advice and suggestions! Be sure to check out all the sections above the recipe card for more in-depth explanations, ingredient insights, and extra tips to ensure your brownies are nothing short of perfect.
