The Ultimate Gluten-Free Southwest Chicken Chili: Creamy, Healthy & Flavorful
Warm up with a big bowl of this incredibly creamy, flavorful, and hearty Southwest Chicken Chili. Bursting with lean protein, an abundance of fresh vegetables, and a medley of aromatic spices, this satisfying meal is a true crowd-pleaser. What makes it even better? It’s naturally gluten-free and dairy-free, making it accessible for various dietary needs without compromising on its rich, comforting taste. Get ready to experience the ultimate combination of warmth, robust flavor, and wholesome goodness in every single bowl.

There’s nothing quite like a warm, comforting bowl of chili to soothe the soul, especially on a chilly evening. This Southwest Chicken Chili recipe takes traditional comfort food and elevates it with vibrant southwestern flavors and a health-conscious twist. While the original inspiration for this delicious dish came from my mom’s kitchen, I’ve lovingly perfected it over the years, making thoughtful adjustments to ensure it’s not only gluten-free but also a cleaner, more nutritious option for the whole family.
This recipe offers a fantastic and lighter alternative to the more common beef chili, without sacrificing any of the satisfying richness you crave. It features tender, shredded chicken breast, a hearty blend of black and pinto beans, an array of colorful vegetables like celery, bell peppers, onions, and leeks, all simmered in a nourishing bone broth. This isn’t just a tasty meal; it’s a powerhouse of nutrients, providing almost 30 grams of protein per serving, making it incredibly filling and energizing. It’s truly a meal that tastes indulgent but fuels your body right.
If you’re anything like me and always on the hunt for more delicious and wholesome chili and soup recipes, you’re in luck! You might also enjoy exploring my flavorful vegan sweet potato chili, which is packed with plant-based goodness, or my incredibly easy and comforting one-pot chicken kale soup. Each offers a unique and healthy way to enjoy a comforting meal.
Why You’ll Love This Southwest Chicken Chili
This Southwest Chicken Chili isn’t just another recipe; it’s a culinary experience designed to bring joy and nourishment to your table. Here’s what truly sets it apart and why it’s bound to become a staple in your meal rotation:
- Naturally Gluten-Free & Dairy-Free: For those with sensitivities or dietary preferences, finding a rich and creamy chili that skips the gluten and dairy can be a challenge. Our Southwest Chicken Chili achieves its wonderfully thick and satisfying base using the natural sweetness of pureed corn and the thickening power of arrowroot or tapioca starch. This means you get all the comfort and creaminess without any of the common allergens, much like my creamy chicken cauliflower soup. It’s a hearty meal that everyone can enjoy without worry.
- Incredibly Nutritious and Filling: This chili is a powerhouse of wholesome ingredients. It’s packed with an array of vibrant vegetables such as crisp celery, colorful bell peppers, pungent onions, and subtle leeks, contributing essential vitamins, minerals, and fiber. The combination of lean shredded chicken and fiber-rich beans provides a substantial amount of both animal and plant-based protein, ensuring each serving is not only delicious but also incredibly satisfying and keeps you feeling full for longer. You’ll feel good about what you’re eating!
- Bursting with Authentic Flavor: Prepare your taste buds for an explosion of authentic southwestern and traditional chili flavors. A carefully balanced blend of spices, including chili powder, cumin, oregano, and coriander, creates a deep, complex profile that’s both warm and inviting. Every spoonful delivers a harmonious blend of savory, slightly smoky, and subtly spicy notes, making this chili truly unforgettable.
- Fantastic for Leftovers & Meal Prep: This chili is a dream come true for meal preppers and anyone who loves easy, ready-to-eat meals throughout the week. The flavors in this chili actually deepen and meld beautifully overnight, making leftovers even more delicious than the first serving. It’s also incredibly freezer-friendly, allowing you to double the batch with ease. Simply portion it out into freezer-safe containers, and you’ll have a quick, healthy, and satisfying meal on hand for busy days.
Key Ingredients for Your Southwest Chicken Chili
Crafting the perfect Southwest Chicken Chili begins with understanding the role of each high-quality ingredient. Here’s a closer look at what you’ll need and why these choices matter:
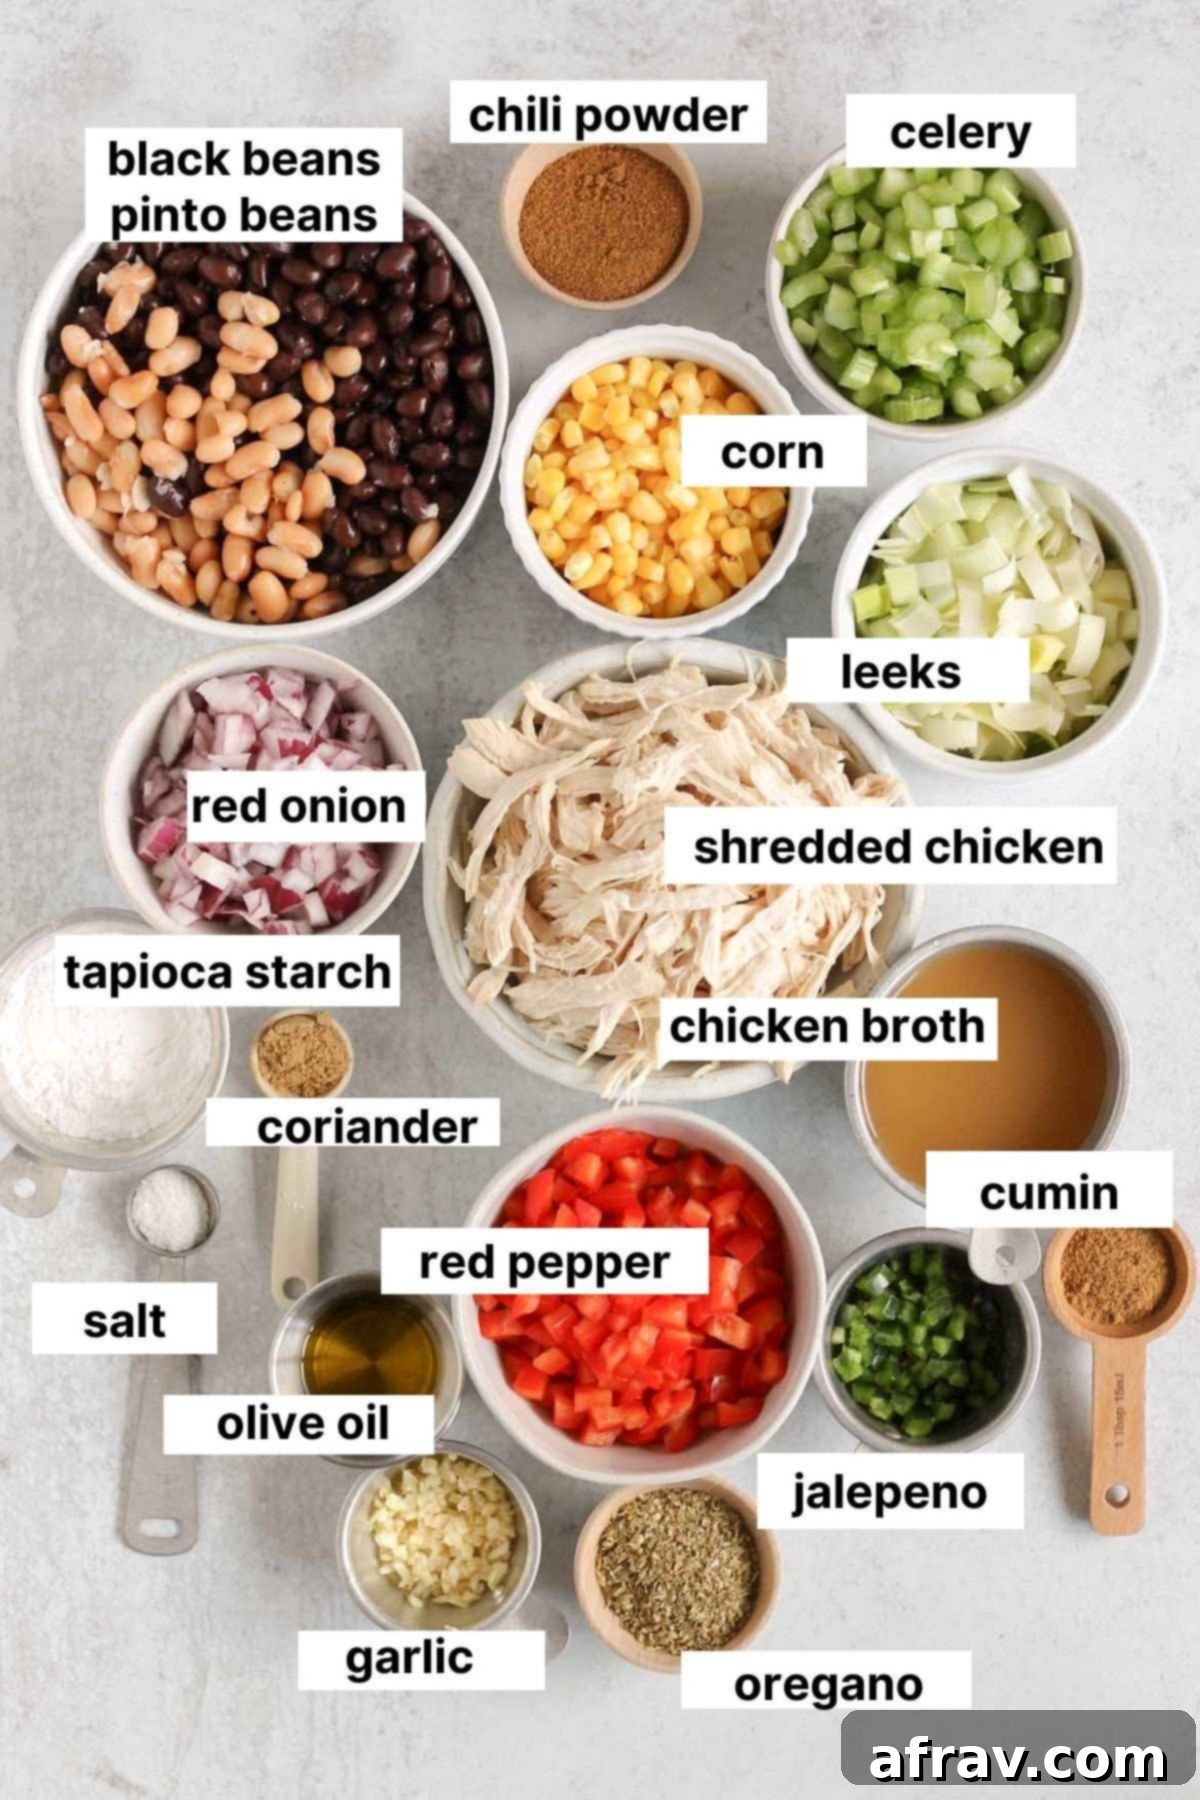
- Shredded Chicken: The star protein of our chili! I typically opt for cooked and shredded chicken breasts for their lean profile and mild flavor that perfectly absorbs the chili’s spices. However, feel free to use shredded chicken thighs for a richer taste, or for ultimate convenience, pulled rotisserie chicken works wonderfully (just be mindful of potential additives in store-bought rotisserie chicken if you’re aiming for “clean” eating).
- Tapioca Starch (or Arrowroot Starch): This is our secret weapon for achieving that desirable thick and creamy consistency without using any dairy or gluten. Tapioca starch, or its excellent alternative, arrowroot starch, acts as a fantastic natural thickener, ensuring your chili has a hearty body that clings beautifully to the other ingredients. Corn starch can also be used as a substitute if that’s what you have on hand.
- Beans: Beans are essential for the classic chili texture and a boost of plant-based protein and fiber. My personal preference is a delicious combination of black beans and pinto beans, which offer a great textural contrast and a rich, earthy flavor. However, don’t hesitate to customize! You can use just one type of bean if you prefer, or even experiment with other varieties like kidney beans or cannellini beans for a different twist.
- Chicken Broth (Bone Broth Recommended): The liquid base truly makes a difference. While regular chicken broth will certainly work, I highly recommend using chicken bone broth. Beyond its richer flavor, bone broth is a nutritional powerhouse, contributing extra protein, collagen, and essential amino acids that support gut health, joint function, and overall well-being. It adds a depth of flavor and a nutritional punch that regular broth simply can’t match.
- Corn: Sweet corn adds a lovely burst of sweetness and a delightful texture to the chili. I typically use frozen sweet corn, which is incredibly convenient and often harvested at its peak freshness. However, canned corn (rinsed and drained) is also a perfectly acceptable and accessible option. Remember, part of the corn will be pureed to create that creamy base, adding natural sweetness and body to the chili.
For a full, detailed list of ingredients and precise amounts, please refer to the comprehensive recipe card located below.
Creative Variations and Easy Substitutions
One of the best things about chili is its versatility! This Southwest Chicken Chili recipe serves as a fantastic foundation, but feel free to get creative and adapt it to your taste preferences or whatever ingredients you have on hand. Here are some exciting variations and simple substitutions to inspire you:
For a Creamy White Chicken Chili: If you’re craving more of a classic white chicken chili profile, you can easily transform this recipe. Simply omit the pureed corn, which is responsible for the creamy base in this version. Instead, when you add the shredded chicken, beans, and remaining corn, stir in about 4 ounces of cubed cream cheese. Continue to stir the chili gently until the cream cheese has completely melted and is fully incorporated, creating a rich, velvety texture. Just a friendly note: adding cream cheese will, of course, make this chili no longer dairy-free.
For Spice Lovers: If you like your chili with a fiery kick, there are several ways to amp up the heat! You can add extra chopped jalapeño (and keep the seeds for maximum spice!), a few dashes of your favorite hot sauce like Tabasco, or a pinch (or more!) of red pepper flakes during the sautéing of the vegetables. Taste as you go to find your perfect level of heat.
To Make it a Chicken Tortilla Soup: This recipe is surprisingly adaptable into a delicious chicken tortilla soup! Many people have enjoyed this chili by simply omitting the pureed corn entirely. This results in a thinner, more soup-like consistency that is perfect for loading with crunchy tortilla strips, a dollop of fresh avocado, and a squeeze of lime. So, if a soup is what you’re after, feel free to skip the corn pureeing step and enjoy a lighter, brothy meal.
For a Hearty Vegetarian Option: Easily convert this chicken chili into a satisfying vegetarian meal! No problem at all – simply omit the chicken from the recipe. To ensure it remains hearty and packed with protein, double up on the beans. You could use two cans of black beans and two cans of pinto beans, or even introduce a third type of bean like kidney beans or chickpeas. This ensures a filling and delicious plant-based chili.
Step-by-Step: How to Make This Flavorful Chili
Creating this delicious Southwest Chicken Chili is a straightforward process, designed to be enjoyable for home cooks of all skill levels. Follow these simple steps to bring a bowl of comforting goodness to your table:
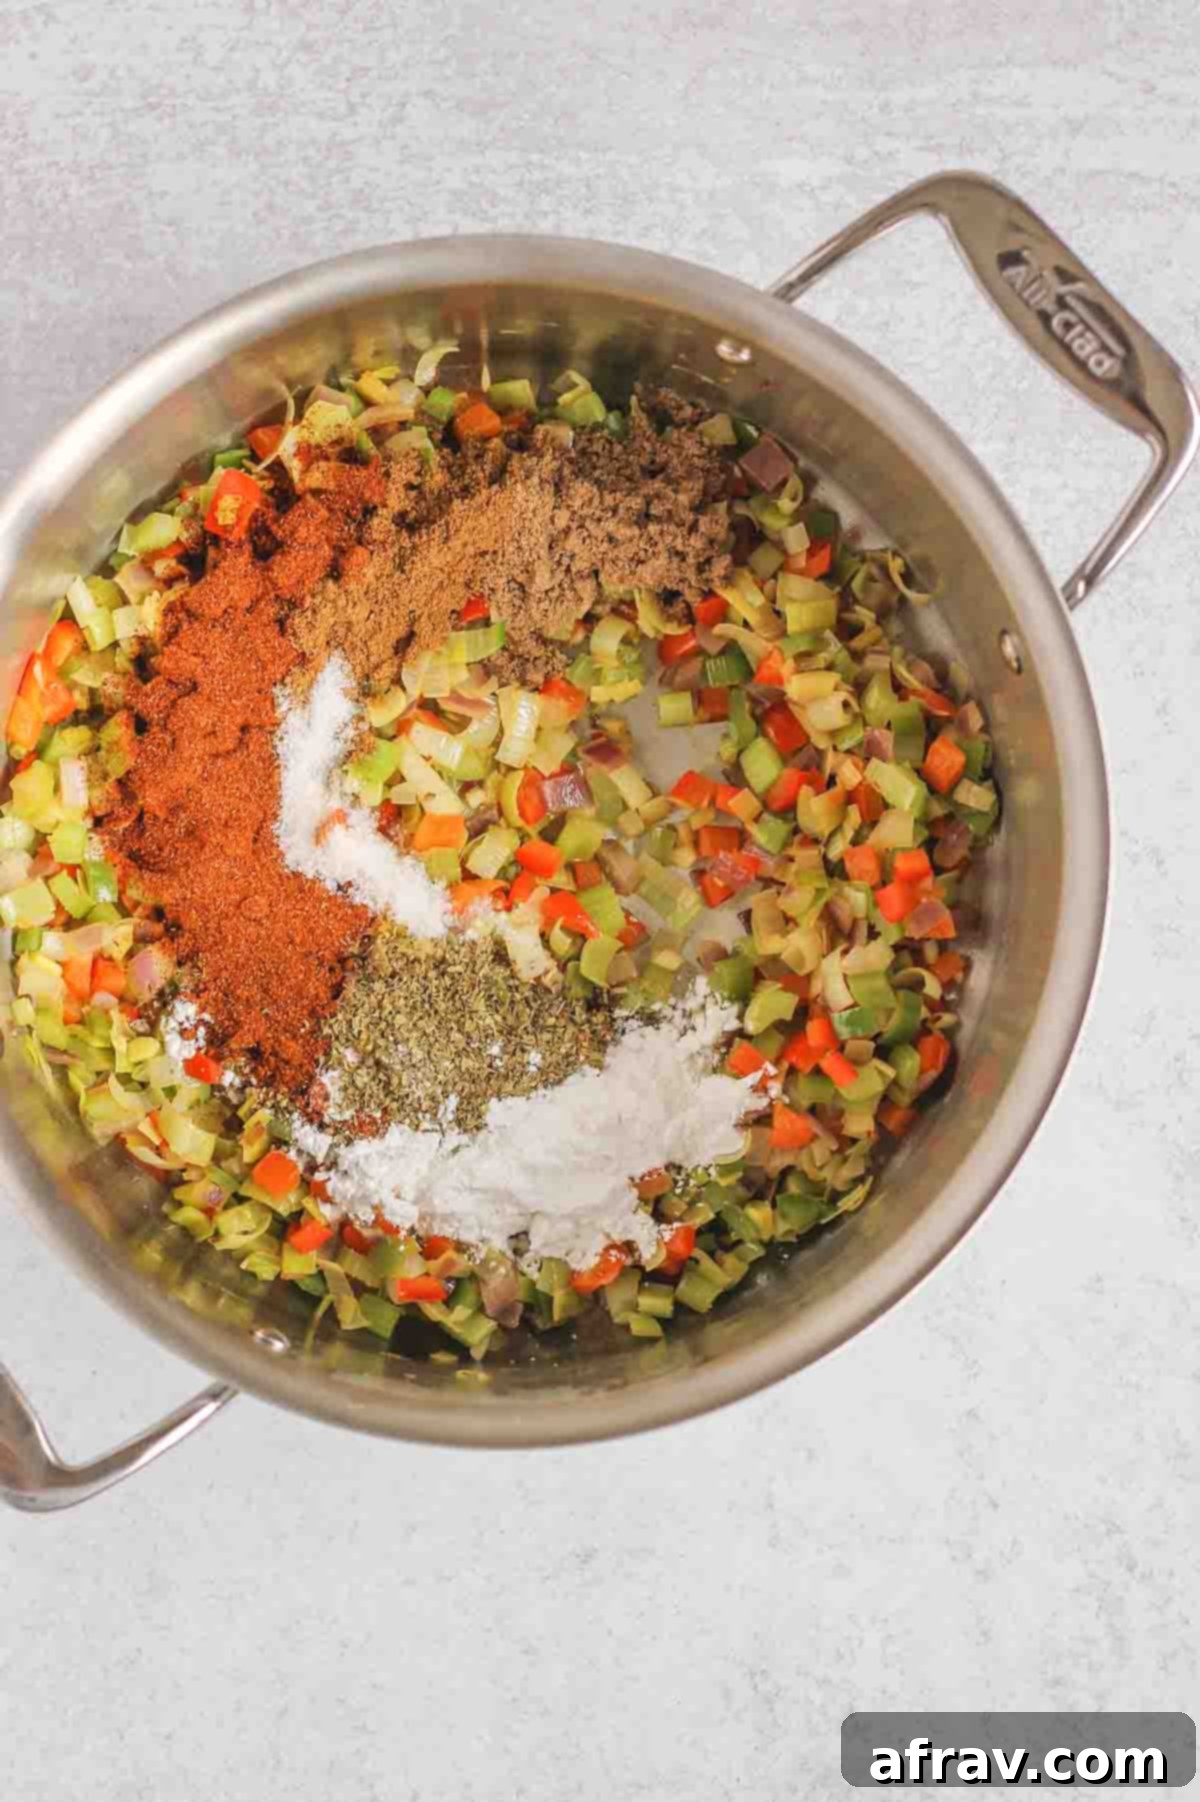
Step 1: Build the Flavor Base. In a large, heavy-bottomed stock pot or Dutch oven, heat the extra-virgin olive oil over medium heat. Add your finely chopped jalapeño, red onion, red pepper, celery, leeks, and minced garlic. Sauté these aromatic vegetables, stirring occasionally, for about 8-10 minutes until they become tender and translucent. This step is crucial for developing a deep, savory foundation for your chili.

Step 3: Create the Creamy Corn Puree. While the chili base is simmering, grab your blender. Combine the specified amount of water with 1.5 cups of the thawed sweet corn. Blend until the mixture is completely smooth and creamy. This puree is key to achieving the chili’s signature thick, dairy-free consistency and adding a subtle natural sweetness. Set it aside for a moment.
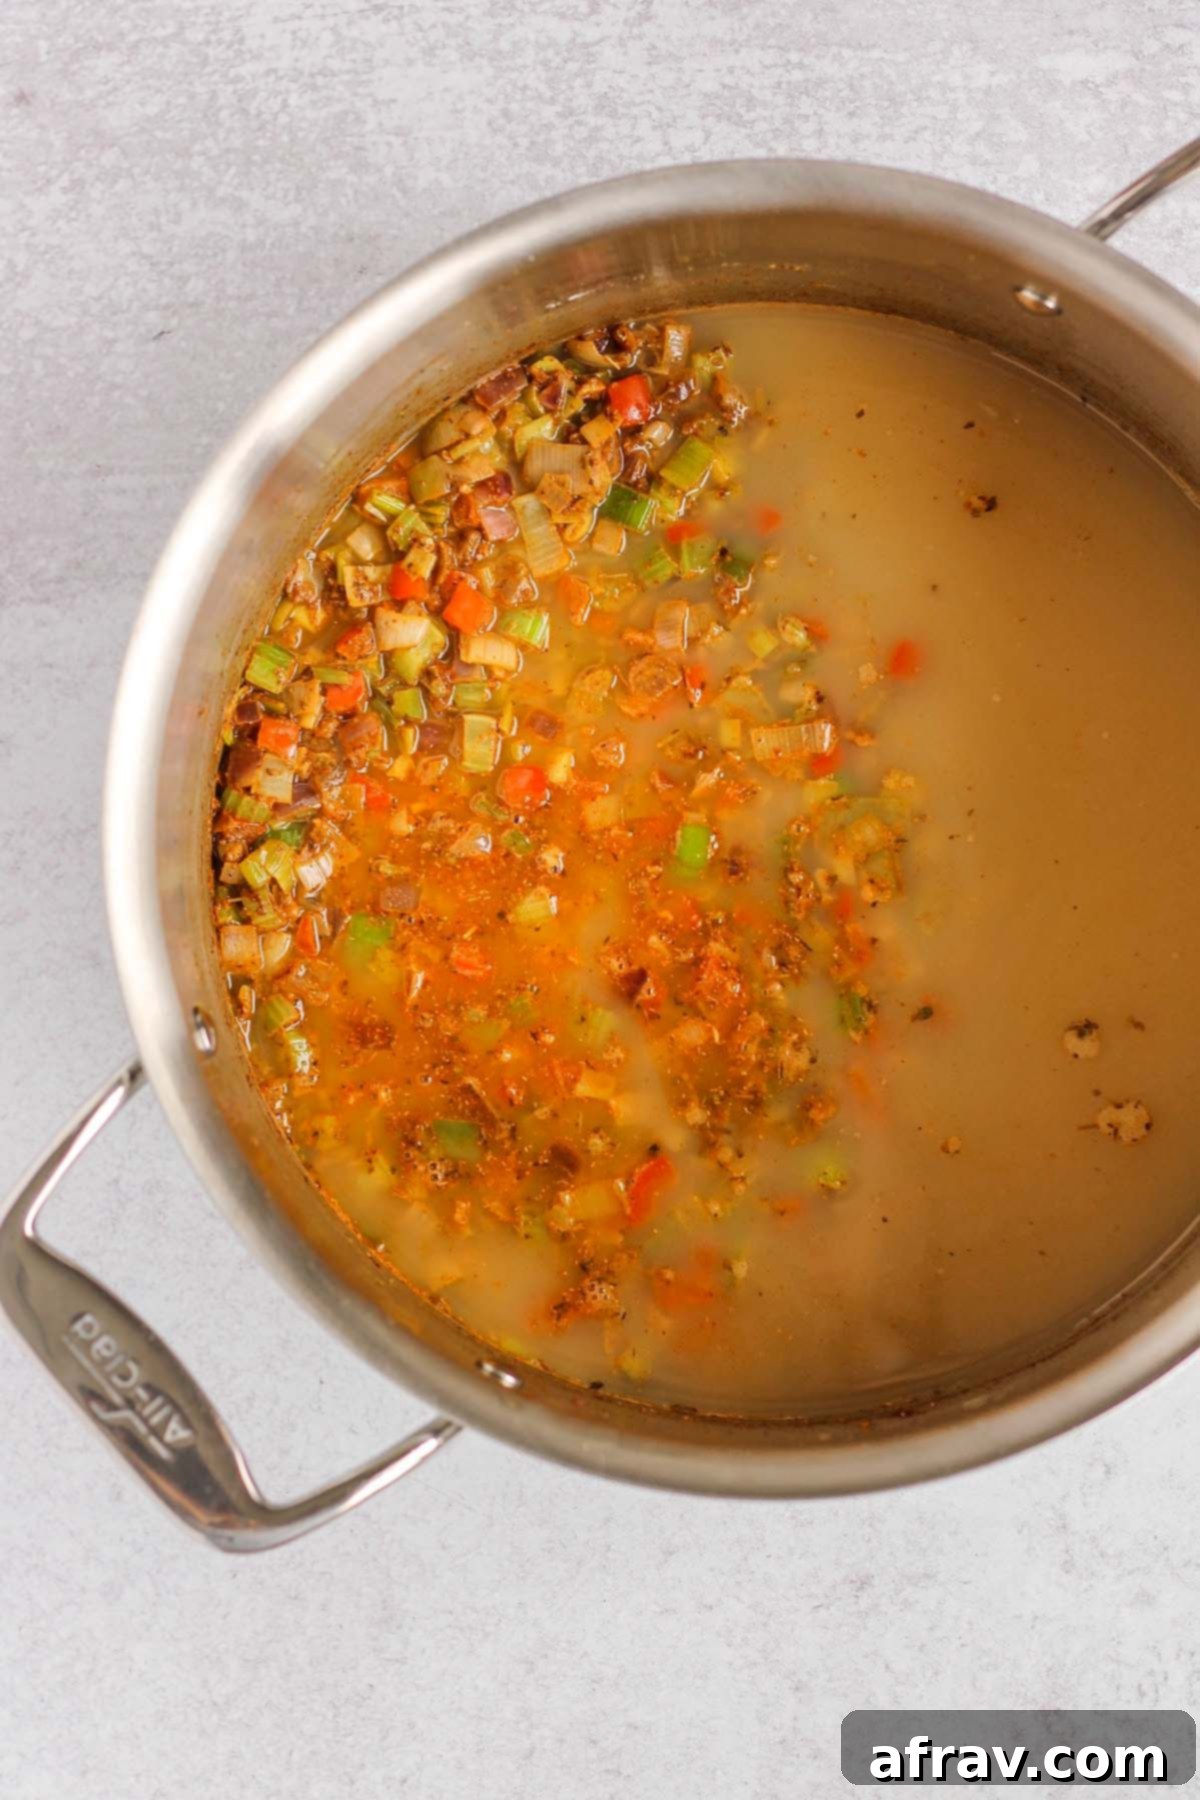
Step 2: Infuse with Spices and Broth. Once the vegetables are softened, reduce the heat to low. Add the dried oregano, chili powder, ground cumin, ground coriander, salt, and tapioca starch (or arrowroot starch) to the pot. Stir constantly for about 2 minutes to toast the spices and cook out the starchiness, which helps to release their full aromatic potential and prevent clumping. Next, pour in the rich chicken bone broth. Increase the heat to medium-high and bring the mixture to a gentle boil, stirring to combine all the flavors.
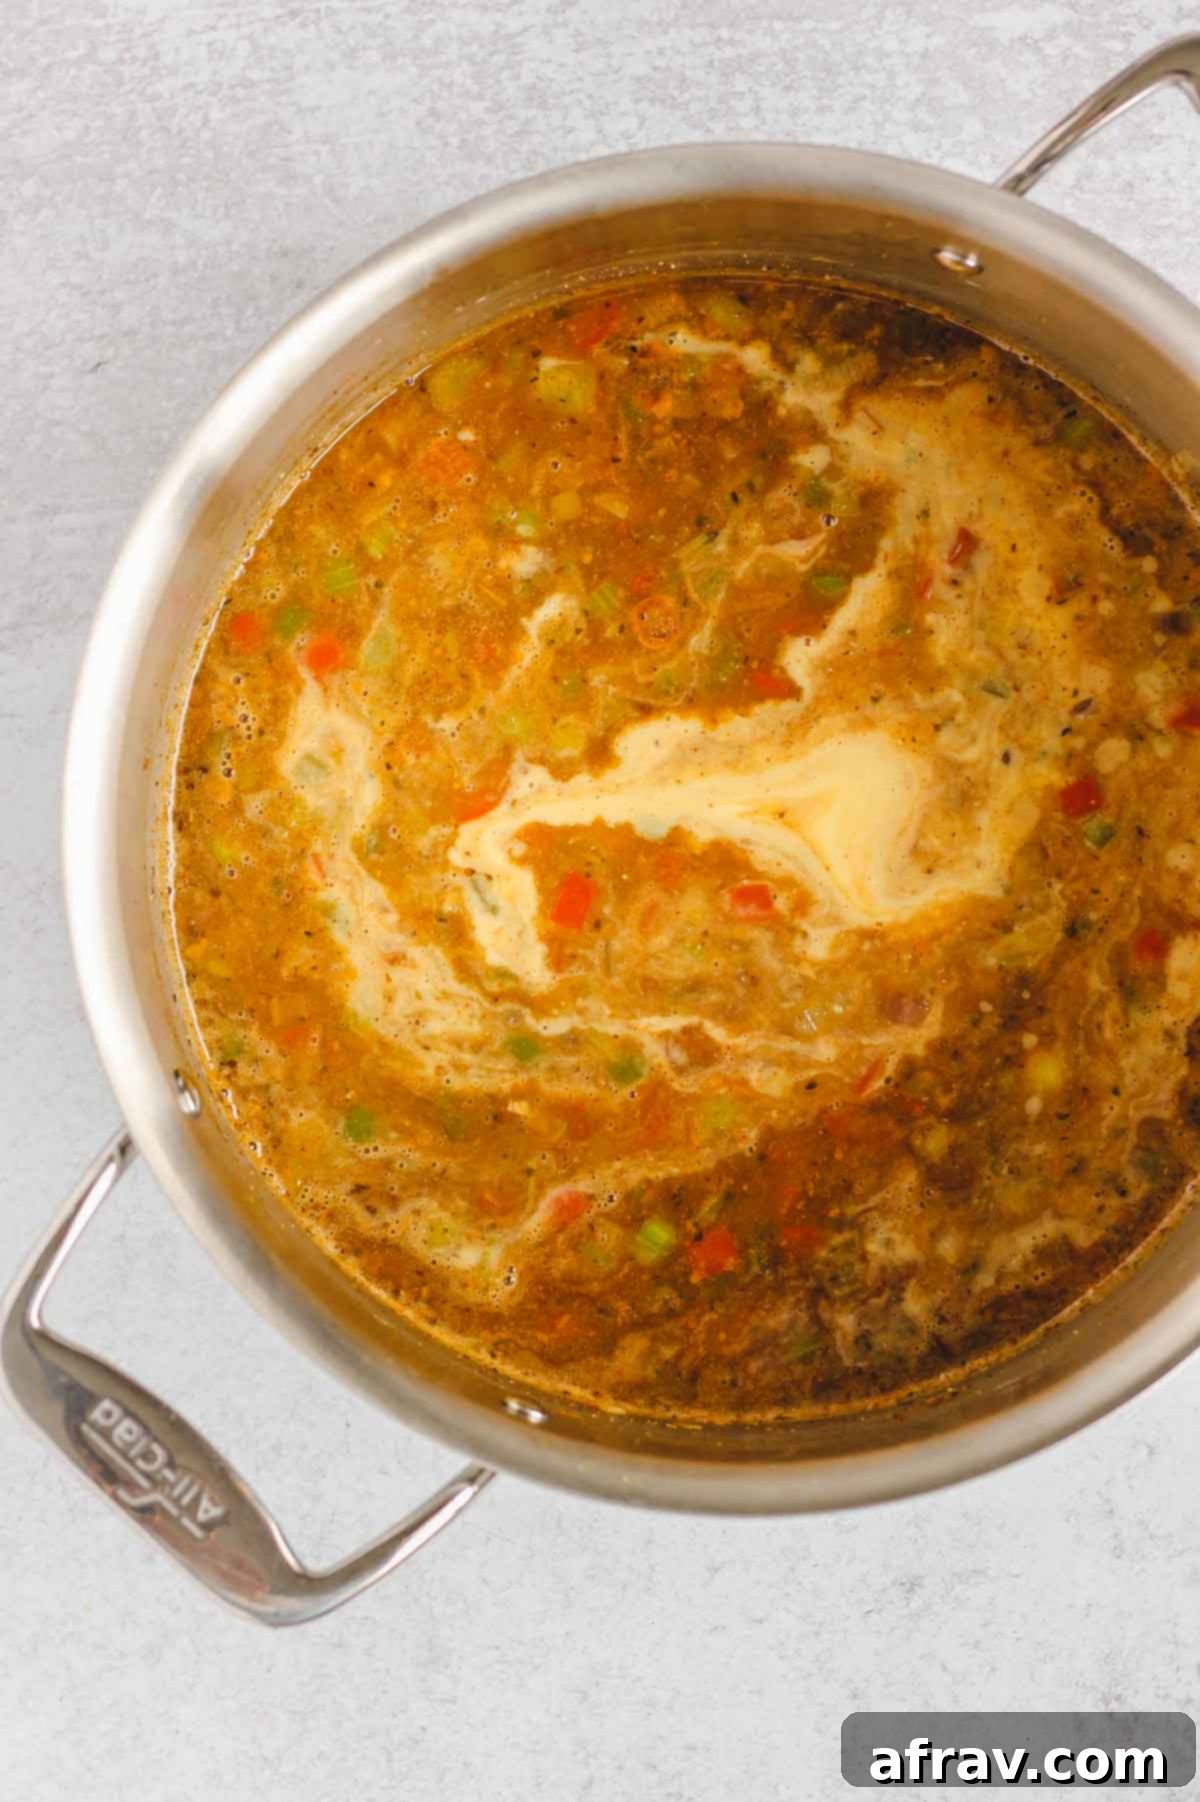
Step 4: Combine for Creaminess. Carefully pour the pureed corn mixture from your blender into the simmering broth and vegetable base in the stock pot. Stir well to ensure it’s evenly distributed. Reduce the heat to low or medium-low to maintain a gentle simmer. This allows the chili to start thickening and the flavors to begin marrying beautifully.
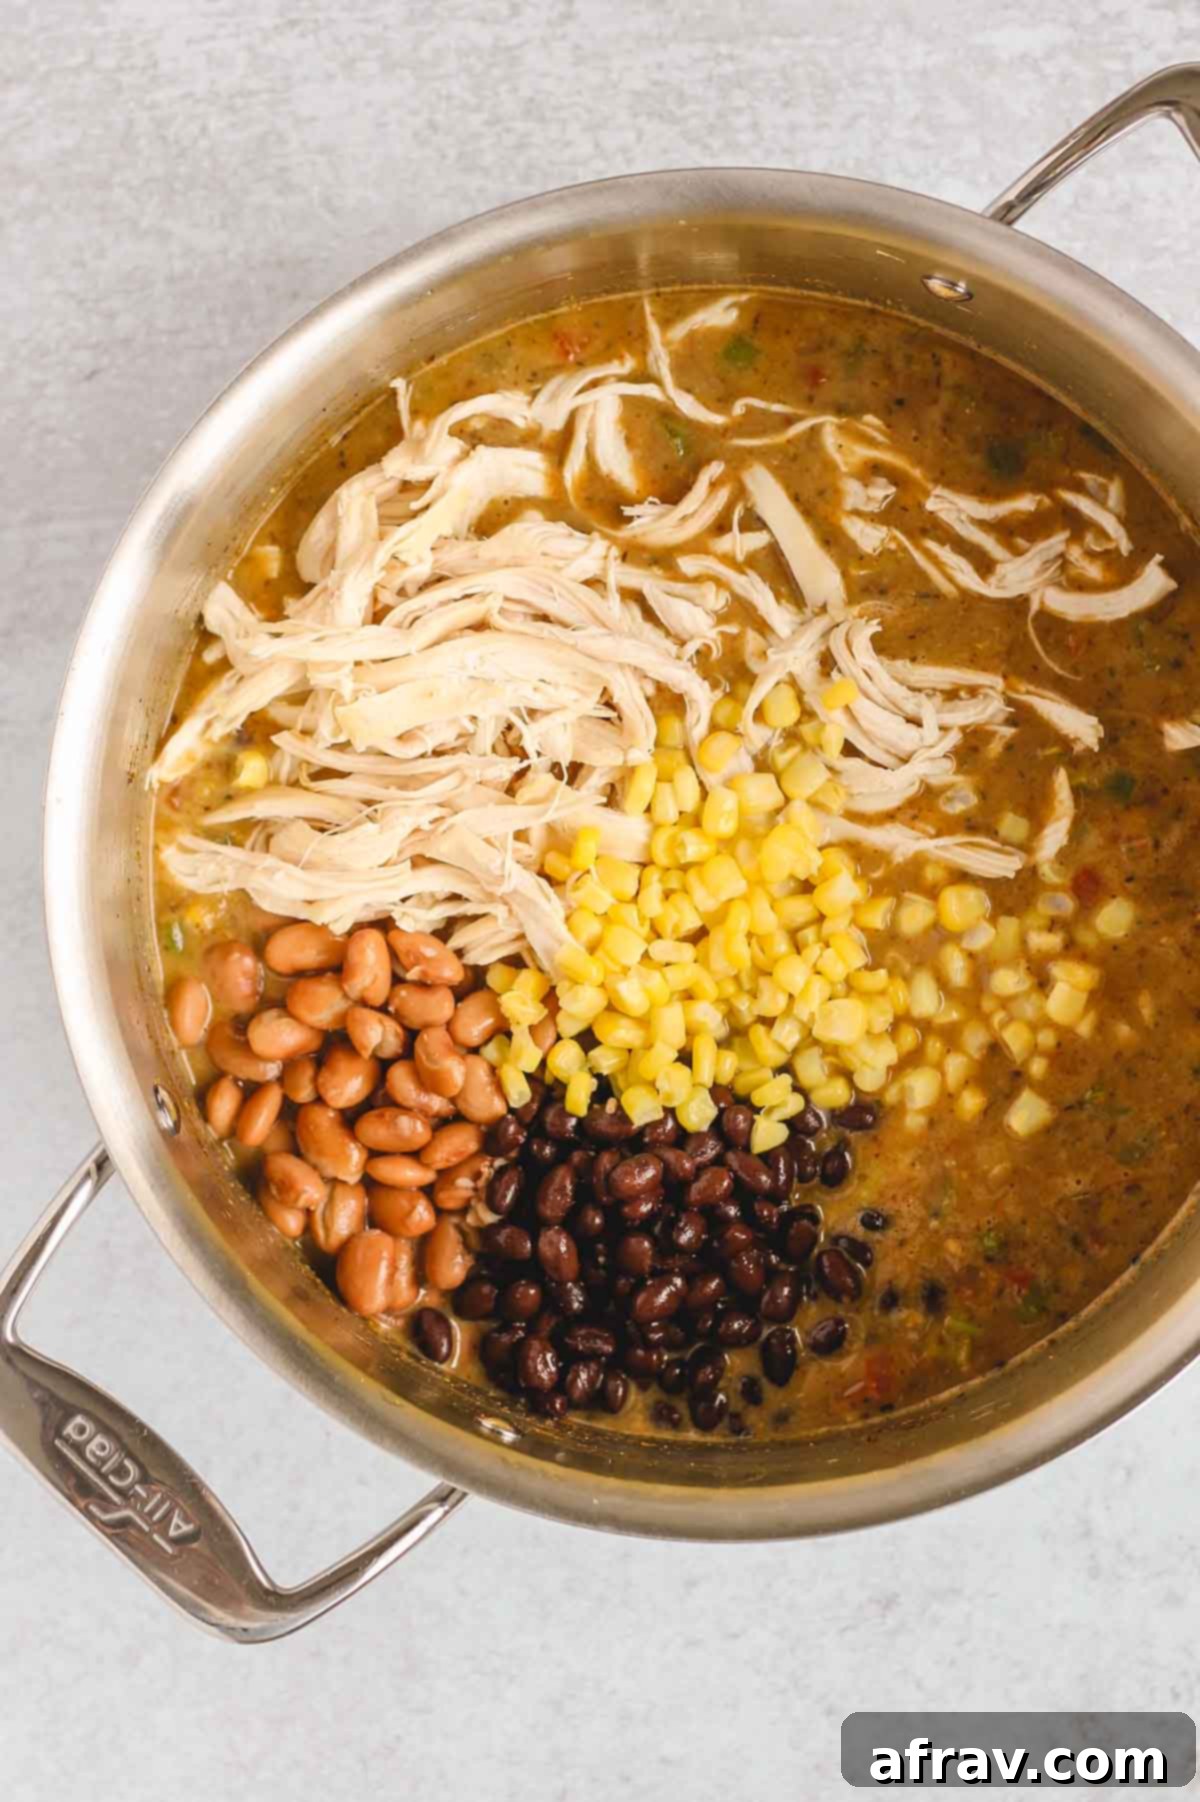
Step 5: Add the Hearty Fillings. Now it’s time to make your chili truly substantial! Add the cooked and shredded chicken, the rinsed and drained black beans, the rinsed and drained pinto beans, and the remaining whole sweet corn to the pot. Stir gently but thoroughly to ensure all these wonderful ingredients are fully coated and evenly distributed throughout the creamy chili base.
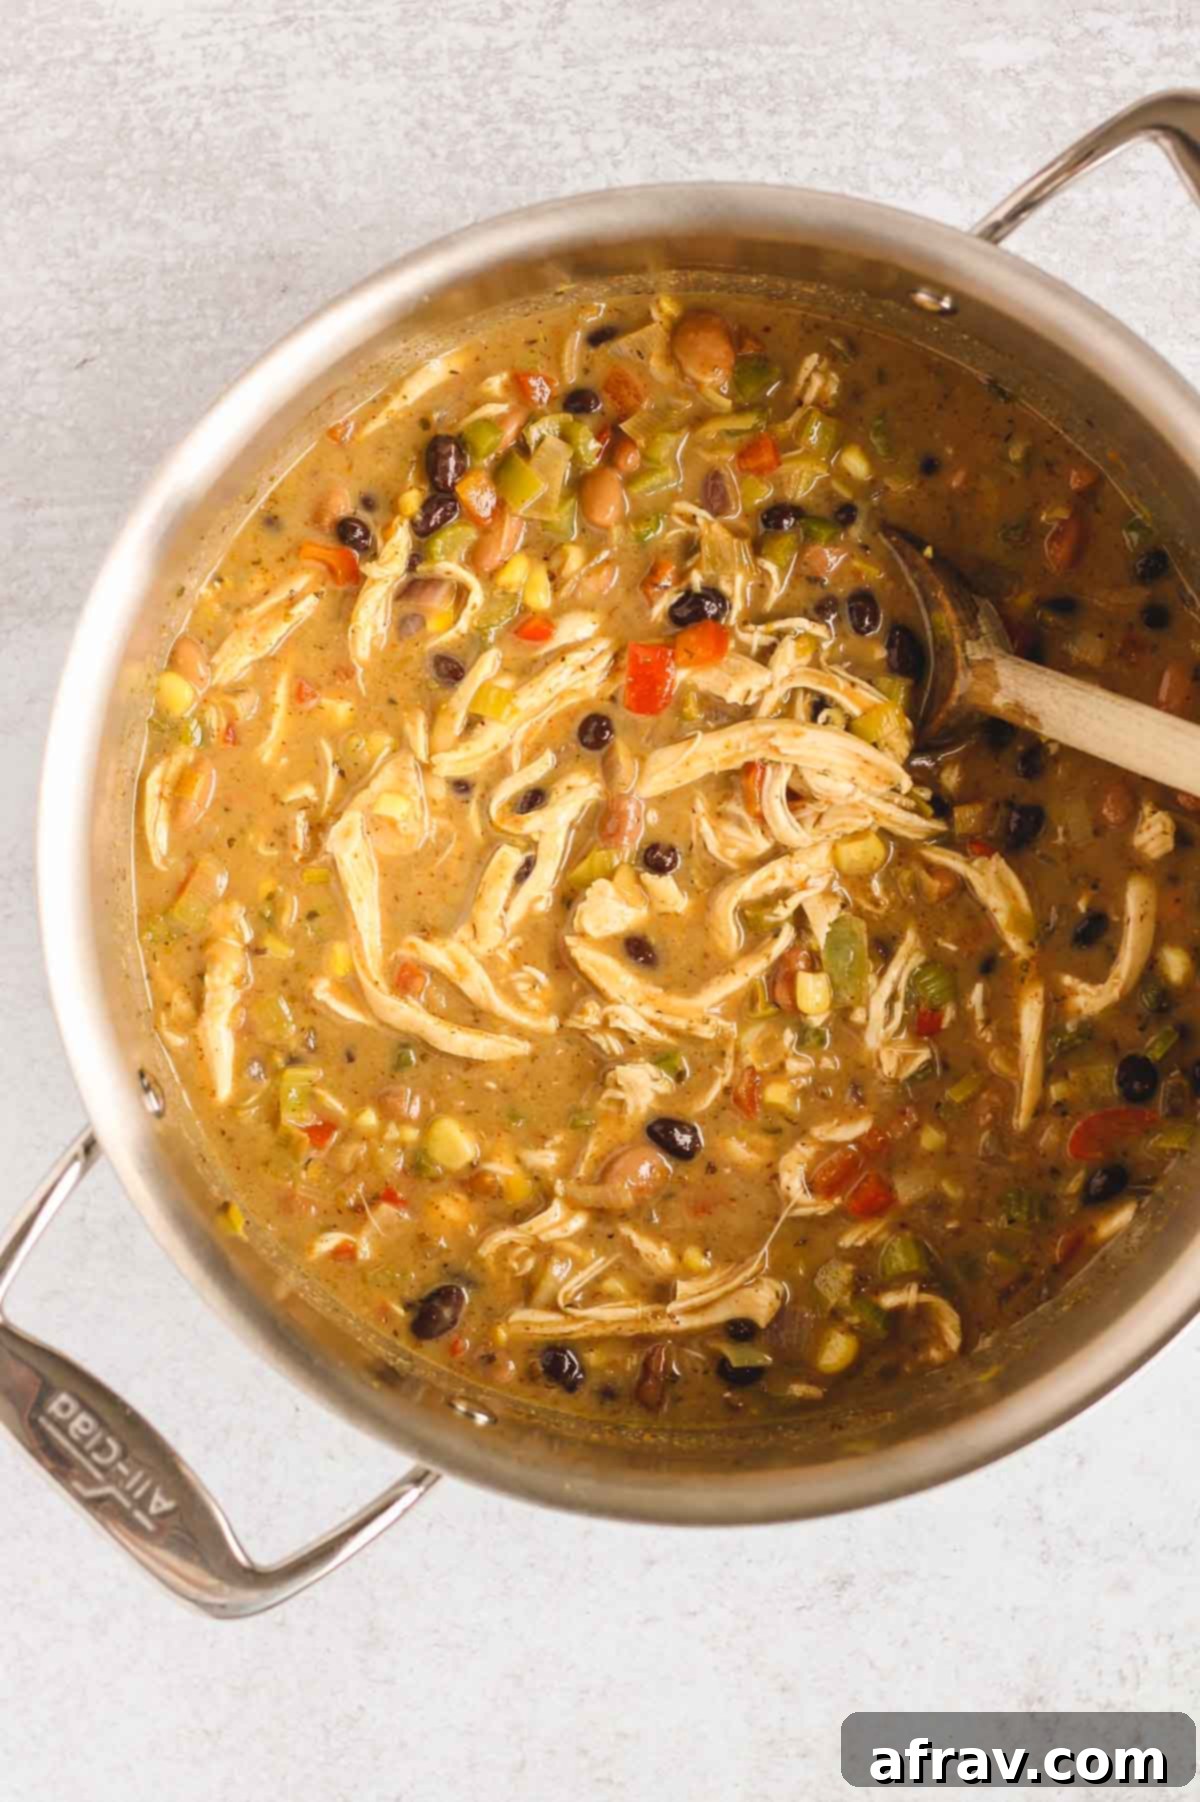
Step 6: Simmer to Perfection and Serve. Once everything is combined, allow the chili to simmer gently over low heat for at least 30 minutes. This crucial simmering period allows all the incredible flavors to meld, deepen, and truly transform into a cohesive and delicious dish. The longer it simmers, the more profound the taste! Before serving, give it a final taste and adjust any seasonings if necessary. Ladle into bowls, add your favorite toppings, and savor every spoonful!
Expert Tips for the Best Southwest Chicken Chili
Achieving a truly exceptional bowl of Southwest Chicken Chili involves a few simple tricks that can elevate your cooking from good to gourmet. Here are my top tips to ensure your chili is absolutely perfect every time:
Embrace the Simmer: Patience is a virtue, especially when making chili! After you’ve added all the ingredients, resist the urge to rush. Allow your chili to simmer over low heat for a minimum of 30 minutes. This isn’t just about heating it through; it’s a critical step that allows all the individual flavors from the spices, vegetables, and proteins to marry and develop a profound, cohesive taste. The longer it simmers, the more complex and delicious the chili will become. If time allows, even an hour or two will make a noticeable difference.
Double the Recipe for Smart Meal Prep: I won’t lie—this chili does require a fair amount of chopping, which takes a bit of upfront effort. So, if you’re already doing the work, why not make it count? I highly recommend doubling the recipe! This way, you’ll have plenty for immediate enjoyment and a generous amount left over for freezing. I love freezing this chili in smaller, individual quantities using freezer-safe bags or containers. This makes it incredibly convenient to grab 1 or 2 servings at a time whenever you need a quick, healthy, and satisfying meal on demand.
Taste and Adjust Seasonings: Cooking is all about personal preference! Once you’ve added the shredded chicken, corn, and beans and allowed the chili to simmer for a bit, take a moment to taste it. Is it flavorful enough? Does it need a little more salt, a dash more chili powder, or a hint of extra cumin? Don’t be afraid to add additional seasonings to your liking. A quick taste test and adjustment can transform a good chili into a truly great one tailored perfectly to your palate.
Control the Consistency with Broth: As chili simmers, it naturally thickens, especially with the addition of pureed corn and starch. If you prefer your chili on the thinner, more soup-like side, or if it becomes too thick for your preference after simmering, simply add a splash or two of additional chicken broth at the end. Stir it in thoroughly and allow it to warm through before serving. This allows you to achieve your desired consistency with ease.
Opt for Rotisserie Chicken for Speed: For those really busy days when you need dinner on the table fast, using pre-cooked, pulled rotisserie chicken is a fantastic shortcut. It saves you a significant amount of prep time! However, if you’re committed to “clean eating,” be aware that many store-bought rotisserie chickens can contain a variety of additives and preservatives. If this is a concern, consider preparing your own shredded chicken in advance, or choose organic, additive-free rotisserie options.
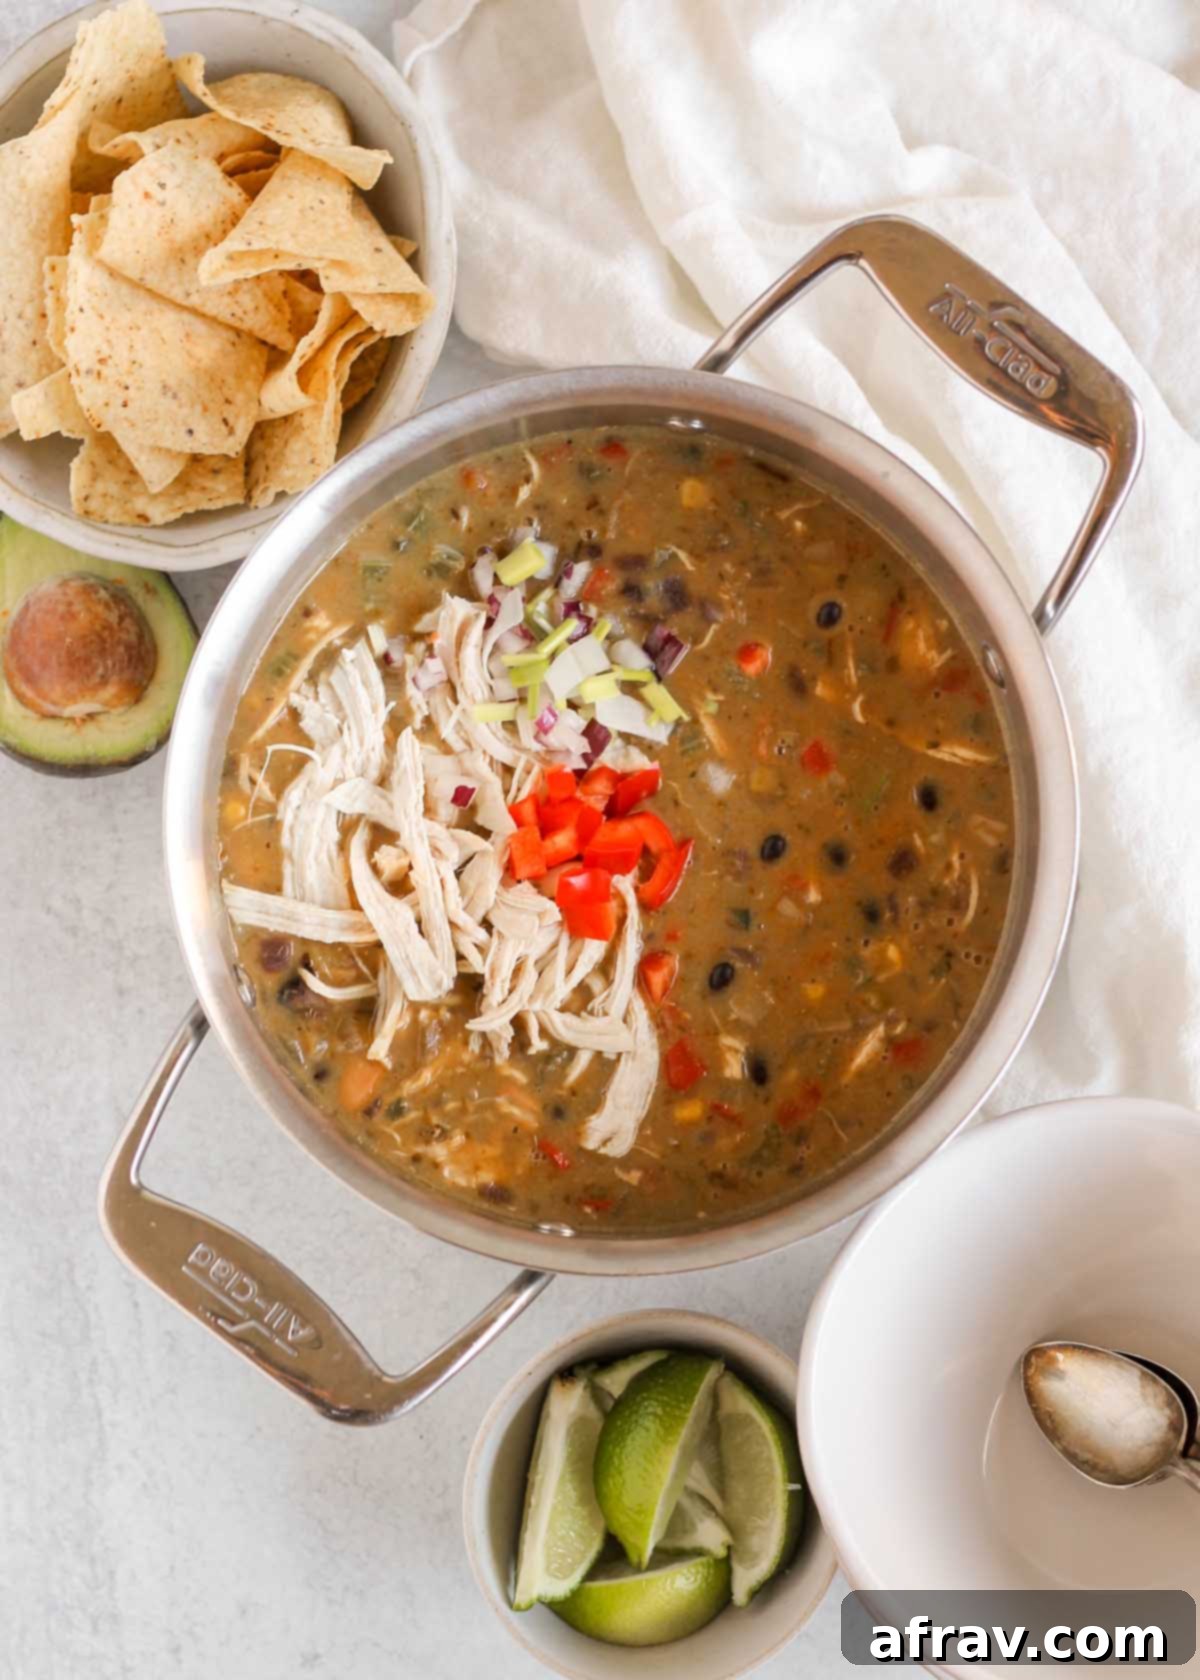
Delicious Toppings & Serving Suggestions
While this Southwest Chicken Chili is incredibly flavorful on its own, a thoughtfully chosen topping can elevate each bowl into a culinary masterpiece. Just like any great chili, there are countless delicious additions you can include to truly enhance and personalize your dining experience. Here are some of my favorite suggestions:
- Sliced Avocado: Adds a creamy, rich texture and a subtle, buttery flavor that beautifully balances the chili’s spice.
- Easy Homemade Guacamole: Takes the avocado experience to the next level with added zesty lime, onion, and cilantro.
- Fresh Cilantro: A sprinkling of fresh, chopped cilantro brightens the entire dish with its distinctive, aromatic freshness.
- Lime Wedges: A squeeze of fresh lime juice just before eating adds a vibrant tang that cuts through the richness and awakens all the flavors.
- Diced Red Onion: Offers a sharp, pungent bite and a satisfying crunch that complements the savory chili.
- Grated Cheese: While this chili is dairy-free by default, for those who enjoy dairy, a sprinkle of cheddar, Monterey Jack, or a Mexican cheese blend adds a classic, melty indulgence.
- Sour Cream (or Dairy-Free Alternative): Provides a cooling, creamy counterpoint to the chili’s warmth and spice. Opt for a dairy-free sour cream to keep the recipe dairy-free.
- Crispy Tortilla Chips: Perfect for dipping, adding a delightful crunch and a salty contrast to each spoonful.
Storing and Reheating Your Chili
This Southwest Chicken Chili is perfect for making ahead and enjoying throughout the week or freezing for future meals. Proper storage ensures it remains delicious and safe to eat. Here’s how to handle your leftovers:
Refrigerator Storage: Once your chili has cooled completely to room temperature (this is important to prevent bacterial growth), transfer it to an airtight container. It will keep beautifully in the refrigerator for 4-5 days. This makes it an ideal option for healthy meal prepping and quick lunches or dinners.
Freezer Storage: For longer storage, this chili freezes exceptionally well. Again, ensure the chili is fully cooled before transferring it to an airtight, freezer-safe container or a heavy-duty freezer bag. Stasher bags are a personal favorite for their reusability and space-saving design. Freeze for up to 3 months. When you’re ready to enjoy, simply let it thaw overnight in the refrigerator for best results before reheating.
Reheating Instructions: To reheat, you have a couple of convenient options. For stovetop reheating, place the chili in a small saucepan over medium-low heat, stirring occasionally until it is heated through. If using a microwave, transfer your desired portion to a microwave-safe bowl. Cover the bowl (to prevent splattering) and heat in 1-2 minute intervals, stirring in between, until piping hot.
Recipe FAQs
Have questions about making this Southwest Chicken Chili? Here are answers to some commonly asked questions to help you along the way:
This recipe is designed to yield approximately 6 generous servings of hearty chili. However, I often find myself doubling this recipe! It’s simply too good to not have extra for freezing or enjoying as leftovers throughout the week. If your serving sizes are a bit smaller, you might even stretch it to 8 servings. Either way, it’s a fantastic meal for families or for batch cooking.
While I personally haven’t tested this exact recipe in a slow cooker, I see no reason why it wouldn’t work beautifully, especially given the nature of chili recipes. The slow cooker is perfect for developing deep flavors with minimal fuss. Here’s how you could adapt it: Add all the ingredients, including the raw chicken (you can cut it into chunks or use whole breasts for shredding later), to your slow cooker, *except* for the pureed corn. Cook on low for 6-7 hours or on high for 3-4 hours, until the chicken is cooked through and easily shreddable (it should reach an internal temperature of 165°F). Once the chicken is cooked, remove it from the crockpot and shred it using two forks. Return the shredded chicken to the slow cooker along with the pureed corn. Stir everything together, and continue to simmer on low for another 30 minutes to allow the flavors to meld and the chili to thicken to perfection.

Discover More Delicious Dinner Recipes
If you loved this Southwest Chicken Chili, you’re in for a treat! Our kitchen is always bubbling with new ideas for wholesome, flavorful, and easy-to-make dinner recipes. Whether you’re looking for another comforting soup, a hearty plant-based meal, or a quick weeknight protein, we’ve got you covered. Explore these other fantastic options to keep your meal rotation exciting and delicious:
- Vegan Sweet Potato & Quinoa ChiliA hearty and flavorful plant-based chili, packed with sweet potatoes and quinoa for a nourishing meal.
- Chili Stuffed Sweet Potatoes (Paleo-Friendly)Warm and satisfying sweet potatoes generously stuffed with a savory, paleo-friendly chili.
- Healthy One-Pot Chicken & Kale SoupAn incredibly easy and wholesome chicken and kale soup, all cooked in a single pot for minimal cleanup.
- Gluten-Free Air Fryer Teriyaki ChickenCrispy and flavorful gluten-free teriyaki chicken, quickly made in the air fryer for a weeknight dinner.

Southwest Chicken Chili
Print
Pin
Rate
Save This Recipe For Later!
We’ll email this post to you, so you can come back to it later. Plus, enjoy weekly clean eating recipes as a bonus.
Equipment
-
1 large stock pot/Dutch oven
-
Blender
Ingredients
- 2 tbsp. extra-virgin olive oil
- 1 small jalapeño, seeded and chopped (if you like spice, keep the seeds)
- 1 small red onion, chopped
- 1 red bell pepper, chopped
- 4 stalks celery, chopped
- 2 large leeks, white part only, chopped
- 2 cloves garlic, finely chopped
- 2 tbsp. dried oregano
- 2 tbsp. chili powder
- 1 tbsp. ground cumin
- 1 tsp. ground coriander
- 1 tsp. salt
- 3 tbsp. tapioca starch (or arrowroot starch)
- 4 cups chicken bone broth (regular chicken broth works too)
- ½ cup water
- 4 cups frozen sweet corn, thawed
- 1 can black beans, rinsed and drained
- 1 can pinto beans, rinsed and drained
- 1.5 lbs. cooked and shredded chicken breasts
Instructions
-
In a large stock pot or Dutch oven, add the extra-virgin olive oil, along with the chopped jalapeño, red onion, red pepper, celery, leeks, and minced garlic. Sauté these vegetables over medium heat, stirring occasionally, until they begin to soften and become fragrant, which typically takes about 10 minutes. This step is essential for building a rich flavor base for your chili.
-
Reduce the heat to low. Add all the dried spices: oregano, chili powder, ground cumin, ground coriander, salt, and the tapioca starch (or arrowroot starch). Continue to cook for about 2 minutes, stirring constantly. This brief toasting of the spices helps to release their full aromatic potential and integrate them thoroughly into the vegetable base, while the starch begins to cook out and prevents lumps.
-
Pour the chicken bone broth into the pot with the sautéed veggies and spices. Increase the heat to medium-high and bring the mixture to a gentle simmer, stirring to ensure everything is well combined.
-
While the broth and veggie mix is simmering, prepare the creamy corn element. In a blender, combine the ½ cup of water with 1 ½ cups of the thawed sweet corn. Blend until the mixture is completely smooth and forms a thick puree. Add this pureed corn mixture to the other ingredients in the stock pot or Dutch oven, stirring it in thoroughly to combine.
-
Next, add the rinsed and drained black beans, pinto beans, the cooked and shredded chicken, and the remaining whole sweet corn to the pot. Stir gently until all the ingredients are well incorporated into the rich, creamy chili base.
-
Reduce the heat to low and allow the chili to simmer for at least 30 minutes. This crucial simmering time allows all the flavors to deepen and meld together beautifully. Before serving, taste and adjust any seasonings as needed. Serve hot and enjoy your hearty and delicious Southwest Chicken Chili!
Notes
- There’s no magic exact amount of shredded chicken needed for this chili; I’ve found that anywhere around 1 ½ lbs. of cooked and shredded chicken works perfectly to make it satisfying and protein-packed. Feel free to adjust slightly based on what you have.
- If you’re new to cooking with leeks, here are some helpful tips to ensure they’re prepped correctly:
- Rinsing: Before you start cutting, rinse each leek thoroughly under cold running water, especially around the base and between layers, as they can often harbor dirt.
- Trimming: Cut each leek where the white part starts to turn into the darker green leaves. You’ll only want to use the bottom white and light green base of each leek, as the dark green tops tend to be too tough for this recipe. Discard the green tops.
- Cutting: Cut the root end off each leek. Then, slice each leek down the middle lengthwise, so you have two long half-moon shapes. Now, slice them crosswise into ¼” thick pieces. This ensures even cooking and distribution in the chili.
- Final Clean: If you notice any dirt trapped within the layers after slicing, you can give the sliced leeks another rinse. Simply place them in a colander and lightly rinse with water, shaking gently to remove any debris.
- You can definitely simmer this chili for longer than the recommended 30 minutes. In fact, a longer simmer (up to an hour or two) will allow the flavors to meld even more deeply, resulting in a richer taste. However, a minimum of 30 minutes is crucial to ensure all the ingredients are heated through and the flavors have a chance to combine.
- Leftover Ideas: Don’t let any leftover chili go to waste! This chili is incredibly versatile for reinventing meals. Try making delicious nachos by spooning warm chili over tortilla chips and topping with cheese (if dairy is okay), jalapeños, and avocado. Alternatively, use it as a filling for hearty quesadillas or even as a topping for baked potatoes.
- While the recipe technically states it makes about 6 servings, if your portions are on the smaller side, or if you’re serving it with a lot of sides and toppings, you can easily get 8 satisfying servings from one batch.
Final step: Loved this recipe? Please take a moment to click the stars below to rate it! And don’t forget to leave a comment to let me, and other home cooks, know what you thought. I absolutely love hearing from you and your feedback is incredibly valuable!
Nutrition
