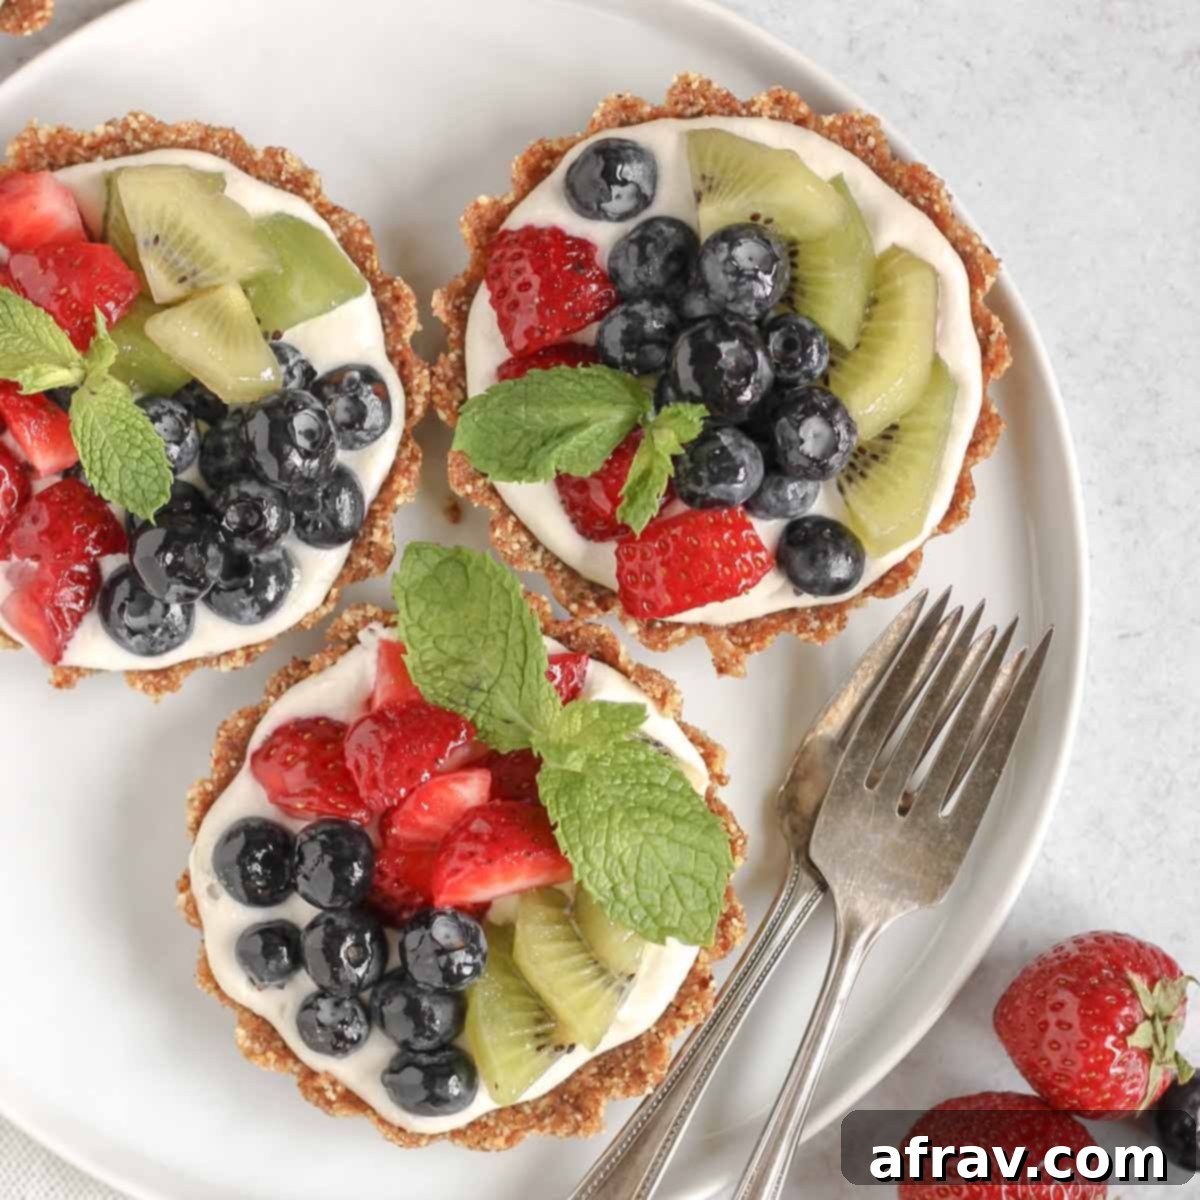
Delicious No-Bake Vegan Fruit Tarts: Wholesome & Gluten-Free Dessert Perfection
Discover how to create delightful mini vegan fruit tarts featuring a simple no-bake crust, a rich coconut cream filling, and an abundance of vibrant, fresh fruit. This wholesome and utterly delicious dessert is not only naturally sweetened but also entirely gluten-free, making it a perfect treat for any occasion.
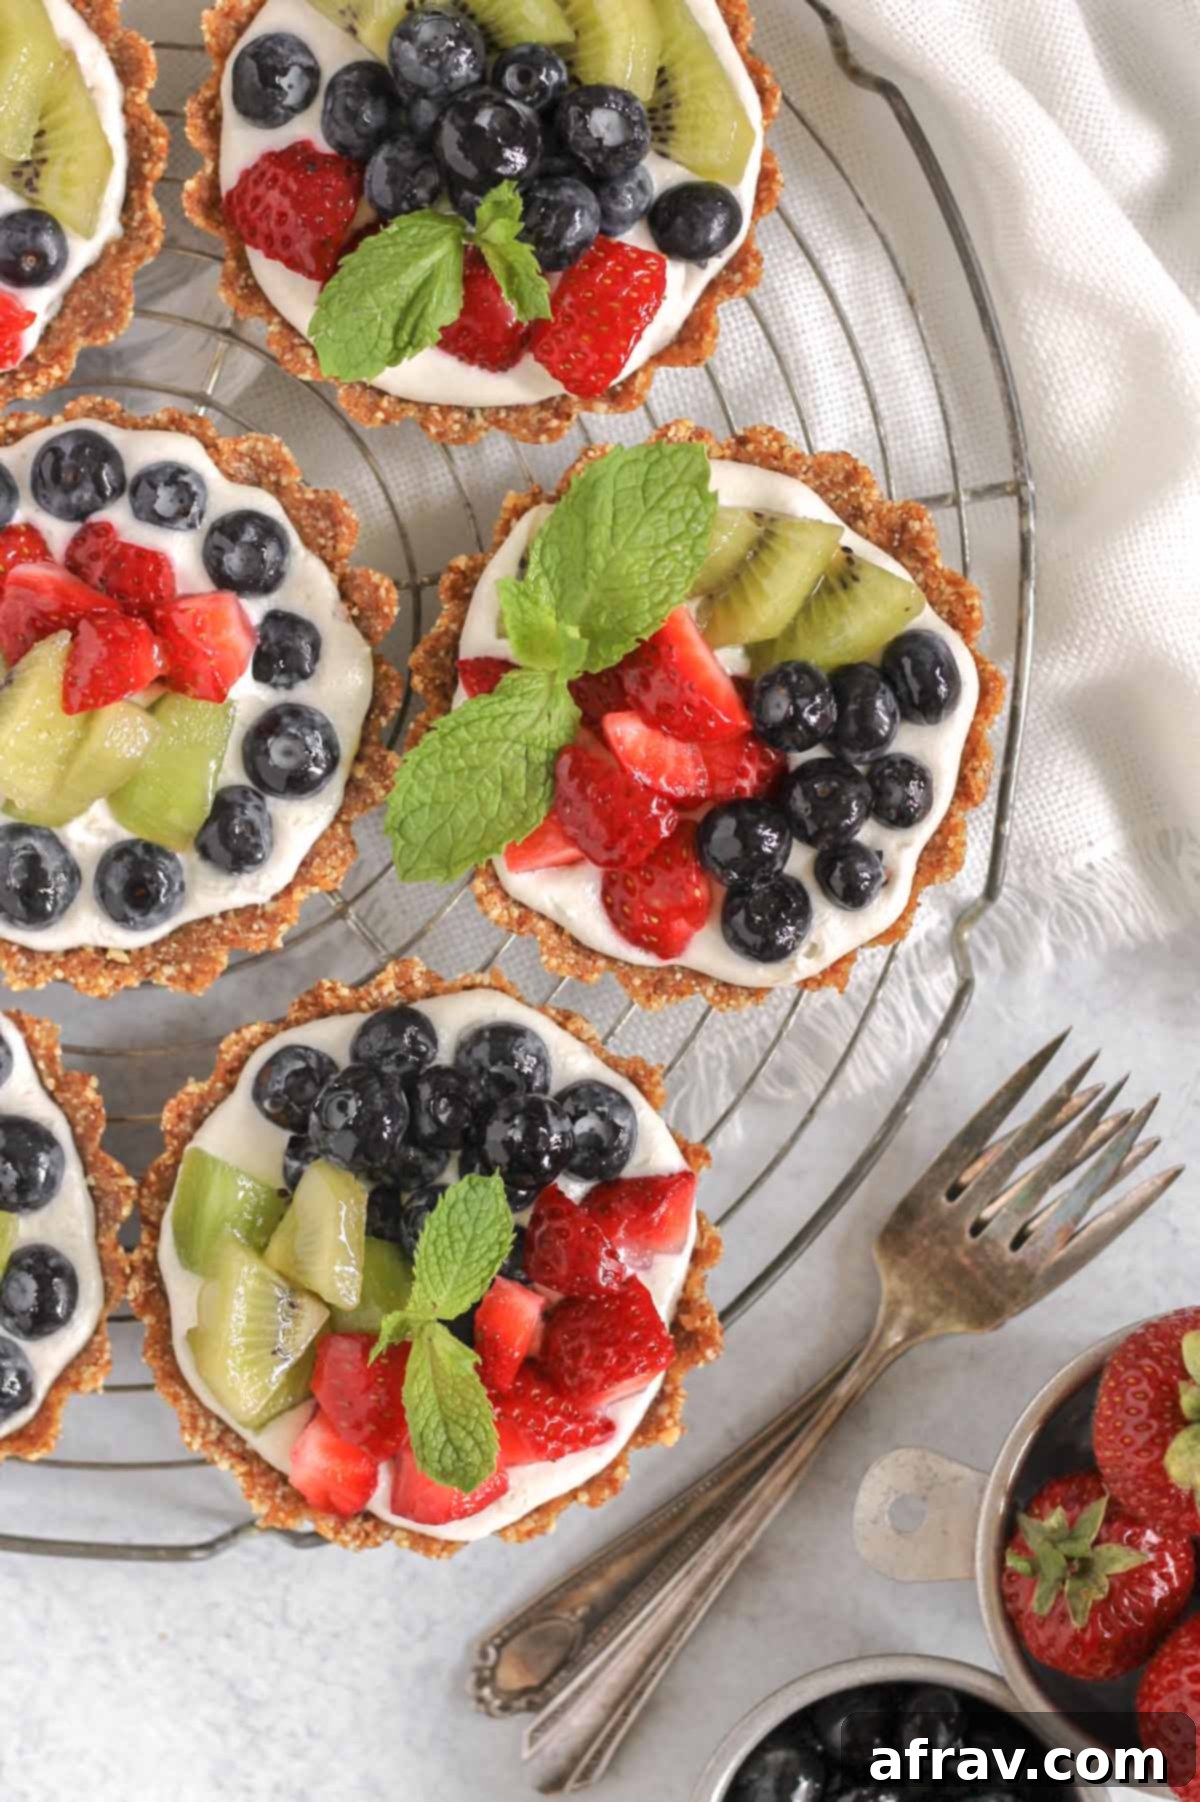
While traditional fruit tarts often boast a delicate, buttery shortbread crust and a creamy, egg-based custard filling, this modern vegan fruit tart recipe offers a refreshing and equally satisfying alternative. Crafted with entirely plant-based ingredients, these tarts prove that you don’t need dairy or eggs to achieve an indulgent dessert. In fact, I promise you, these are just as good, if not better, than their conventional counterparts. What’s more, they are significantly easier to make, requiring absolutely no baking, and they come packed with wholesome, natural goodness.
The magic of these fruit tarts lies in their simplicity and the thoughtful combination of ingredients. The crust is ingeniously made from a blend of dates and almonds, providing a naturally sweet, chewy, and satisfying base without ever needing to touch an oven. The luxurious filling is a dream come true, created from silky coconut cream and smooth cashews, delivering a rich and velvety texture that perfectly complements the sturdy, flavorful crust. Topped with a colorful array of fresh fruit, each bite is a harmonious blend of creamy, crunchy, and naturally sweet flavors. Every component of this dessert is carefully selected to be natural, vegan, and gluten-free, catering to various dietary preferences without compromising on taste.
I absolutely adore individual-sized desserts, which is why I opted to make these mini vegan fruit tarts. There’s something undeniably charming and convenient about having your own perfect portion, much like my popular coconut cream chocolate mousse. If you’re a fan of no-bake mini treats, you’ll also love exploring other easy and delicious options like these vegan chocolate turtles, rich chocolate cashews, or wholesome dark chocolate peanut butter balls. These recipes are perfect for satisfying your sweet tooth with healthier, plant-based choices.
Ingredient Notes & Selection Tips
Crafting the perfect no-bake vegan fruit tart begins with selecting high-quality ingredients. Here’s what to look for to ensure your tarts are absolutely delicious.
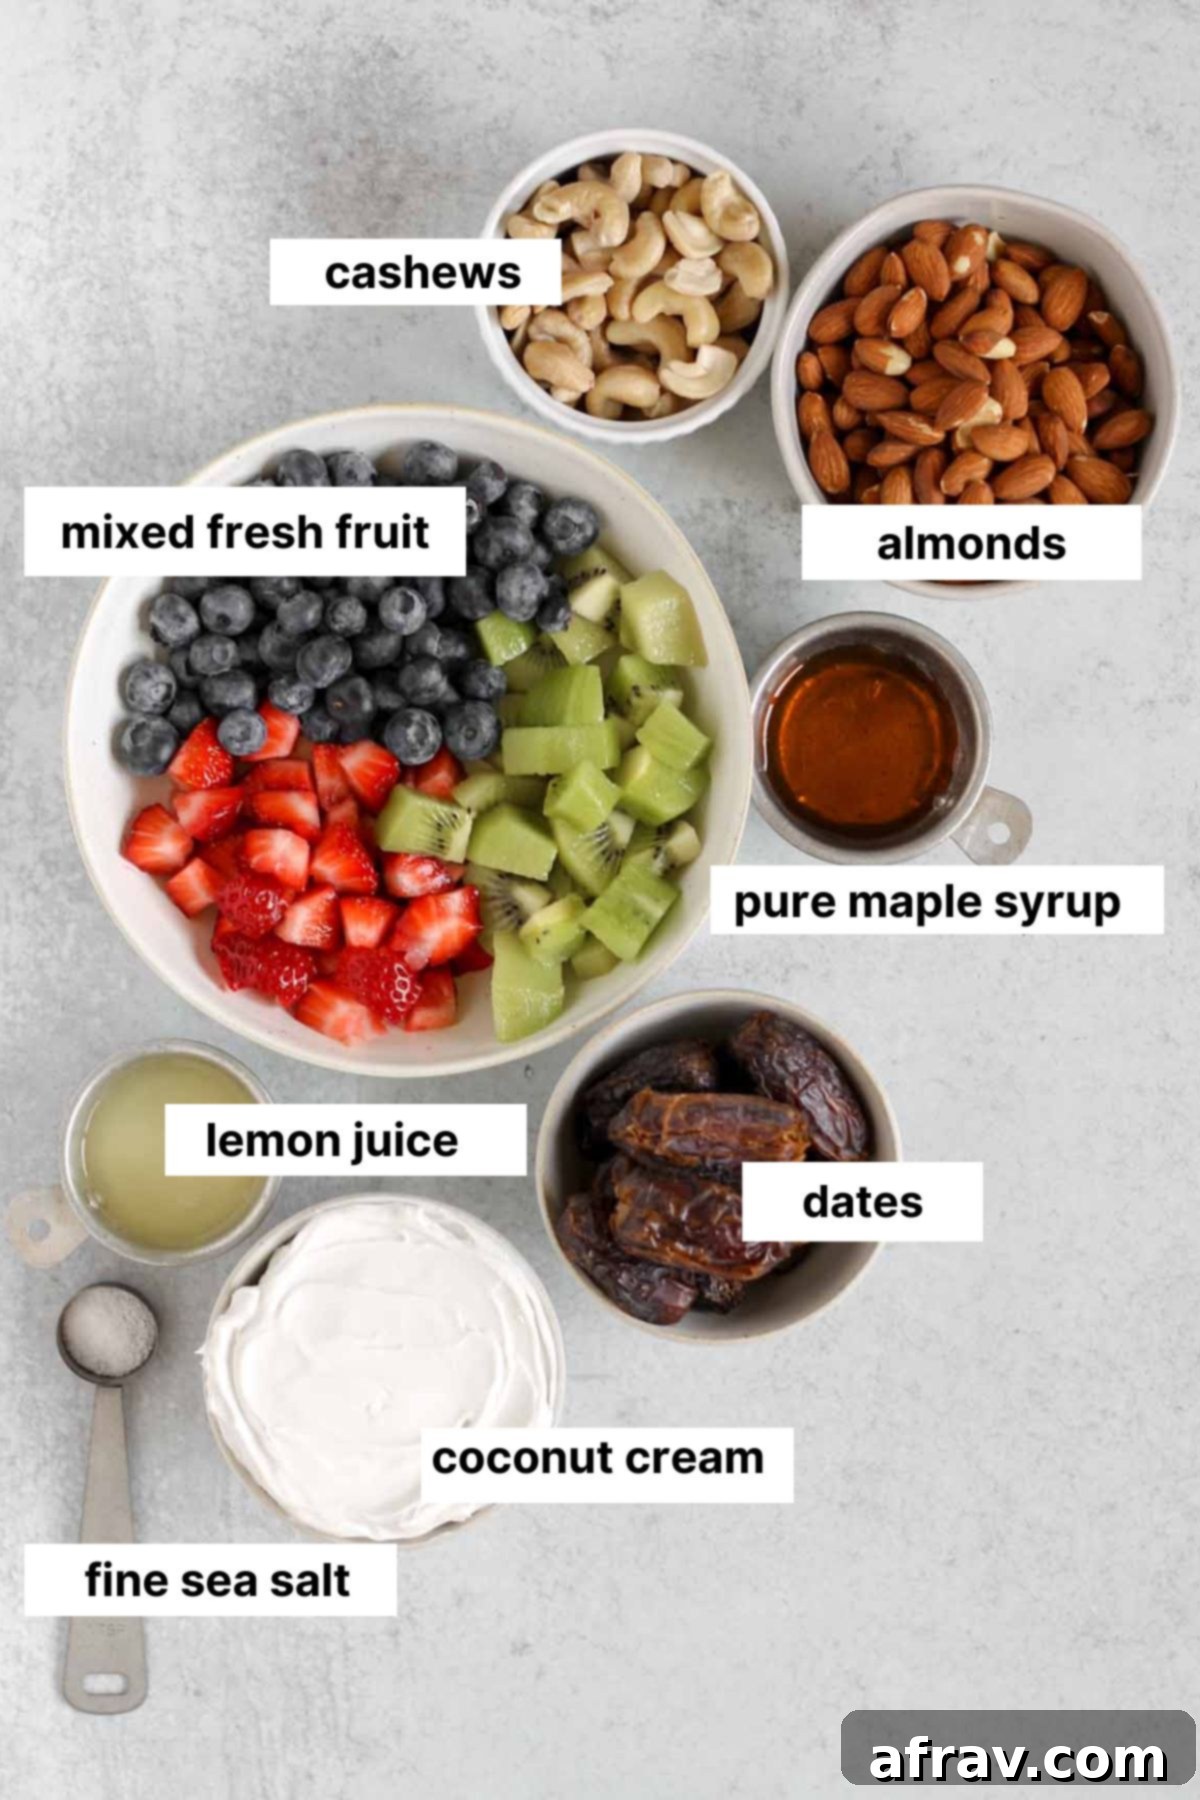
A comprehensive list of ingredients and precise amounts can be found in the detailed recipe card below. This section provides specific guidance on selecting the best ingredients for optimal flavor and texture.
For the No-Bake Vegan Crust:
- Medjool Dates: These are truly the star of our crust! I highly recommend using Medjool dates because they are naturally softer, wonderfully sweet, and have a rich, caramel-like flavor that works perfectly as a binder and sweetener. Their moisture content is crucial for the crust to stick together without added oils. If your dates feel a bit dry, simply soak them in warm water for about 10 minutes, then drain thoroughly before using.
- Almonds: Raw almonds provide a fantastic crunch and nutty flavor that forms the backbone of our crust. They are also packed with healthy fats and protein. You have flexibility here; you could use just almonds, walnuts for a slightly richer flavor, or even a combination of both to create a unique taste profile. Ensure they are unsalted and raw for the best results.
- Fine Sea Salt: A pinch of sea salt is essential to balance the sweetness of the dates and enhance the nutty flavors of the almonds, bringing all the crust ingredients into perfect harmony.
For the Creamy Vegan Fruit Tart Filling:
- Full-Fat Canned Coconut Cream: This is the secret to our incredibly rich and creamy filling! Coconut cream is thicker and has a higher fat content than regular coconut milk, which is exactly what we need for that luxurious, custardy texture. It’s crucial to use full-fat CANNED coconut cream (not the carton variety) and refrigerate the can overnight. This allows the thick cream to separate and solidify at the top, leaving the watery liquid at the bottom. Only scoop out the thick cream for the filling. Do NOT use low-fat coconut milk, as it will result in a runny filling.
- Cashews: Soaked cashews are indispensable for achieving a wonderfully smooth and silky filling. Soaking them overnight (or using the quick-soak method described in the tips section) softens them significantly, allowing them to blend seamlessly into a creamy texture with the coconut cream, eliminating any graininess. They add a subtle richness and body to the filling.
- Pure Maple Syrup: For natural sweetness and a hint of warmth, pure maple syrup is the ideal choice. Please, always opt for pure maple syrup – avoid artificial pancake syrups, as their flavor and composition will not yield the same delicious results.
- Fresh Lemon Juice: A squeeze of fresh lemon juice is vital! It brightens the flavor of the filling, cutting through the richness of the coconut and cashews, and adds a delicate tang that truly elevates the overall taste of the tart.
For the Fresh Fruit Topping:
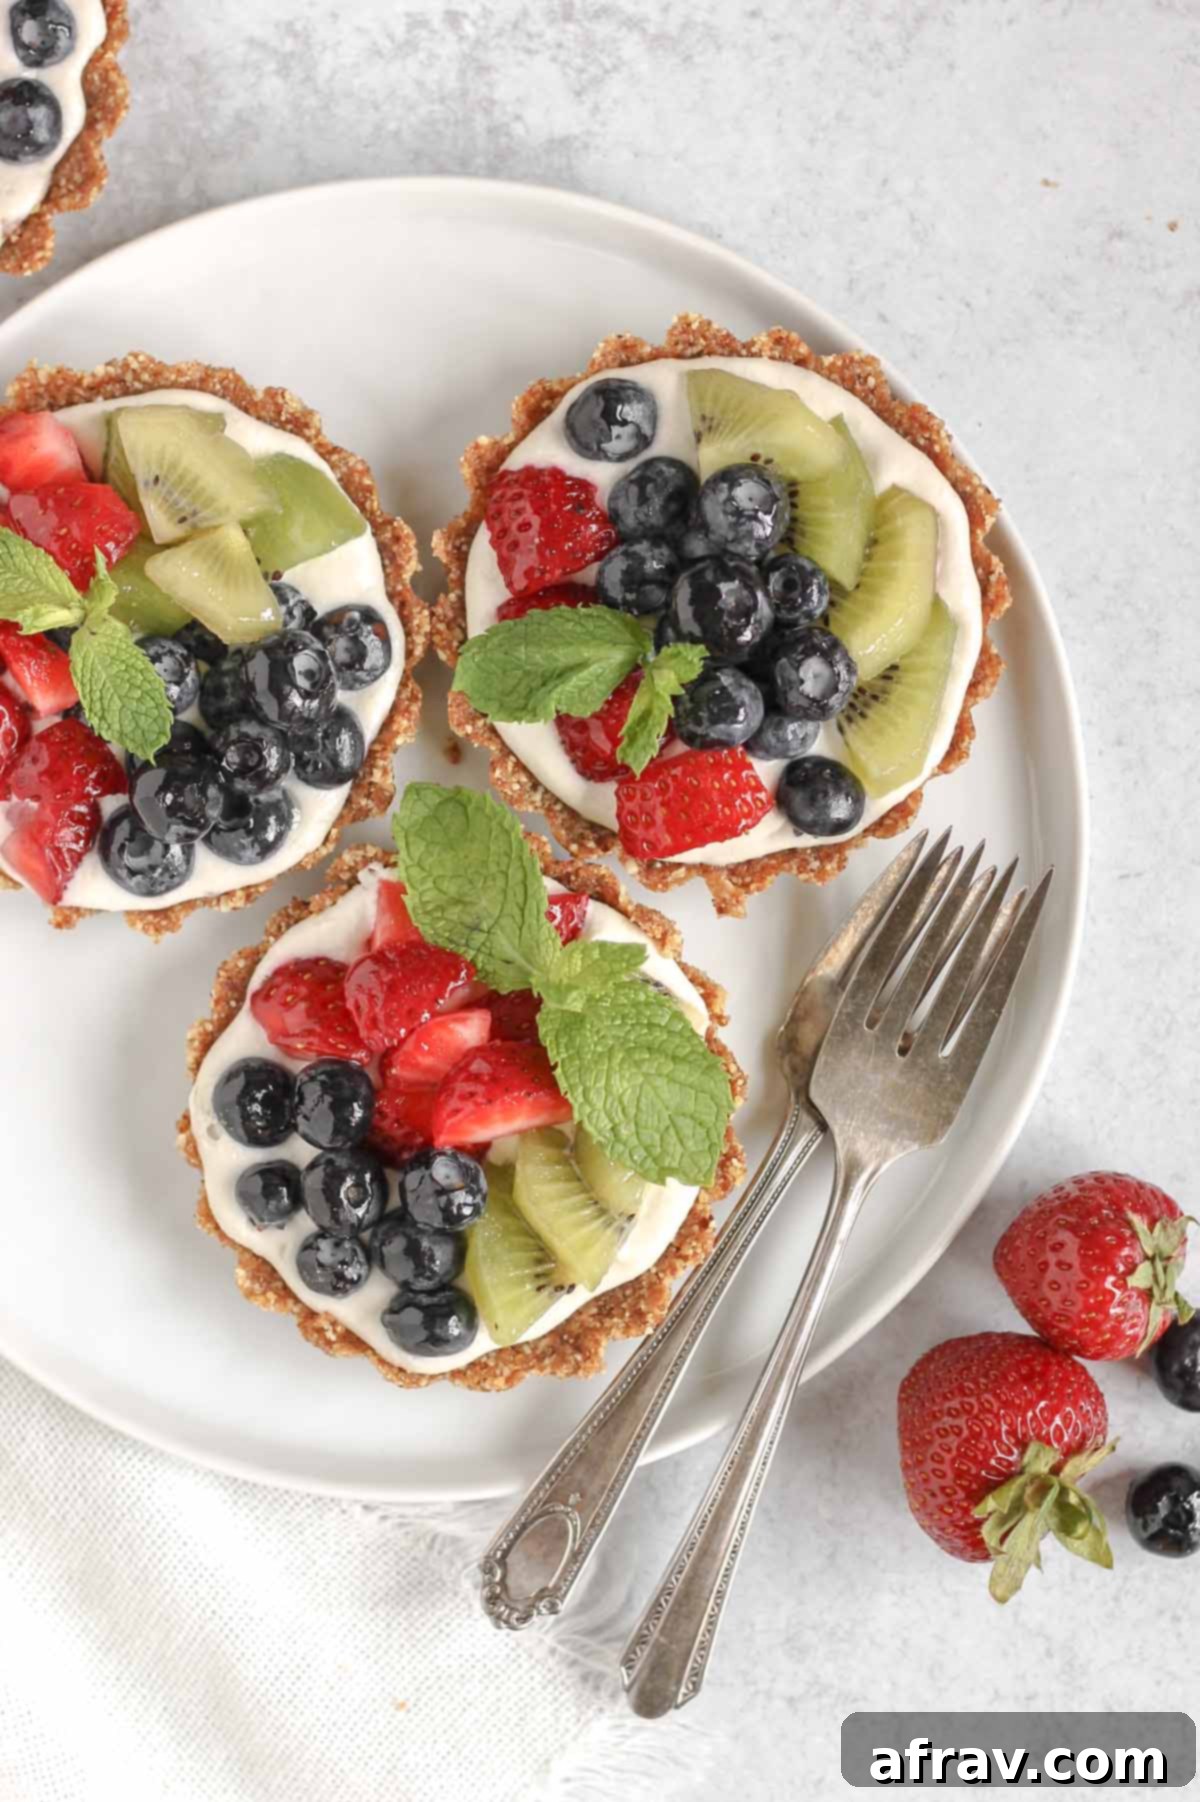
- Fresh Fruit of Your Choosing: The beauty of these tarts is their versatility! For the tarts pictured, I used a vibrant combination of finely chopped strawberries, brightly colored chopped kiwi, and sweet blueberries. However, feel free to get creative! Other excellent options include ripe mango slices, juicy peach or nectarine segments, tart raspberries, or even black grapes. Choose fruits that are in season for the best flavor and visual appeal.
Essential Equipment for No-Bake Fruit Tarts
Making these delightful no-bake fruit tarts requires only a few key pieces of kitchen equipment. Having the right tools will make the process much smoother and ensure perfect results.
- Good Quality Food Processor: A robust food processor is crucial for both the crust and the filling. For the crust, it needs to effectively break down and bind the dates and nuts into a cohesive dough. For the filling, it’s essential for blending the cashews and coconut cream into a perfectly smooth consistency. I’ve found an 8-cup processor works well, offering enough space without being too large. A 4-6 cup model would be even more ideal for these mini tarts, ensuring the ingredients are processed efficiently without getting stuck. Ensure your food processor has a sharp blade for best results.
- Mini Fruit Tart Pans: To create those adorable individual portions, you will need 6 mini fruit tart pans. I typically use ones with removable bottoms, which can make serving and presentation a bit easier if you choose to take the tarts out of the molds. However, since I often enjoy eating the tarts directly from the mold, the removable bottom isn’t strictly necessary. If you don’t have tart pans, muffin tins lined with paper or silicone liners can serve as a decent alternative, though the shape will be different.
- Baking Sheet: A simple baking sheet is useful for easily transferring the prepared tart pans to and from the refrigerator, keeping them stable and level during the chilling process.
- Measuring Cups & Spoons: Standard kitchen measuring tools are needed for accurate ingredient quantities.
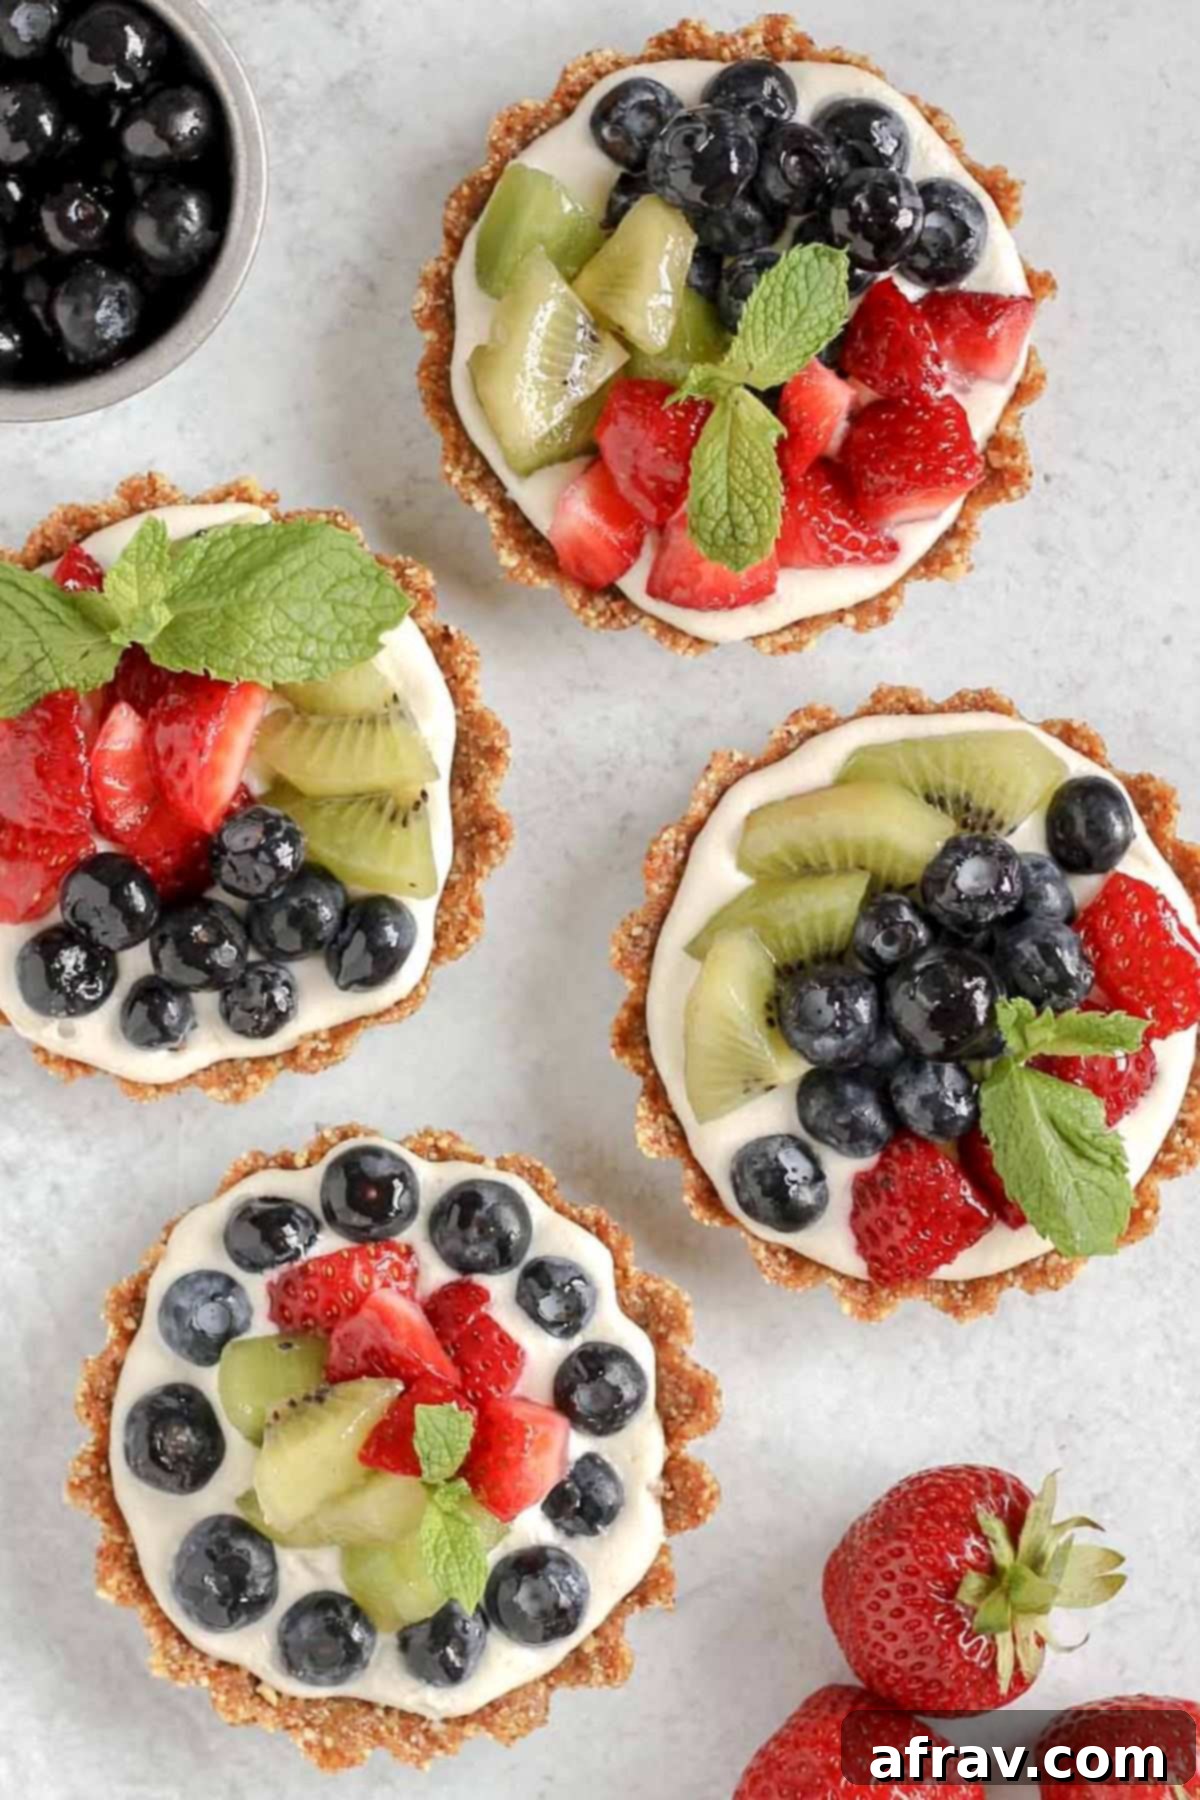
How to Make Delicious No-Bake Vegan Fruit Tarts
Creating these easy and delightful no-bake fruit tarts is a straightforward process that will have you enjoying a healthy dessert in no time. Follow these steps for perfect results!
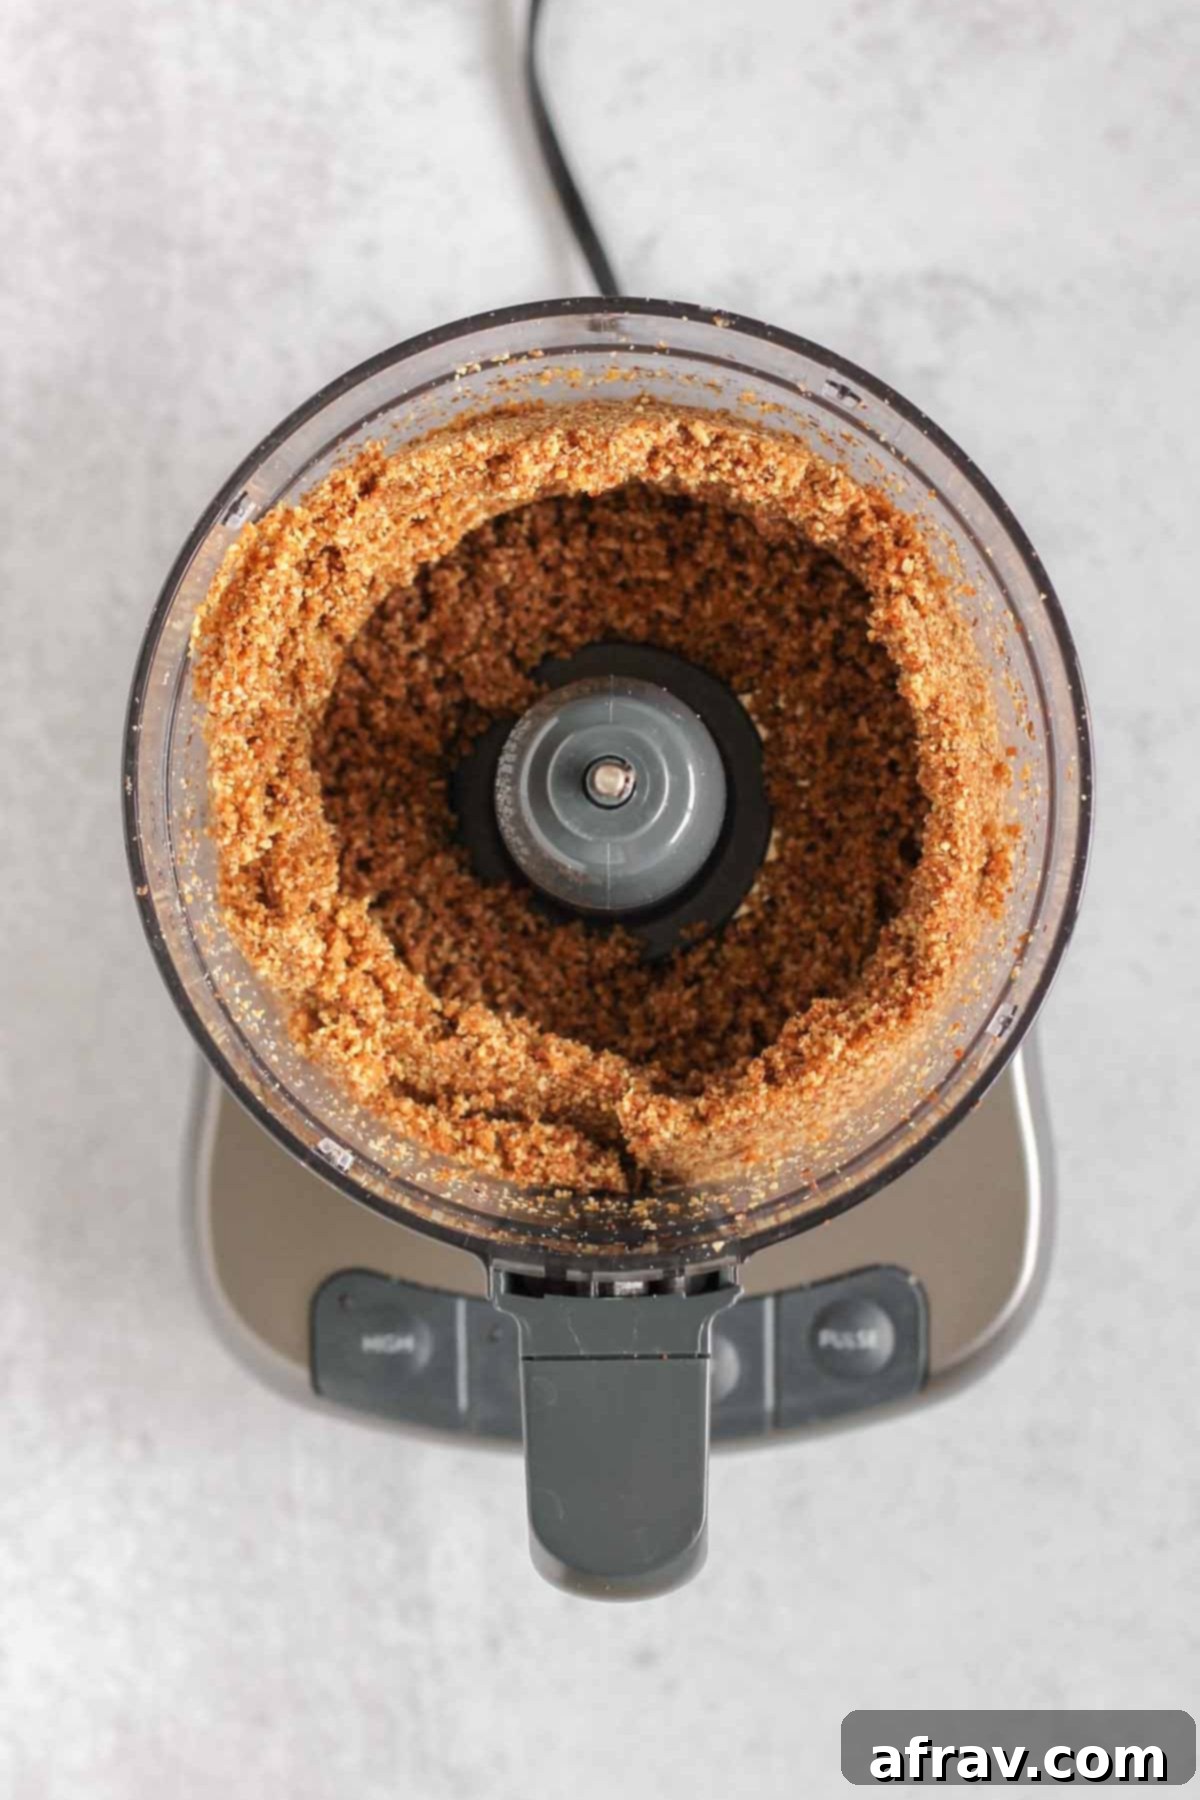
Step 1: Prepare the Crust Base. Begin by adding your pitted Medjool dates, raw almonds, and a pinch of fine sea salt into your food processor. Pulse on high speed until the ingredients are thoroughly blended and the mixture starts to clump together. You’ll know it’s ready when you can pinch a small amount between your fingers, and it holds its shape. This process typically takes about 1-2 minutes, and you may need to pause and scrape down the sides of the food processor a few times to ensure everything is evenly incorporated.
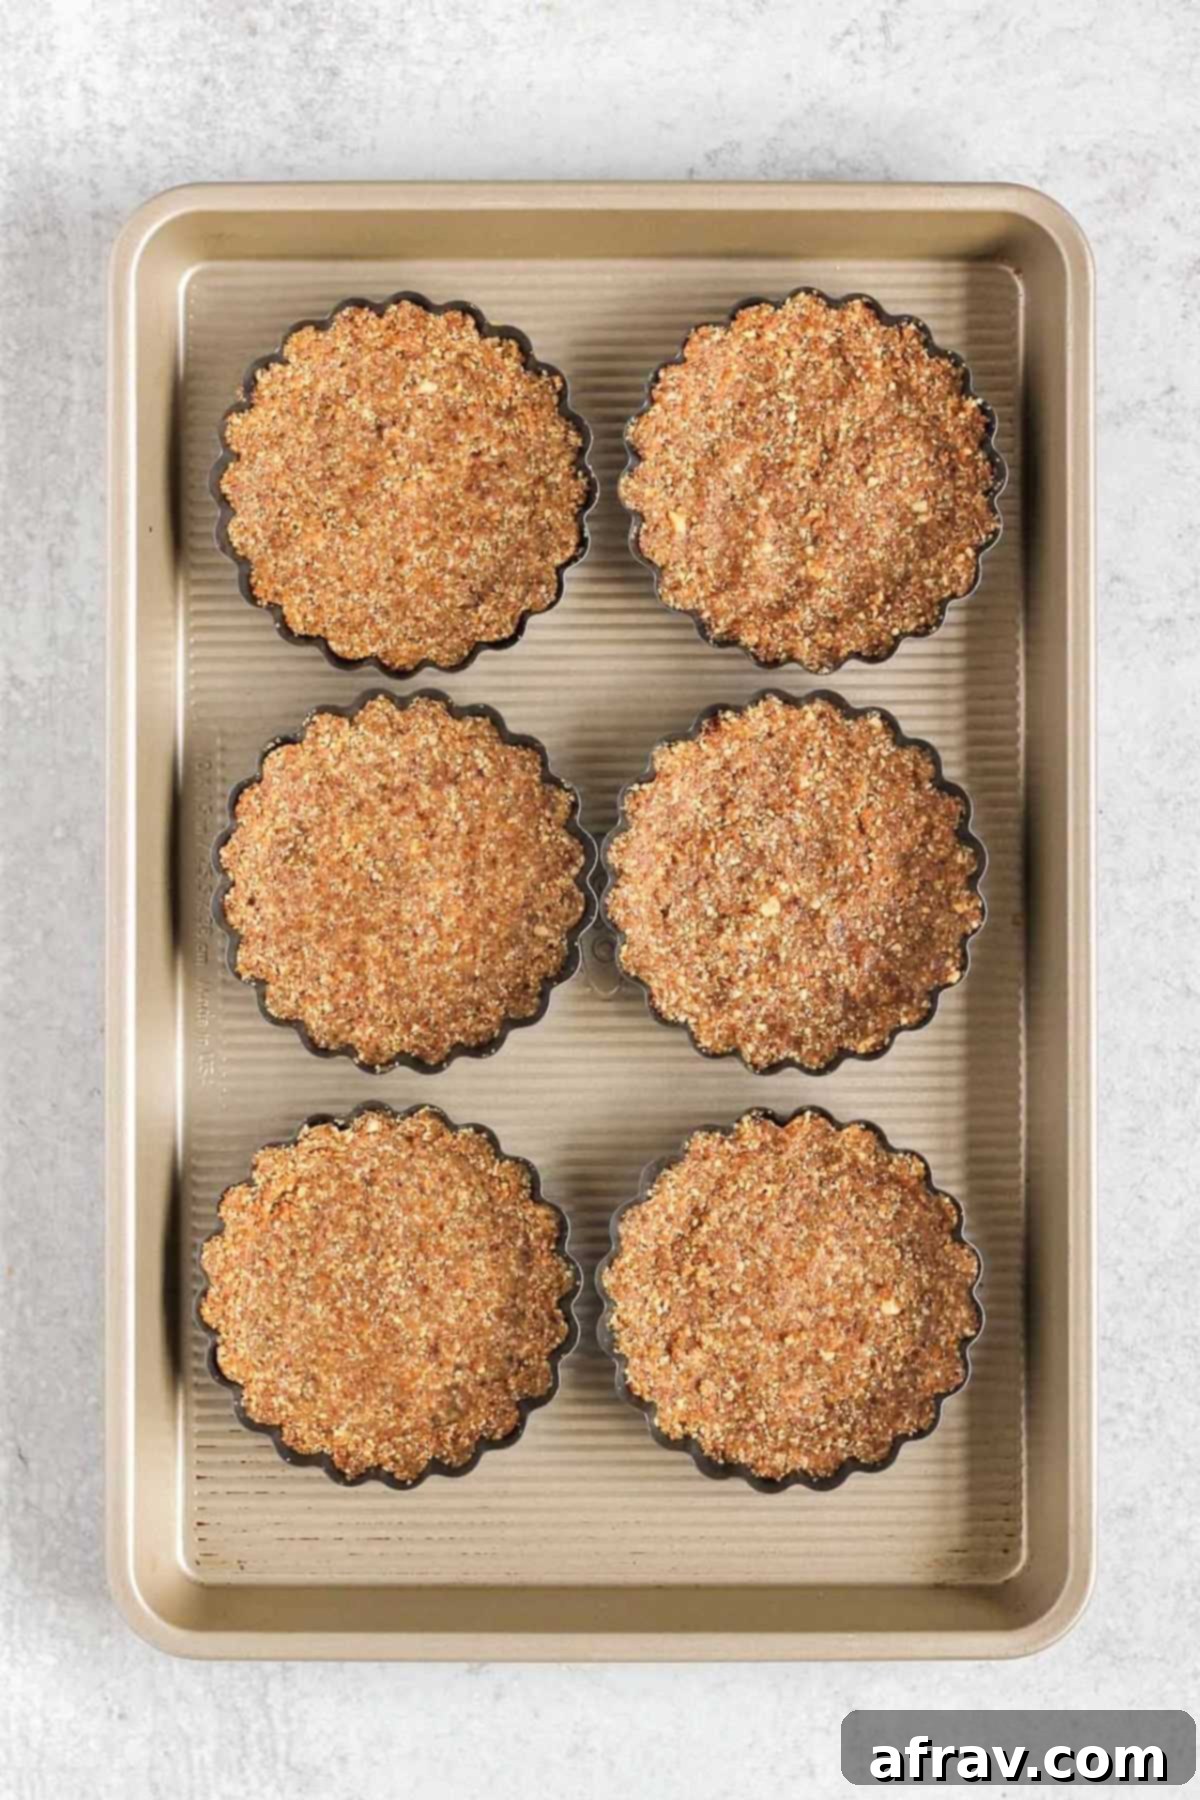
Step 2: Form the Tart Crusts. Arrange your mini tart pans on a baking sheet, which will make them easier to transport. Take approximately ¼ cup of the prepared date-almond “dough” and press it firmly into the bottom of each tart pan. Use your fingertips to spread the dough evenly across the base and slightly up the sides of the pan, creating a foundational layer for your tarts.
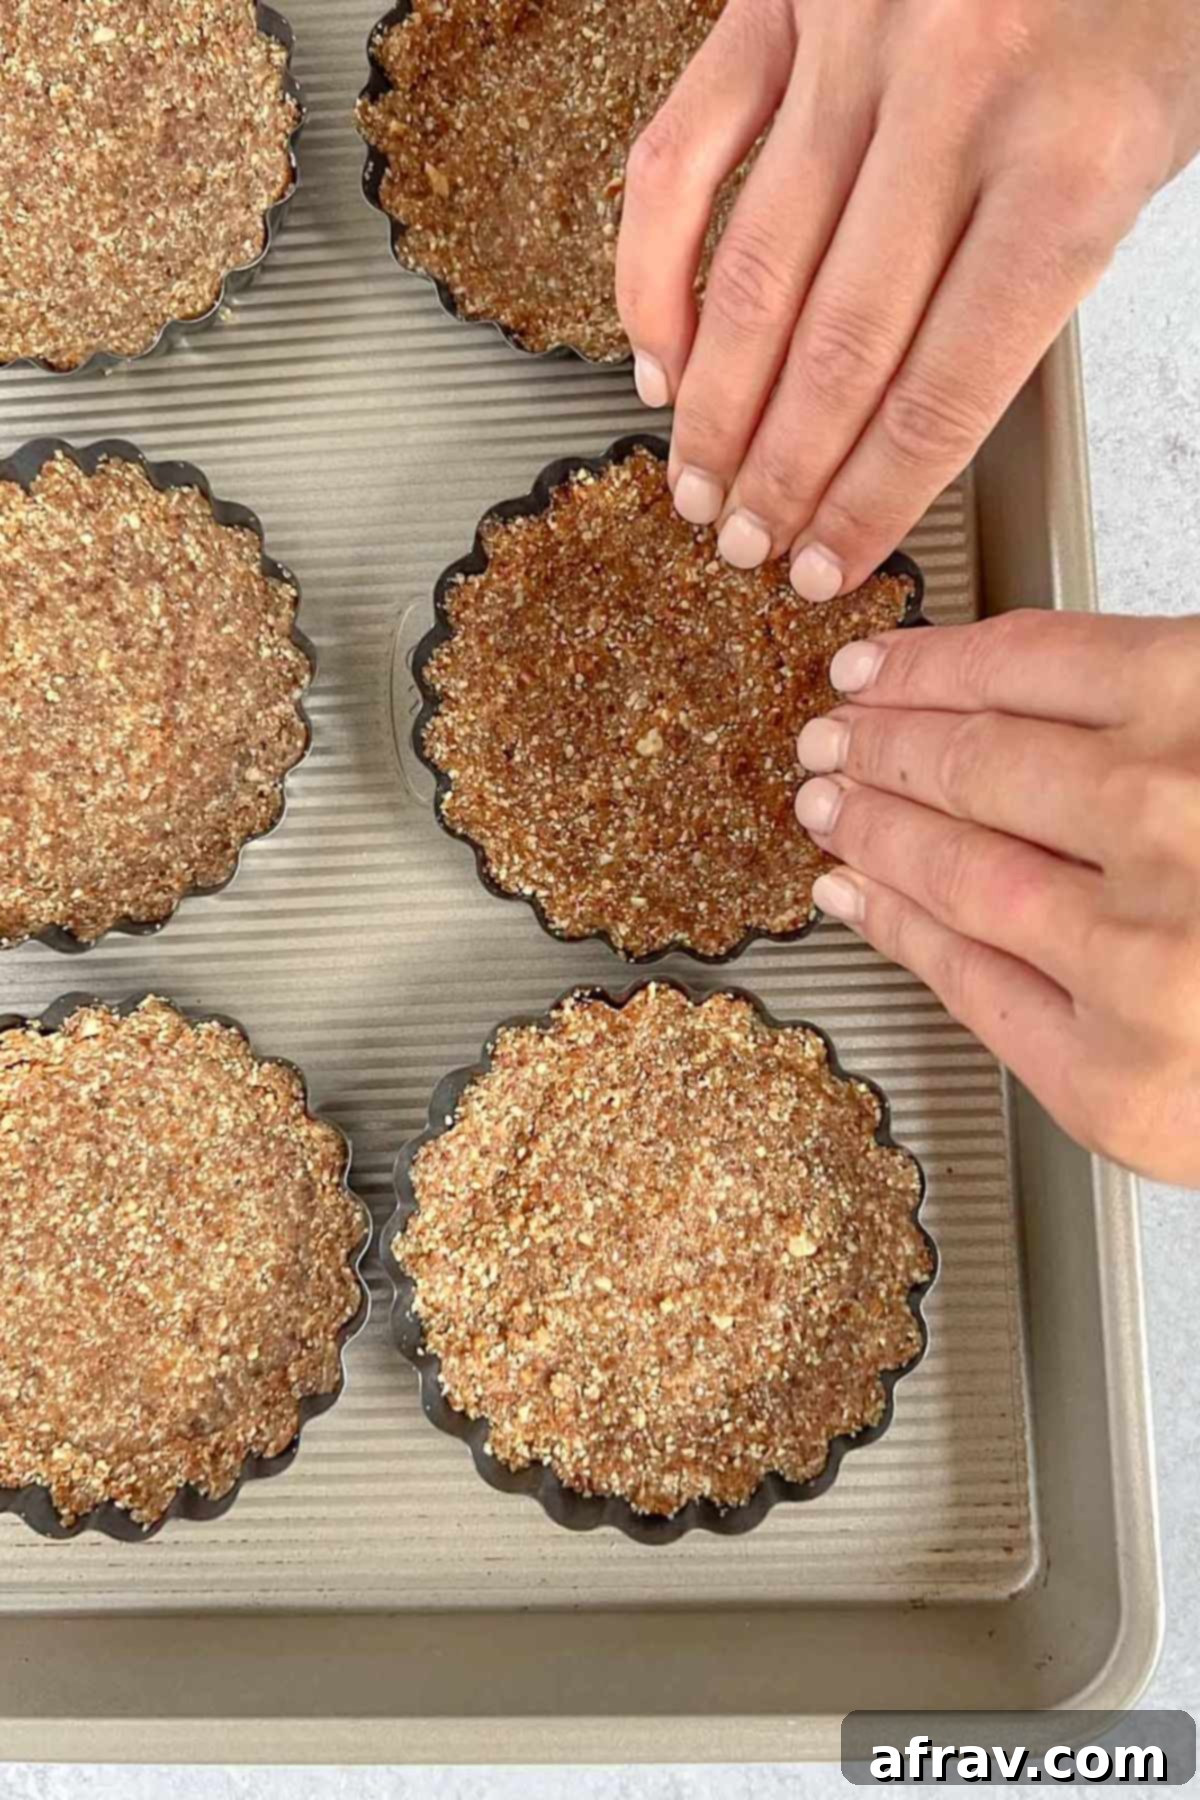
Step 3: Define the Edges. Now, using both your fingers and thumbs, carefully press and pinch the “dough” up the sides of each tart pan. This action forms the neat edges of your tart crusts. It’s important to work the dough diligently with your hands to ensure it’s well-packed and sticks together securely, creating a stable and attractive border for your filling. Aim for an edge thickness of about ¼ inch for stability.
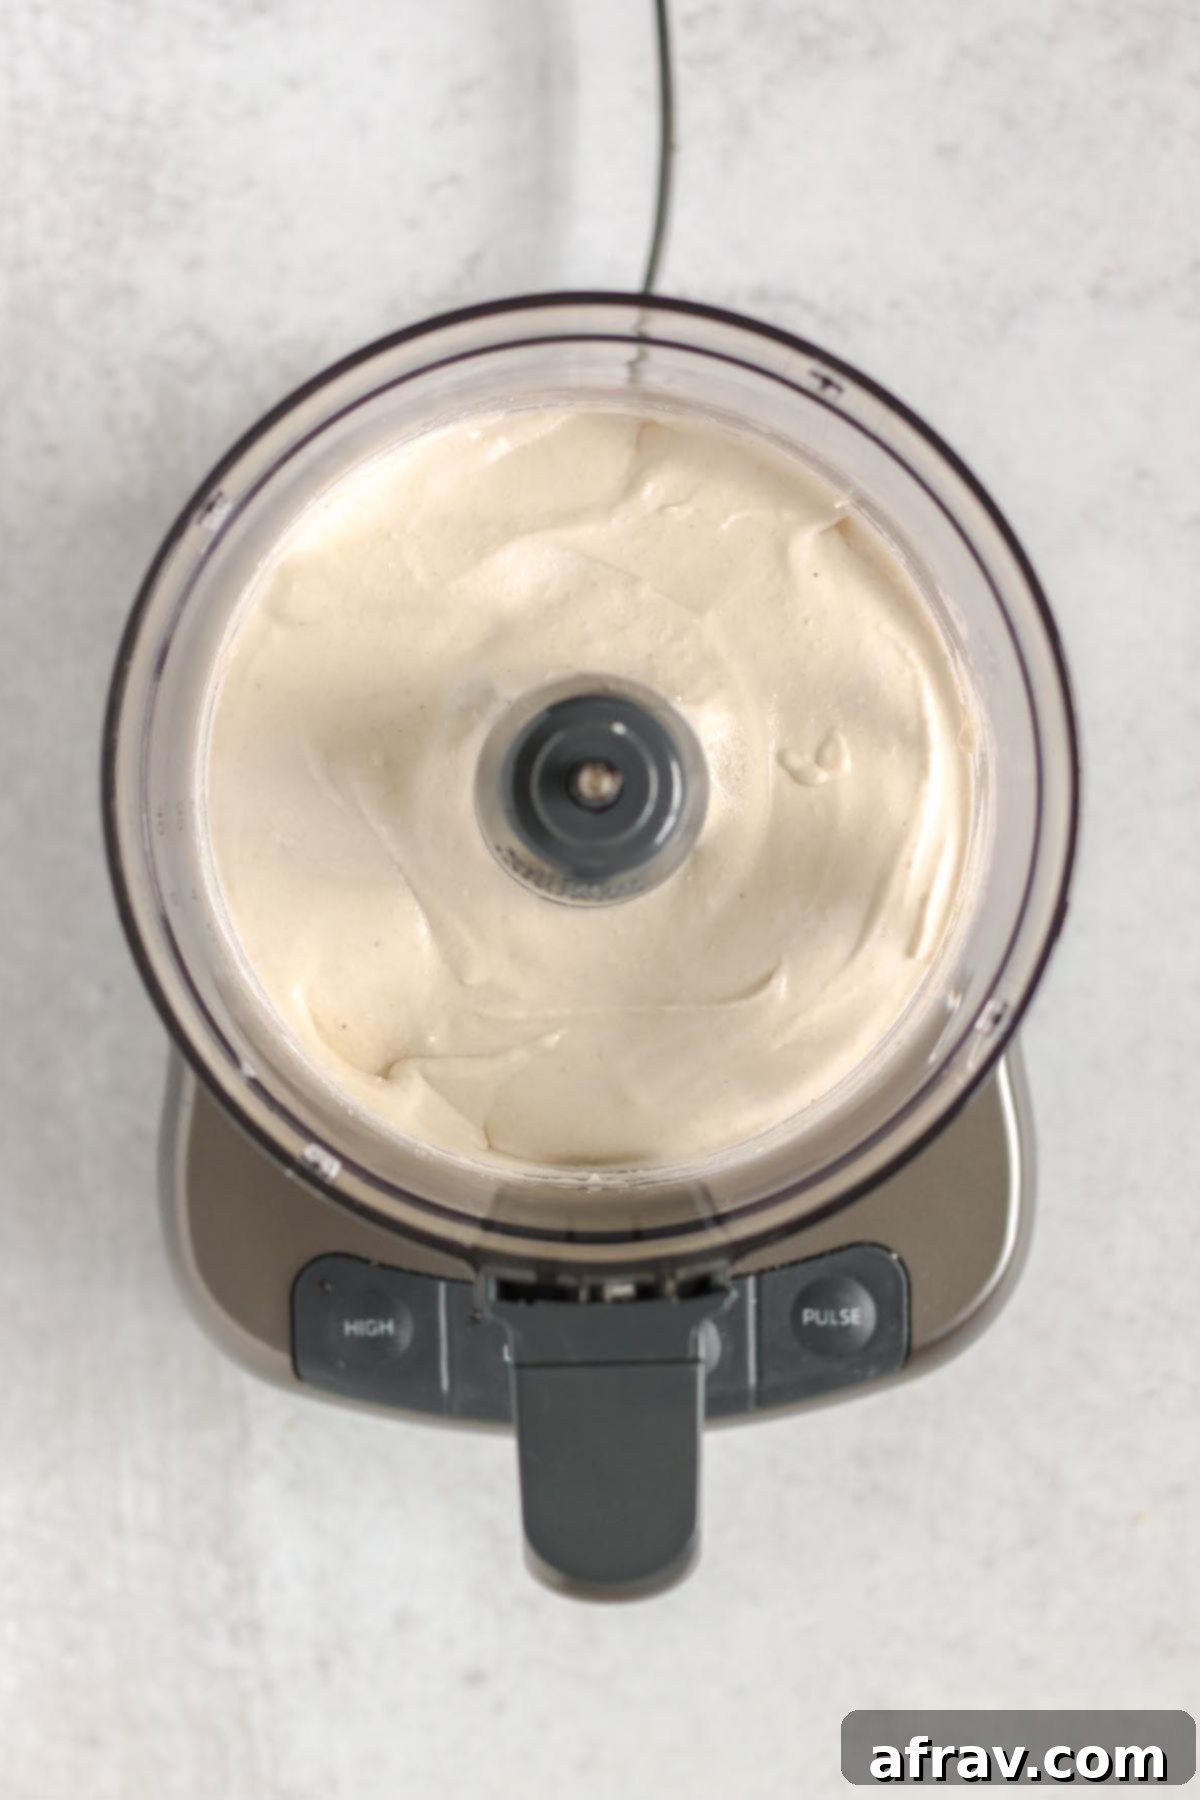
Step 4: Prepare the Creamy Filling. Take your chilled coconut cream (scooping only the thick cream from the top of the can), along with your pre-soaked cashews, fresh lemon juice, and pure maple syrup, and add them to a clean food processor. Blend on high speed until the cashews are completely pulverized and the mixture achieves a perfectly smooth, velvety consistency. Be mindful not to overblend, as this can sometimes cause the coconut cream to curdle (see expert tips for more on this!).
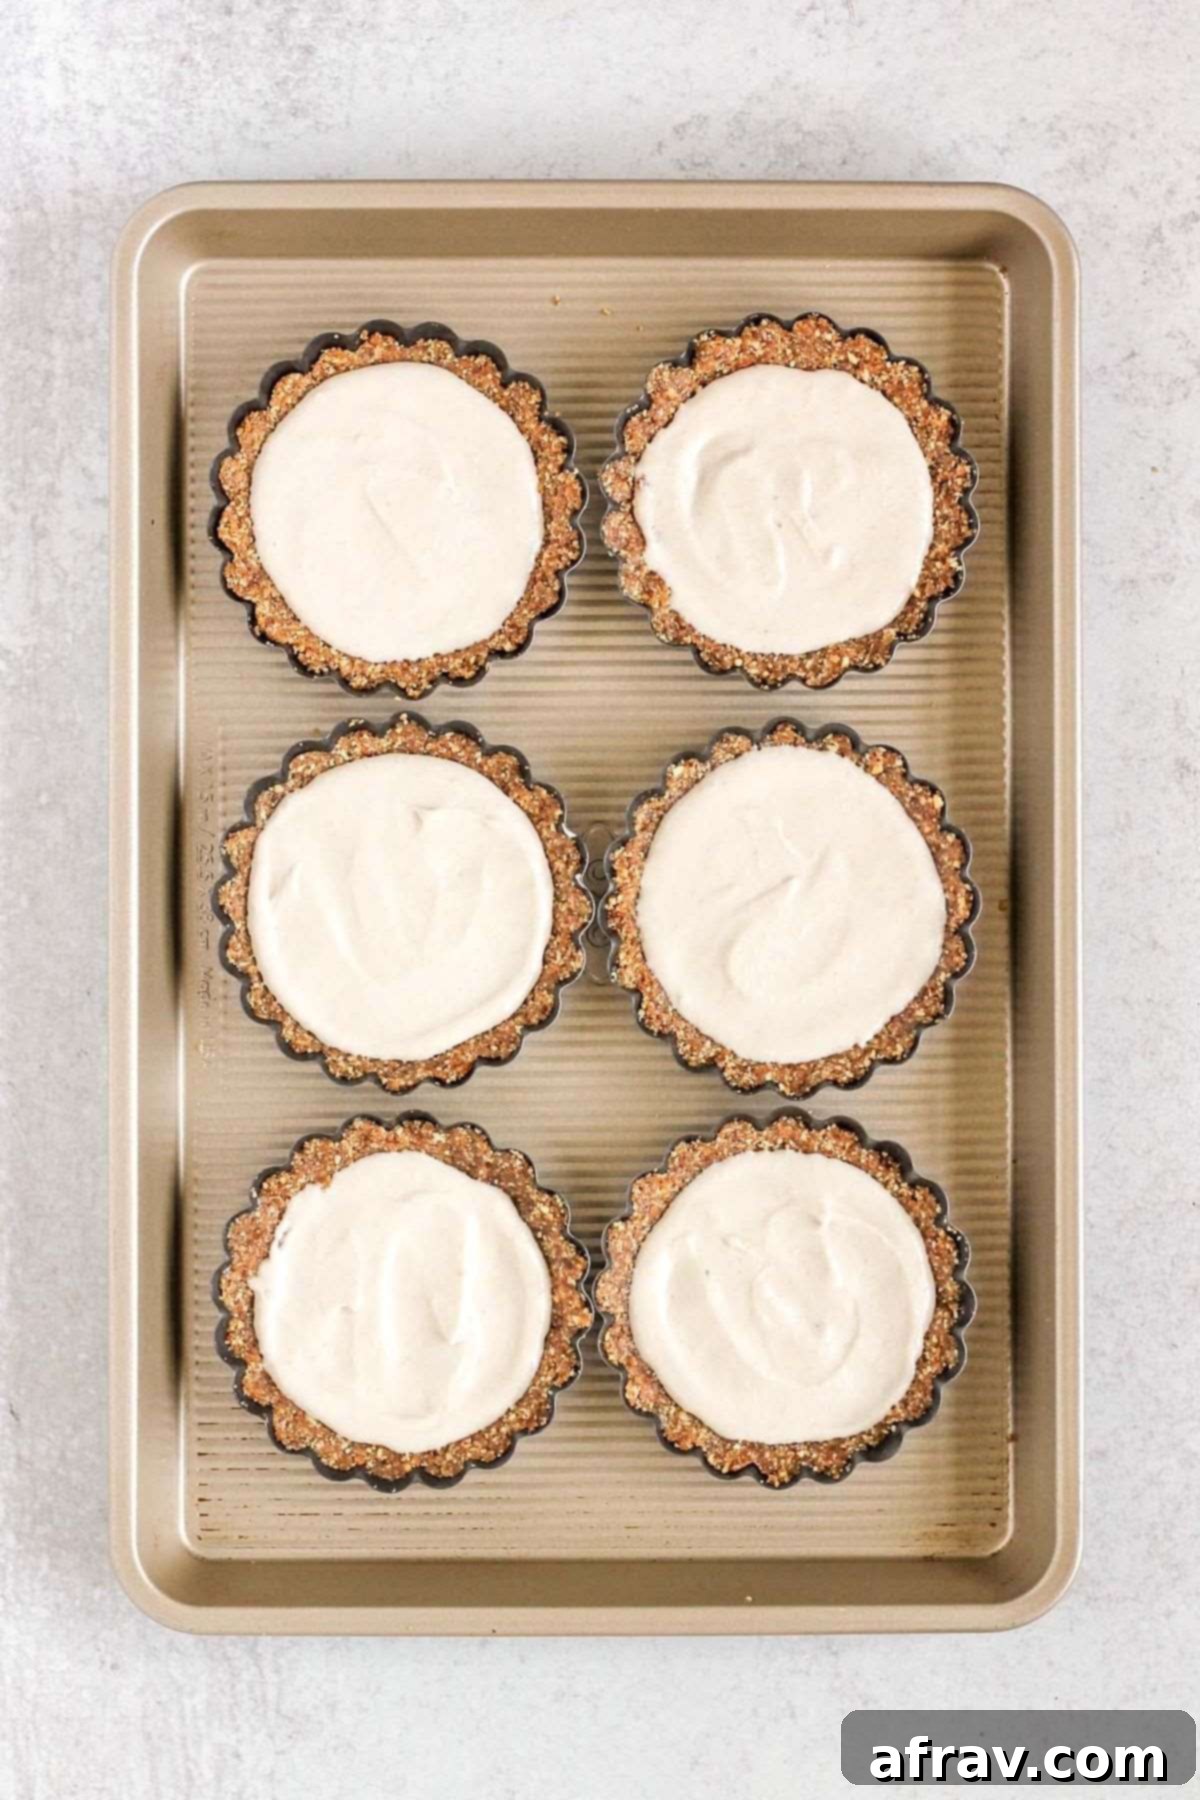
Step 5: Fill the Tart Shells. Carefully scoop the luscious coconut cream filling into each of the prepared tart pans, ensuring an even distribution among all six crusts. Use a small spatula or the back of a spoon to gently spread the filling out, creating a smooth and level surface for your fruit topping.
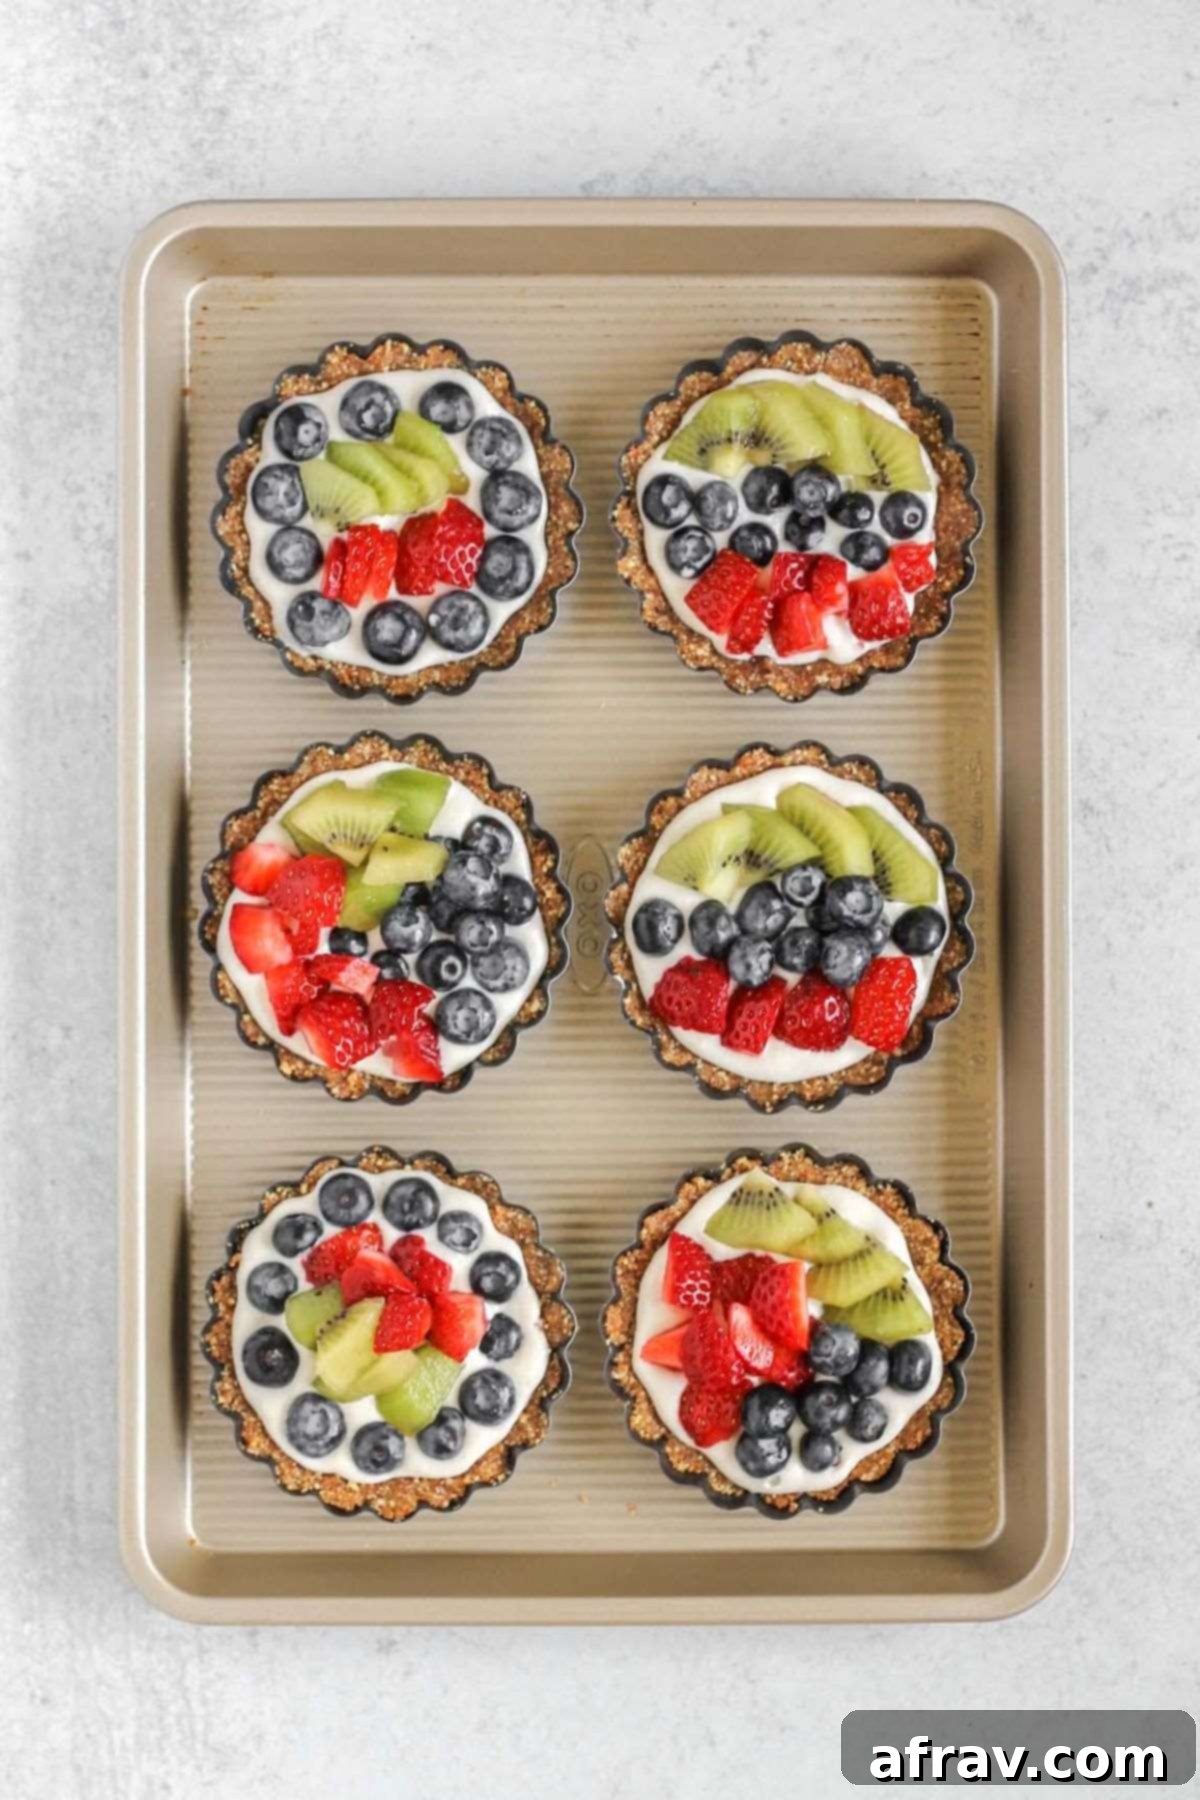
Step 6: Add Fresh Fruit Topping. The final step in assembling your tarts is to adorn them with a generous and colorful layer of fresh fruit. Arrange your chosen fruits—strawberries, kiwi, blueberries, or any combination you prefer—artistically on top of the creamy filling. This not only adds a burst of flavor but also makes for a visually stunning dessert.
💭 Important Note on Setting: Once your beautiful tarts are fully assembled with their fruit toppings, they must be refrigerated to properly set. Allow them to chill for a minimum of 2-3 hours before serving. For optimal firmness of both the crust and the coconut cream filling, four or more hours of refrigeration is ideal. This chilling time is essential for the flavors to meld and the textures to become perfectly firm.
Expert Tips for Perfect Vegan Fruit Tarts
Achieve consistently perfect no-bake vegan fruit tarts with these helpful tips and tricks:
Precision in Crust Formation: When shaping the crust within the tart pans, aim for the edges to be approximately ¼ inch thick. This specific thickness provides structural integrity, significantly helping the tarts maintain their shape, especially if you plan to carefully remove them from the pans for serving.
Handling Fragile Crusts: The date-and-nut crust, while delicious, can be delicate. For the easiest and most reliable experience, I highly recommend serving these tarts directly from their tart pans. If you do wish to remove them, do so with extreme care. Use a thin, flat spatula to gently lift and transfer the tarts to a serving plate, ensuring you support the entire base to prevent breakage.
Avoid Over-Blending the Filling: When making the coconut cream and cashew filling, blend until just smooth and creamy. It’s crucial not to overmix! Excessive blending can cause the delicate emulsion of the coconut cream to break, leading it to curdle or become grainy. Trust me, this happened to me once, and the result was unusable. Stop blending as soon as you achieve a silky-smooth consistency.
Quick-Soak Cashew Method: Forgot to soak your cashews overnight? No problem! Bring a pot of water to a boil, remove it from the heat, add your cashews, cover the pot, and let them sit for 20 minutes. Drain and rinse them thoroughly before using, and they’ll be perfectly softened for blending.
Ensure Dates are Soft: The quality of your Medjool dates directly impacts the crust’s texture. Always ensure your dates are soft and pliable, not dried out or hard. If they feel firm, you can quickly soften them by soaking them in hot water for about 10 minutes, then drain well before adding them to your food processor.
Creative Flavor Boosts for Filling: While the basic filling is delightful, consider adding a touch of vanilla extract, a pinch of cardamom, or a bit of orange zest to the coconut cream mixture for an extra layer of flavor complexity. These additions can transform the tart to suit different palates or occasions.
Troubleshooting a Dry Crust: If your crust mixture seems too dry and isn’t sticking together after blending, add a teaspoon of water (or a touch more maple syrup) at a time to the food processor and pulse again until it reaches the desired sticky consistency. Be careful not to add too much liquid, or the crust will become too wet.
Serving and Storing Your Vegan Fruit Tarts
To enjoy these mini vegan fruit tarts at their best, proper serving and storage techniques are key.
Serving: These tarts are absolutely at their peak freshness and flavor when eaten on the same day they are made. However, remember they require a minimum of 2-3 hours (ideally 4+ hours) of refrigeration after assembly to allow the crust to firm up and the filling to set beautifully. Therefore, plan your preparation accordingly. Always serve these tarts directly from the fridge; allowing them to sit at room temperature for extended periods will soften the crust and filling, compromising their ideal texture and presentation.
Making Ahead: If you’re looking to prepare these tarts in advance, they can be made the day before. For optimal freshness and appearance, I recommend assembling the crust with the creamy filling, chilling them thoroughly, and then storing them in the fridge *without* the fresh fruit topping. The delicate fruit is best added right before you plan to serve. This prevents the fruit from potentially weeping or softening the filling. I do not recommend preparing the fully assembled tarts more than 24 hours in advance.
Storing Leftovers: Should you have any of these delightful treats left over (which is rare!), they should be stored properly to maintain their quality. Place them in an airtight container and keep them refrigerated. They will remain fresh and delicious for up to 2 days. Beyond that, the crust might soften, and the fruit might lose some of its vibrant texture.
Frequently Asked Questions (FAQs)
Yes, you can freeze these tarts, but there’s a small caveat: the fresh fruit topping tends to become a little mushy once thawed. For the best results when freezing, I highly recommend doing so *without* the fruit. Simply freeze the crust and filling assembled, then add fresh fruit right before serving after thawing. To thaw, transfer the frozen tarts to the refrigerator overnight.
Absolutely! This vegan dessert is naturally gluten-free. All the ingredients used in this recipe – from the dates and almonds in the crust to the coconut cream and cashews in the filling – are inherently free of gluten, making it a safe and delicious option for those with gluten sensitivities or preferences.
By all means, yes! The beauty of this recipe is its adaptability. You can absolutely use any combination of fresh fruit you desire for the topping. Beyond strawberries, kiwi, and blueberries, other fantastic options that would complement the creamy filling beautifully include vibrant mango, juicy peaches or nectarines (especially in summer!), sweet raspberries, blackberries, or even thin slices of orange or fig. Feel free to experiment with seasonal fruits to keep things exciting!
If your filling isn’t as smooth as you’d like, it could be due to one of two primary reasons. Firstly, your food processor might not be powerful enough to fully pulverize the cashews and blend them into the cream. A high-speed, good-quality food processor is essential for achieving that silky texture. Secondly, the type or brand of coconut cream you used could be a factor. Some brands of canned coconut milk/cream can be slightly grainy even when chilled, which will affect the final smoothness of your filling. My personal favorite for consistently smooth results is Thai Kitchen coconut cream, which I find reliably creamy.
While the recipe uses almonds and cashews, you can adapt it to be nut-free with some substitutions. For the crust, you could try using sunflower seeds or a combination of rolled oats and dates. For the filling, replacing cashews is trickier as they provide unique creaminess. You might experiment with silken tofu (ensure it’s soft and thoroughly blended) or sunflower seed butter (which might alter the flavor profile) combined with coconut cream, but expect a different texture and taste than the original cashew-based filling.
Yes, you can easily scale this recipe to make one large tart. You’ll need an 8-inch or 9-inch tart pan with a removable bottom. Simply use all the crust mixture to line the larger pan, ensuring the sides are built up evenly. Then, pour all the filling into the single crust. The refrigeration time will likely need to be extended to at least 4-6 hours, or even overnight, to ensure the larger tart sets completely through the center.
Explore More Wholesome Vegan Recipes
If you’ve loved these delightful vegan fruit tarts and are eager for more plant-based culinary adventures, you’re in luck! Here are some other fantastic vegan recipes that are clean, healthy, and incredibly satisfying:
- Refreshing Chia Bowl
- Healthy Samoa Cookies (Vegan)
- No-Bake Carrot Cake Energy Balls
- Vegan Mediterranean Buddha Bowls (w/ tahini dressing)
If you’ve had the pleasure of making this delightful No-Bake Vegan Fruit Tart recipe, please share your thoughts! I would be incredibly grateful if you could leave a star rating and/or a comment below. Your feedback helps others discover and enjoy these recipes. And don’t forget to share a photo of your beautiful creations on Instagram or Facebook and mention @CleanPlateMama! I love seeing your culinary masterpieces!
Eat Clean. Be Well!
-Sara

Vegan Fruit Tarts (no bake)
Save This Recipe For Later!
We’ll email this post to you, so you can come back to it later. Plus, enjoy weekly clean eating recipes as a bonus.
Equipment
-
1 food processor (no larger than 8 cups)
-
6 mini fruit tart pans
Ingredients
Ingredients for the Crust
- 8 soft, pitted Medjool dates (this is roughly 1 cup)
- 1 ¼ cups raw almonds
- ⅛ tsp. fine sea salt
Ingredients for the Filling
- ½ cup cashews
- 1 cup coconut cream (1-2 cans worth)
- 1 tbsp. fresh lemon juice
- 1 ½ tbsp. pure maple syrup
Ingredients for Fruit Topping
- ½ cup blueberries
- ½ cup chopped strawberries
- ½ cup chopped kiwi
Instructions
Day Before Preparation
-
Chill Coconut Cream: Place both cans of full-fat coconut cream in the fridge overnight. This essential step allows the thick, rich cream to separate and solidify at the top, making it easy to scoop away from the watery liquid below. Depending on the brand and how much cream separates, you might need the cream from 1 or 2 cans to achieve the required volume.
-
Soak Cashews: Submerge the cashews in a bowl of water and let them soak overnight at room temperature. This prolonged soaking process is vital for softening the cashews completely, ensuring they blend into an incredibly smooth and creamy consistency for your tart filling.
Assembling the Vegan Fruit Tarts
-
Prepare the Crust: In your food processor, combine the pitted Medjool dates, raw almonds, and fine sea salt. Pulse on high speed until the ingredients are thoroughly blended and the mixture begins to clump together. The ideal consistency is when the mixture holds its shape when you pinch a piece between your fingers; this usually takes 1-2 minutes of blending. If the mixture appears too dry, add a teaspoon of water at a time and pulse again until the desired consistency is reached.
-
Form the Tart Shells: Arrange your mini fruit tart pans on a baking sheet for easy transfer to the refrigerator. Divide the prepared “dough” mixture evenly among the 6 tart pans, using approximately ¼ cup per tart. Using your fingers, firmly press the mixture into the bottom and up the sides of each pan, ensuring it’s well-packed and sticks together to form sturdy crusts. Refer to the photos in the blog post for visual guidance on shaping the edges.
-
Make the Creamy Filling: Carefully scoop out 1 cup of the thick coconut cream from your chilled cans (you may have some liquid left over, which can be discarded or used for smoothies). Add this solid coconut cream to a clean food processor, along with your pre-soaked and drained cashews, fresh lemon juice, and pure maple syrup. Blend on high speed until the mixture is completely smooth and creamy, with no visible cashew pieces. Be careful not to over-blend to prevent curdling.
-
Fill and Top: Evenly divide the creamy filling mixture among the 6 prepared tart crusts, spreading it smoothly to the edges. Immediately top each tart with your chosen assortment of fresh fruit, arranging them decoratively for an appealing finish.
-
Chill to Set: Transfer the baking sheet with the assembled tarts to the refrigerator. Allow them to chill for a minimum of 2-3 hours. For the best firm texture of both the crust and filling, 4 hours or more is highly recommended.
-
Serve and Enjoy: Once fully set, serve your delicious no-bake vegan fruit tarts directly from the refrigerator. Enjoy this wholesome, naturally sweet, and refreshing dessert!
Notes
- When forming the crust, try to make the edges about ¼” thick. This will help the tarts to hold their shape if you plan to remove them from the pans.
- However, I recommend serving these/eating these straight from the tart pans. If you do remove from the pan, use a spatula to transfer tarts as they are fragile.
- These are best eaten the day you make them. However, they do need to sit in the fridge for a minimum of 2-3 hours before serving, so plan accordingly.
- If you’d like to make ahead, make the crust with the filling and store in the fridge without the fruit topping. Add the fresh fruit before serving.
- For a nut-free option, consider replacing almonds with sunflower seeds in the crust and explore silken tofu or sunflower seed butter alternatives for the filling, though textures may vary.
- Ensure your coconut cream is full-fat and thoroughly chilled for the best, thickest filling.
