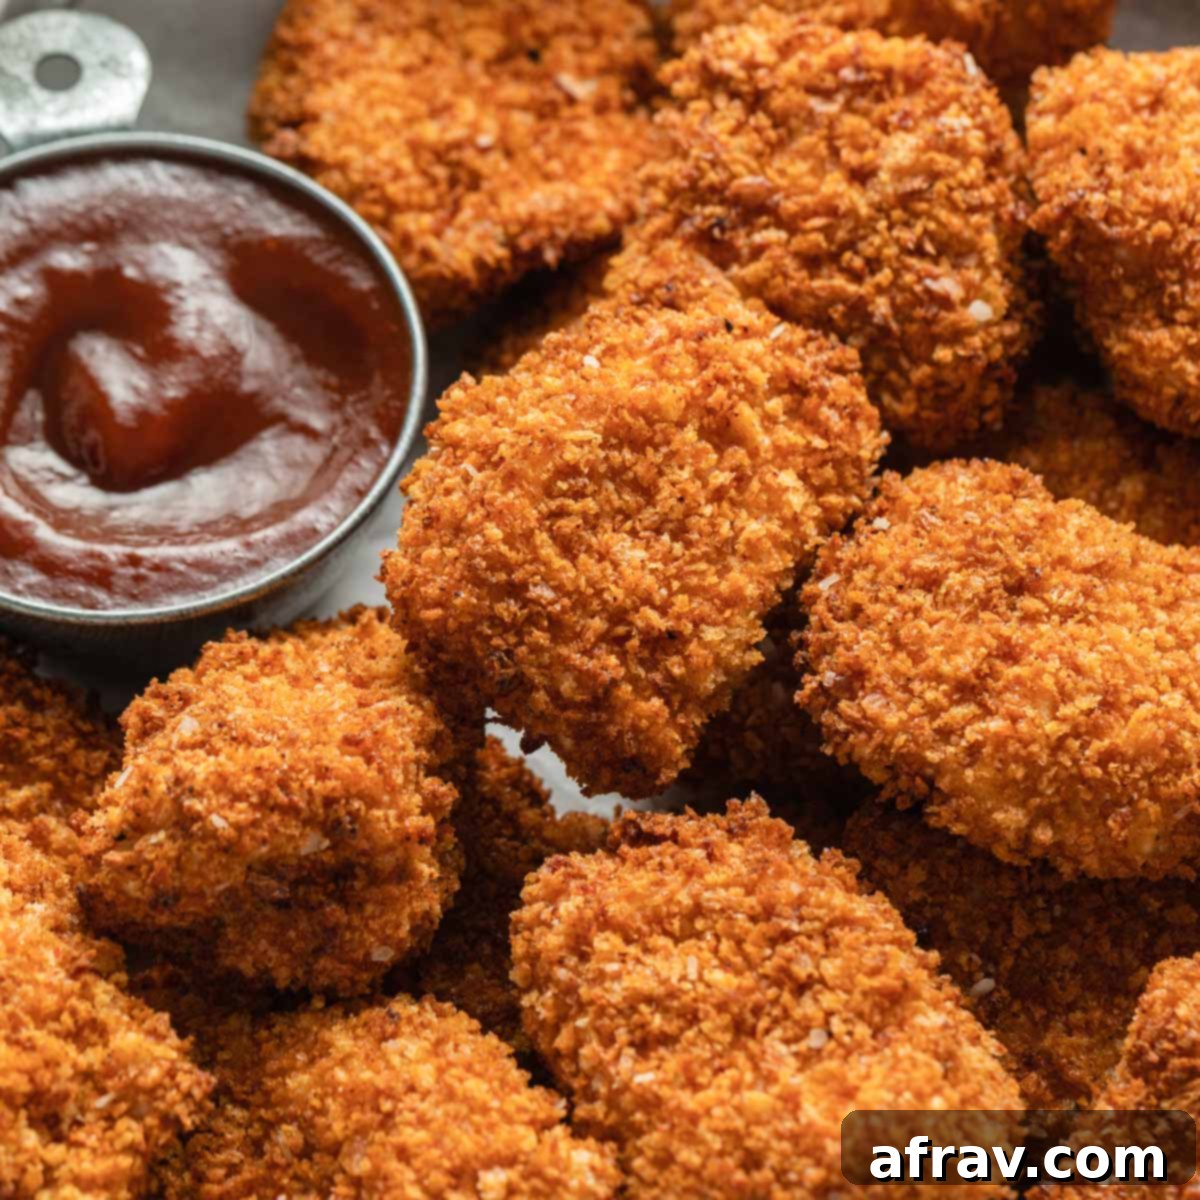
Perfectly Crispy Air Fryer Chicken Bites: Your Guide to Easy Homemade Nuggets
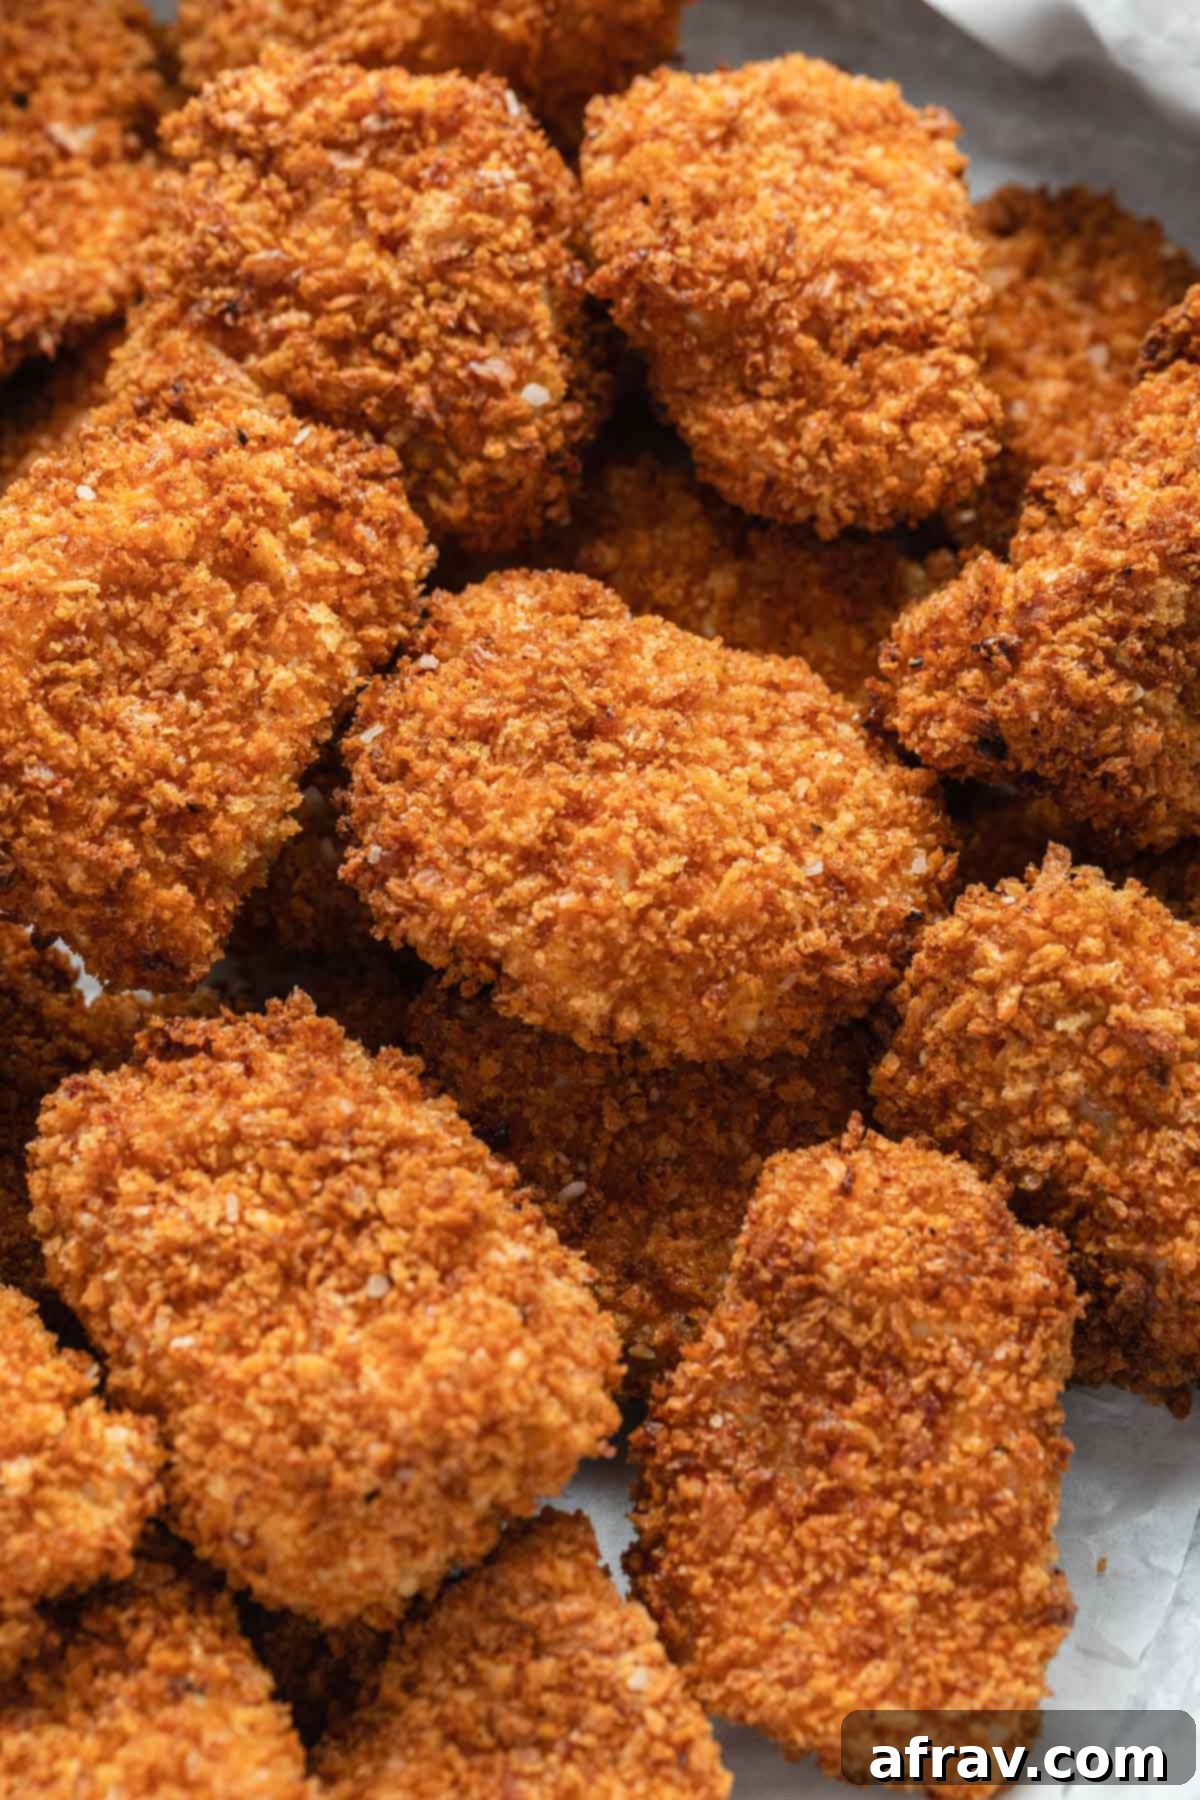
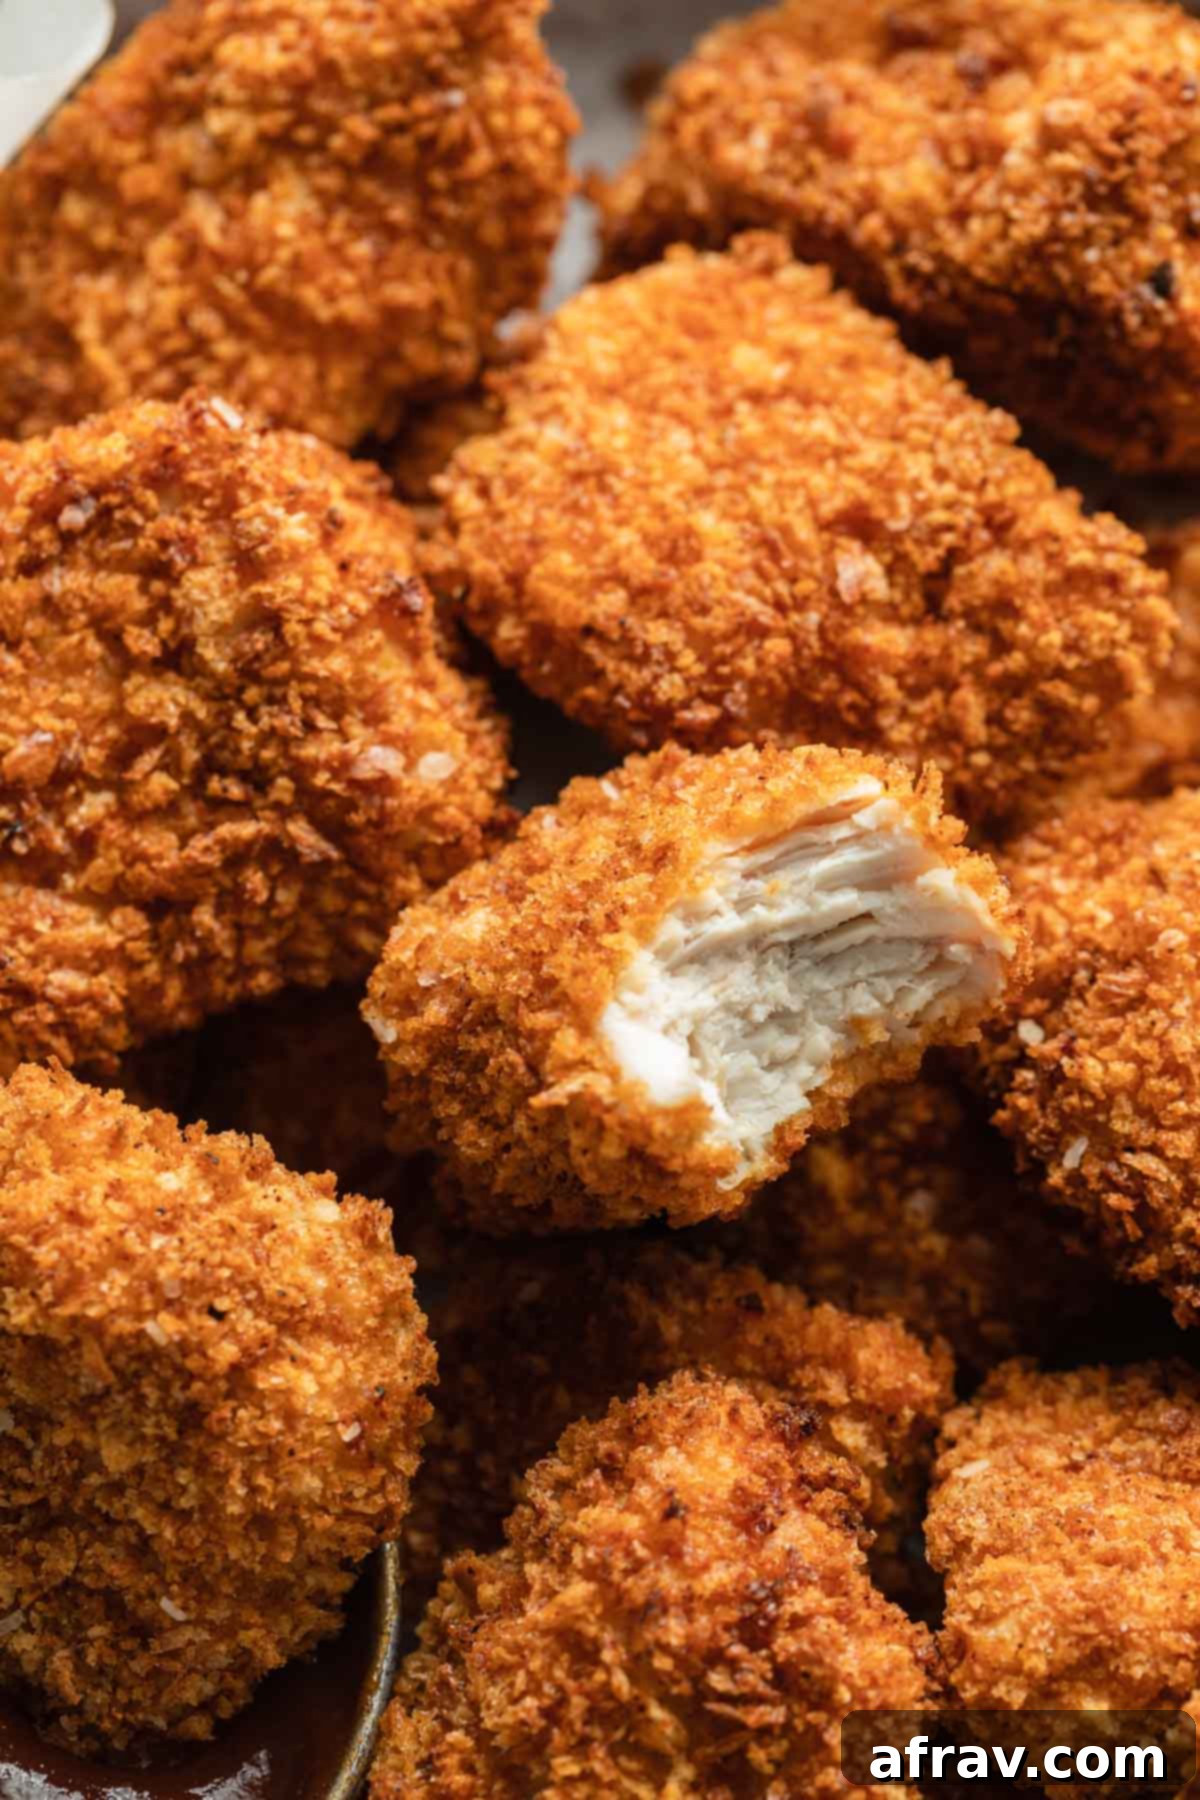
Say goodbye to soggy, greasy chicken nuggets and hello to the most delicious, ultra-crispy, and incredibly tender Air Fryer Chicken Bites! These homemade chicken nuggets are a game-changer, achieving that coveted golden-brown crunch with just a fraction of the oil used in traditional deep-frying. Perfect for picky eaters, impressive enough for an appetizer spread, or ideal as a satisfying game day snack, this recipe brings a healthier, homemade twist to a beloved classic.
We’re taking a cherished childhood favorite – the humble chicken nugget – and elevating it with the magic of the air fryer. Not only are these air fryer chicken bites (which you can absolutely call homemade chicken nuggets!) exceptionally easy to prepare, but they also lean towards the healthier side, making them a fantastic choice for any meal.
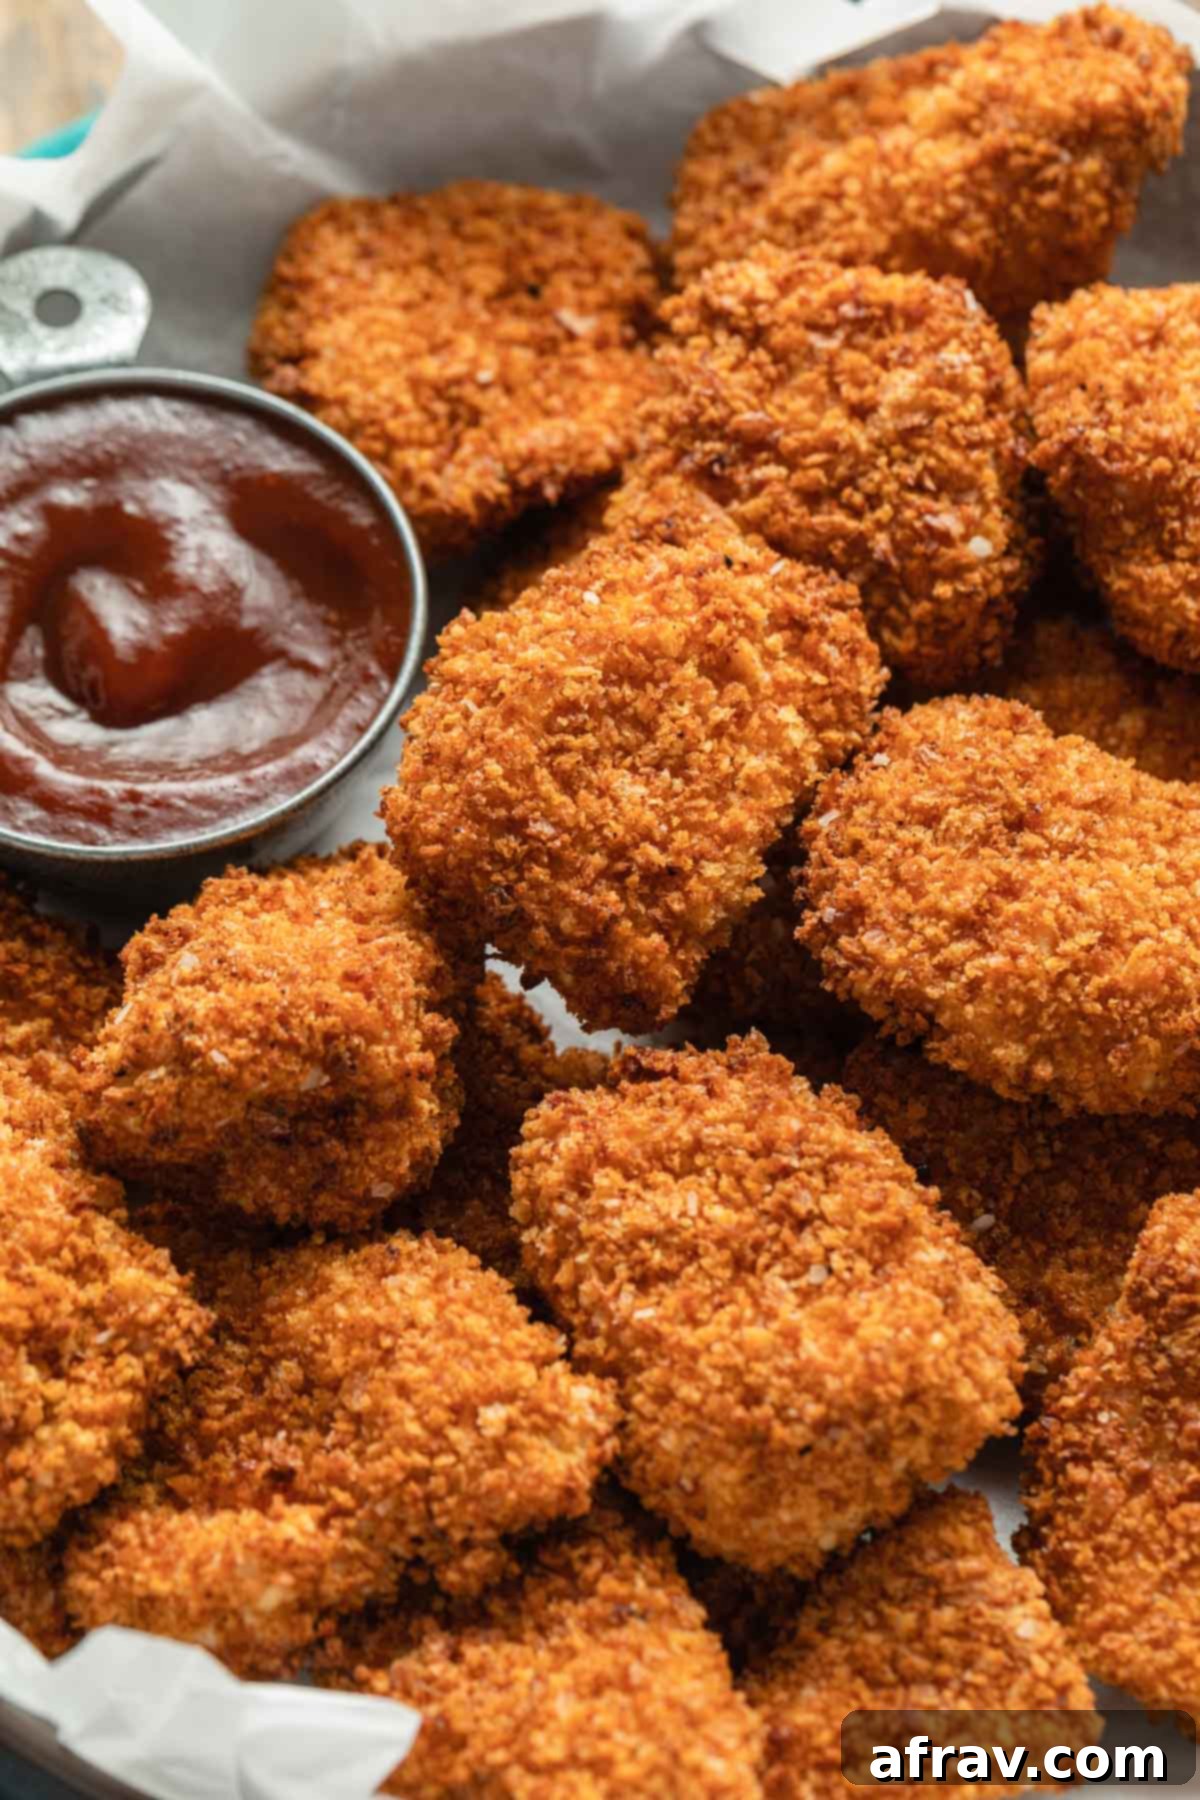
The air fryer truly excels at transforming breaded foods into crispy delights without the need for excessive oil that comes with deep frying or even pan frying. In most cases, a simple, light spritz of cooking oil is all it takes to achieve perfectly golden and irresistibly crunchy results. It’s a culinary marvel that delivers on taste and texture while cutting down on fat.
This method has quickly become a favorite for many of our breaded recipes. Some of our top picks for the air fryer include crispy pork schnitzel, flaky air-fried cod fish, and succulent breaded shrimp. And now, these delightful crispy chicken bites are making a much-anticipated addition to that stellar list!
Why You’ll Love This Air Fryer Chicken Bites Recipe
There are countless reasons why these homemade air fryer chicken nuggets will become a staple in your kitchen. Here’s a closer look at what makes this recipe truly special:
- Perfect for Meal Prep: These chicken bites are an absolute lifesaver for busy weeknights or healthy lunchboxes. You can easily make a big batch, then store them in the fridge for a few days or freeze them for longer. When hunger strikes, simply reheat them in the air fryer, and they’ll be as good as freshly made!
- Unbelievably Crispy Breading: The secret to their incredible crunch lies in a simple yet effective technique: toasting the panko crumbs first. While panko breadcrumbs are naturally crispier than traditional breadcrumbs, a quick 5-minute toast in the oven before breading turns them a beautiful golden brown and amplifies their crunch factor to a whole new level. This step is a game-changer for texture!
- Minimal Oil Required: One of the biggest advantages of air frying is its ability to create crispy textures with very little oil. This recipe is no exception, requiring just a light spritz of cooking spray on the panko crumbs before toasting. This significantly reduces the fat content compared to deep-fried versions, making it a healthier alternative without compromising on flavor or crunch.
- Versatile Pairing Options: These chicken nuggets are incredibly versatile. Enjoy them on their own as a satisfying snack, or transform them into a complete and delicious meal. Pair them with some crispy air fryer potato wedges for a classic combination. They also make excellent additions to a snack platter alongside other air fryer favorites like air fryer gnocchi or spicy jalapeno poppers.
Details on the Essential Ingredients
Crafting these perfect air fryer chicken bites requires a few key ingredients, each playing an important role in achieving that ideal flavor and texture. Here’s a detailed breakdown of what you’ll need:
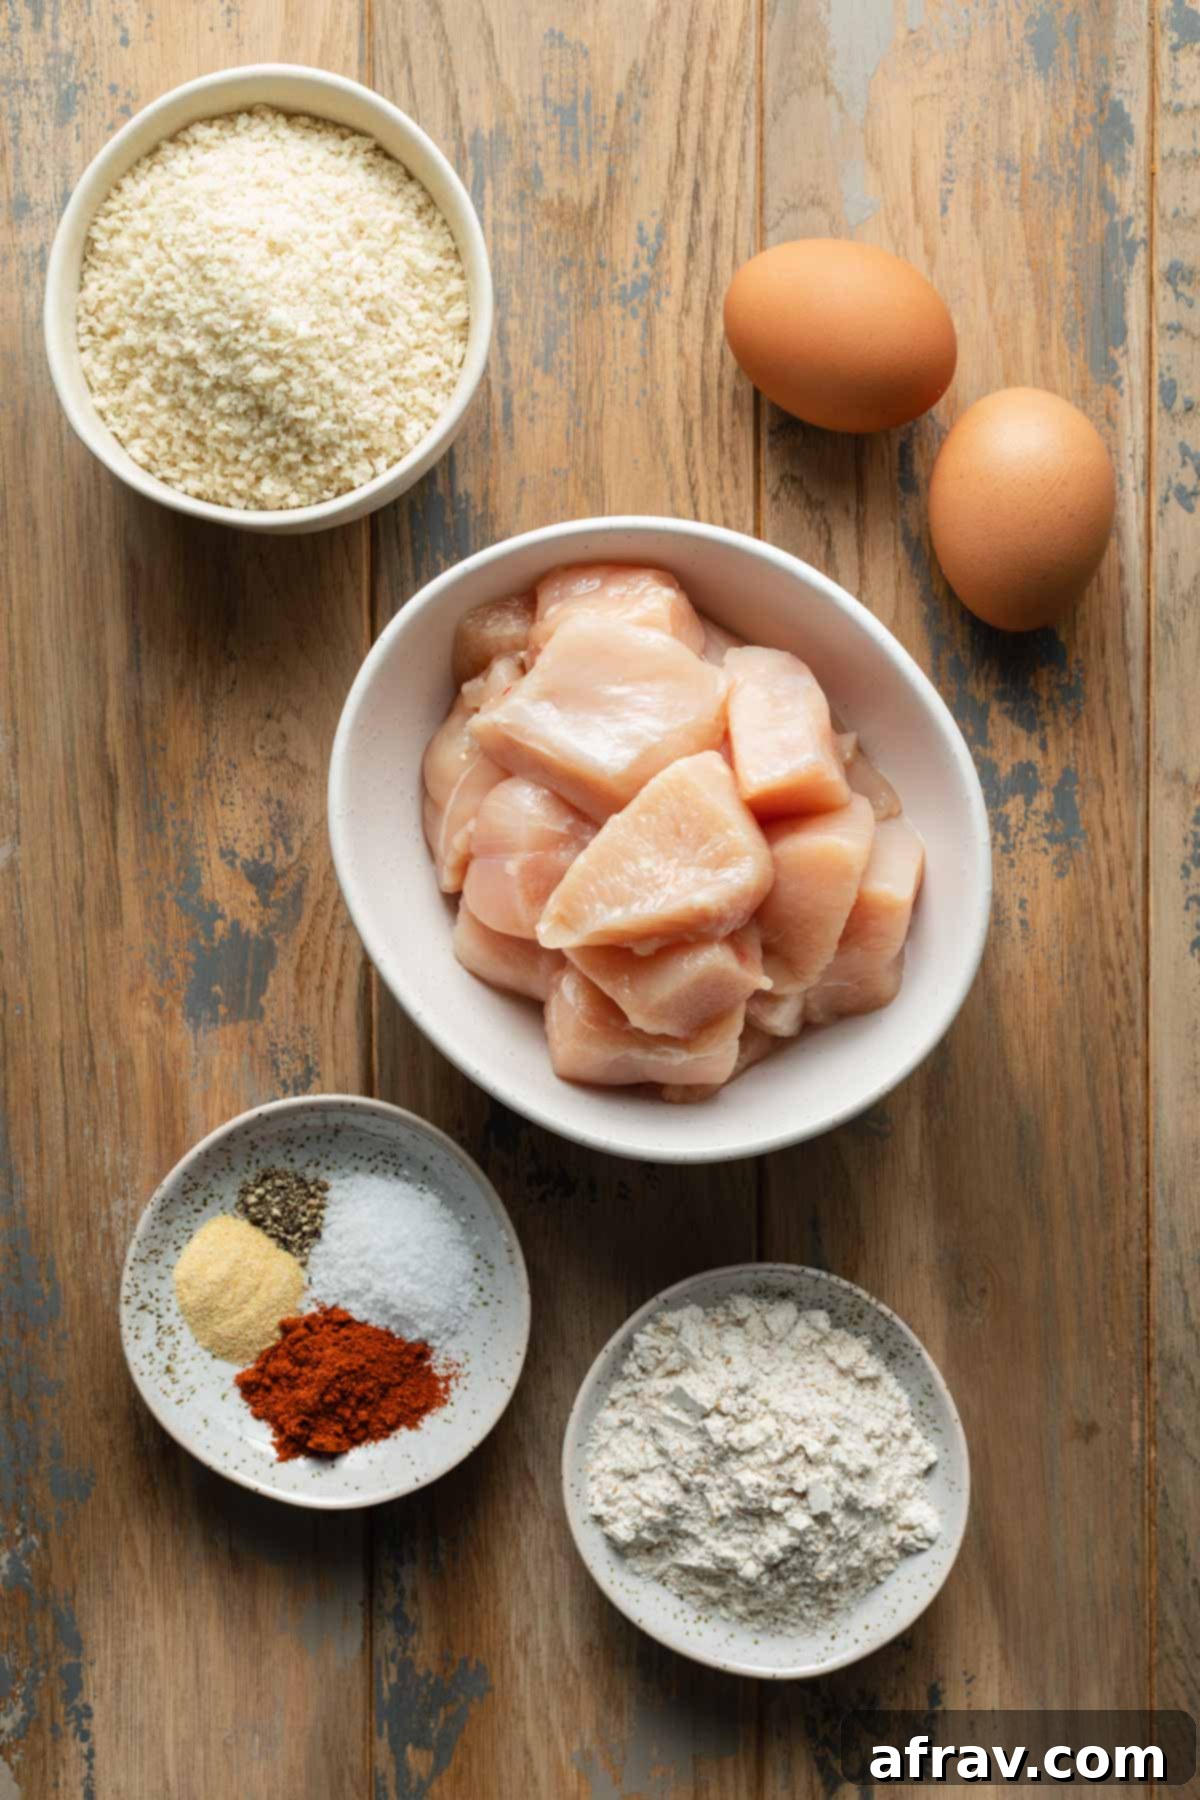
- Chicken: For this recipe, you’ll need 1 pound of boneless, skinless chicken breast. It’s best to cut the chicken into roughly 2-inch pieces, which is typically about 2 large chicken breasts. This size ensures even cooking and creates perfectly bite-sized nuggets. If you prefer a slightly richer flavor and juicier texture, boneless, skinless chicken thighs can be used as a delicious alternative. Just ensure they are also cut into uniform pieces for consistent cooking.
- Flour: A mere 1/4 cup of flour is used to lightly dust the chicken pieces. This initial coating is crucial as it absorbs any surface moisture from the chicken, creating a dry exterior. This dry surface then allows the egg wash to adhere much more effectively, which in turn helps the panko breading stick beautifully. The recipe suggests whole wheat flour for a slightly more wholesome touch, but standard all-purpose white flour will work just as well.
- Egg: You’ll need two large eggs, whisked together to create an egg wash. After the chicken is floured, it’s dipped into this egg mixture. The egg wash acts as a binding agent, providing the necessary sticky layer for the panko crumbs to cling to, ensuring a thick, even, and crispy coating.
- Panko Crumbs: These are the star of the crispy coating! I recommend using white panko crumbs due to their light, airy, and flaky texture, which results in an unparalleled crispiness. However, whole wheat panko crumbs are also an excellent choice if you can find them. The key is to toast the panko crumbs in the oven first, a step that elevates their crispiness and gives them a beautiful golden hue. This simple pre-toasting makes all the difference for that extra crunch.
- Seasonings: A harmonious blend of smoked paprika, garlic powder, salt, and black pepper is used to season the panko crumbs, infusing flavor directly into the crispy coating.
- Smoked Paprika: Adds a wonderful smoky depth that complements the chicken perfectly. If you’re not a fan of smoky flavors, feel free to substitute with regular paprika for a milder, more classic taste.
- Garlic Powder: Provides a savory, aromatic base that enhances almost any savory dish.
- Salt and Black Pepper: Essential for bringing out all the flavors and providing a balanced seasoning profile.
You can also experiment with other dried herbs and spices to customize the flavor (see the “Seasoning Variations” section below for more ideas!).
How to Make Delicious Homemade Chicken Nuggets in the Air Fryer
Making these homemade chicken nuggets in your air fryer is a straightforward process that yields incredibly delicious results. Follow these steps for perfectly crispy and juicy bites every time:
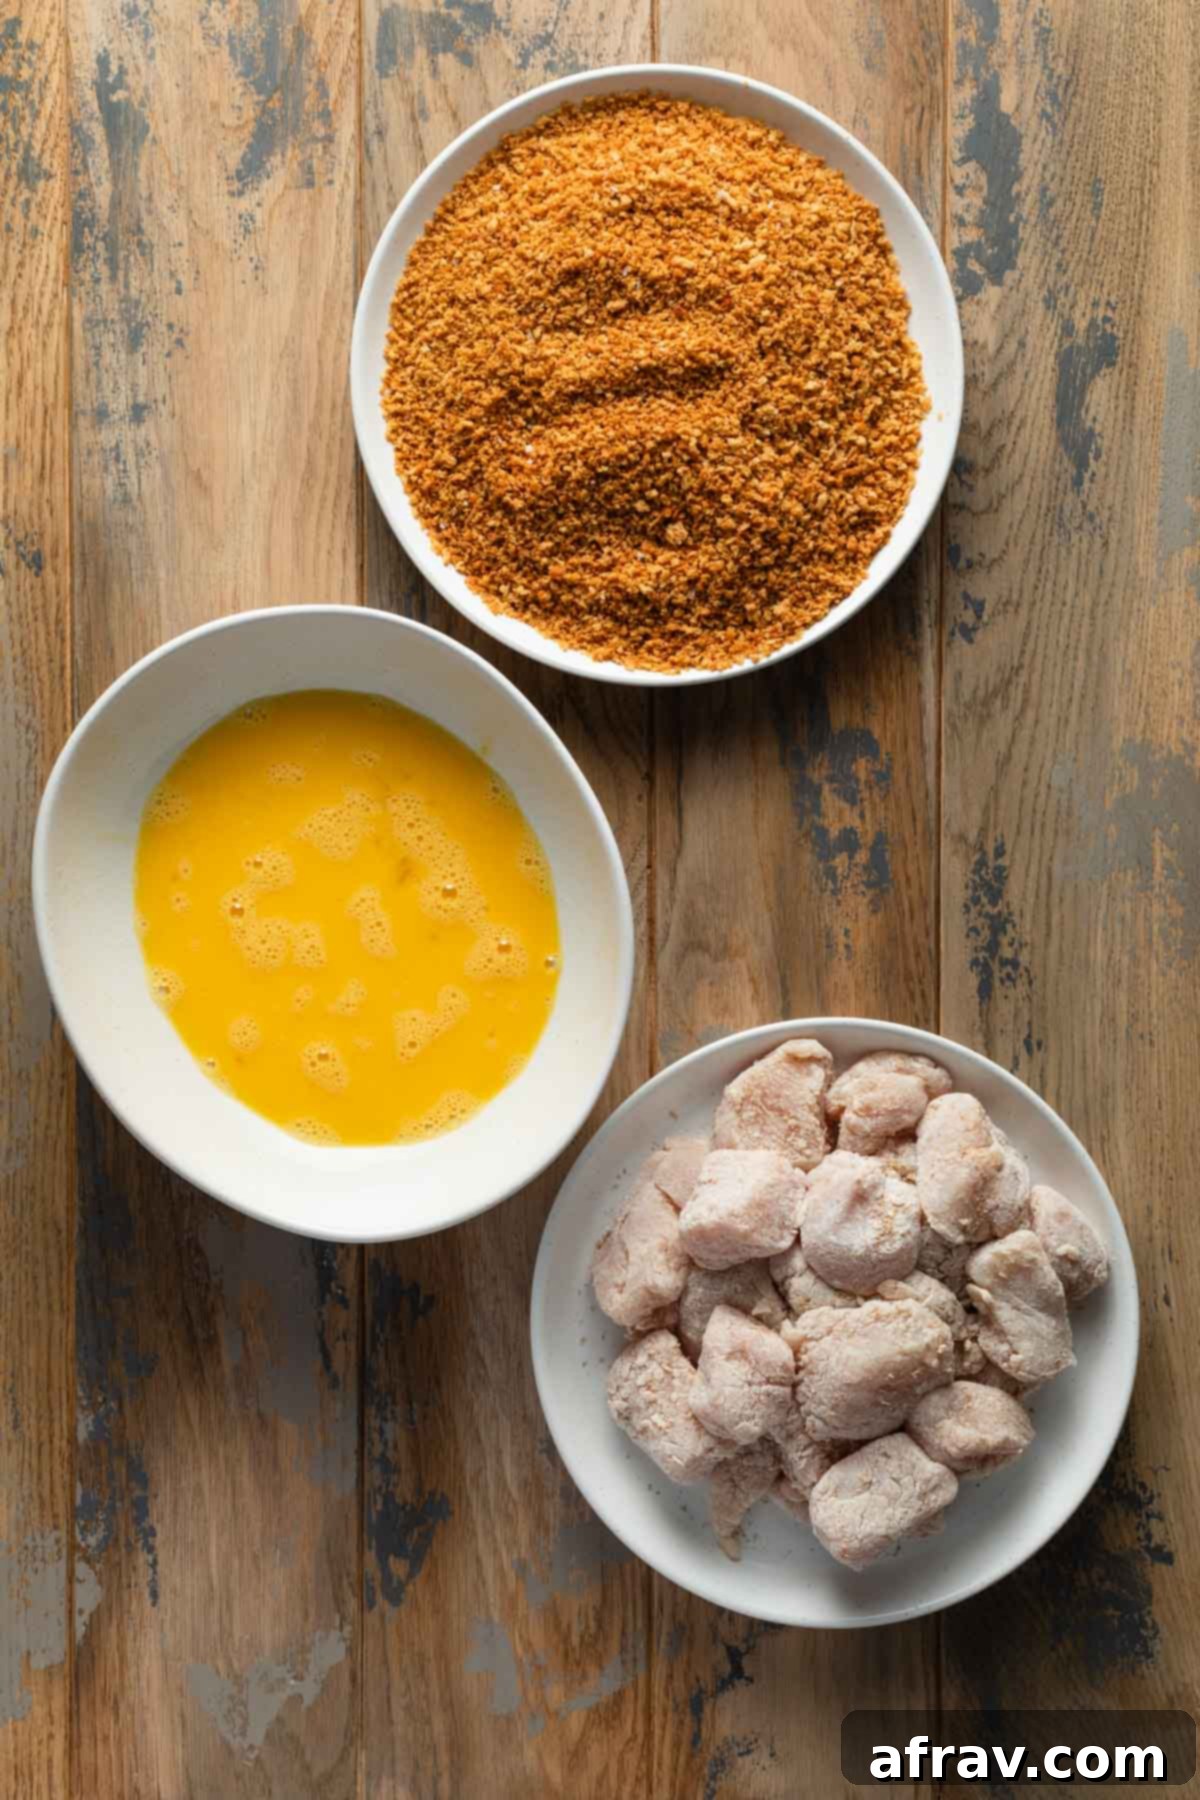
- Toast the Panko Crumbs: First, and this is a key step for maximum crispiness, preheat your oven to 400°F (200°C). Line a large baking sheet with parchment paper and spread the panko crumbs evenly across it. Lightly spritz the crumbs with a non-stick cooking spray or a light drizzle of oil. Bake for 5 minutes, or until the crumbs turn a beautiful golden brown. Make sure to stir them halfway through to ensure even browning and prevent burning. Once toasted, remove them from the oven and let them cool completely. This pre-toasting step gives them an extra layer of crunch.
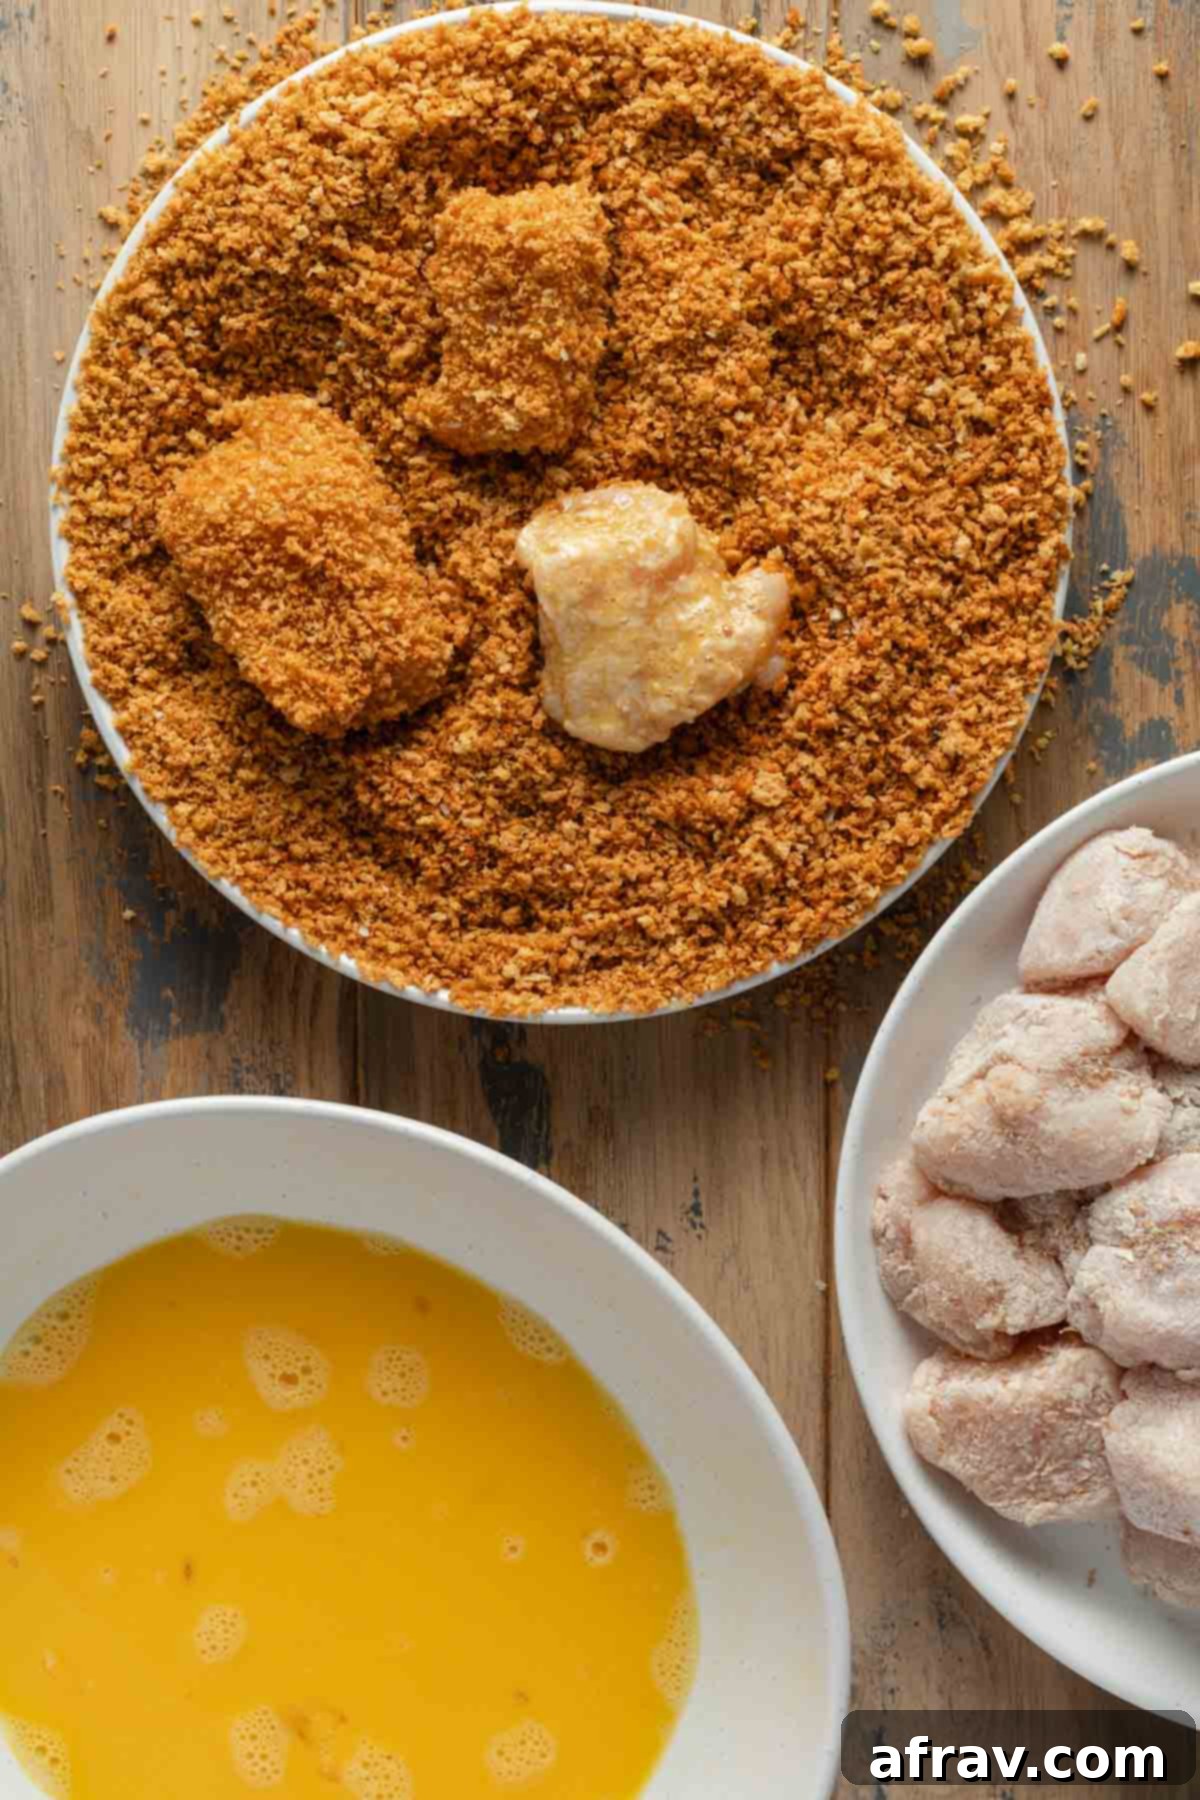
- Flour the Chicken: Add the cut chicken pieces and the 1/4 cup of flour to a large ziplock bag. Seal the bag and shake it vigorously until all the chicken pieces are thoroughly coated with a light, even dusting of flour. This thin layer helps the egg wash adhere better.
- Prepare the Egg Wash: In a shallow bowl, whisk together the two large eggs until well combined. This will be your binder for the panko crumbs.
- Season the Panko: In a separate shallow pie dish or a large rimmed plate, combine the cooled, toasted panko crumbs with your chosen seasonings: salt, smoked paprika, garlic powder, and black pepper. Mix them well so the flavor is evenly distributed.
- Breading the Chicken: Now it’s time to bread the chicken! Dip each floured chicken piece into the egg wash, allowing any excess egg to drip off. Then, transfer the egg-coated chicken piece into the seasoned panko crumb mixture. Use your fingers to lightly press the crumbs firmly into the surface of the chicken to ensure a thick and even coating. This two-hand method (one wet hand for egg, one dry hand for panko) is crucial to avoid clumpy fingers.
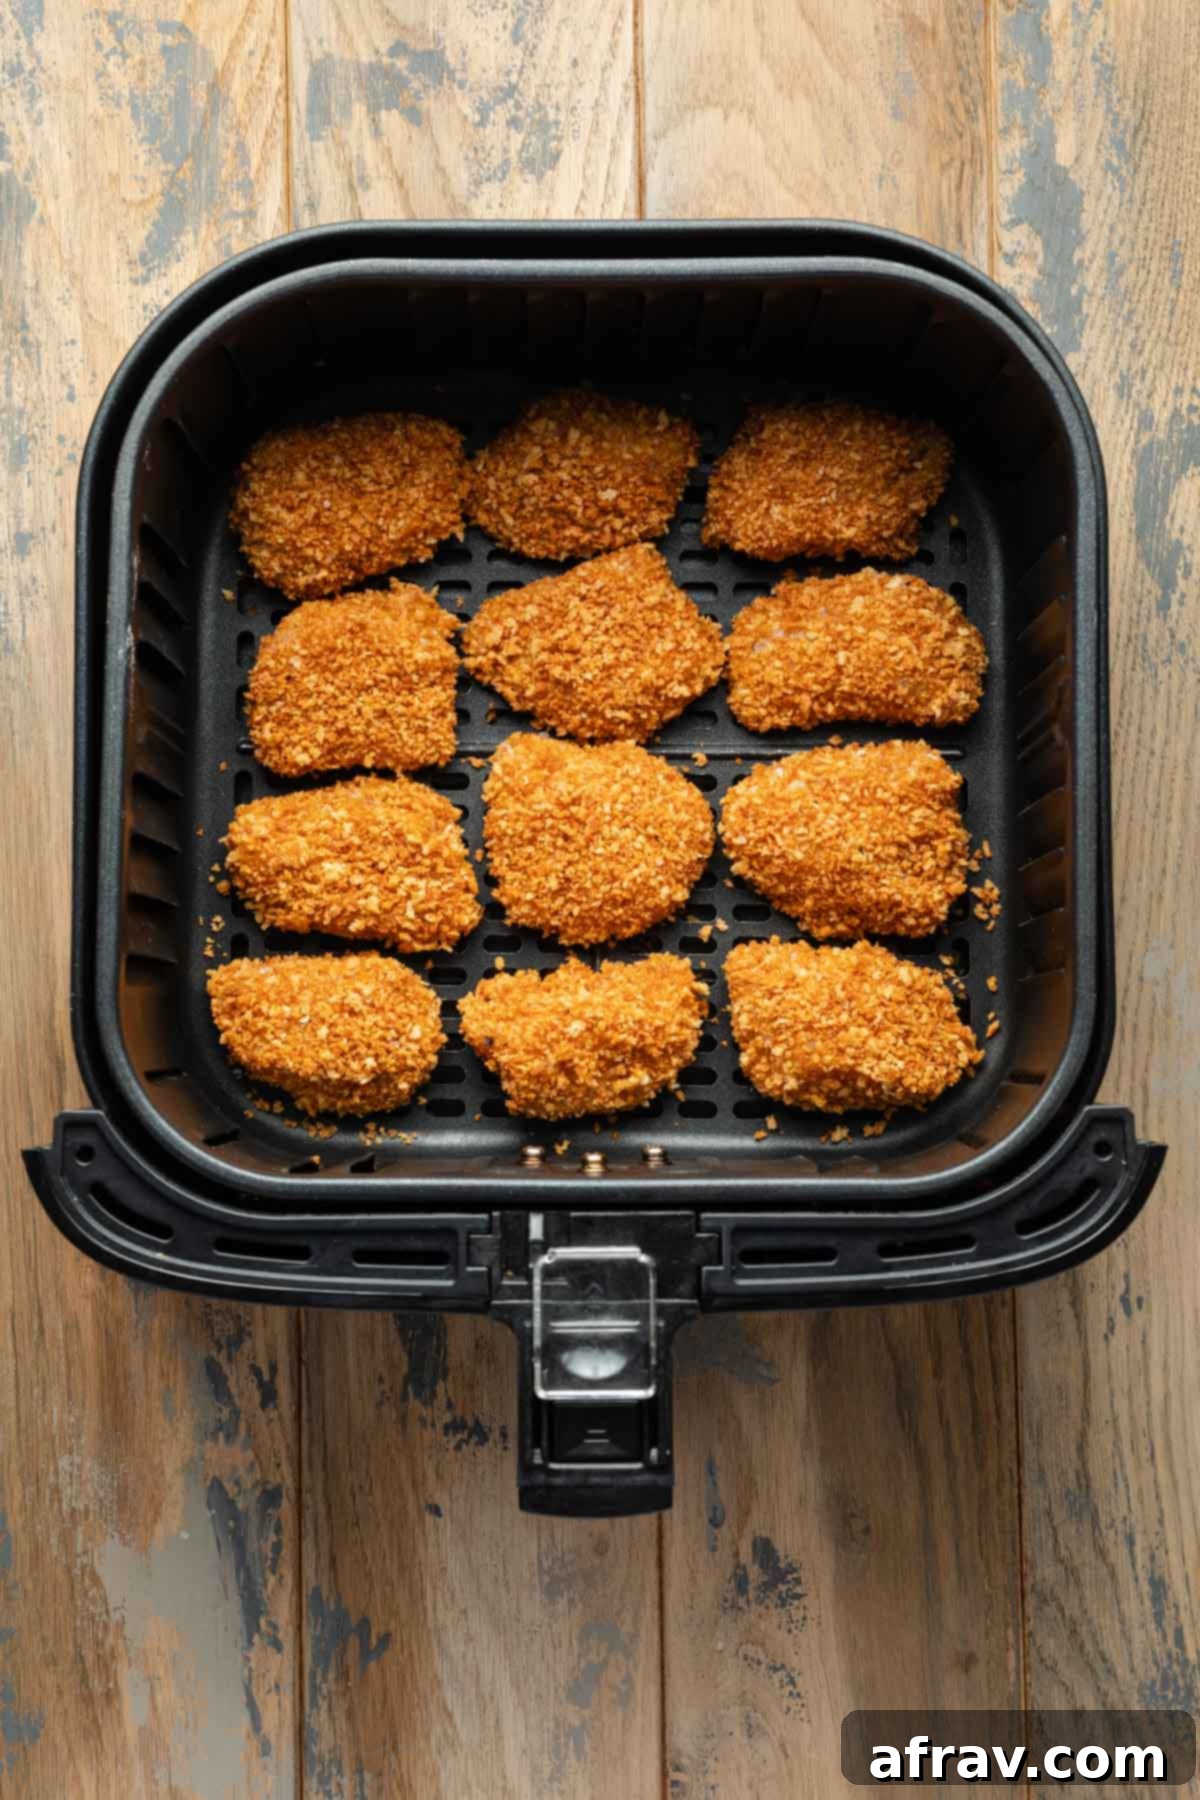
- Air Fry in Batches: Arrange the breaded chicken pieces in a single layer in your air fryer basket. It’s essential not to overcrowd the basket, as this allows the hot air to circulate properly, ensuring even cooking and crispiness. You will likely need to air fry in two or more batches depending on the size of your air fryer. Place any remaining breaded chicken in the fridge while the first batch cooks.
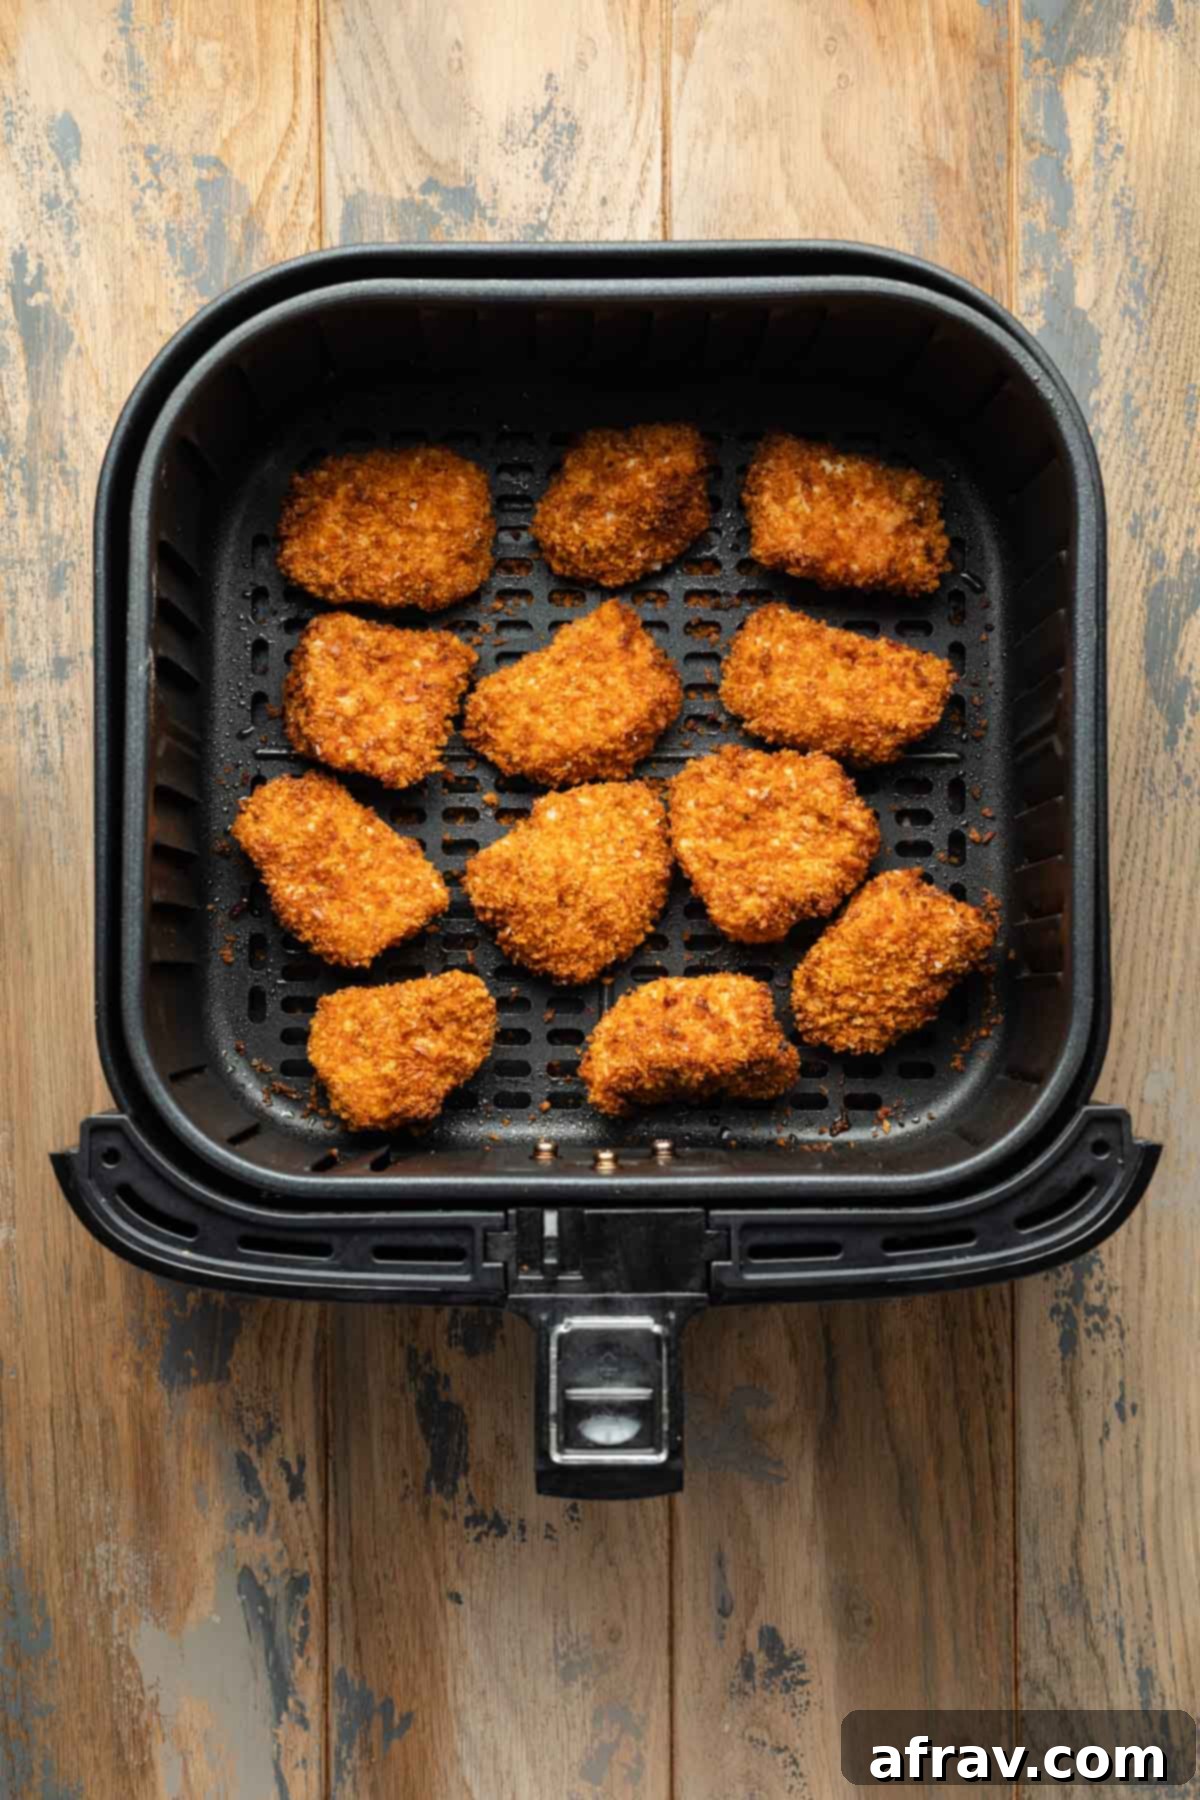
- Cook the First Batch: Set your air fryer to 400°F (200°C) and air fry for 6 minutes. After 6 minutes, carefully flip the chicken nuggets over to ensure both sides get equally crispy and golden. Continue to air fry for another 5-6 minutes, or until the chicken is cooked through, golden brown, and delightfully crispy. The internal temperature of the chicken should reach 165°F (74°C) when tested with a meat thermometer.
- Cook Remaining Batches: Repeat the process with the remaining breaded chicken. Keep in mind that subsequent batches may cook slightly faster as the air fryer will already be preheated and at temperature. Always monitor for doneness and internal temperature.
Exciting Seasoning Variations
While the basic seasoning mix for these air fryer chicken bites is fantastic, don’t hesitate to get creative and tailor the flavors to your preference. Here are some ideas to inspire your culinary adventures:
- For a Non-Smoky Flavor: If the smoky notes of paprika aren’t your preference, simply swap out the smoked paprika for an equal amount of regular sweet paprika. This will provide a milder, more classic flavor profile while still adding a beautiful color.
- For an Extra Smoky Kick: If you adore smoky flavors, consider adding a pinch of chipotle seasoning to the panko mixture. Chipotle will introduce a deeper, more intense smokiness with a hint of heat.
- To Make Them Spicy: For those who love a bit of heat, you have several options! Incorporate some chili powder, a small pinch of cayenne pepper, or a few crushed red pepper flakes into the breading. Start with a small amount and adjust to your desired spice level.
- For a Savory Herbaceous Touch: Elevate the savory profile by mixing in some dried herbs. Oregano, basil, or parsley would all be delicious additions, bringing an aromatic, earthy depth to the nuggets. A “poultry seasoning” blend could also work wonderfully.
- Everything Bagel Seasoning: For a unique and trendy twist, replace some of the traditional seasonings with “Everything but the Bagel” seasoning. Its blend of sesame seeds, poppy seeds, garlic, onion, and salt offers a fantastic texture and a burst of savory flavor that pairs surprisingly well with chicken.
Delicious Dip Options
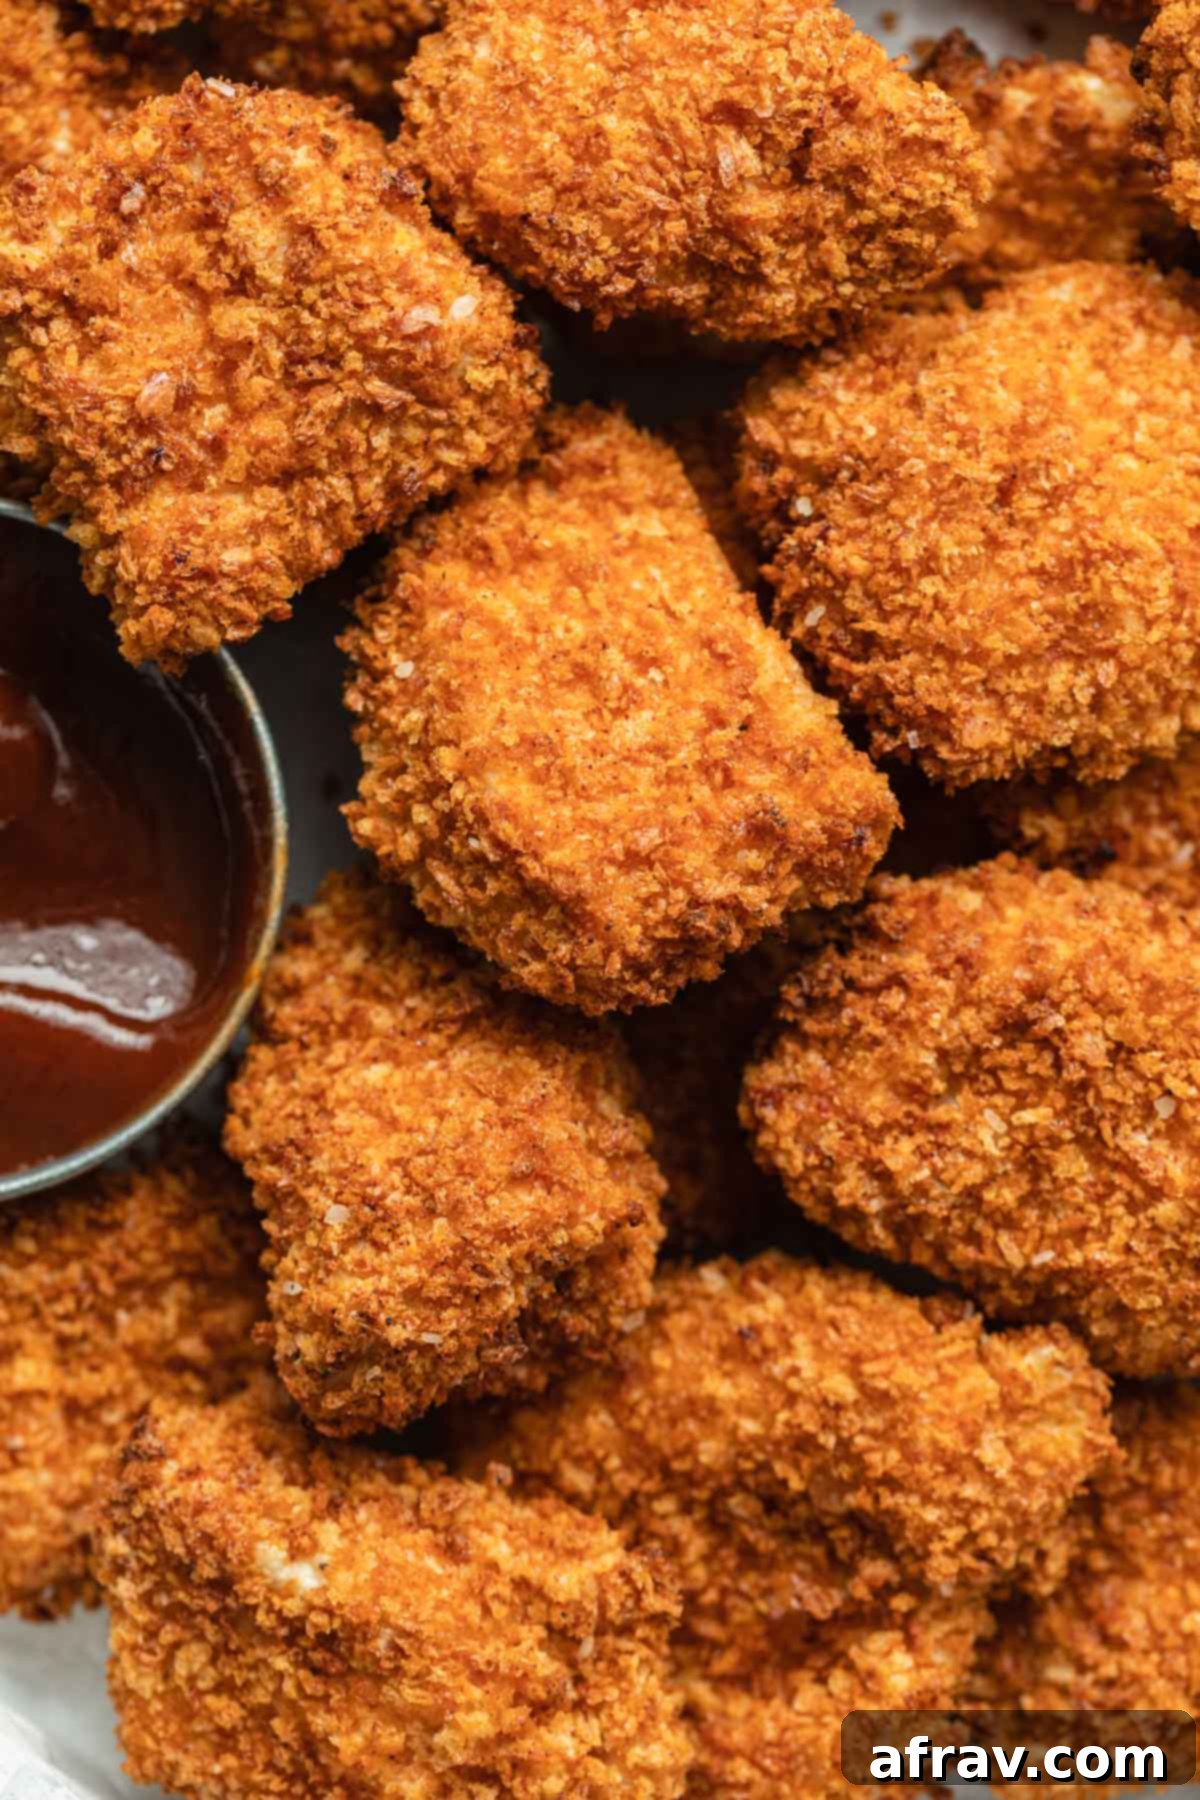
What’s a chicken nugget without a fantastic dipping sauce? The options are virtually endless, and part of the fun is finding your perfect pairing. Here are some of our favorite dips that beautifully complement these crispy air fryer chicken bites:
- BBQ Sauce: A classic for a reason! Its sweet and tangy profile is a timeless match for chicken.
- Ranch Dressing: Creamy, savory, and with a hint of herbs, ranch is a universally loved dip for nuggets.
- Sweet and Sour Sauce: Offers a delightful contrast with its bright, fruity, and tangy notes.
- Honey Mustard: The perfect balance of sweet and savory, adding a zesty kick.
- Marinara Sauce: A warm, herb-infused tomato sauce provides a comforting Italian-inspired option.
- Ketchup: The ultimate simple, kid-friendly choice that never goes out of style.
- Chipotle Dip: For those who enjoy a smoky, spicy, and creamy dip that adds a punch of flavor.
- Jalapeno Dip: Brings a fresh, zesty, and moderately spicy kick that’s incredibly addictive.
- Queso: A warm, cheesy, and savory dip that’s perfect for a game day spread.
Frequently Asked Questions About Air Fryer Chicken Bites
Here are some common questions and helpful answers to ensure your air fryer chicken bites turn out perfectly every time:
I highly recommend setting your air fryer to 400°F (200°C) for these chicken bites. This high temperature is ideal because it allows the chicken to cook through efficiently without drying out, while simultaneously ensuring the panko coating becomes beautifully browned and incredibly crispy. Cooking at a lower temperature would prolong the cooking time, making it harder for the breading to achieve optimal crispiness and increasing the risk of the chicken nuggets becoming dry.
At 400°F (200°C), these chicken nuggets typically take only about 11-12 minutes to cook completely. This involves an initial 6 minutes, followed by flipping and another 5-6 minutes. However, cooking times can vary slightly depending on several factors: the specific brand and model of your air fryer, its wattage, and the exact size and thickness of your chicken pieces. The nuggets are perfectly done when they are golden brown and crispy on the outside, and no longer pink in the middle. For accuracy and food safety, the internal temperature of the chicken should register 165°F (74°C) when checked with a reliable meat thermometer.
While you technically *can* use traditional breadcrumbs, for the best and crispiest coating, I strongly recommend sticking with panko crumbs. Panko are Japanese-style breadcrumbs that are specifically designed to be lighter, flakier, and coarser than regular breadcrumbs. This unique texture allows them to absorb less oil and become significantly crispier. Regular breadcrumbs, with their finer and softer texture, simply won’t achieve the same level of satisfying crunch.
Toasting the panko crumbs first isn’t absolutely mandatory, but it’s a step I highly recommend if you want to elevate the crispiness and depth of flavor. This simple pre-toasting process turns the crumbs a beautiful golden brown and gives them an extra layer of crunch that truly makes a difference in the final texture of your chicken bites.
Absolutely! If you prefer a slightly juicier and richer flavor, you can certainly substitute 1 pound of boneless, skinless chicken thighs for the chicken breasts. Just ensure you cut them into uniform 2-inch pieces, similar to the breast, to ensure even cooking.
This recipe was thoroughly tested and perfected using a 5.8-quart Cosori basket-style air fryer. If you are using a different brand, model, or size of air fryer, you may need to make slight adjustments to the cooking time or temperature to achieve the best results. It’s always a good idea to monitor your first batch closely.
Storage, Freezing, and Reheating Instructions
These air fryer chicken bites are fantastic for making ahead or enjoying as leftovers. Here’s how to properly store, freeze, and reheat them to maintain their deliciousness:
- Storage: Any leftover cooked chicken bites should be stored in an airtight container in the refrigerator. When stored correctly, they will remain fresh and tasty for 3-4 days.
- Reheating from the Fridge: The breading on the chicken bites will naturally soften a bit in the fridge. To restore their crispiness and warmth, simply air fry them at 350°F (175°C) for about 6-7 minutes. Keep an eye on them until they are heated through and the breading is beautifully crispy again. Be cautious not to overheat them, as this can lead to dry chicken.
- Freezing Cooked Chicken Bites: These nuggets freeze wonderfully! To freeze them, first arrange the completely cooled, cooked chicken nuggets in a single layer on a baking sheet. Place the baking sheet in the freezer for a few hours until the nuggets are fully frozen solid. This prevents them from sticking together. Once frozen, transfer the nuggets to a freezer-safe bag or airtight container and store them in the freezer for up to 2-3 months.
- Reheating from Frozen: To reheat the chicken bites directly from frozen, place them in your air fryer basket in a single layer. Air fry at 350°F (175°C) for approximately 10-12 minutes, or until the breading is crispy and the chicken is thoroughly heated through to an internal temperature of 165°F (74°C).
Essential Recipe Tips for Perfect Air Fryer Chicken Bites
Achieving perfectly crispy and juicy air fryer chicken bites is easy when you follow these helpful tips:
- Seasoning to Your Taste: These nuggets are intentionally seasoned to be a versatile base, perfect for dipping in various sauces. If you prefer a bolder flavor profile right out of the air fryer, don’t hesitate to increase the amount of seasonings or experiment with additional dried herbs and spices in your panko mixture.
- Uniform Nugget Size: For consistent cooking, it’s crucial to cut your chicken into roughly 2-inch pieces. Larger pieces will naturally require a longer cooking time, and smaller pieces might cook too quickly and dry out. Aim for uniformity to ensure every bite is perfectly cooked.
- Efficient Flour Coating: Instead of dipping each chicken piece individually in flour, save time and minimize mess by adding all the cut chicken pieces and the flour to a large ziplock bag. Seal the bag and shake it well until all the chicken is evenly coated with a light dusting. Before moving to the egg wash, shake off any excess flour to prevent clumping.
- The Two-Hand Breading Process: To keep your hands clean and avoid clumpy fingers, adopt the “wet hand, dry hand” method. Use one hand (your “wet hand”) to handle the chicken in the egg wash. Use your other hand (your “dry hand”) exclusively for coating the chicken in the panko crumbs. This prevents a sticky build-up on your fingers.
- Air Fryer Preheat Considerations: While I personally didn’t preheat my air fryer for this specific recipe, some air fryer models perform better with preheating. If your air fryer manual recommends preheating, or if you find your first batch takes longer, feel free to preheat it to 400°F (200°C) before adding the nuggets. This might slightly reduce the overall cooking time.
- Single Layer for Crispy Results: To ensure that each chicken bite cooks evenly and achieves maximum crispiness, it’s vital to arrange them in a single layer within the air fryer basket. Avoid overcrowding at all costs. Depending on the size of your air fryer, this will almost certainly require cooking in at least two separate batches.
- Flip for Even Browning: Don’t forget to flip the chicken nuggets halfway through the air frying process. This ensures that both sides are exposed to the circulating hot air, resulting in even cooking, consistent golden-brown color, and uniform crispiness.
- Avoid Overcooking: The key to juicy chicken nuggets is to cook them just until they’re done. The chicken nuggets are ready when their internal temperature reaches 165°F (74°C). Using a reliable meat thermometer is the best way to accurately check for doneness and prevent overcooking, which can lead to dry and less enjoyable results.
Explore More Air Fryer Recipes
If you’ve loved making these chicken bites, you’re in for a treat! The air fryer is incredibly versatile. Discover more delicious and easy recipes that utilize this amazing kitchen appliance:
- Air Fryer Fish Tacos
- Air Fryer Mini Pizza
- Air Fryer Scallops
- Air Fryer Tortilla Chips
- Air Fryer Carrots
- Air Fryer Beets
- Air Fryer Pita Chips
- Air Fryer Garlic Bread from Carmy
If you give this Air Fryer Chicken Bites recipe a try, I’d absolutely love to hear your thoughts! Please share your experience and what you think in the comments section below!
HUNGRY FOR MORE? Follow Crumb Top Baking on Instagram, Pinterest and Facebook!
Print

Air Fryer Chicken Bites
5 Stars 4 Stars 3 Stars 2 Stars 1 Star
No reviews
Author: Leanne
Prep Time: 15 minutes
Cook Time: 24 minutes
Total Time: 39 minutes
Yield: 4 servings
Category: Dinner; Appetizer
Method: Air Fry
Cuisine: American
Description
These Air Fryer Chicken Bites are incredibly crispy, tender, and juicy, made with a simple panko breading and minimal oil. They’re a kid-friendly favorite and also make a fantastic appetizer or game day snack!
Ingredients
- 1 1/2 cups panko crumbs
- Non-stick cooking spray
- 1 pound boneless, skinless chicken breasts (about 2 large breasts), cut into 2-inch pieces
- 1/4 cup whole wheat flour
- 2 large eggs
- 1 teaspoon salt
- 1 teaspoon smoked paprika
- 1/2 teaspoon garlic powder
- 1/4 teaspoon ground black pepper
Instructions
- Preheat oven to 400°F (200°C). Line a baking sheet with parchment paper and spread out the panko crumbs. Lightly spray with oil (non-stick cooking spray works well). Bake for 5 minutes, or until the crumbs are golden brown. (Stir a few times to ensure they brown evenly and don’t burn). Remove from oven and let cool completely.
- Add the flour and chicken to a large ziplock bag and toss until the chicken pieces are lightly coated with flour.
- Whisk together the eggs in a shallow bowl.
- In a separate shallow bowl or large rimmed plate, mix together the toasted panko crumbs, salt, smoked paprika, garlic powder and black pepper.
- Dip the floured chicken pieces in the egg wash, letting any excess egg drip off, and then coat with the panko crumb mixture. (Use your fingers to lightly press the crumbs into the surface of the chicken).
- Place the chicken pieces in a single layer in the air fryer basket. (You’ll need to air fry in two batches so place the remaining breaded chicken in the fridge).
- Air fry on 400°F (200°C) for 6 minutes. Flip the nuggets over and air fry for another 5-6 minutes, or until the internal temperature of the nuggets reach 165°F (74°C).
- Repeat with remaining chicken. (The second batch may cook faster than the first as the air fryer is already heated).
Notes
- You can substitute 1 pound of boneless, skinless chicken thighs for the chicken breasts for a slightly different texture and flavor.
- While not absolutely necessary, toasting the panko crumbs in the oven first is highly recommended for an extra crunchy breading.
- These nuggets are seasoned to be versatile for dipping. If you prefer more intense flavor, feel free to add more seasoning or experiment with different dried herbs and spices.
- For a non-smoky flavor, use regular paprika instead of smoked paprika.
- The chicken was cut into 2-inch pieces. Adjust cooking time slightly if your pieces are larger or smaller to ensure they cook through evenly without drying out.
- To prevent messy, clumpy hands during breading, use one hand for dipping the chicken in egg wash (“wet hand”) and the other for coating in panko crumbs (“dry hand”).
- I did not preheat my air fryer for this recipe, but if your specific air fryer model requires it, do so before adding the nuggets. This may slightly reduce the cooking time.
- This recipe was tested in a Cosori 5.8 quart basket-style air fryer. If you have a different brand, model, or size, you may need to adjust the air frying temperature and time slightly.
- For more detailed advice, serving suggestions, and troubleshooting tips, be sure to check out the sections above the recipe card.
