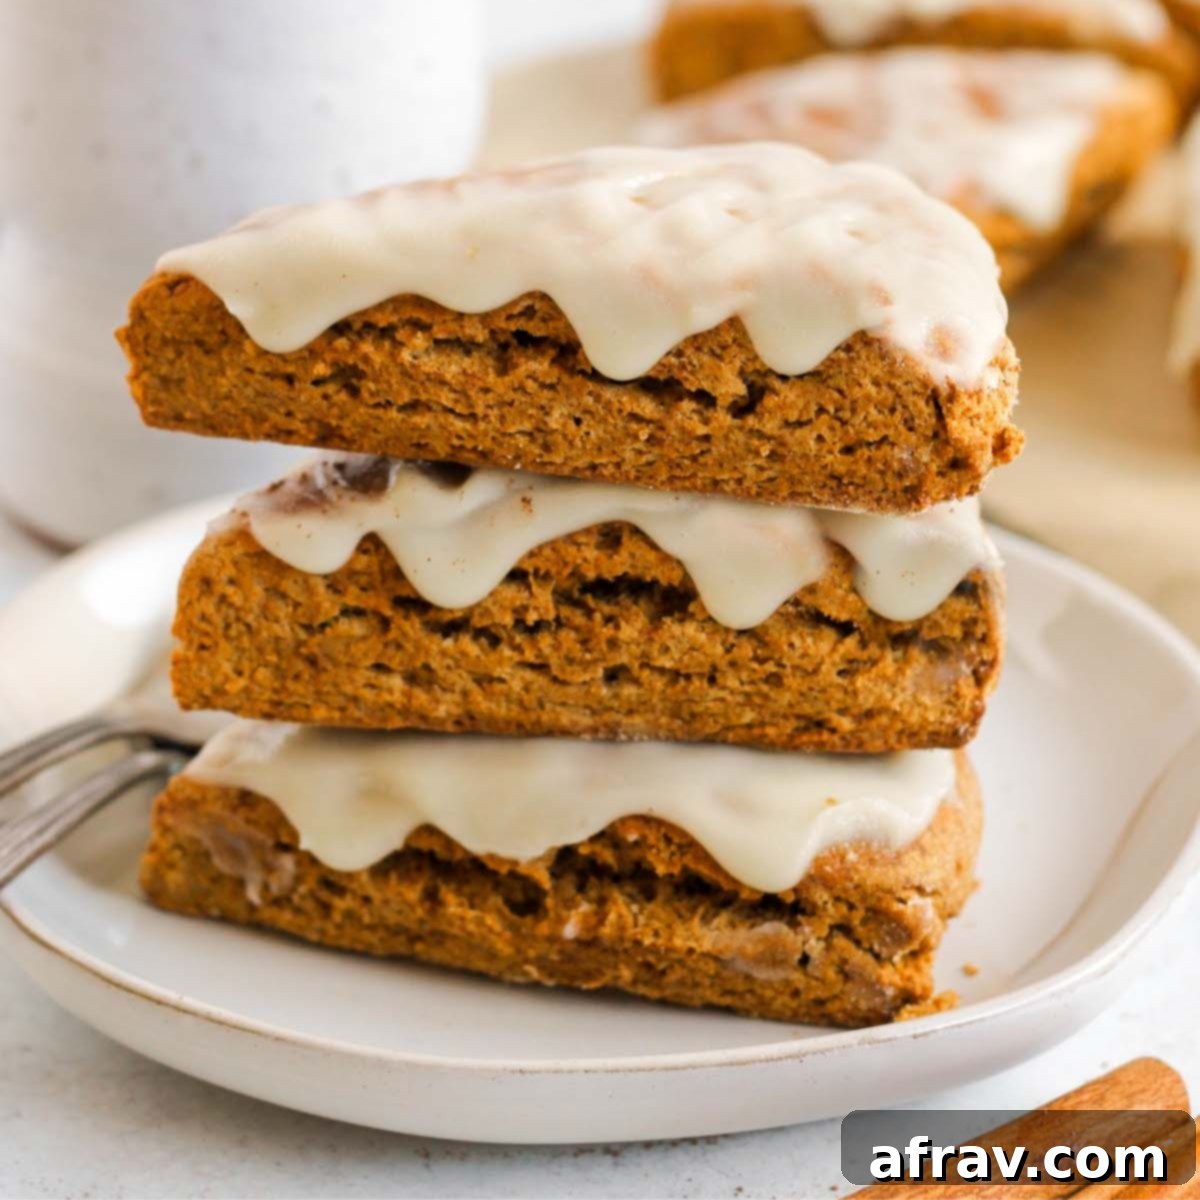
Irresistibly Fluffy Gluten-Free Pumpkin Scones: Your Go-To Recipe for Cozy Fall Baking
As the leaves begin to change and a crisp breeze fills the air, there’s nothing quite like the comforting aroma of pumpkin spice wafting from your kitchen. And what better way to embrace the season than with a batch of homemade, incredibly soft, and wonderfully fluffy gluten-free pumpkin scones? These delightful pastries are more than just a treat; they’re an experience, promising to become your new favorite fall baking tradition.
Imagine starting your day with a warm, spiced scone, perfectly paired with your morning coffee or tea. Or perhaps serving them as an elegant addition to a weekend brunch spread. These pumpkin scones are not only exquisitely delicious but also surprisingly easy to whip up, making them an ideal choice for bakers of all skill levels. Forget complicated techniques and endless chilling times – our recipe has been crafted for simplicity and speed, ensuring you can enjoy these autumnal delights in under an hour.
This recipe celebrates everything we love about fall, from the rich, earthy notes of pumpkin to the comforting embrace of cinnamon and pumpkin pie spice. Plus, with options to make them refined sugar-free and easily dairy-free, they cater to various dietary preferences without compromising on flavor or texture. Get ready to impress your family and friends, or simply treat yourself to a moment of pure culinary bliss with every tender bite of these irresistible gluten-free pumpkin scones.
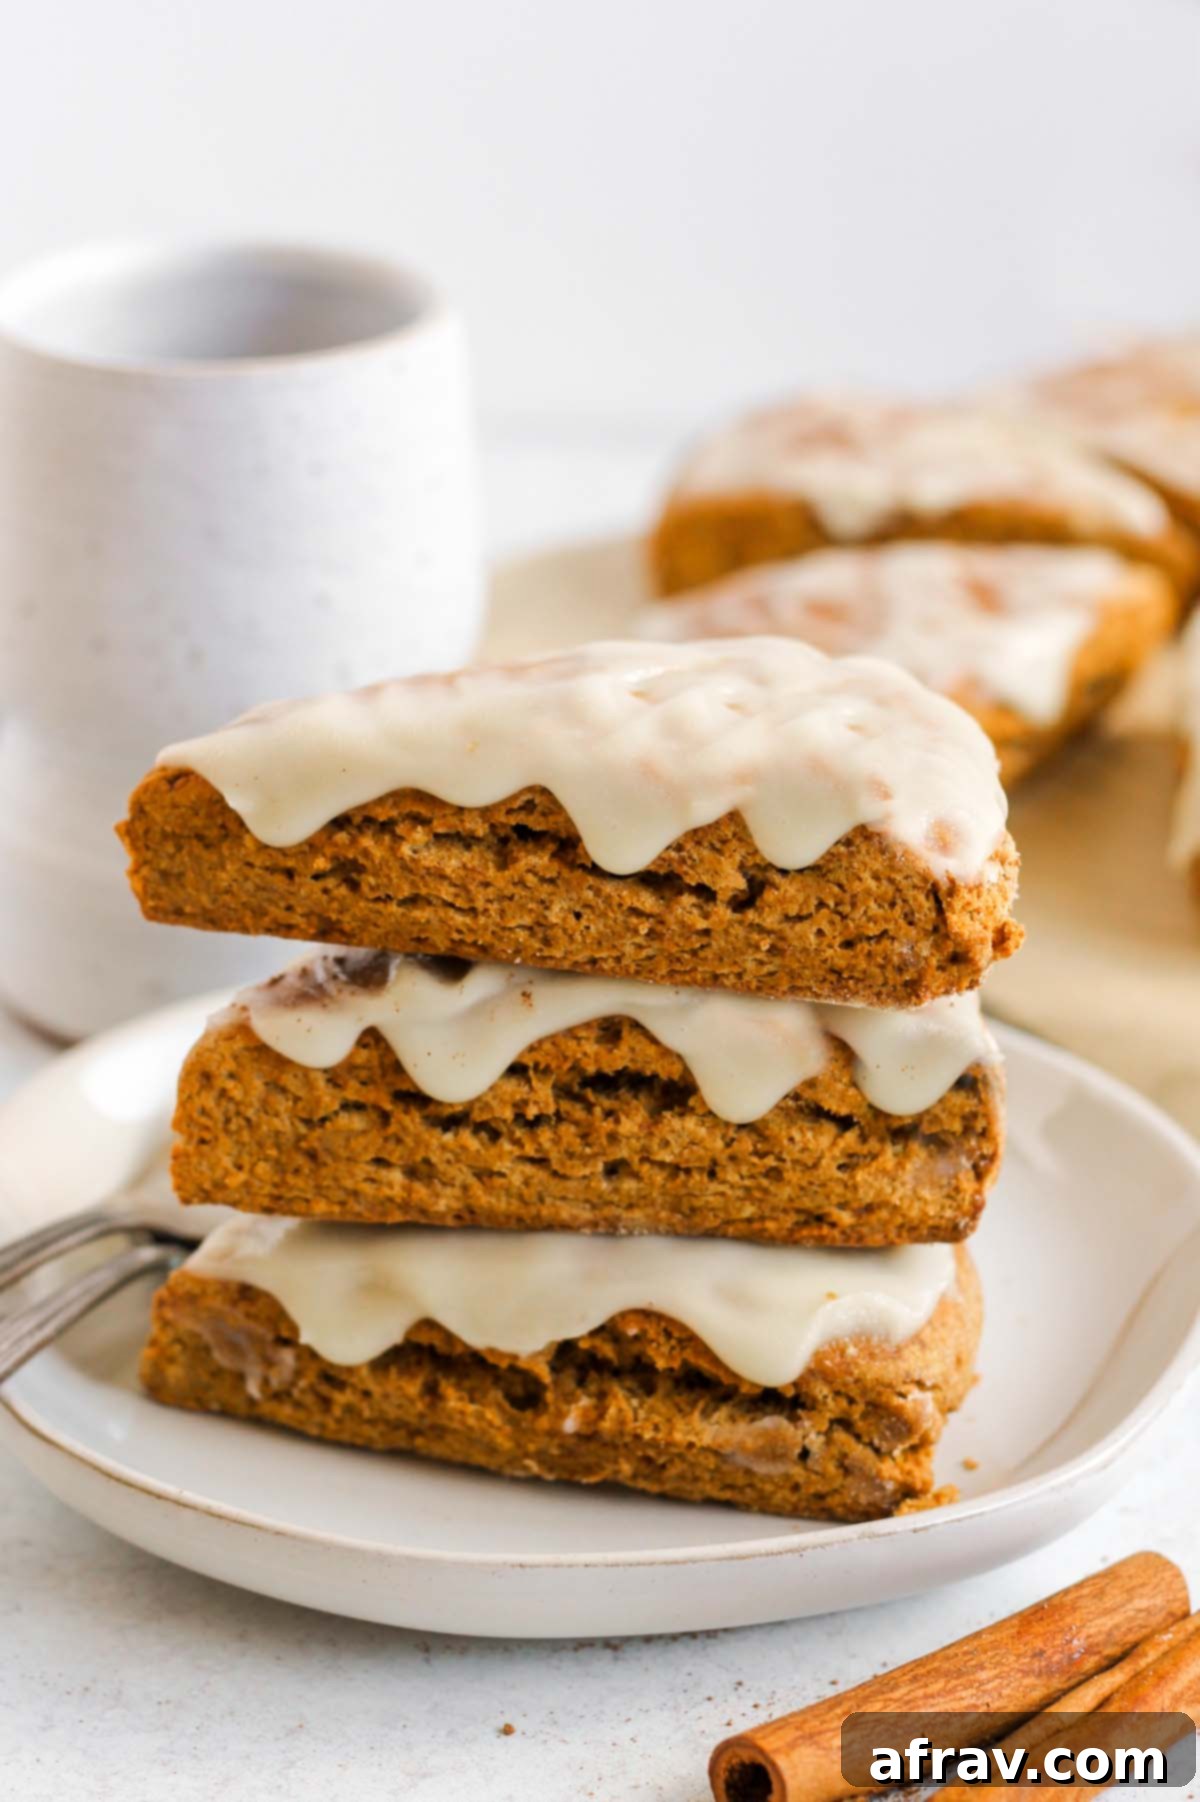
If I’m not baking these delicious gluten-free pumpkin scones, you’ll likely find me in the kitchen whipping up some other favorite fall treats. The season is just too short not to enjoy all the wonderful flavors it has to offer! Some of my other go-to recipes include chocolate chip pumpkin bread, homemade pumpkin spice granola, pumpkin breakfast cookies, easy gluten-free apple blondies, healthy apple cinnamon bread, or gluten-free apple cinnamon oat muffins. All perfect for capturing the essence of autumn!
Why These Gluten-Free Pumpkin Scones Will Become Your New Fall Favorite
These aren’t just any pumpkin scones; they are specifically designed to deliver a superior baking and eating experience. Here’s why you’ll find yourself reaching for this recipe again and again, solidifying their place as a must-have in your fall baking repertoire:
- Unbeatable Texture: Crisp Exterior, Tender Interior. Achieving the perfect scone texture can sometimes feel like a culinary quest, but with this recipe, it’s a guarantee. Each scone boasts a delicately crisp golden-brown exterior that gives way to a wonderfully crumbly, yet incredibly tender and moist interior. This delightful contrast of textures ensures every bite is a truly satisfying experience, making these pumpkin scones stand out from the rest and keeping you coming back for more.
- Mindfully Crafted for Dietary Needs: Gluten-Free & Refined Sugar-Free with Dairy-Free Option. We believe everyone should be able to enjoy delicious fall treats, which is why these scones are inherently gluten-free, using a carefully balanced blend of gluten-free flours. They are also naturally sweetened with coconut sugar, skillfully avoiding refined sugars without sacrificing a hint of sweetness. For those with dairy sensitivities or following a vegan diet, simple substitutions outlined below make these scones easily dairy-free, proving that healthy eating doesn’t mean compromising on flavor or indulgence.
- Embrace the Essence of Autumn: Rich & Cozy Fall Flavors. What would a pumpkin scone be without its signature fall spices? This recipe is generously infused with warm cinnamon, aromatic pumpkin pie spice, and a hint of vanilla, creating a symphony of flavors that truly evokes the spirit of autumn. Crowned with an optional luscious maple-infused glaze (like our homemade healthy coconut butter glaze), each scone delivers a comforting and festive taste that is simply irresistible and embodies the true spirit of the season.
- Effortless Baking: Quick & Easy, No Fuss Recipe. Don’t let the idea of homemade scones intimidate you. This recipe for gluten-free pumpkin scones is designed for maximum ease and efficiency. You won’t need a stand mixer, nor will you have to deal with complicated rolling techniques or extended chilling times. From start to finish, these pumpkin scones can be ready for the oven in under 20 minutes, making them perfect for busy mornings or spontaneous baking urges. It’s truly a simple process that yields professional-quality results every time, proving that delicious can also be convenient.
Key Ingredient Notes & Tips for Perfect Pumpkin Scones
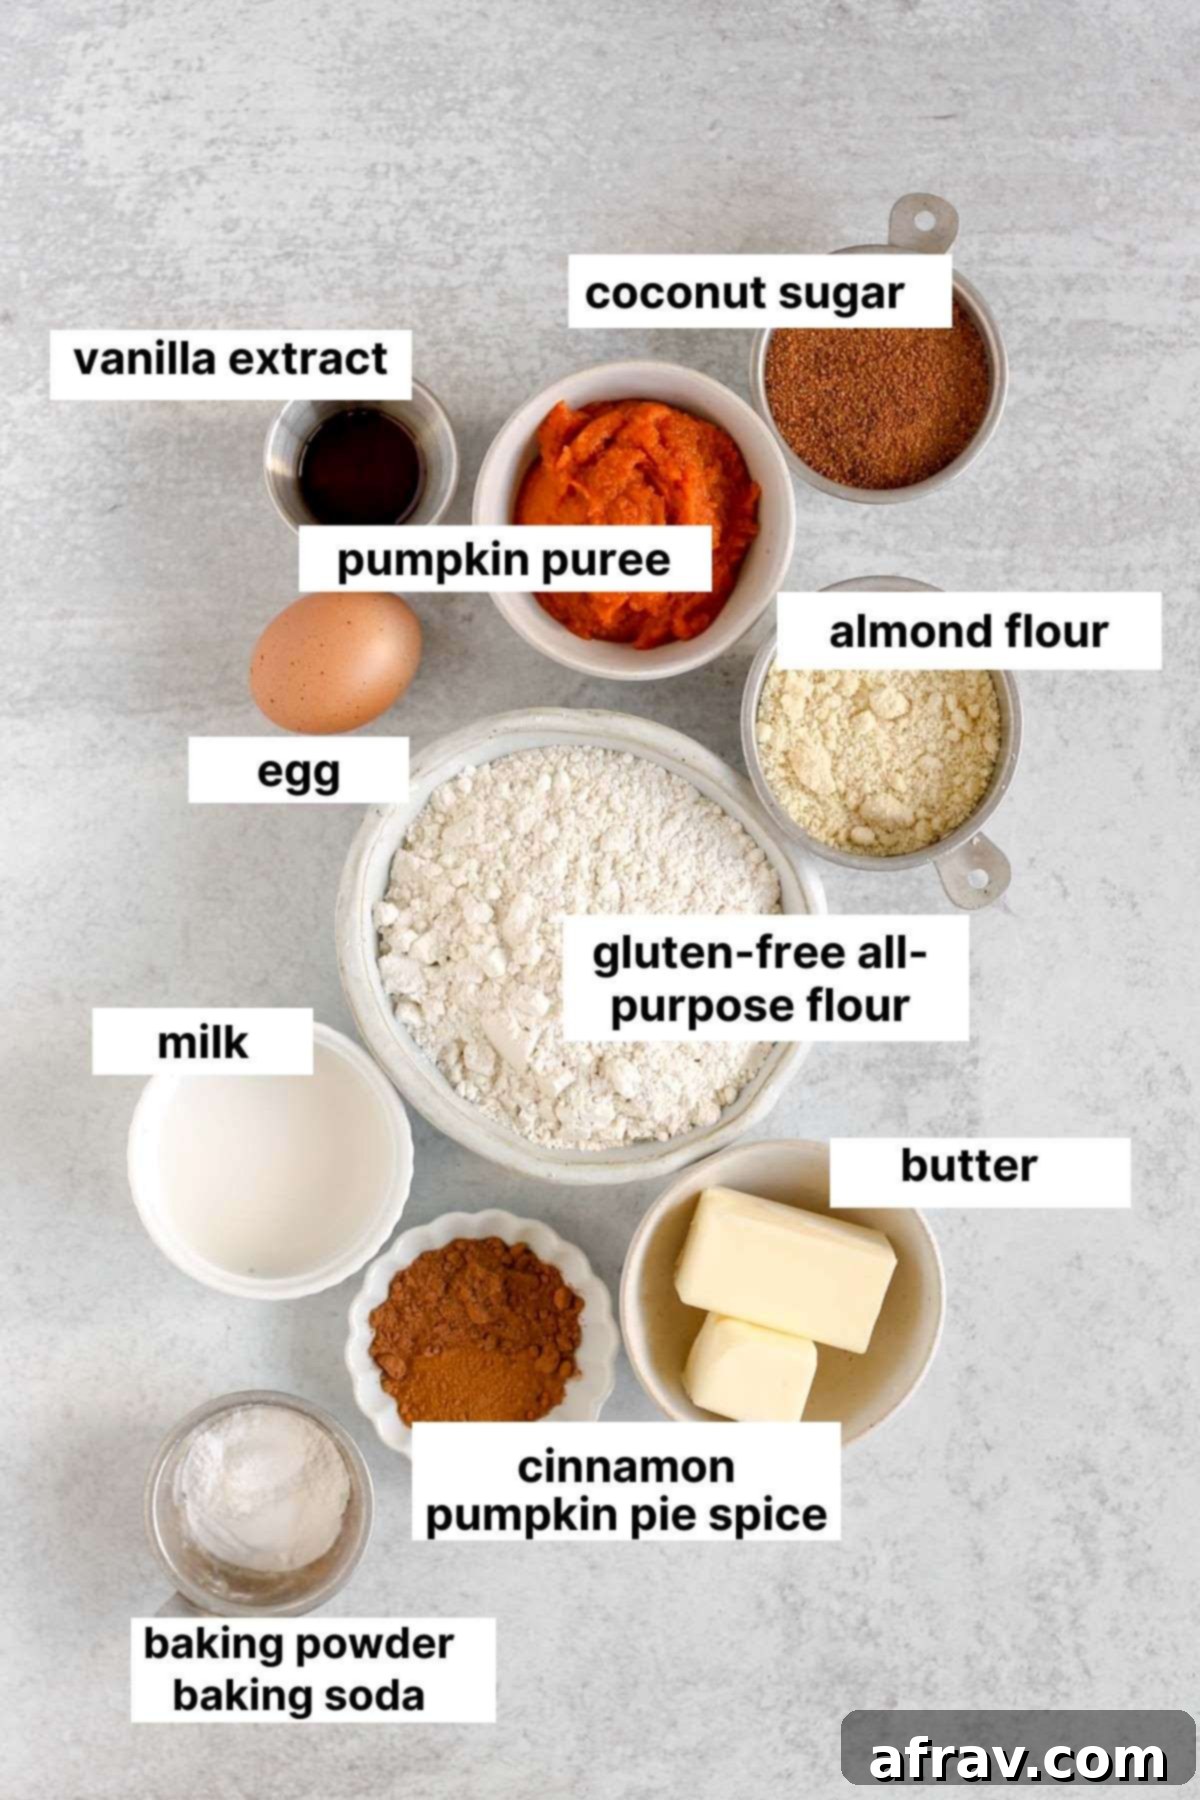
A complete list of ingredients and precise amounts can be found in the detailed recipe card below. Here, we highlight some specific ingredient callouts and, when needed, provide valuable tips on selecting and preparing them for the best clean eating results. Choosing quality ingredients is paramount to both the flavor and exceptional texture of your homemade gluten-free pumpkin scones!
- Gluten-Free All-Purpose Flour Blend: The type of gluten-free all-purpose flour you use can significantly impact the final texture of your scones. I’ve had consistent success and achieved fantastic results using well-known, reliable brands like King Arthur’s and Bob’s Red Mill gluten-free all-purpose flours in this recipe. While I often bake with my personal favorite, Namaste Organic Perfect Flour Blend, it’s important to note that this specific blend was not used during the development or testing of *this* particular scone recipe. For optimal results, sticking with the recommended brands is advisable, as different GF flour blends can absorb liquids differently. Always remember to “spoon and level” your flour measurements for accuracy; packing it down can lead to dense, dry scones.
- Almond Flour: This ingredient is crucial for adding a delicate richness, a tender crumb, and a slightly nutty flavor to our gluten-free pumpkin scones. It’s absolutely vital to use fine-ground almond flour, not almond meal. Almond meal is more coarsely ground and often contains almond skins, which will result in a tougher, grainier scone with a noticeably different and less desirable texture. Almond flour contributes significantly to the scone’s overall tenderness and helps achieve that desirable light, airy crumb that makes these scones so delightful.
- Pumpkin Puree: For that authentic fall flavor and essential moistness, you’ll need pure pumpkin puree. Be very careful to select 100% pure pumpkin puree and always double-check the label to avoid “pumpkin pie mix.” Pumpkin pie mix comes pre-spiced and pre-sweetened, which will completely throw off the carefully balanced flavors and sweetness level of this recipe. The goal here is to add pure pumpkin, allowing our thoughtfully chosen spices to shine through perfectly and create a balanced taste.
- Coconut Sugar: As an unrefined sugar, coconut sugar is our preferred sweetener for these pumpkin scones. It provides a lovely, subtle caramel-like depth of flavor and a natural sweetness that complements the pumpkin and spices beautifully. Its granular texture also works wonderfully within the scone dough, dissolving just enough to sweeten without making the dough too wet.
- Frozen Unsalted Butter: This is a non-negotiable secret to achieving truly flaky, tender scones! Using extremely cold, ideally frozen, unsalted butter is paramount. When grated and cut into the dry ingredients, the frozen butter pieces remain distinct and melt slowly in the oven, creating pockets of steam that lift the dough and result in those coveted flaky layers. Clean food tip: Opting for grass-fed or pasture-raised butter is a fantastic choice, as it not only supports more ethical farming practices but also offers a higher concentration of beneficial nutrients and healthy fats compared to conventional butter. This slight upgrade can truly enhance both the flavor and nutritional profile of your homemade treats.
- Egg: The egg acts as a binder, helping to hold the scone dough together, and contributes to the scone’s richness and golden-brown crust. For those opting for a vegan version, please refer to our substitution notes below for alternative options.
- Milk (plus more for brushing): Milk adds essential moisture to the dough, helping it come together and creating a tender crumb. A little extra milk is used for brushing the tops of the scones before baking, which helps them achieve that beautiful golden sheen. You can use regular dairy milk or your preferred dairy-free alternative.
- Spices (Ground Cinnamon & Pumpkin Pie Spice): These are the very heart of our fall flavor profile. Ensure your spices are fresh and aromatic for the most potent and delicious results. A good quality pumpkin pie spice blend typically includes a harmonious mix of cinnamon, nutmeg, ginger, and cloves, bringing all those classic autumnal notes to life in perfect balance with the pumpkin.
By paying close attention to these key ingredients and following these tips, you’ll be well on your way to baking a batch of the most delicious, perfectly textured gluten-free pumpkin scones you’ve ever tasted!
Flexible Baking: Smart Substitutions for Your Scones
This gluten-free pumpkin scone recipe is wonderfully adaptable, allowing you to tailor these delicious treats to suit various dietary needs and preferences without sacrificing flavor or quality. Here are some smart substitution options to consider:
Making Them Dairy-Free: To transform these into delightful dairy-free pumpkin scones, simply swap the unsalted butter for an equal amount of solid, cold coconut oil. Just like with butter, ensure the coconut oil is firm and chilled (or even frozen and grated) to maintain the flaky texture. Additionally, use your preferred dairy-free milk alternative. For the cleanest option, I highly recommend choosing dairy-free milks that contain minimal ingredients – typically just the nut/oat source and water, avoiding unnecessary additives. Brands like Malk and Three Trees are excellent choices for their purity and rich flavor. The cold coconut oil will effectively mimic the butter’s role in creating those desirable flaky layers.
For a Vegan Version: To make these pumpkin scones entirely vegan, you’ll need to implement the dairy-free substitutions mentioned above. In addition, you’ll need to replace the egg with a suitable vegan egg substitute. Options such as a ‘flax egg’ (prepared by mixing 1 tablespoon of ground flaxseed with 3 tablespoons of water and letting it sit for 5-10 minutes until it gels) or a commercial vegan egg replacer could work well. Please note: I have not personally tested this specific scone recipe with a vegan egg replacement. If you do experiment with an egg substitute, please let me know how they turn out – your valuable feedback is incredibly helpful to the wider clean eating community!
Alternative Sweeteners: While coconut sugar provides a wonderful depth of flavor and is considered an unrefined sugar, you can certainly use other granulated sweeteners if you prefer or if coconut sugar isn’t readily available. White sugar, regular cane sugar, or light brown sugar can all be substituted cup-for-cup for the coconut sugar. Keep in mind that these substitutions might slightly alter the final flavor profile and the nutritional aspects of the scones. Using brown sugar will impart a deeper, molasses-like note, which can be particularly lovely and complementary in fall baking, enhancing the cozy autumn vibe.
Baking Perfection: A Step-by-Step Guide to Gluten-Free Pumpkin Scones
Making these gluten-free pumpkin scones is an incredibly rewarding process, and surprisingly straightforward, even for novice bakers. Follow these detailed instructions, complete with visual aids, to ensure a batch of perfectly tender, flaky, and flavorful scones every time.
Preparation is Key!
- Preheat your oven: Set your oven to 400°F (200°C). This ensures your oven is at the correct temperature for immediate baking once the dough is ready, promoting a quick rise and golden crust.
- Line your baking sheet: Prepare a large baking sheet by lining it with parchment paper. This prevents sticking and makes for incredibly easy cleanup, allowing you to focus on enjoying your delicious scones. Set it aside for later use.
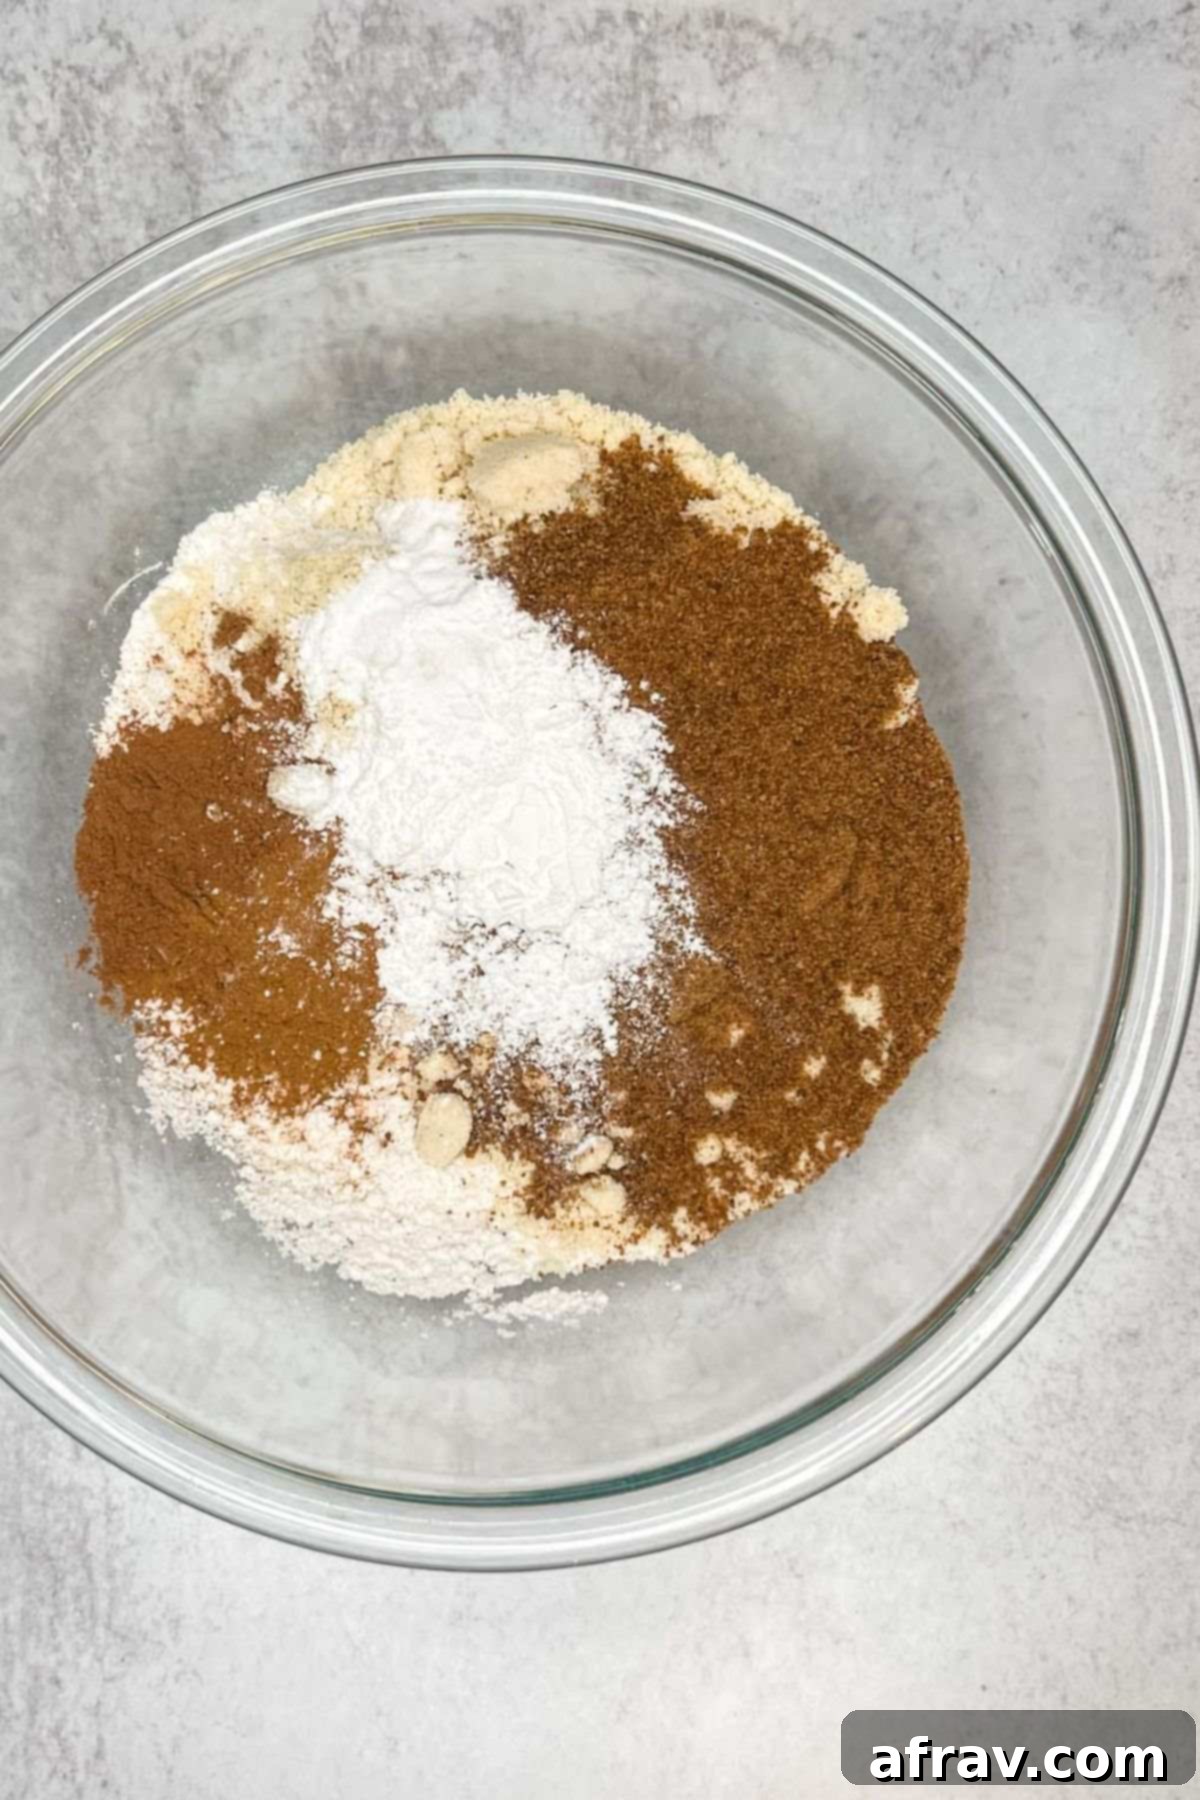
Step 1: Combine Dry Ingredients. In a large mixing bowl, thoroughly whisk together your gluten-free all-purpose flour, almond flour, baking powder, baking soda, ground cinnamon, pumpkin pie spice, and coconut sugar. Ensure all ingredients are evenly distributed and no lumps remain, as this contributes to a consistent texture and flavor throughout your scones. A good whisking also helps to aerate the flours, making for lighter, more tender scones.
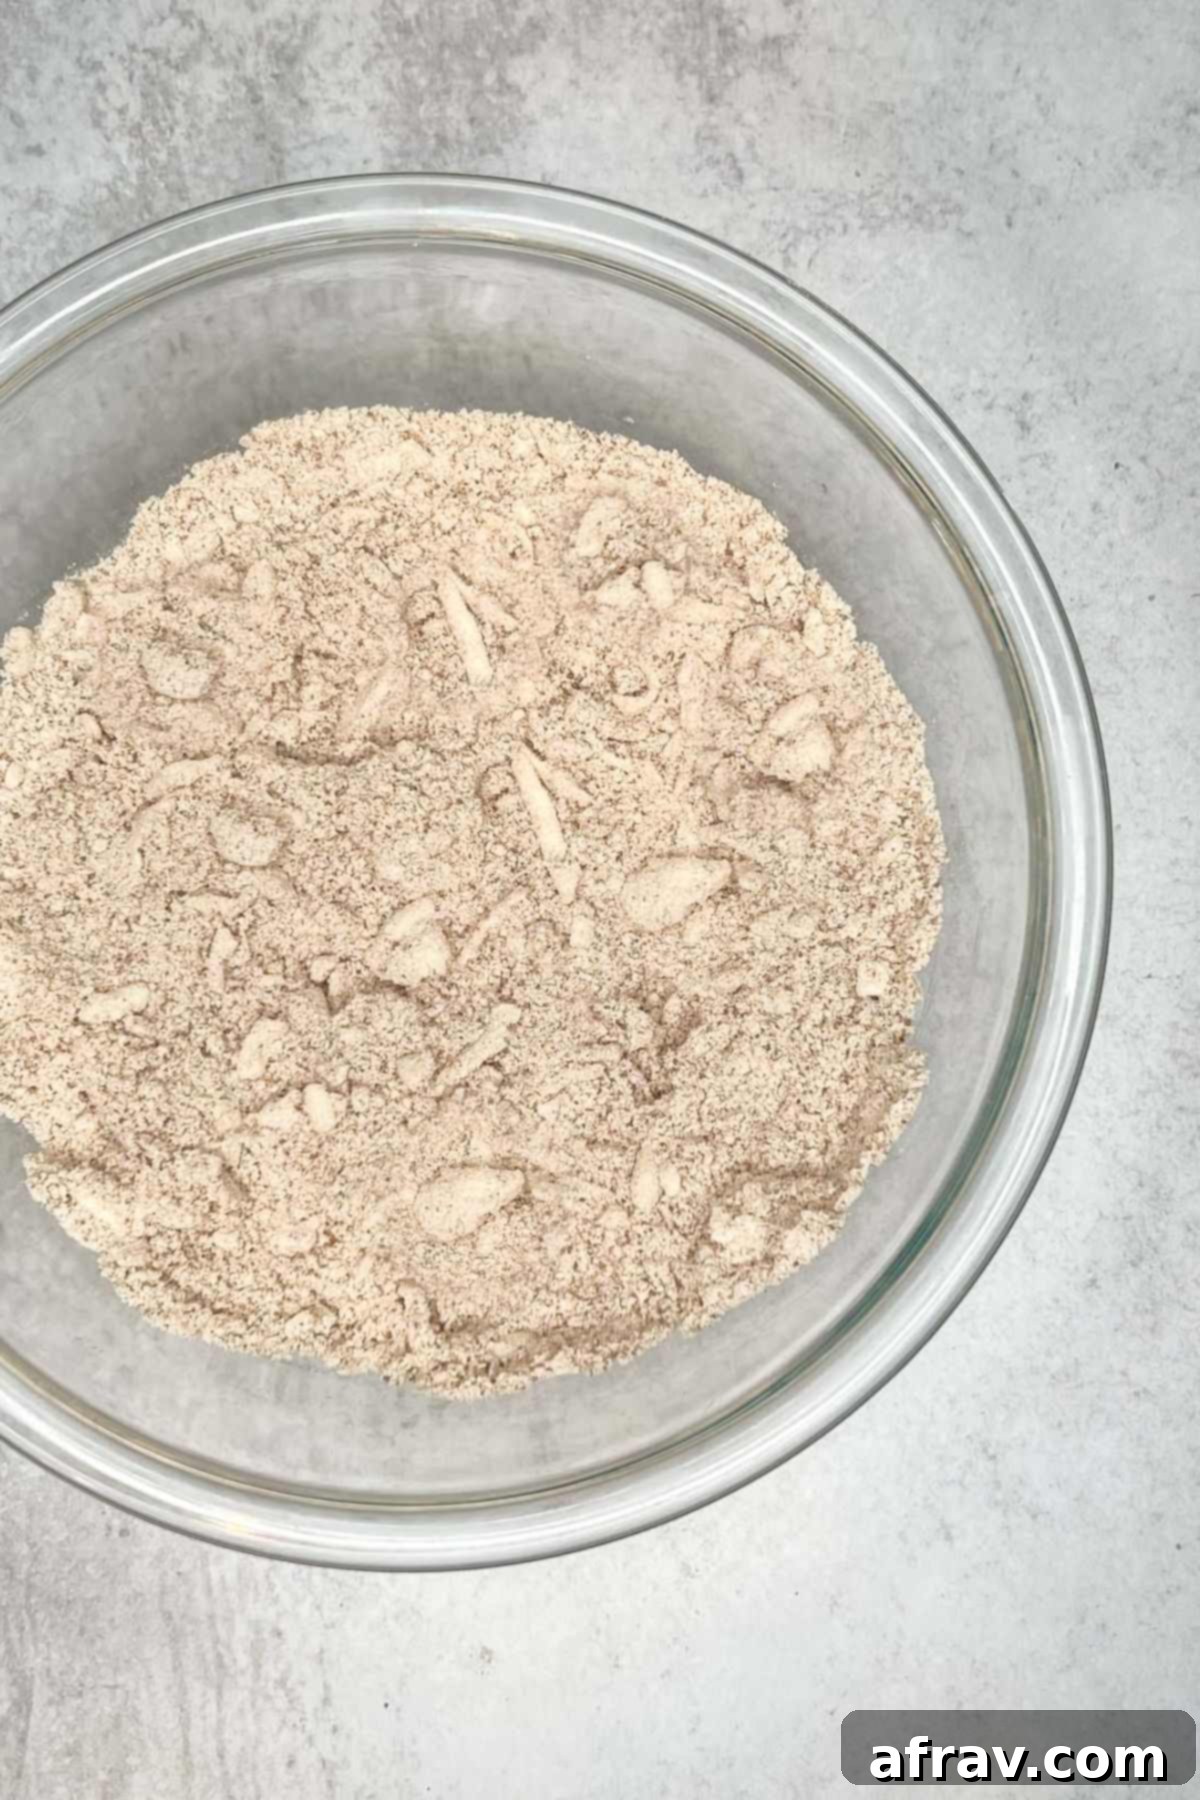
Step 2: Incorporate the Cold Butter. Take your frozen unsalted butter (or very cold, solid coconut oil for dairy-free) and grate it directly into the dry ingredient mixture using the large holes of a box grater. Once grated, use a pastry cutter (or the back of two forks, or even your fingertips if you work very quickly) to cut the butter into the flour. Work quickly to prevent the butter from warming up. Continue until the mixture resembles coarse crumbs with some distinct pea-sized pieces of butter still visible. These cold butter pockets are the secret to creating those wonderful flaky layers.
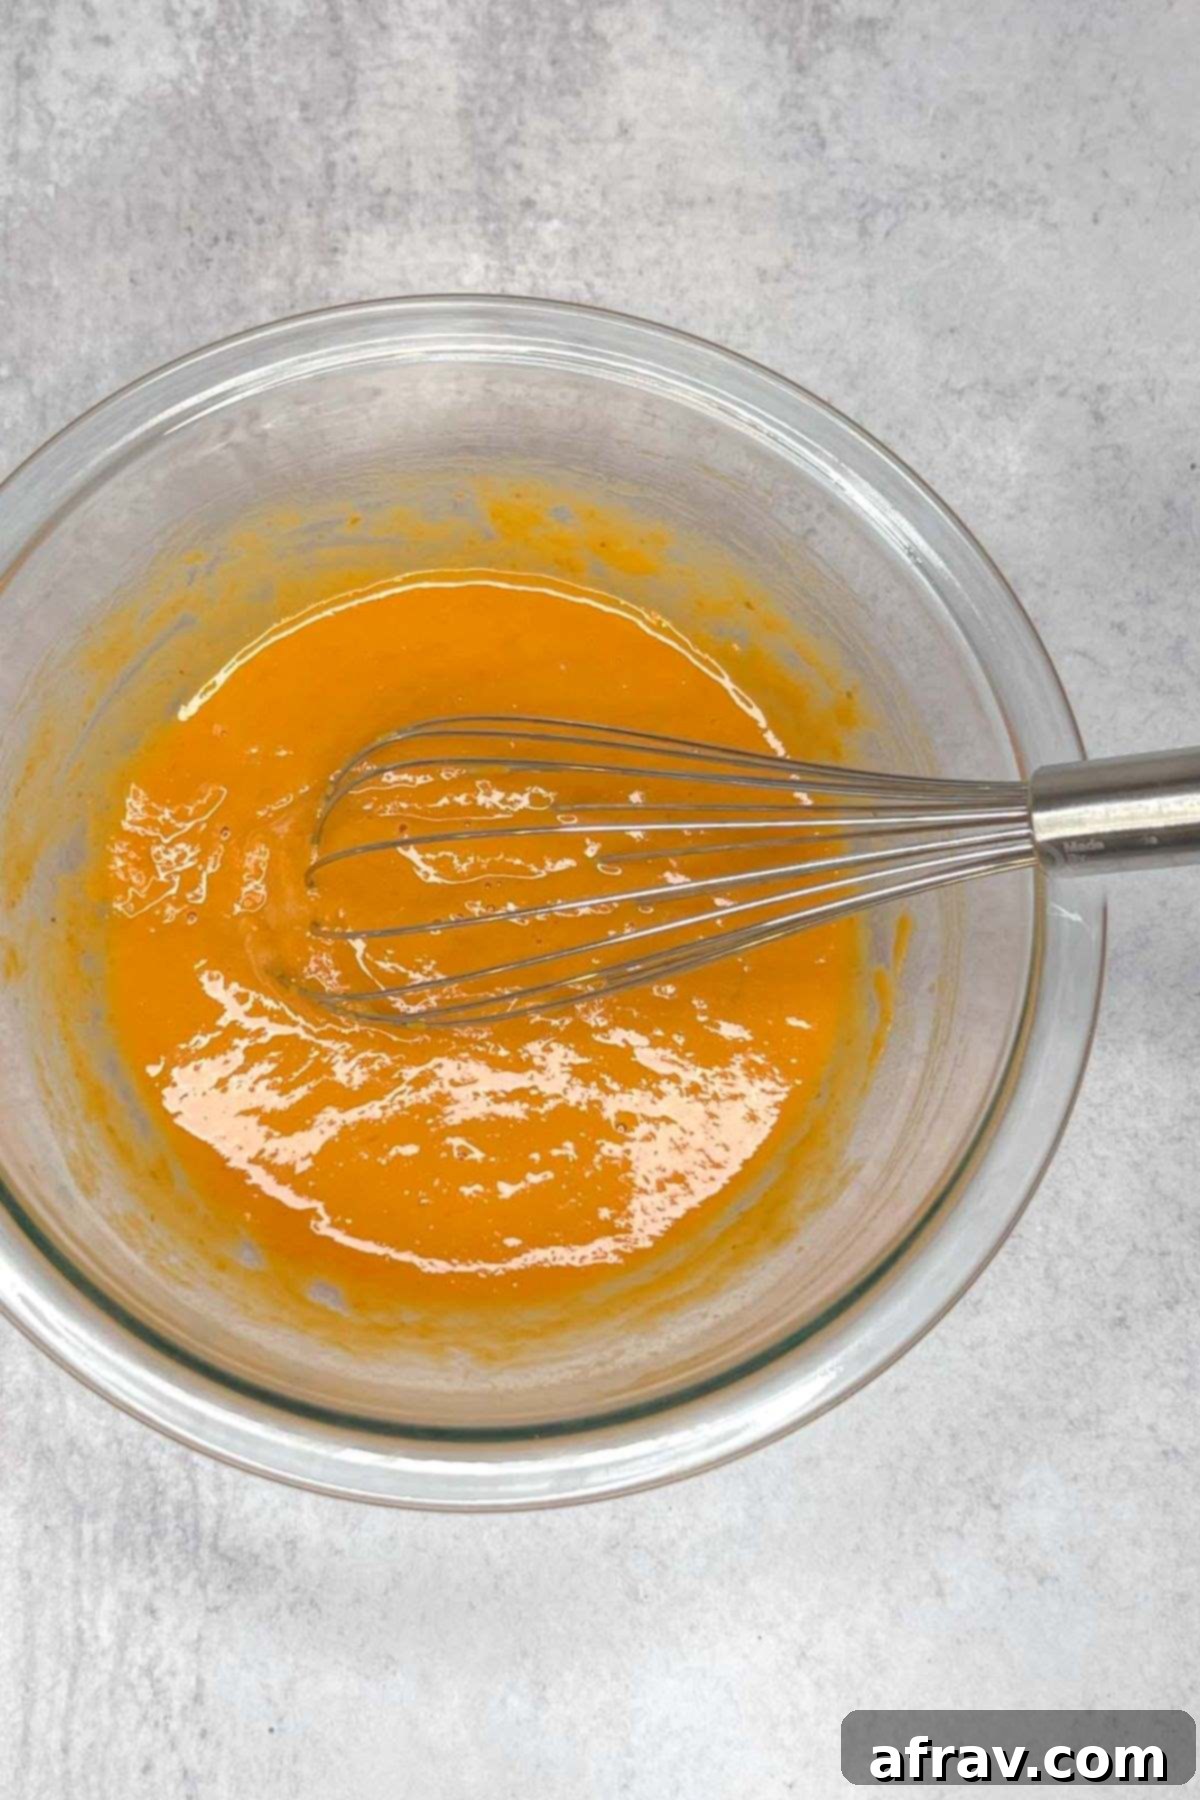
Step 3: Prepare the Wet Ingredients. In a separate, small bowl, whisk together the egg (or vegan egg replacement), pumpkin puree, pure vanilla extract, and milk (dairy or dairy-free alternative). Whisk these ingredients until they are well combined and smooth. This step ensures an even distribution of moisture and flavor throughout the scone dough, contributing to a consistent, delicious result.
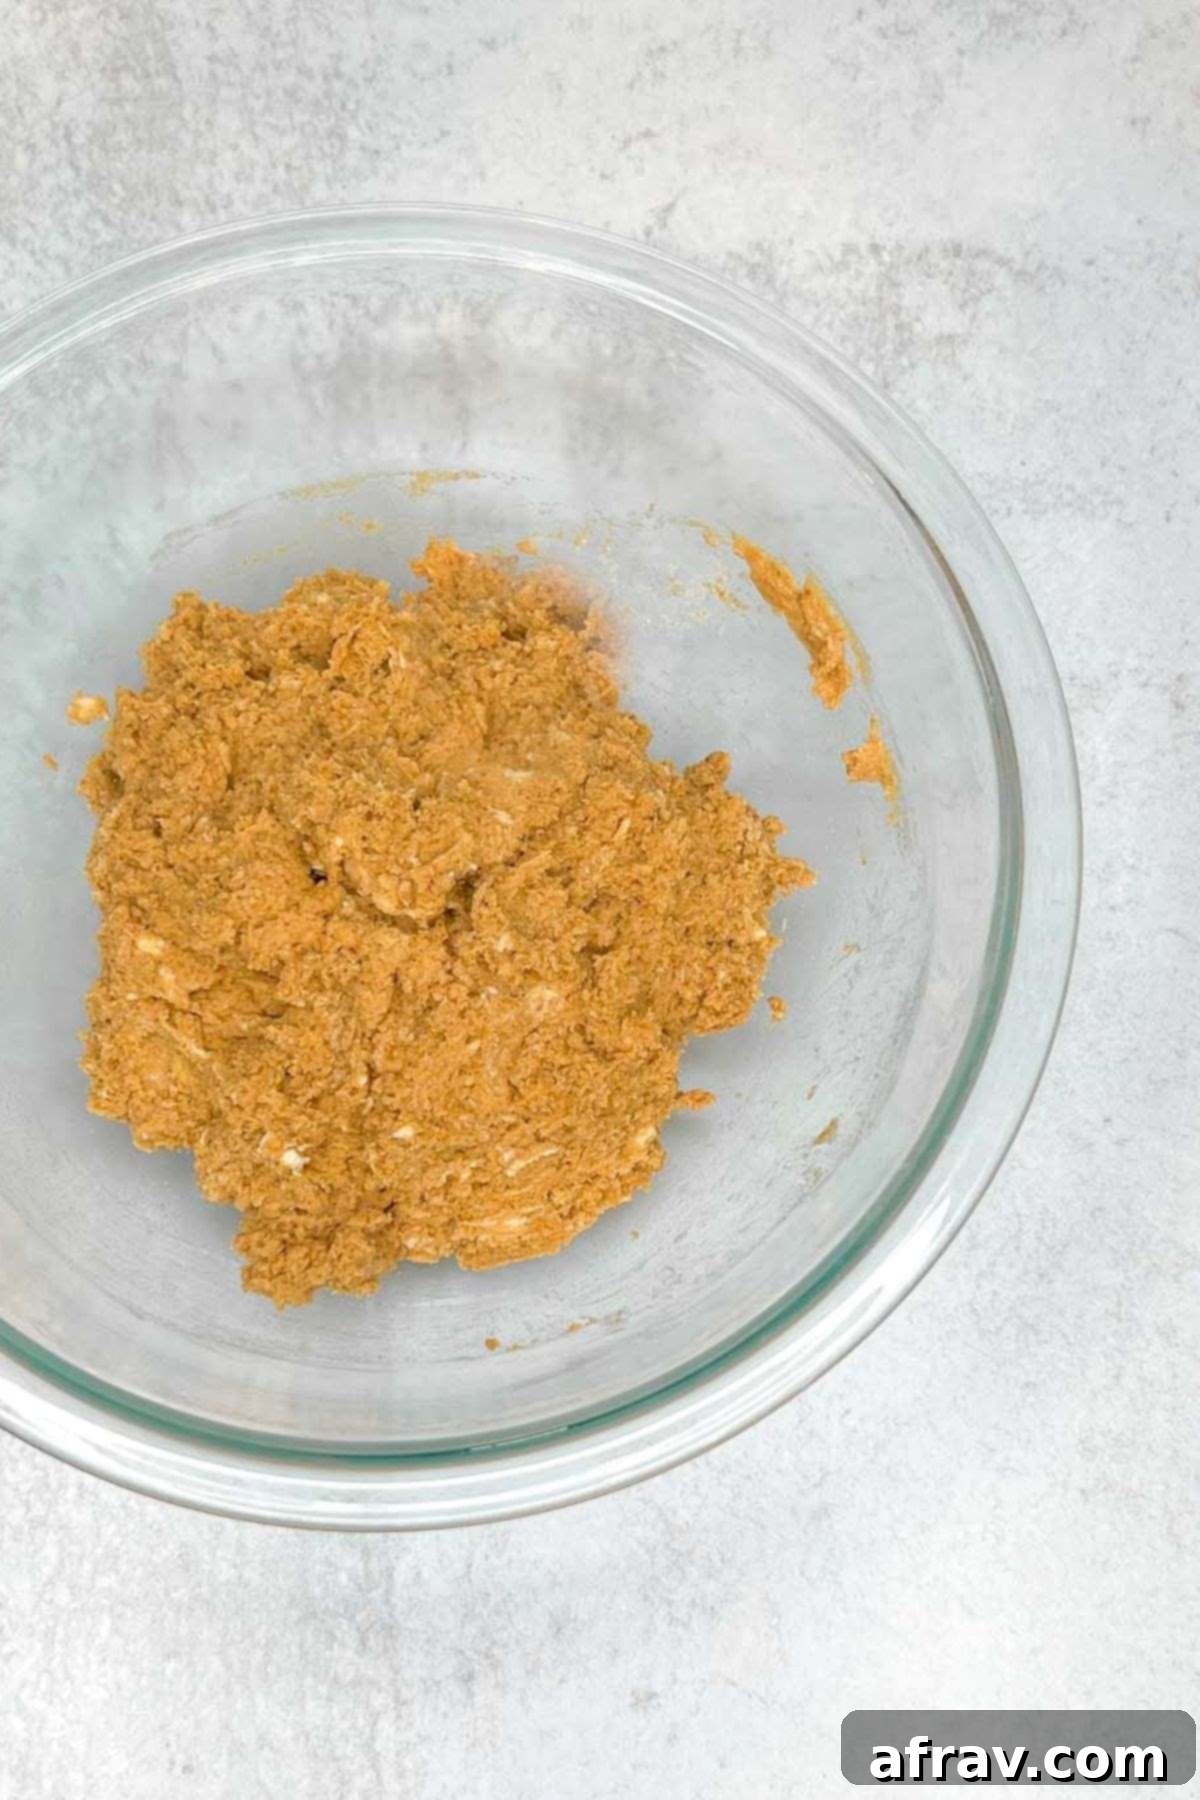
Step 4: Combine Wet and Dry Mixtures. Pour the prepared wet ingredients into the large bowl containing your flour and butter mixture. Using a wooden spoon or a sturdy spatula, gently mix until the ingredients are just combined and a shaggy dough begins to form. The dough will likely be sticky, and it’s perfectly normal to finish mixing it by hand. Gather the dough and lightly knead it a few times within the bowl, just enough until it comes together into a cohesive mass. Be careful not to overmix, as this can warm the butter too much and negatively impact the flaky texture.
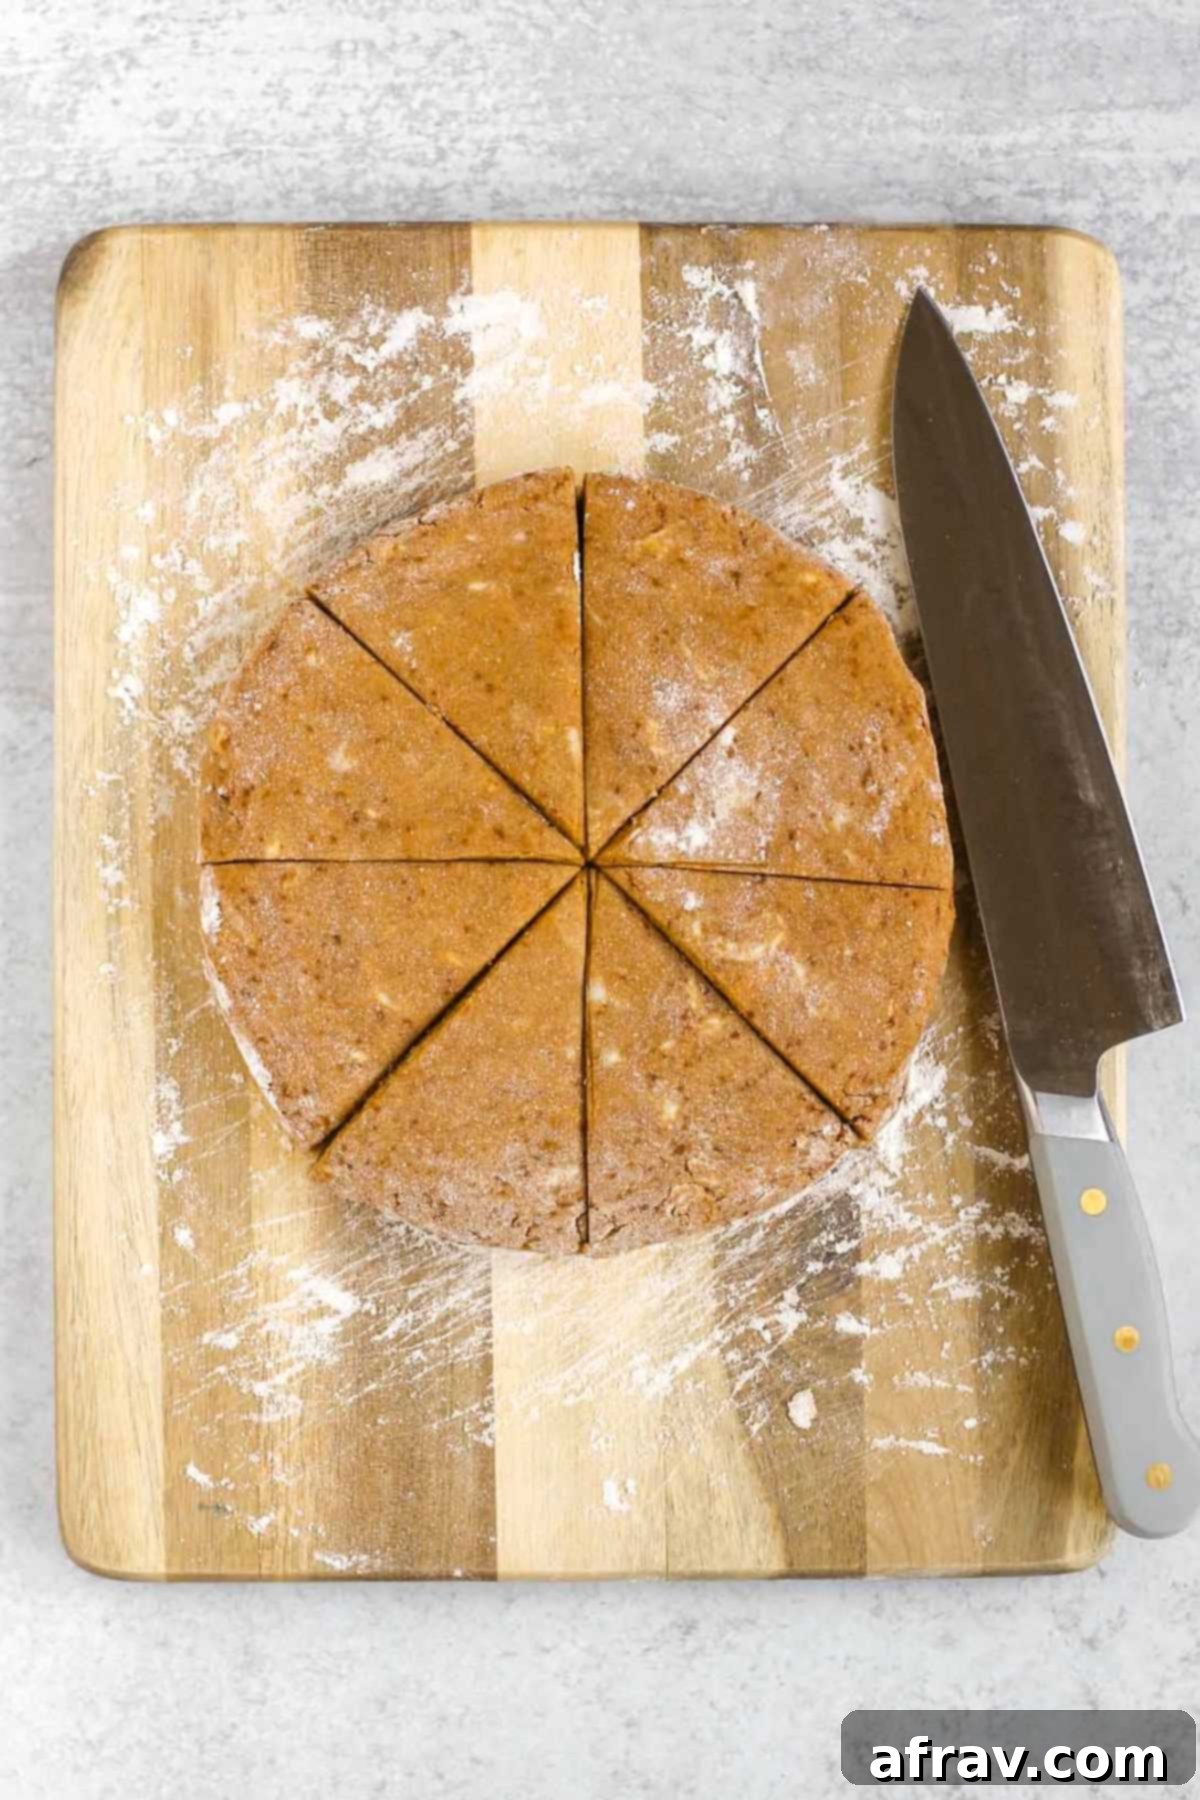
Step 5: Shape and Cut the Scones. Lightly flour a clean work surface with extra gluten-free flour. Transfer the sticky scone dough onto this floured surface. With floured hands, gently shape the dough into a cohesive ball. Then, using your hands or a rolling pin, flatten the dough ball into a uniform disc, approximately 6 inches in diameter and about ¾ inch thick. Using a sharp knife or a bench scraper, cut the disc into 8 equal wedges, much like slicing a pizza. Flour your knife periodically if it starts to stick, to ensure clean cuts.
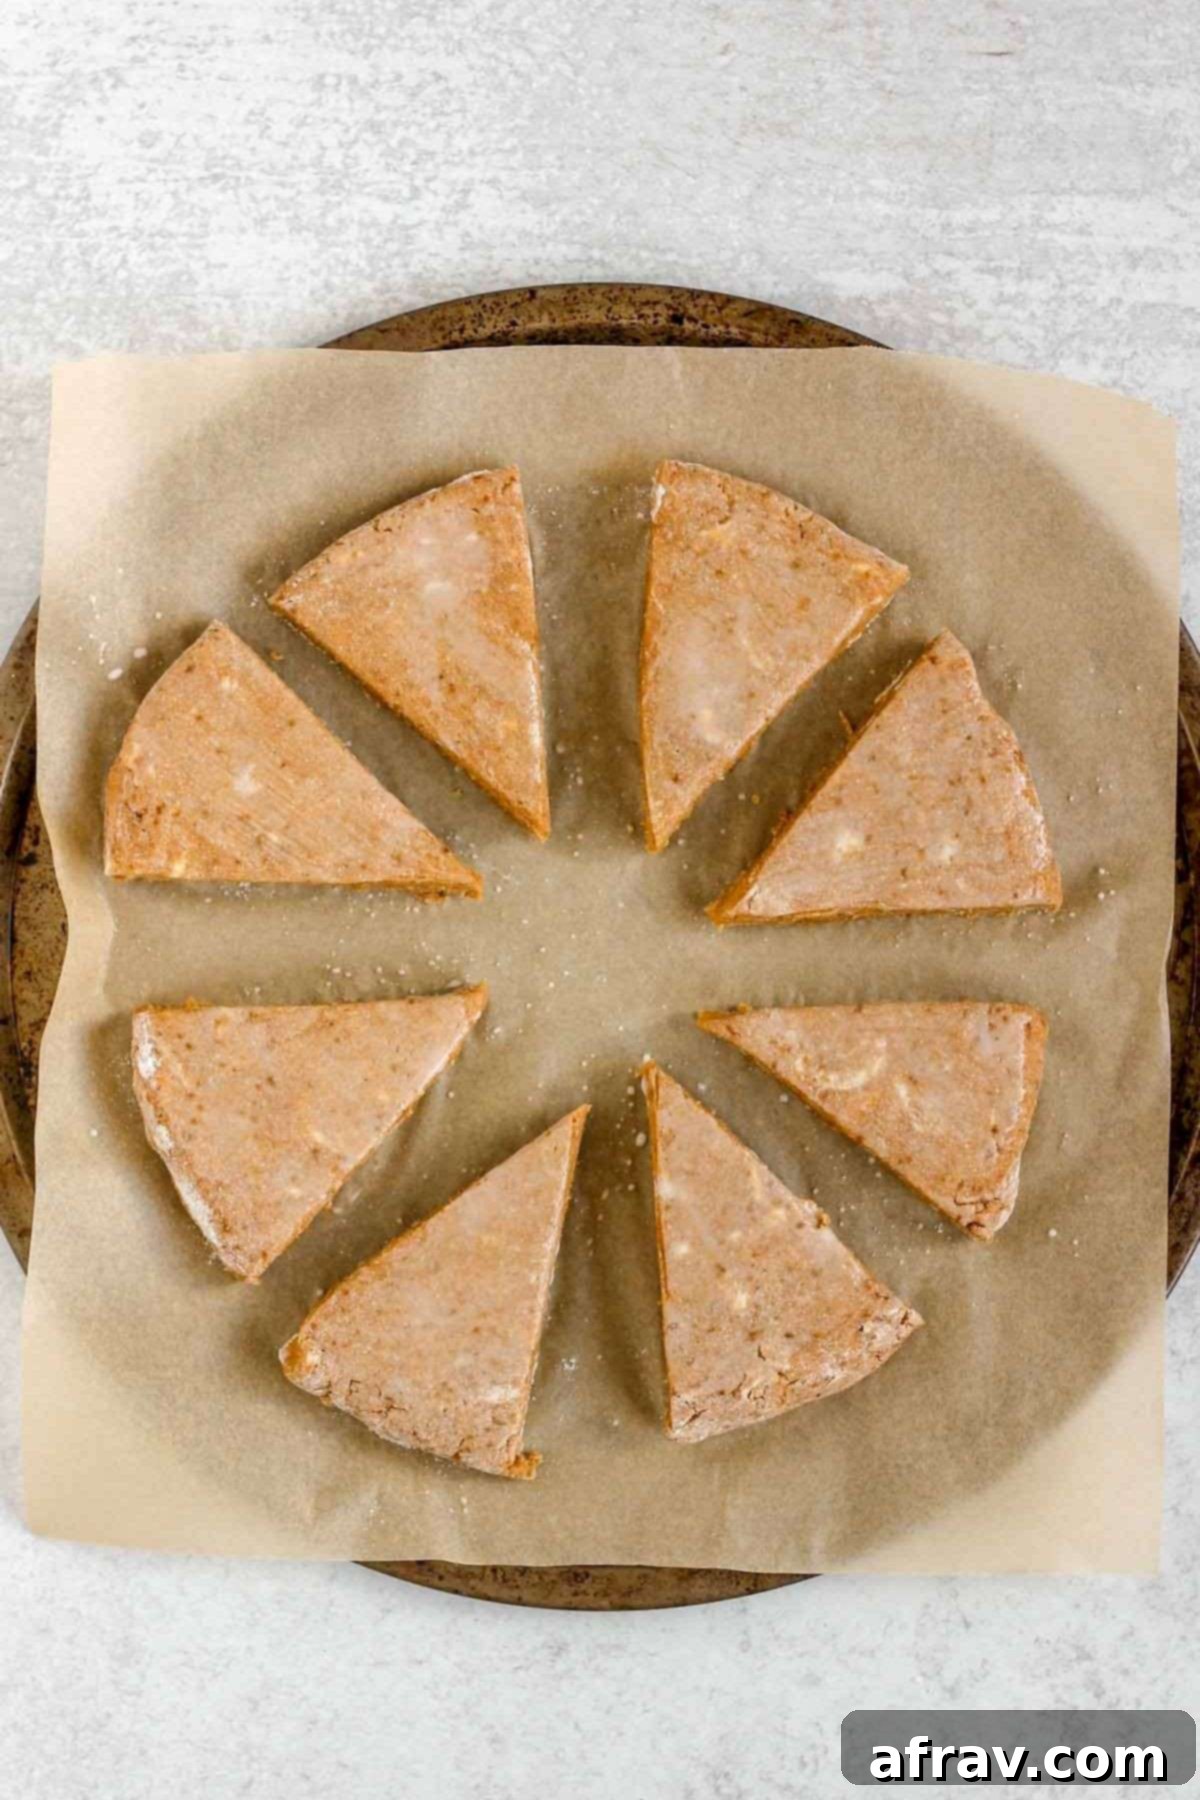
Step 6: Bake to Golden Perfection. Carefully transfer the scone triangles to your prepared baking sheet, ensuring you leave about an inch of space between each one to allow for even baking and proper air circulation. Using a pastry brush, gently brush the tops of each scone with a little extra milk. This milk wash is essential for creating a beautiful golden-brown crust and a lovely sheen. Bake in the preheated 400°F (200°C) oven for 18-20 minutes, or until the edges are golden brown and the centers are fully set and cooked through. The scones should feel firm to the touch.
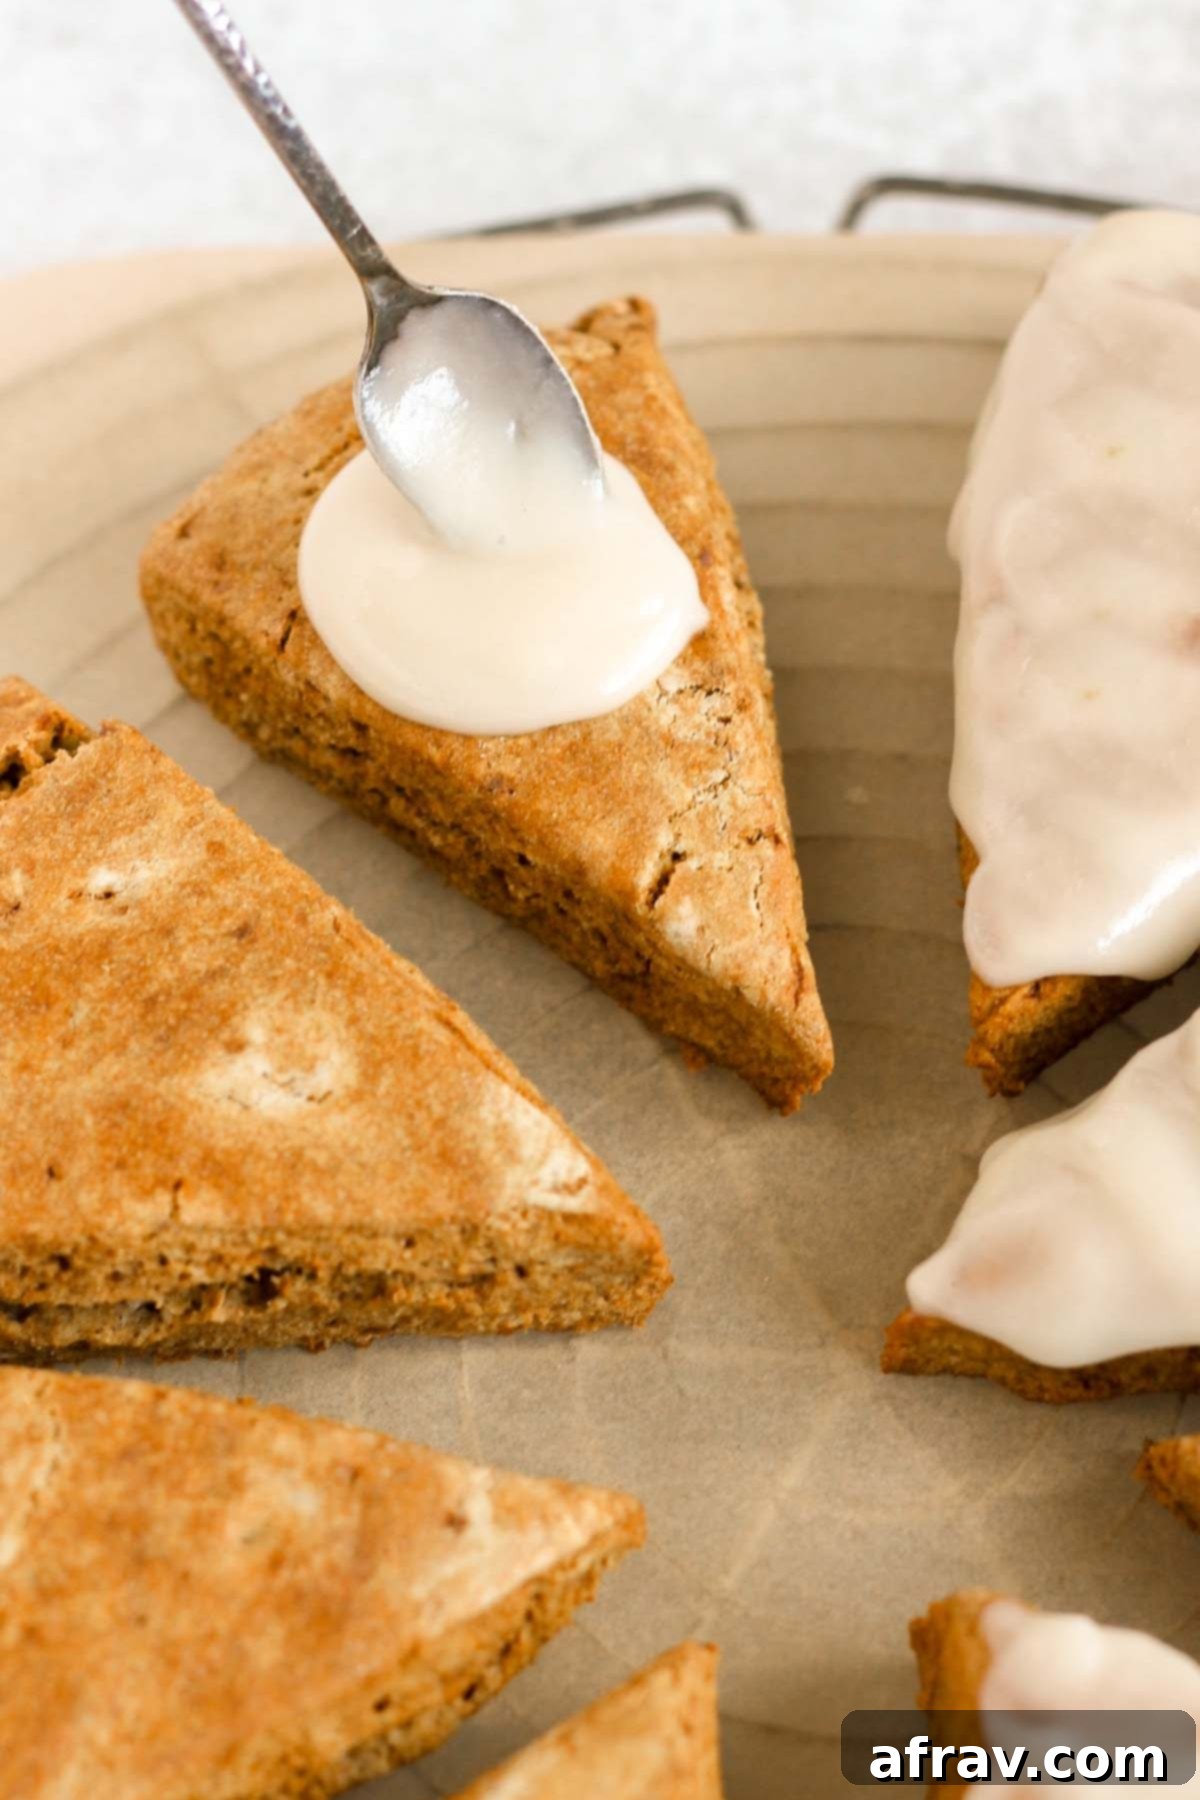
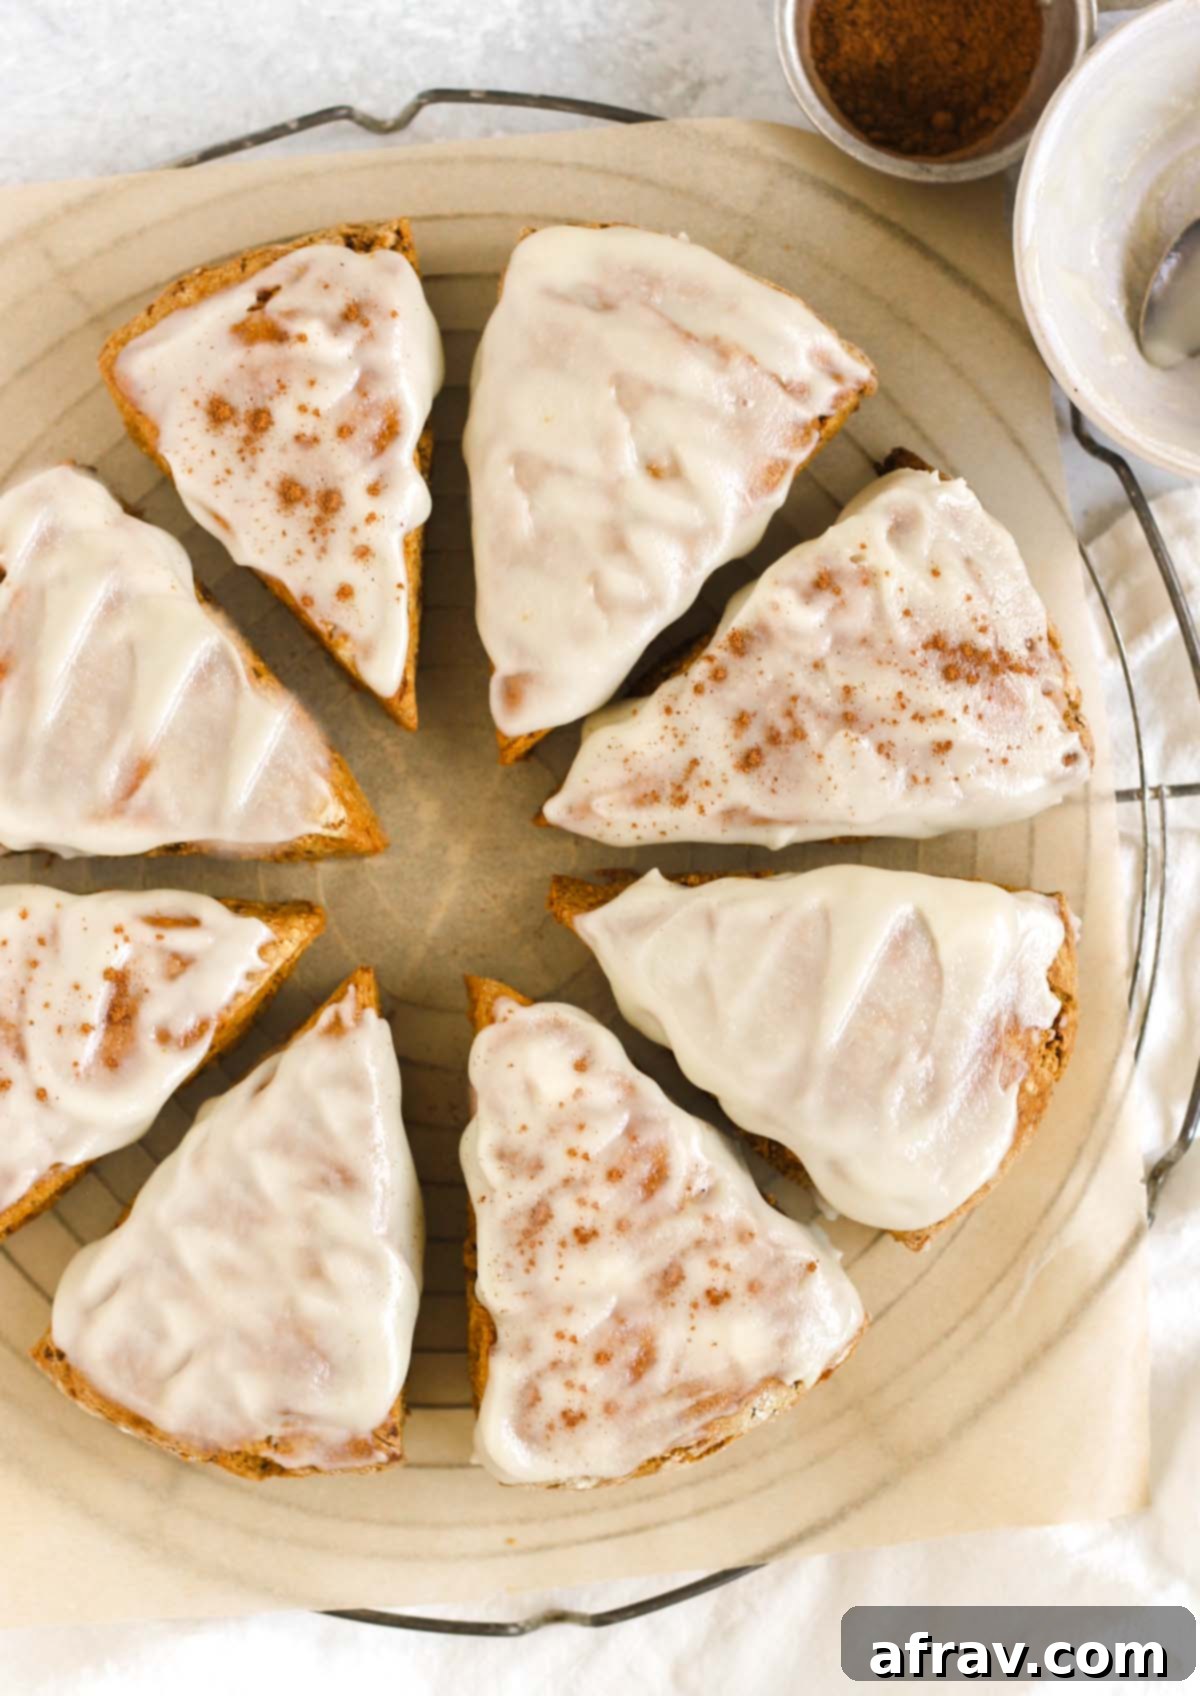
Step 7: Prepare Your Glaze. While the scones are cooling on a wire rack, prepare your chosen glaze. For the homemade healthy coconut butter glaze, gently soften the coconut butter in a small microwave-safe bowl for about 30 seconds until it’s pliable but not fully melted. Then, whisk in the maple syrup and milk until you achieve a smooth, pourable, yet thick consistency. If making the classic powdered sugar glaze, combine powdered sugar, vanilla, and milk, adding the milk gradually until it’s just right for drizzling. Refer to the detailed instructions in the recipe card below for both glaze options.
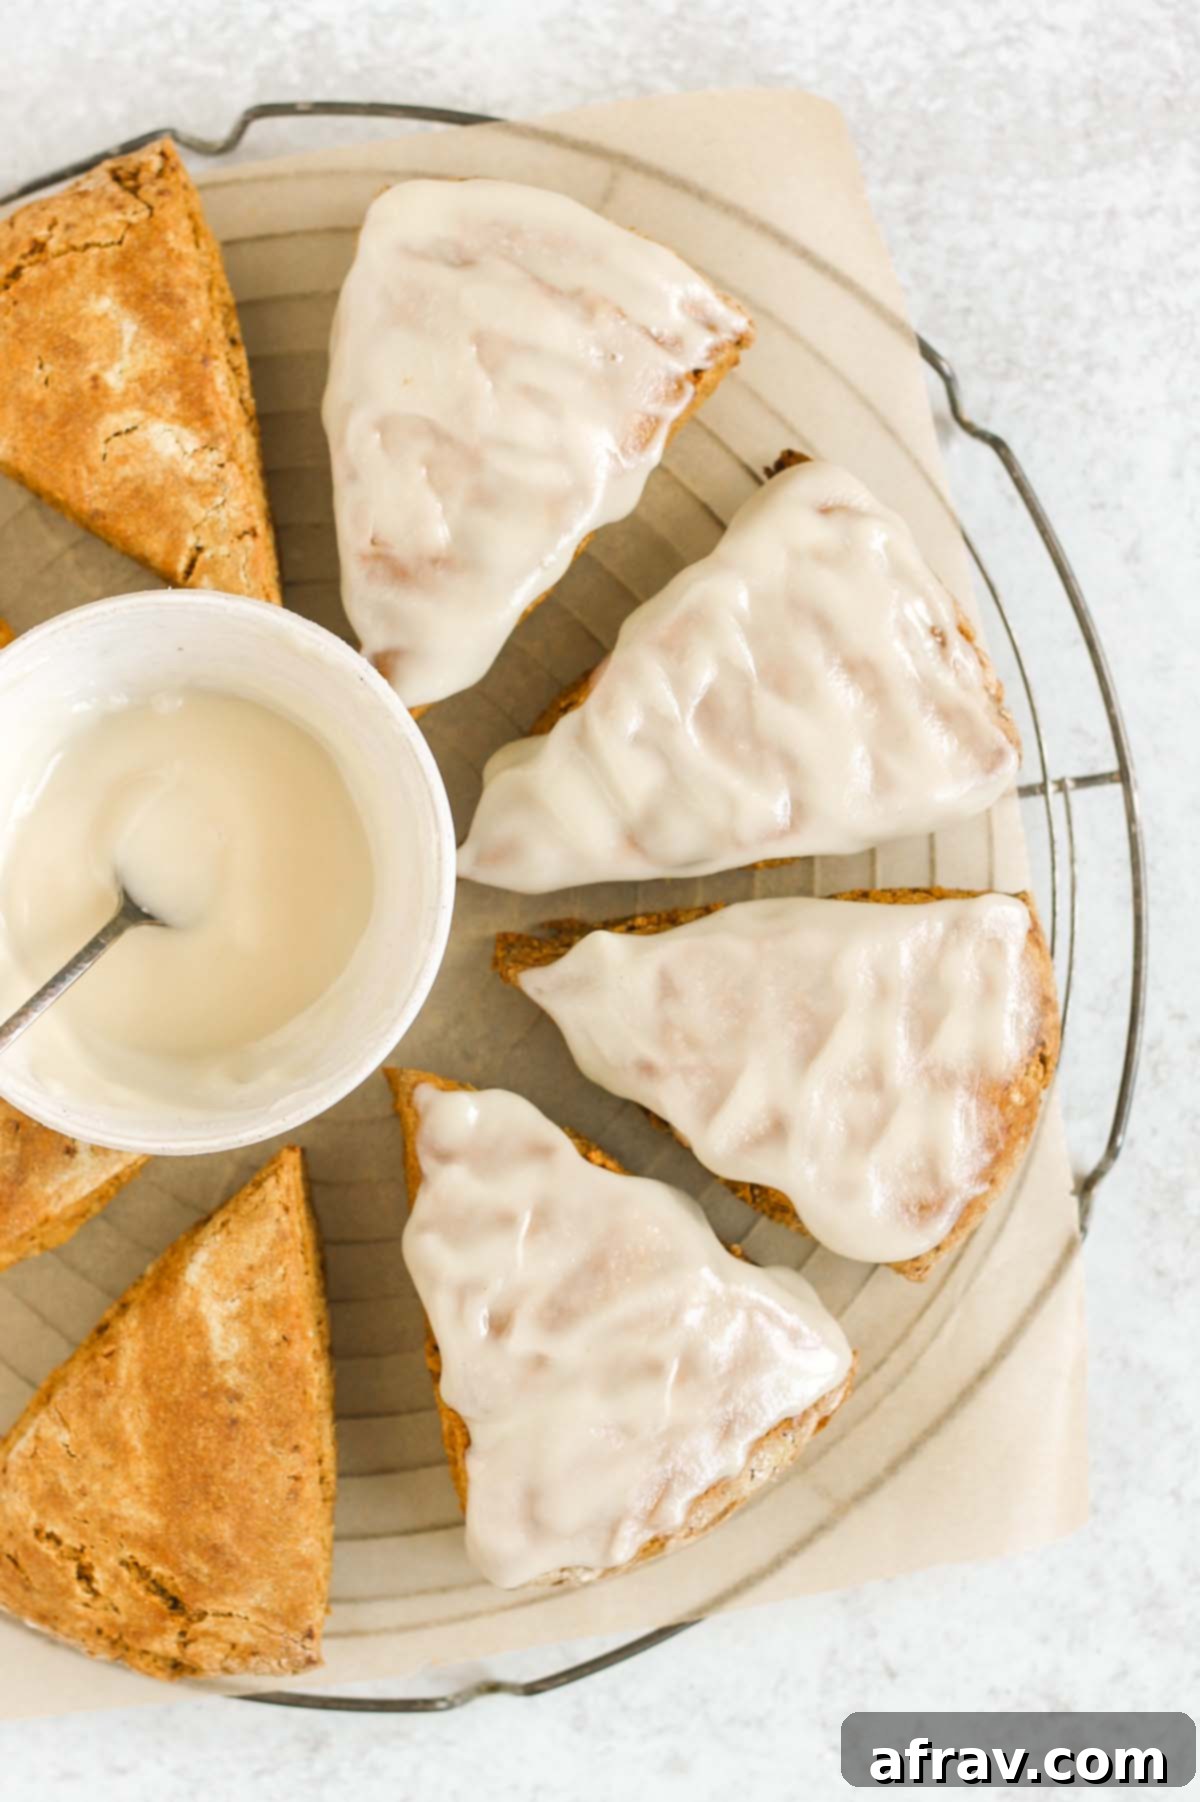
Step 8: Glaze and Serve. Once the scones have cooled sufficiently (they should still be warm but not hot), generously spread or artfully drizzle your chosen glaze over the top of each scone. The coconut butter glaze will set as it cools, creating a delightful, slightly firm finish. Serve these beautiful, freshly baked gluten-free pumpkin scones immediately and savor every comforting bite! They are truly a perfect companion to your favorite fall beverage.
Pro Tips for Flawless Gluten-Free Pumpkin Scones
Achieving bakery-quality scones at home, especially when baking gluten-free, comes down to a few critical techniques. Heed these expert tips to ensure your gluten-free pumpkin scones are nothing short of spectacular, delivering that perfect tender, flaky texture every time:
The Golden Rule of Cold Butter: We cannot stress this enough – the colder your butter, the flakier and more tender your scones will be! Using frozen butter is the ultimate secret. As the tiny, cold butter pieces slowly melt in the hot oven, they release steam, which creates those desirable pockets of air and contributes to the scone’s signature tender, flaky texture. If your butter isn’t frozen, ensure it’s straight from the fridge and cut it into very small cubes or grate it quickly to keep it as cold as possible before incorporating it into the dry ingredients. Remember, warm butter equals dense, cake-like scones rather than the desired light and airy ones!
Gentle Mixing is Key – Embrace Your Hands: While it might be tempting to use a stand mixer, mixing scone dough by hand is often the best approach. It allows you to feel the dough and ensures you don’t overmix. Overmixing can warm the butter, which, as we discussed, is detrimental to texture. It can also overdevelop the gluten substitutes present in gluten-free flour blends, potentially leading to a tougher texture. Mix just until the ingredients are barely combined and a dough forms, even if it’s a bit shaggy. A slightly sticky dough is perfectly normal at this stage, and a light, quick hand is your best friend here.
Invest in the Right Tools: A few simple tools can make a world of difference in your scone-making process, making it more efficient and successful. A good quality pastry cutter is invaluable for efficiently cutting the cold butter into the dry ingredients without using your warm hands. This helps maintain the butter’s crucial cold temperature. Additionally, a soft-bristled pastry brush is perfect for gently applying the milk wash to the tops of the scones before baking, ensuring a beautiful, even golden-brown crust without disturbing the dough.
Accurate Flour Measurement – Spoon and Level: This tip is absolutely crucial for all baking, but especially for gluten-free recipes where flour consistency can be tricky. Always use the “spoon and level” method when measuring both your gluten-free all-purpose flour and almond flour. To do this, lightly spoon the flour into your measuring cup until it overflows, then use the back of a straight knife or a flat edge to level off the excess. Never scoop the measuring cup directly into the flour bag, as this can compact the flour, leading to significantly more flour than needed and ultimately resulting in dense, dry, and crumbly scones instead of light, fluffy ones.
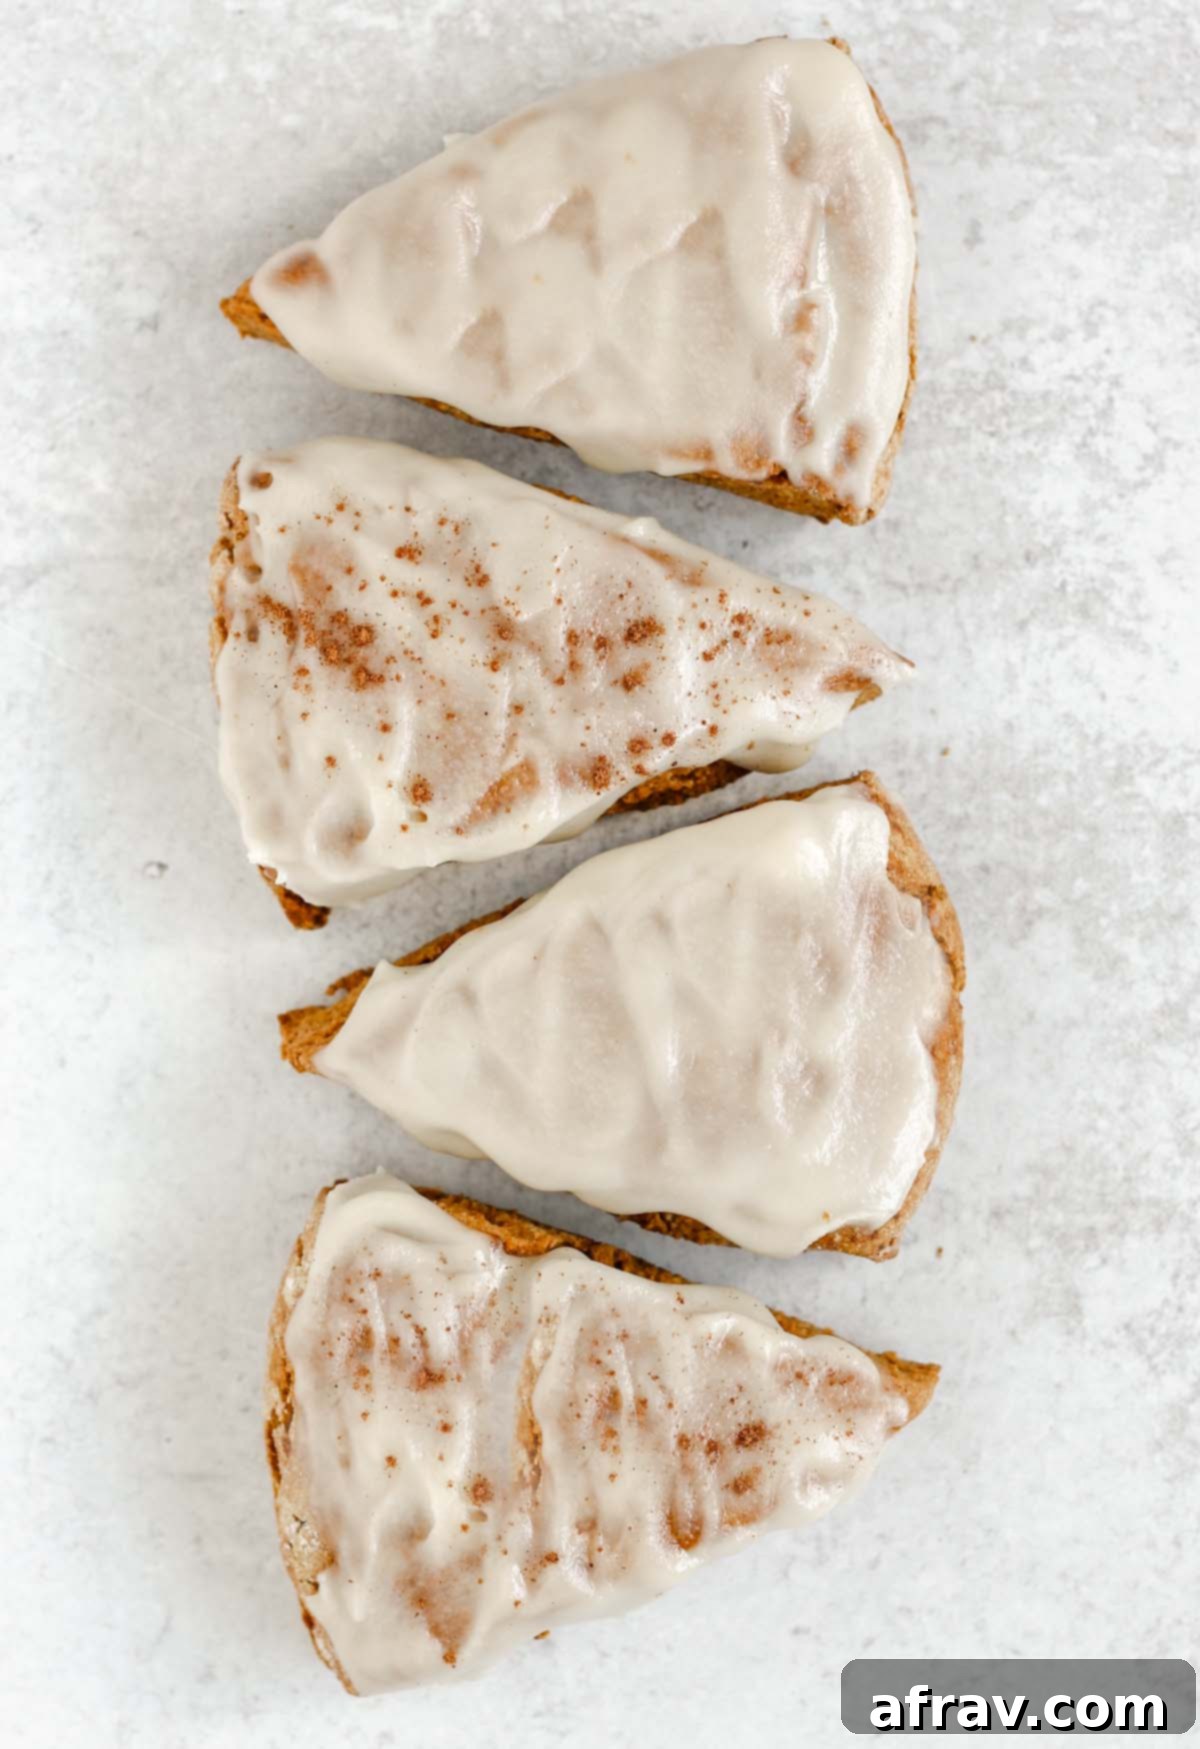
Storing & Freezing Your Gluten-Free Pumpkin Scones for Lasting Freshness
While these homemade gluten-free pumpkin scones are undeniably at their absolute best when enjoyed fresh from the oven, still warm and fragrant, you can certainly extend their deliciousness with proper storage techniques. Here’s how to keep them delightful for longer, ensuring you always have a comforting treat on hand:
Storing at Room Temperature: For immediate enjoyment within the same day, baked scones can be stored in an airtight container at room temperature for up to 24 hours. Placing a paper towel at the bottom of the container can help absorb any excess moisture and prevent them from becoming too soft. While still tasty, their initial crisp exterior will naturally soften over time.
Refrigeration for Extended Freshness: To keep your scones fresh for a bit longer, transfer them to an airtight container and store them in the refrigerator for up to 3 days. Before serving, I highly recommend gently warming them up to restore their tender texture. A quick 15-30 second zap in the microwave will bring back some of their softness and warmth, making them feel almost freshly baked. Alternatively, a few minutes in a toaster oven or conventional oven (around 250-300°F / 120-150°C) can help restore a slightly crisp exterior and a beautifully warm center.
Freezing for Long-Term Enjoyment: These pumpkin scones freeze beautifully, allowing you to enjoy a taste of fall anytime you wish, even months later! For the best results and to maintain optimal texture:
- Freeze without Glaze: It’s highly recommended to freeze the scones *before* glazing them. The delicate texture of the glaze can become watery, sticky, or separate after thawing and reheating, diminishing its appeal.
- Individual Wrapping: Once the baked scones have completely cooled down to room temperature, individually wrap each scone tightly. Start with a layer of plastic wrap, ensuring it’s sealed well, then follow with a layer of tin foil. This double layer of protection is crucial for preventing freezer burn and preserving their freshness.
- Airtight Container: Place the individually wrapped scones into a large freezer-safe bag or an airtight container. They will maintain their quality and deliciousness in the freezer for up to 3 months.
- Thawing and Reheating: When you’re ready to indulge, simply remove the desired number of scones from the freezer. Allow them to thaw at room temperature for a few hours (or overnight in the refrigerator for a slower thaw). Once thawed, reheat them in a preheated oven at 300°F (150°C) for about 5-10 minutes, or until they are warmed through and tender.
- Glaze After Thawing: If you plan to glaze them, do so only after they have been fully thawed and gently warmed up. This ensures the glaze looks and tastes its absolute best, providing that fresh-baked finish.
Having a stash of these gluten-free pumpkin scones in your freezer is a brilliant way to always have a delightful, comforting treat on hand for unexpected guests, busy mornings when you need a quick breakfast, or simply when a craving for cozy fall flavors strikes!
Frequently Asked Questions About Gluten-Free Pumpkin Scones
Here are some common questions you might have as you embark on your journey to bake these delicious gluten-free pumpkin scones, along with detailed answers to help you achieve success:
Yes, absolutely! The base recipe is already thoughtfully crafted to be gluten-free, making it accessible for those with gluten sensitivities. To effortlessly convert these into delicious dairy-free pumpkin scones, simply make two straightforward substitutions: replace the traditional unsalted butter with an equal amount of cold, solid coconut oil, and use your preferred dairy-free milk alternative (such as unsweetened almond milk, oat milk, or cashew milk) in place of regular dairy milk. These simple swaps ensure everyone can enjoy these delightful fall treats, regardless of dairy sensitivities or dietary preferences, without compromising on flavor or texture.
While the unparalleled freshness of a warm scone straight from the oven is truly a treat and highly recommended, you certainly can prepare these in advance. For the very best flavor and texture, we recommend enjoying them within a few hours of baking. However, any leftover scones can be stored in an airtight container at room temperature for up to 24 hours. To extend their shelf life for longer-term planning, store them in an airtight container in the refrigerator for up to 3 days. Before serving, a quick gentle warming in the microwave (15-30 seconds) or a low oven (around 250°F / 120°C for 5-7 minutes) will help restore their tenderness and make them more enjoyable, almost like they were just baked. For truly long-term planning, consider freezing them unglazed as described in the “Storing & Freezing” section.
It’s hard to say definitively, as it’s been many years since I’ve indulged in a baked good from Starbucks, including their pumpkin scones. My focus has always been on creating homemade recipes that are not only incredibly delicious but also align with clean eating principles and offer superior texture. What I can confidently tell you is that these gluten-free pumpkin scones are bursting with authentic fall flavor, perfectly balanced in sweetness, and utterly “drool-worthy.” Whether you opt for the healthy coconut butter glaze or the classic powdered sugar glaze, you’ll find them to be a truly satisfying, wonderfully spiced, and memorable autumnal treat in their own right, deserving of a place in your fall baking rotation!
Using frozen butter is a fundamental secret to achieving the perfect flaky and tender texture that scones are known for. When tiny pieces of very cold, solid butter are incorporated into the dry ingredients, they remain distinct and separate. As the scones bake in the hot oven, these cold butter pieces melt slowly, creating steam that puffs up the dough. This steam generation is what results in airy pockets and distinct layers within the scone, giving it that desirable light and flaky consistency. If the butter is too warm, it melts and fully incorporates into the dough before baking, leading to a denser, more cake-like scone rather than the desired light, airy, and flaky texture. Grating frozen butter helps create those perfect small pieces quickly without warming them with your hands, preserving the butter’s crucial cold state.
Explore More Cozy Fall Recipes!
If you’ve loved the warm, inviting flavors and comforting experience of making these gluten-free pumpkin scones, then you’re undoubtedly a true fan of all things fall! The season offers a bounty of delicious ingredients and inspiring dishes, perfect for cozy gatherings or simply treating yourself. Keep the autumnal spirit alive and well in your kitchen with these other delightful recipes, ideal for crisp days and comforting evenings:
- Harvest Chicken Apple Sausage Sheet Pan Dinner
- Apple Cinnamon Baked Oatmeal
- Cold Wild Rice Salad with Dried Cranberries and Pecans
- Air Fryer Apples
We truly hope you enjoy baking and savoring these delightful gluten-free pumpkin scones as much as we do. They are a testament to how nourishing ingredients can create incredibly satisfying and flavorful treats, perfect for any fall occasion.
If you give this wonderful recipe a try, please don’t hesitate to share your experience and let me know what you think! Your feedback is incredibly valuable to our community. I would be so grateful if you could take a moment to leave a star rating and/or comment below. And of course, if you snap a photo of your beautiful creations, please share it on Instagram or Facebook and make sure to mention or tag @CleanPlateMama and use #CleanPlateMama! Let’s spread the joy of clean, delicious fall baking together!
Eat Clean. Live Well. Enjoy Every Bite!
-Sara
Gluten-free Pumpkin Scones
Print
Pin
Rate
Save This Recipe For Later!
We’ll email this post to you, so you can come back to it later. Plus, enjoy weekly clean eating recipes as a bonus.
Equipment
-
2 mixing bowls
-
1 Baking sheet
-
1 pastry cutter
-
1 pastry brush
Ingredients
Ingredients for the Scones
- 1 ½ cups gluten-free all-purpose flour
- ¾ cup almond flour
- 2 tsp. baking powder
- ½ tsp. baking soda
- 1 tsp. ground cinnamon
- 2 tsp. pumpkin pie spice
- ⅓ cup coconut sugar
- 6 tbsp. unsalted butter, frozen (see notes)
- 1 egg
- ½ cup pumpkin puree (not pumpkin pie mix)
- 1 tsp. pure vanilla extract
- ¼ cup milk (plus more for brushing on scones)
Ingredients for Coconut Butter Glaze
- ¼ cup coconut butter
- 1 tbsp. pure maple syrup
- 1 tbsp. milk
Ingredients for Powdered Sugar Glaze
- ½ cup powdered sugar
- 1-2 tbsp. milk
- ½ tsp. pure vanilla extract
Instructions
-
Pre-heat oven to 400-degrees F (200°C). Line a baking sheet with parchment paper and set aside.
-
Whisk dry ingredients (gluten-free flour, almond flour, baking powder, baking soda, cinnamon, pumpkin spice, and coconut sugar) together in a large mixing bowl until well combined.
-
Using a box grater, grate the frozen butter directly into the dry ingredients. Add butter to the dry ingredients. Using a pastry cutter, or the back of a fork, cut the butter into the flour mixture until small pea-sized butter crumbs form.
-
In a separate small bowl, whisk together the egg, pumpkin puree, vanilla, and milk. Add this wet mixture to the flour/butter mixture and stir with a wooden spoon until a shaggy dough forms. You may need to use your hands to fully mix the ingredients together until just combined. Note: the dough will be sticky!
-
Using your hands, shape the dough into a ball (coat your hands in gluten-free flour if needed to prevent sticking). Transfer dough to a lightly floured surface and then sprinkle the dough ball with additional gluten-free flour. Shape the dough into a disc that is roughly 6″ wide and ¾” high. Using a sharp knife, cut the disc into 8 even triangles.
-
Carefully transfer the dough triangles to the prepared baking sheet, leaving about an inch between each scone. Brush the tops of each scone with additional milk using a pastry brush.
-
Bake for 18-20 minutes, or until scones are golden brown around the edges and are fully set and cooked through in the center.
-
Allow the baked scones to cool on a wire rack. If adding glaze, drizzle with your chosen glaze after they have cooled sufficiently (they can still be slightly warm). Enjoy!
Instructions for Coconut Butter Glaze
-
Add coconut butter to a small microwave safe bowl. Warm the coconut butter in the microwave until it is soft and pliable, but NOT fully melted into a liquid. This should take roughly 30 seconds, depending on your microwave.
-
Using a fork or a small whisk, mix in the pure maple syrup and milk. Start with 1 tablespoon of milk and add additional milk (a teaspoon at a time) if needed, until the glaze is thick but easily spreadable or able to drizzle.
-
Either spread or artfully drizzle the glaze evenly over each cooled scone. The glaze will naturally harden as it sets, creating a delicious finish.
Instructions for Powdered Sugar Glaze
-
Add powdered sugar to a small bowl. Add the vanilla extract and milk, starting with 1 tablespoon of milk, and stir with a fork or small whisk. Add additional milk as needed (a teaspoon at a time) until the glaze is thick but you are able to drizzle it smoothly over the scones.
-
Evenly drizzle the prepared glaze over each cooled scone.
Notes
- Accurate Flour Measurement: Always use the “spoon and level” method when measuring both the gluten-free all-purpose flour and almond flour. This ensures you don’t overpack the measuring cup and inadvertently use too much flour, which can lead to dense, dry scones.
- Butter Temperature is Key: I highly recommend using frozen butter as it keeps the butter nice and cold when mixed in with the other ingredients, crucial for flaky scones. However, butter straight from the fridge can also be used. If your butter isn’t frozen, cut it into very small cubes (about ¼-inch) as opposed to grating, as indicated in the main directions. Work quickly to keep it cold.
- Nutritional Information: The estimated nutritional value provided is based on one scone and includes the coconut butter glaze. Please note that these values are approximations and can vary based on specific brands and ingredient variations.
Nutrition
