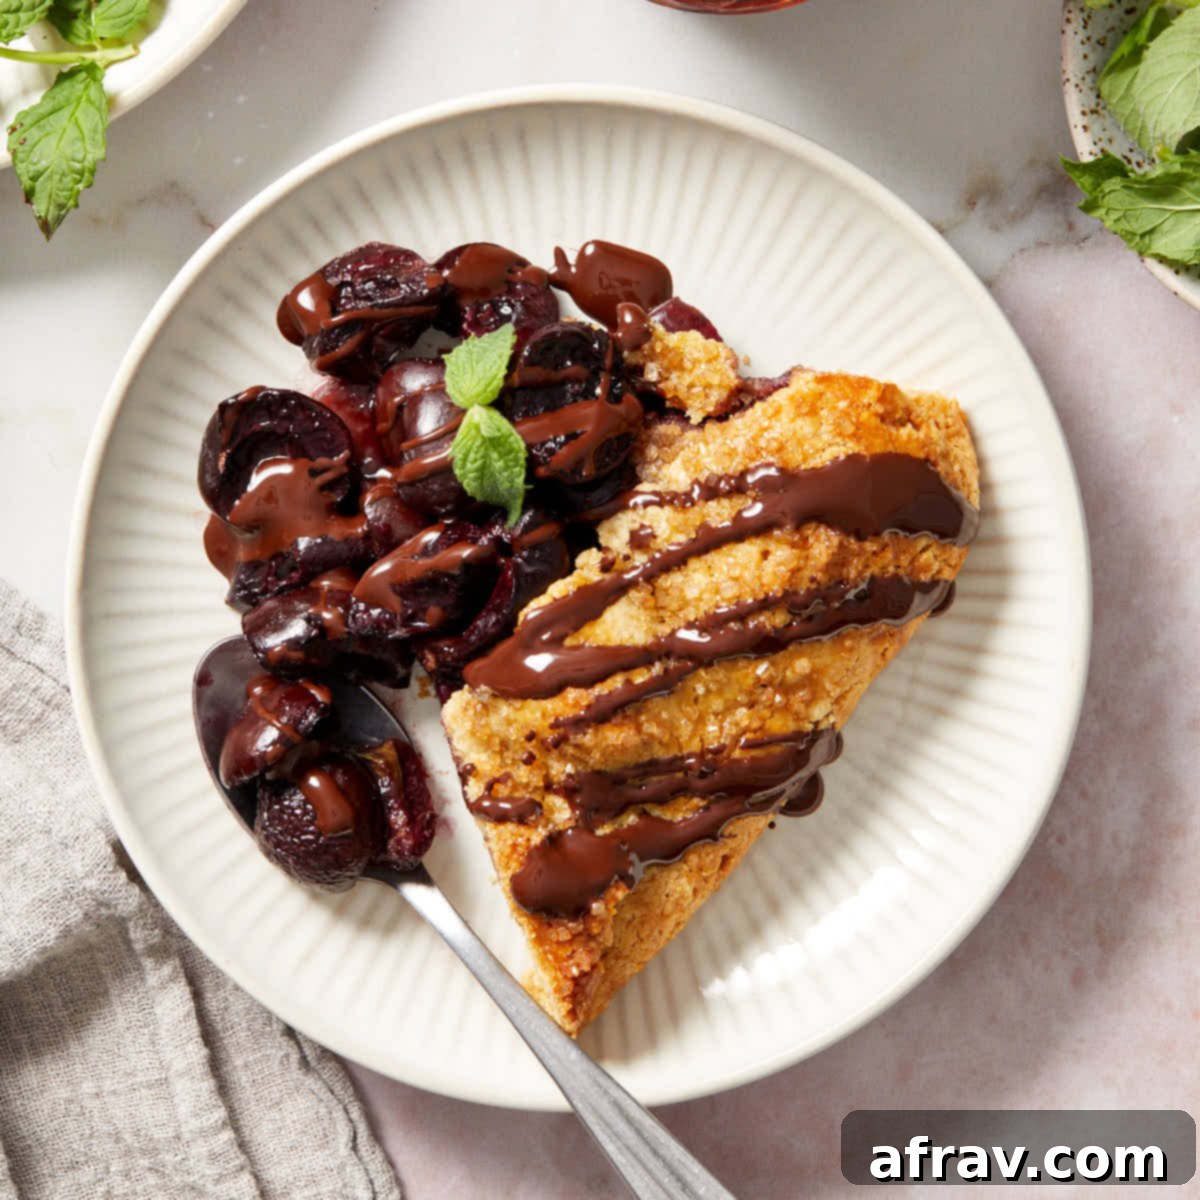
Rustic Gluten-Free Cherry Galette with Flaky Almond Flour Crust
Indulge in the simple elegance of this **Cherry Galette**, a delightfully decadent and rustic dessert. Crafted with a perfectly flaky **almond flour crust**, bursting with sweet, juicy cherries, and brightened by a hint of fresh mint, this galette is a true showstopper. What makes it even better? It’s completely **gluten-free, grain-free, and dairy-free**, making it a fantastic option for a variety of dietary needs. Whether enjoyed on its own with a delicate drizzle of melted chocolate or paired with a generous scoop of your favorite ice cream, this galette promises a memorable experience.
As cherry season draws to a close, there’s no better way to celebrate its lingering sweetness than with this beloved recipe. First shared in 2019, this recipe has been lovingly updated with new photos and expanded tips to ensure your baking success. The core recipe remains the same, a testament to its delicious simplicity and timeless appeal.
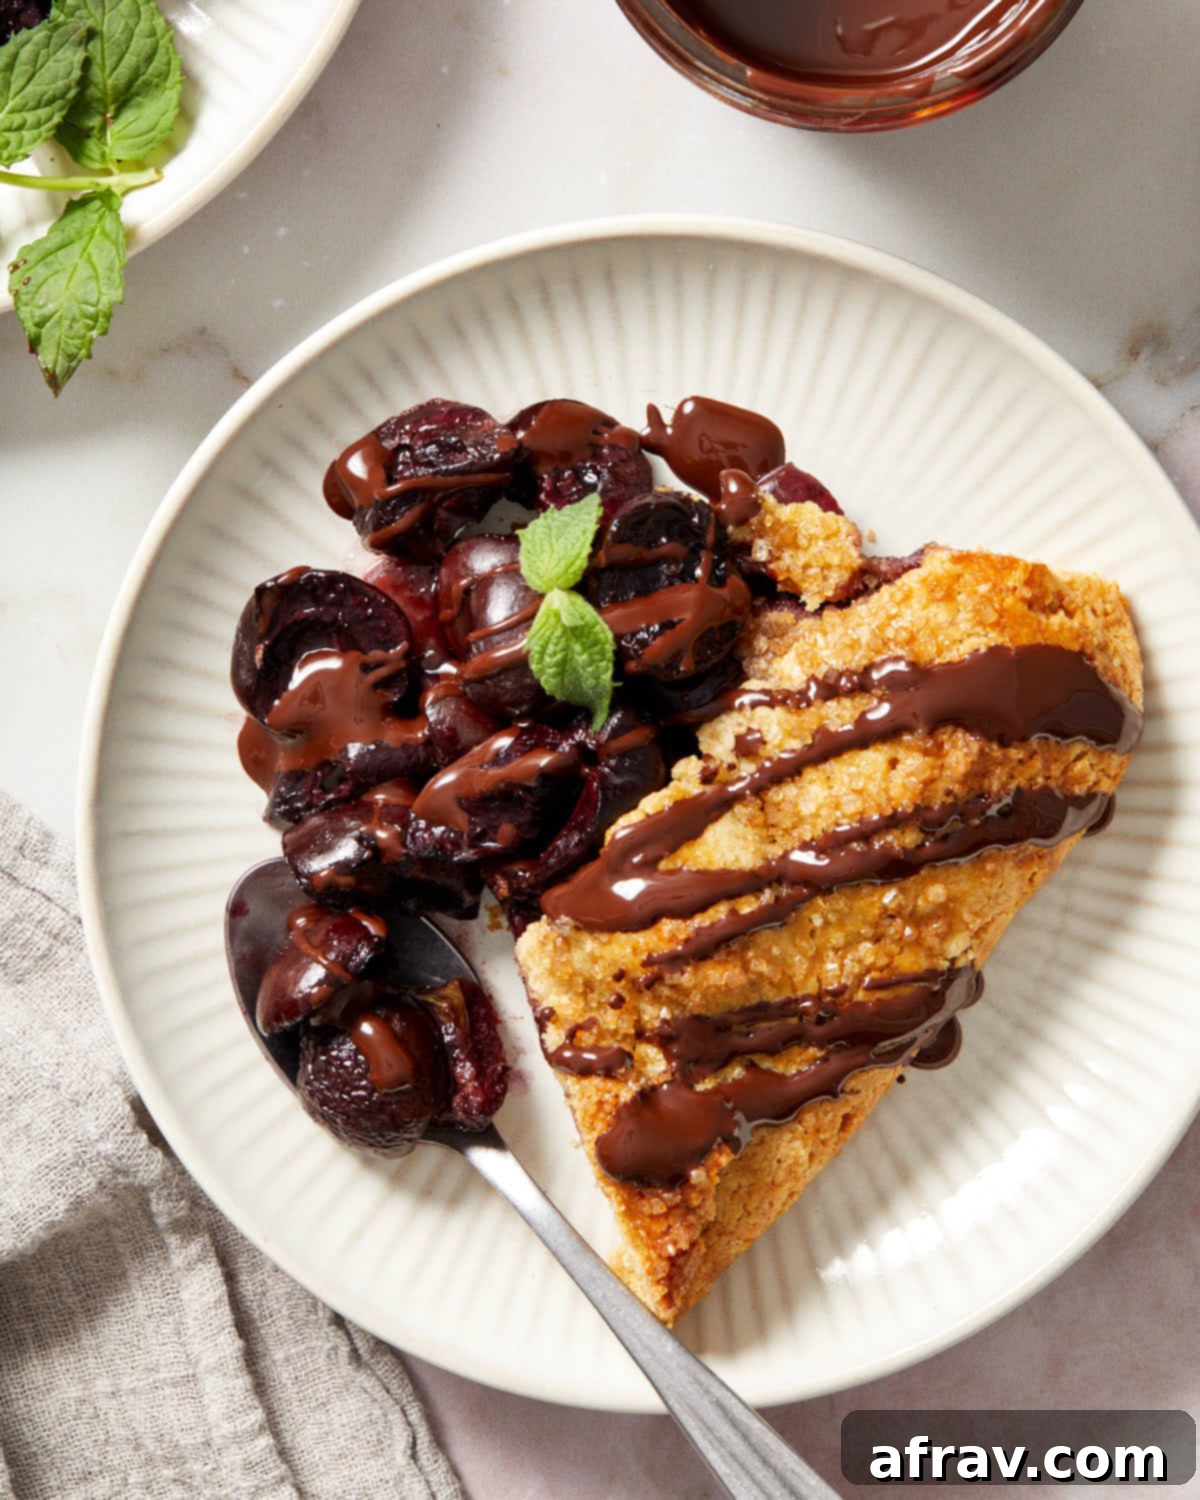
If you’re new to the world of galettes, don’t fret! These open-faced pies are surprisingly easy to make and incredibly forgiving, making them an ideal baking project for beginners and seasoned bakers alike.
This particular cherry galette boasts a luscious, sweet cherry filling nestled within a tender, flaky, and buttery almond flour crust. Thanks to a simple egg wash and a sprinkle of turbinado sugar, the crust bakes up to a beautiful golden brown, achieving that coveted crispy texture that perfectly complements the soft fruit filling.
What is a Galette? The Rustic French Pastry Explained
At its heart, a galette is a charming French pastry, often described as a free-form or rustic pie. It’s distinguished by its crust, typically made from a simple pie dough, which is rolled out flat. Instead of being confined to a pie pan, the filling (sweet or savory) is placed in the center of the dough, and the edges are then casually folded over the filling in an overlapping, unpretentious fashion. This relaxed method means there’s no need for intricate crimping or specific pie or tart pans – it’s simply baked on a flat sheet pan.
One of the most appealing aspects of a galette is its forgiving nature. Unlike perfectly sculpted pies or tarts that demand precision, galettes are meant to look rustic. If the crust cracks slightly or a bit of the fruit filling bubbles out during baking, it only enhances its charming, homemade aesthetic. This makes them significantly less intimidating to prepare than their more formal counterparts.
While this recipe focuses on a delightful fruit-filled version, galettes are incredibly versatile. You can easily adapt them to create savory dishes, such as a tomato galette, making them suitable for appetizers, main courses, or desserts.
Why You’ll Adore This Cherry Galette Recipe
Prepare to fall in love with this **gluten-free cherry galette** for several compelling reasons:
- Effortless Elegance: It delivers all the delightful flavors and textures of a homemade cherry pie, but with significantly less effort and no pie pan required. Its rustic charm is part of its appeal!
- Simple & Forgiving Dough: The almond flour crust is remarkably easy to make, requiring just five basic ingredients. It’s also incredibly forgiving, making it perfect for those new to gluten-free baking. Minor tears are easily pinched back together, contributing to its rustic look.
- Perfectly Portioned: This recipe yields a small galette, ideal for serving approximately 4 people, making it perfect for intimate gatherings or a special treat for your family without an abundance of leftovers.
- Dietary Friendly: Thoughtfully crafted with plant-based and grain-free ingredients, this galette is naturally dairy-free, gluten-free, and grain-free, catering to various dietary preferences without compromising on taste.
- Seasonal Delight: It’s the ultimate way to showcase fresh, seasonal cherries, letting their natural sweetness shine through in a truly delicious dessert.
- Customizable Toppings: Enjoy it as is, or customize with your favorite toppings like a decadent chocolate drizzle or a scoop of creamy vanilla ice cream.
Essential Ingredients and Smart Substitutions for Your Cherry Galette
For the precise list of ingredients and their quantities, please refer to the comprehensive recipe card located at the end of this post. Here’s a deeper dive into the key components and potential substitutions to help you achieve the perfect galette:
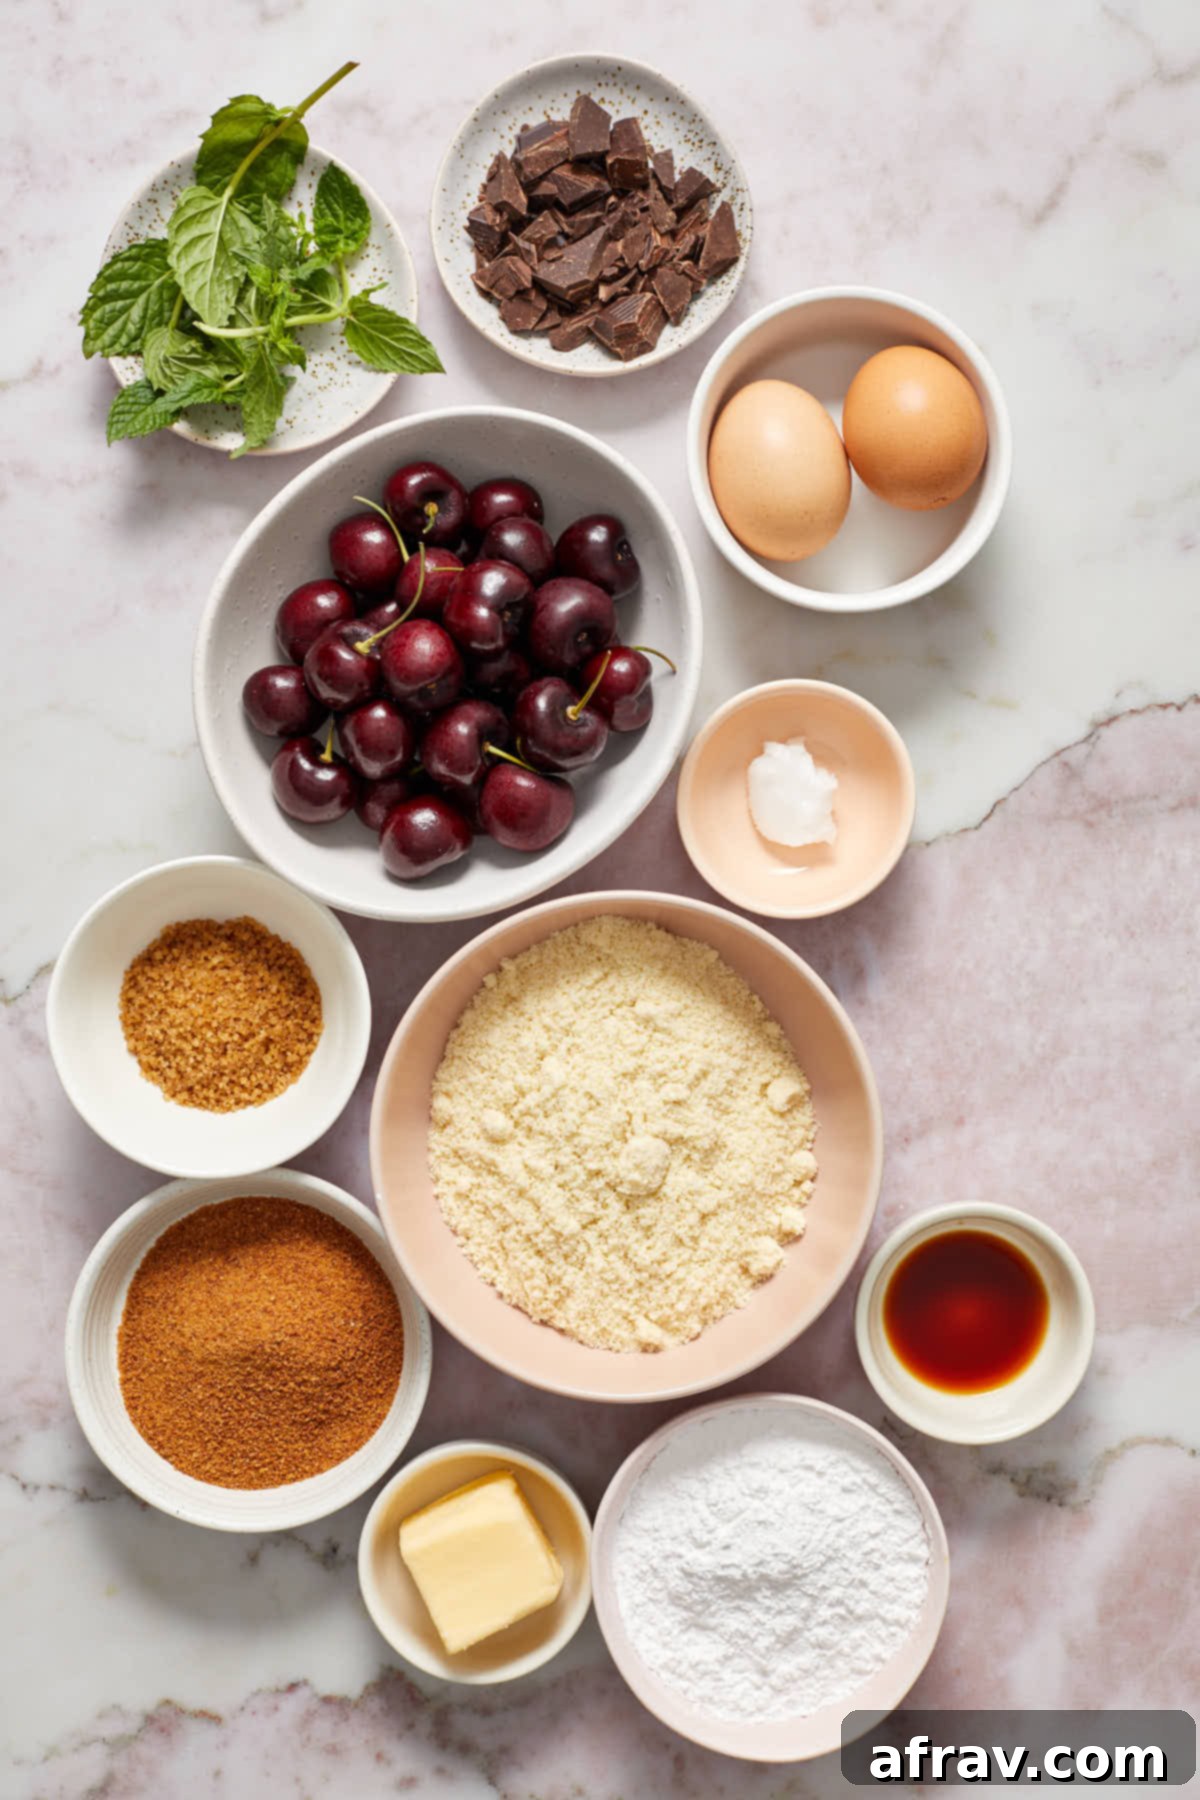
Cherries: For this delightful galette filling, I opted for fresh **Bing cherries**. Their deep red color and naturally sweet flavor make them an excellent choice, and they are typically abundant during cherry season. However, don’t limit yourself! Any other variety of fresh, sweet cherry will work beautifully. If fresh cherries are out of season or unavailable, you can use frozen cherries (see FAQ section for tips on using them).
Almond Flour: The foundation of our **gluten-free and grain-free crust** is blanched almond flour. This finely ground flour, made from blanched (skinless) almonds, provides a tender and slightly nutty flavor. It’s crucial to use blanched almond flour for its fine texture, which is quite different from coarser almond meal (made from unblanched almonds with skins on). Using almond meal will result in a denser, less delicate crust.
Tapioca Flour: Also known as tapioca starch, this ingredient is derived from the cassava plant root. In this recipe, it serves a dual purpose: it helps create a workable, pliable dough for the crust and, more importantly, acts as a thickener for the cherry filling. It’s an excellent grain-free alternative to cornstarch. While I haven’t specifically tested cornstarch in this exact recipe, it often works as a 1:1 substitute for tapioca flour in fruit fillings, but be aware it might slightly alter the texture of the crust if substituted there.
Coconut Sugar: This unrefined sugar is used to sweeten both the almond flour crust and the vibrant cherry filling. It imparts a subtle caramel-like flavor that complements the cherries wonderfully. While brown sugar is often used interchangeably with coconut sugar in some recipes, I advise caution here. Brown sugar contains more moisture, which could potentially affect the texture of your dough, making it stickier, and could also thin out the filling. If you choose to substitute, be prepared to adjust other dry ingredients slightly.
Turbinado Sugar: This coarse, golden-brown sugar is sprinkled on the edges of the galette crust just before baking. Its larger crystals don’t melt away completely, providing a beautiful sparkle, a delightful crunch, and contributing to that desirable golden-brown color on the crust. If turbinado sugar isn’t available, you can use extra coconut sugar, or try cane sugar or granulated sugar for a similar effect, though the texture might be slightly different.
Eggs: You’ll need two eggs for this recipe. One egg is essential for binding the almond flour dough, providing structure and richness to the crust. The second egg is whisked to create an egg wash, which is brushed over the dough before the filling is added and again on the folded edges before baking. This egg wash helps create that beautiful golden-brown, crispy exterior and acts as a barrier to prevent a soggy bottom.
Butter: Cold, cubed unsalted butter is crucial for achieving a light, flaky, and rich crust. The cold butter creates pockets of steam during baking, resulting in those desirable layers. To maintain the **dairy-free** nature of this recipe, I used a high-quality plant-based butter. However, if dairy is not an issue for you, feel free to use regular unsalted butter.
Vanilla Extract: Just a touch of vanilla extract is added to the cherry filling to enhance the fruit’s natural sweetness and add a layer of aromatic depth. For an interesting twist that pairs exceptionally well with cherries and almonds, consider substituting with a small amount of almond extract.
Fresh Mint: A few finely chopped leaves of fresh mint are incorporated into the cherry filling. This addition offers a subtle, refreshing herbaceous note that surprisingly complements the sweet cherries and, especially, any chocolate topping you might add. If mint isn’t to your taste or you don’t have any on hand, the galette will still be absolutely delicious without it.
Dark Chocolate: Drizzling the warm, baked galette with melted dark chocolate is an optional step, but one that is highly recommended for an extra touch of indulgence. To keep this recipe **dairy-free and gluten-free**, ensure you select a plant-based and gluten-free dark chocolate or chocolate chips. If you don’t have these dietary restrictions, any good quality dark chocolate will do.
Coconut Oil: A small amount of virgin, cold-pressed coconut oil is melted with the dark chocolate. This helps to thin out the chocolate, creating a smooth, pourable consistency perfect for drizzling. Alternatively, you can use a bit more plant-based butter if preferred.
Crafting Your Gluten-Free Cherry Galette: A Step-by-Step Guide
Creating this rustic cherry galette is simpler than you might imagine. Follow these steps for a beautiful and delicious result:
Preparing the Flaky Almond Flour Crust
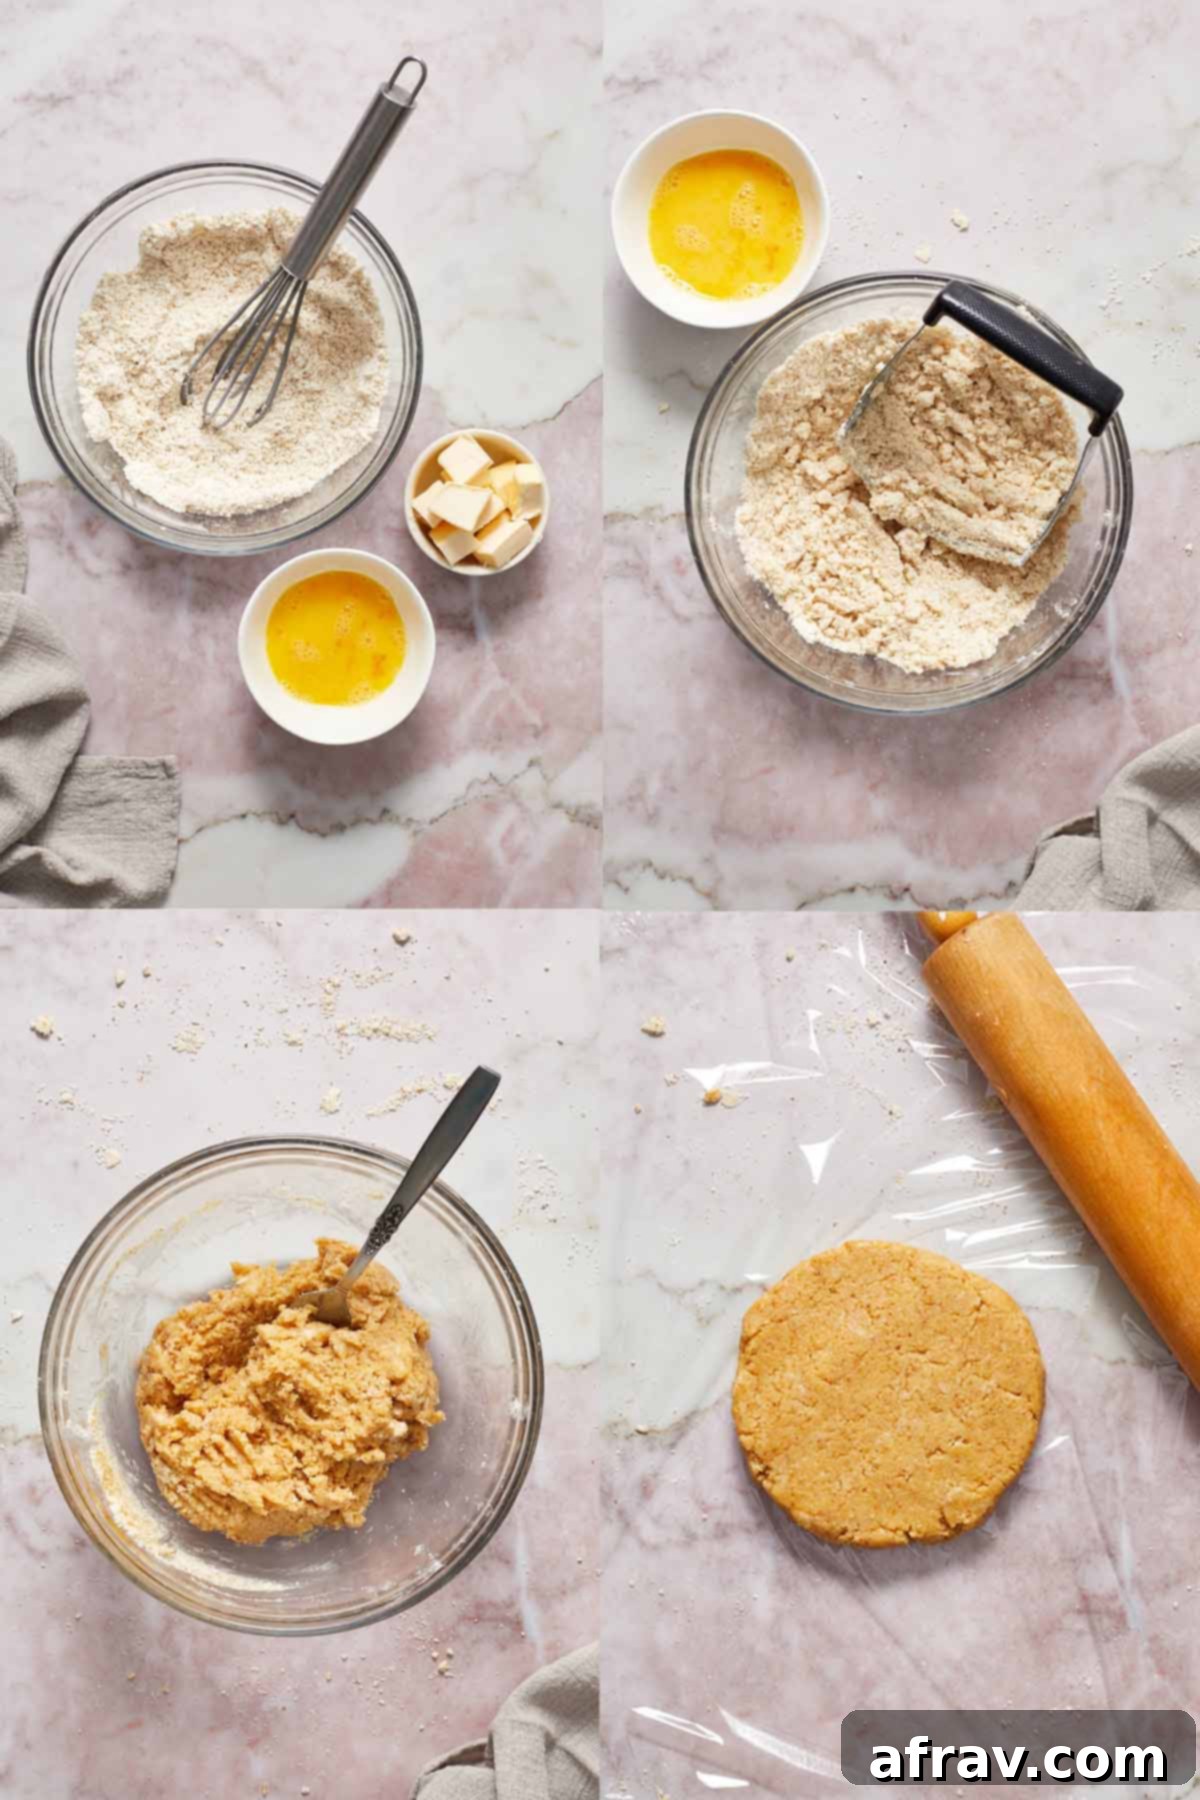
- Begin by combining the dry ingredients for your crust: almond flour, tapioca flour, and coconut sugar in a medium-sized bowl. Whisk them thoroughly to ensure even distribution.
- Next, add the cold, cubed butter. Using a pastry cutter (or a dough blender, or even your fingertips), cut the butter into the flour mixture until it resembles coarse crumbs with some small, pea-sized pieces of butter remaining. These small pockets of butter are key to achieving a flaky crust. Avoid overworking the mixture, as this can warm the butter too much.
- Introduce the whisked egg to the crumbly mixture. Use a fork to mix it in until the dough just comes together.
- Gently form the dough into a ball, then flatten it into a disk, approximately 5 inches in diameter. Wrap the disk tightly in plastic wrap and refrigerate for at least one hour. This chilling time is crucial as it allows the gluten-free flours to hydrate and the butter to firm up, making the dough much easier to roll out.
Crafting the Sweet Cherry Filling
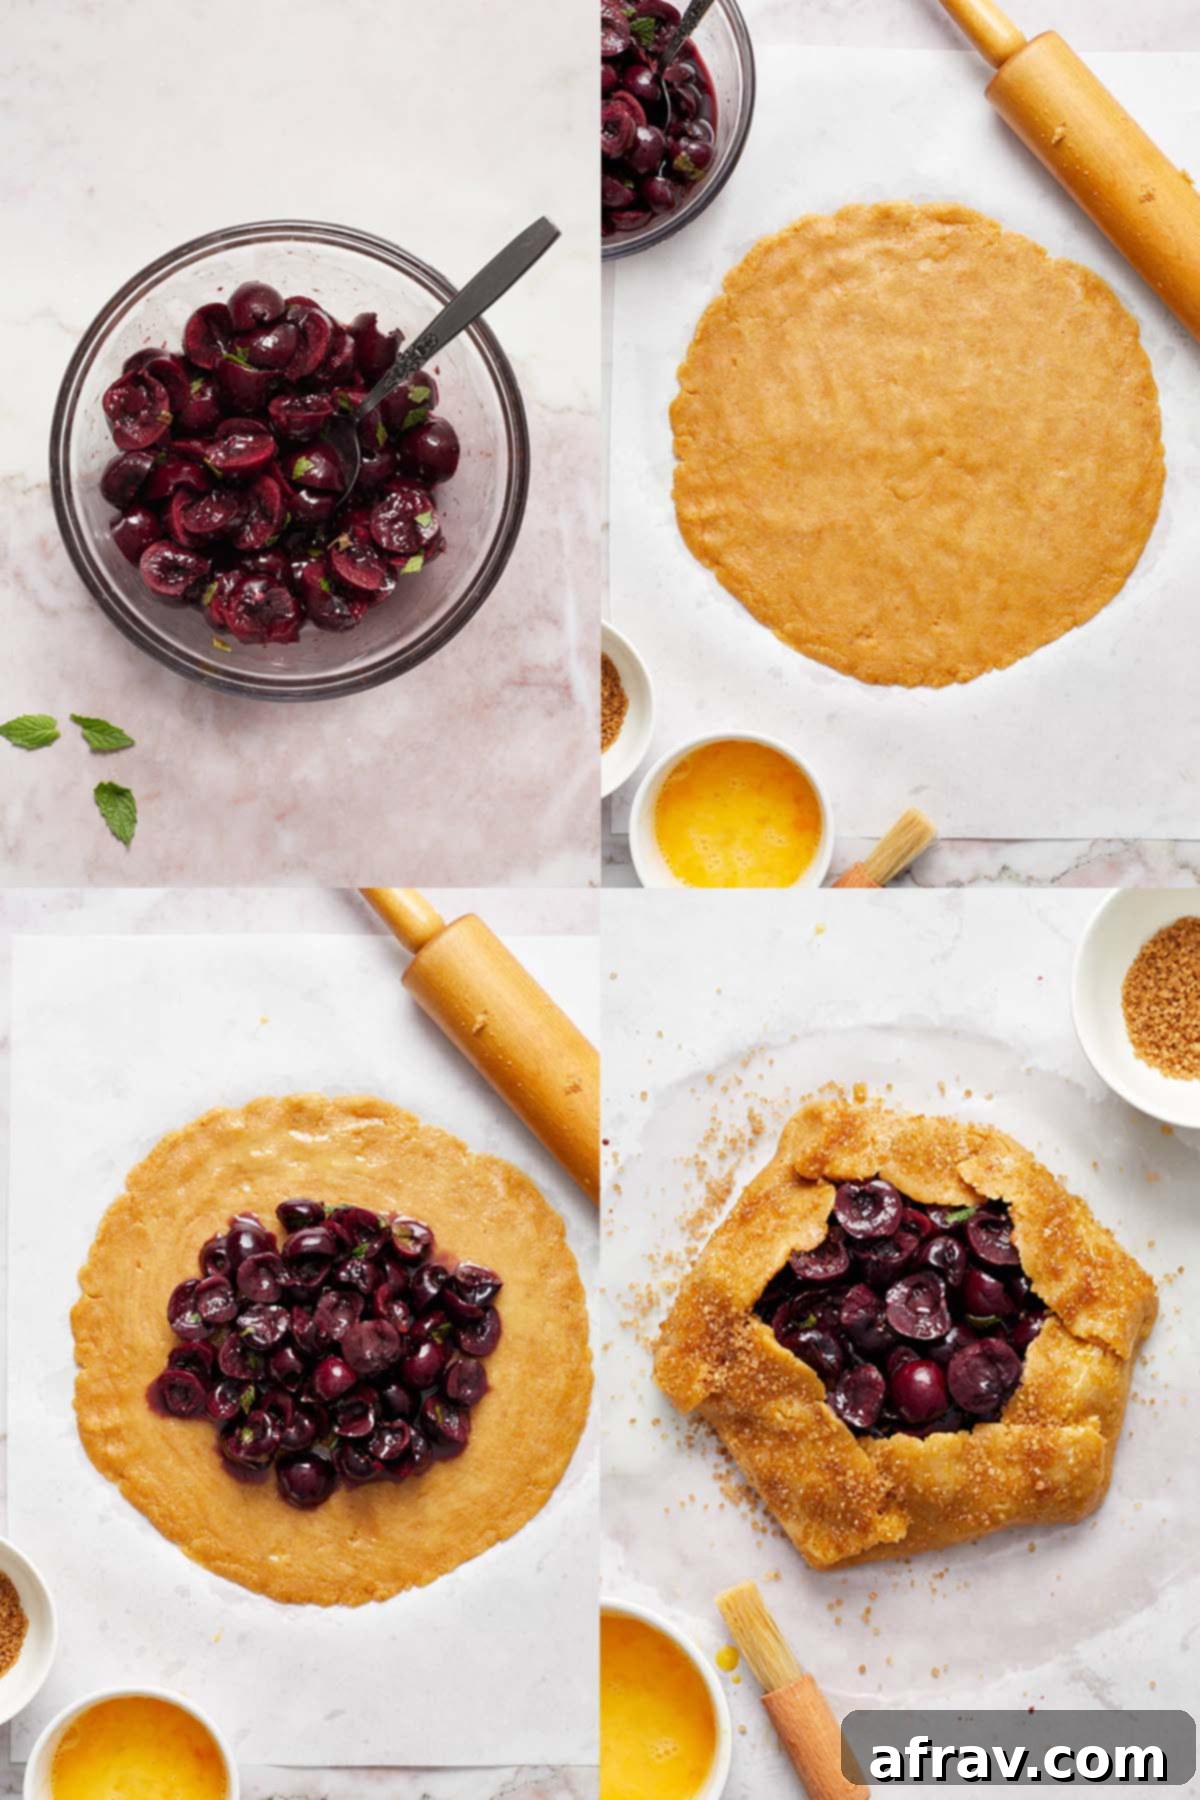
- While your dough is chilling, prepare the flavorful cherry filling. In a small bowl, combine the pitted and halved cherries, coconut sugar, tapioca flour, vanilla extract, and chopped fresh mint.
- Stir all the ingredients together thoroughly, ensuring that the tapioca flour is fully incorporated and coats the cherries. This will help thicken the juices released during baking and prevent a soggy bottom. Store this mixture in the fridge until you’re ready to assemble the galette.
Assembling and Baking Your Galette
- Once the dough has sufficiently chilled, preheat your oven to 375°F (190°C). Prepare your work surface by laying down a sheet of parchment paper. Remove the dough from its plastic wrap and place it on the parchment paper.
- Using a rolling pin, carefully roll out the dough into a circular shape, about 10 inches in diameter. The parchment paper helps prevent sticking and makes transferring the galette much easier.
- Lightly brush the rolled-out dough with a thin layer of the whisked egg wash (this is your first barrier against a soggy crust!). Then, spoon the cherry mixture (including any accumulated liquid) into the center of the dough, leaving a generous 2-inch border around the edges.
- Now, for the rustic part! Gently fold the border of the dough up and over the cherry filling, creating overlapping pleats. Don’t worry about perfection; the charm of a galette is its imperfect, free-form shape. If the dough feels a bit sticky, use the parchment paper to assist in lifting and folding the edges. Should the dough tear, simply pinch it back together with your fingers. It’s very forgiving!
- Once the edges are folded, brush the exposed dough with the remaining egg wash. This will help achieve a beautiful golden crust. Sprinkle the turbinado sugar generously over the egg-washed edges for extra crunch and sparkle.
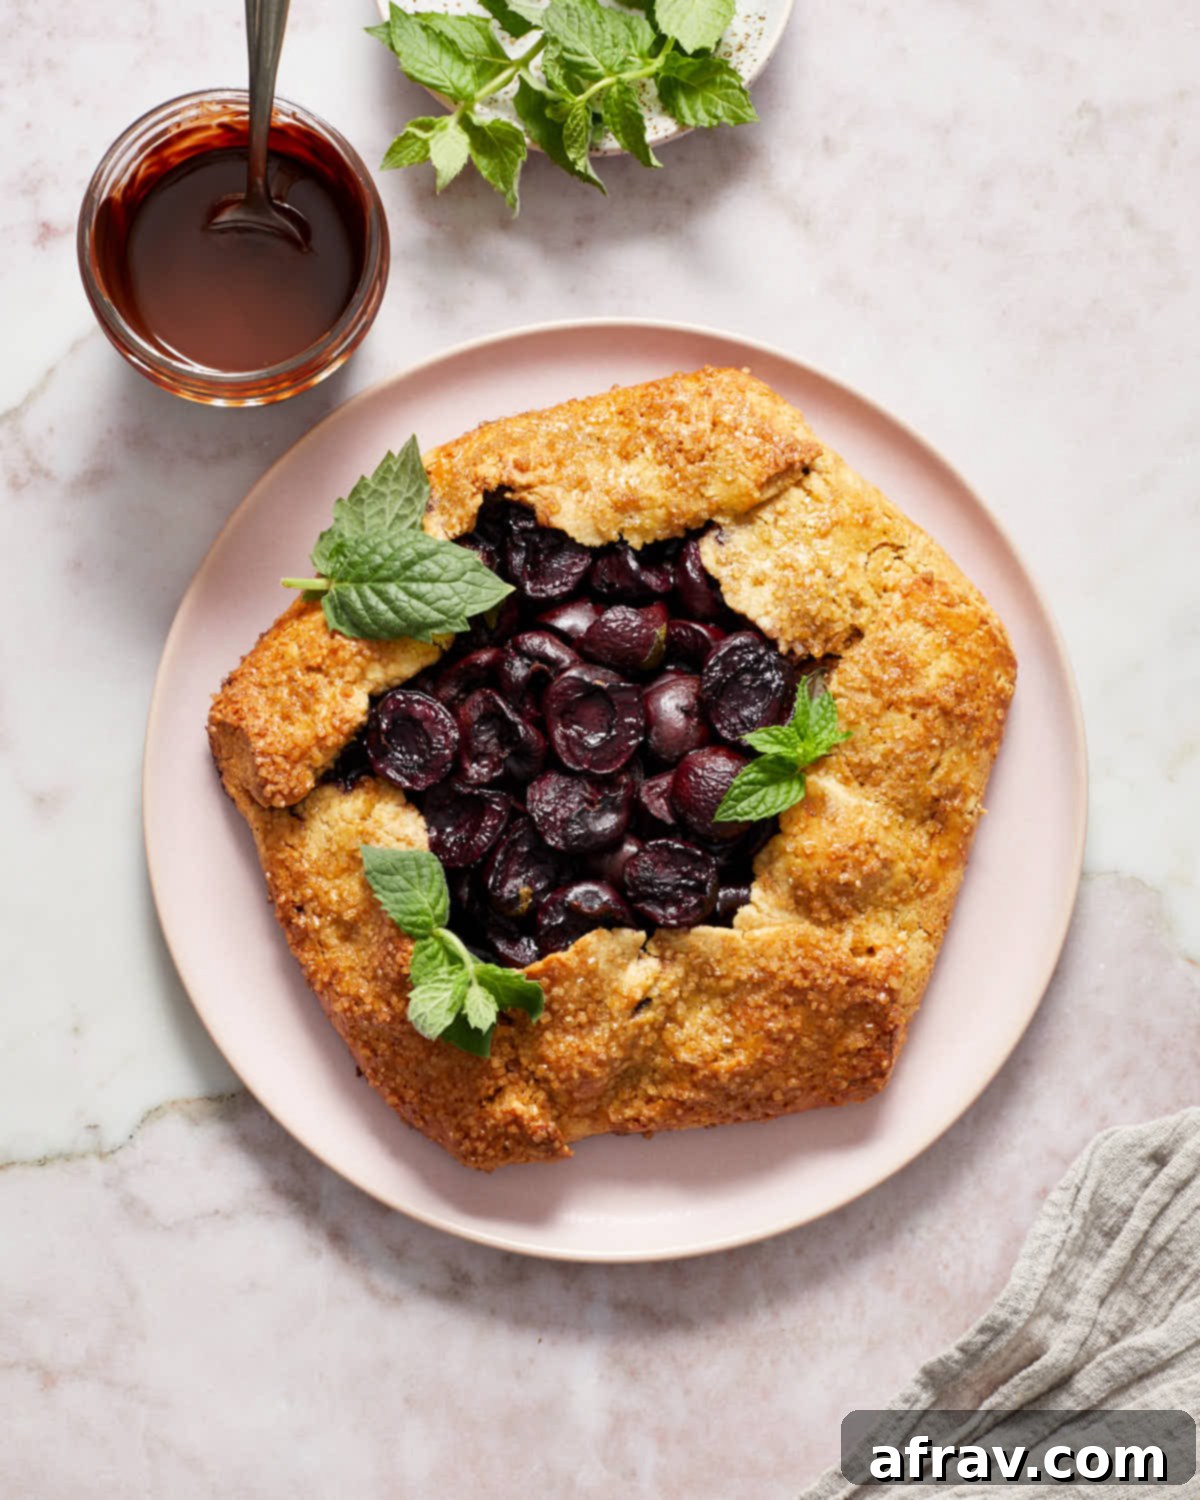
- Carefully transfer the galette, still on its parchment paper, to a baking sheet. Bake for 30-35 minutes, or until the crust achieves a deep golden brown color and appears crispy.
- Once baked, remove the galette from the oven and allow it to cool slightly on the baking sheet before transferring.
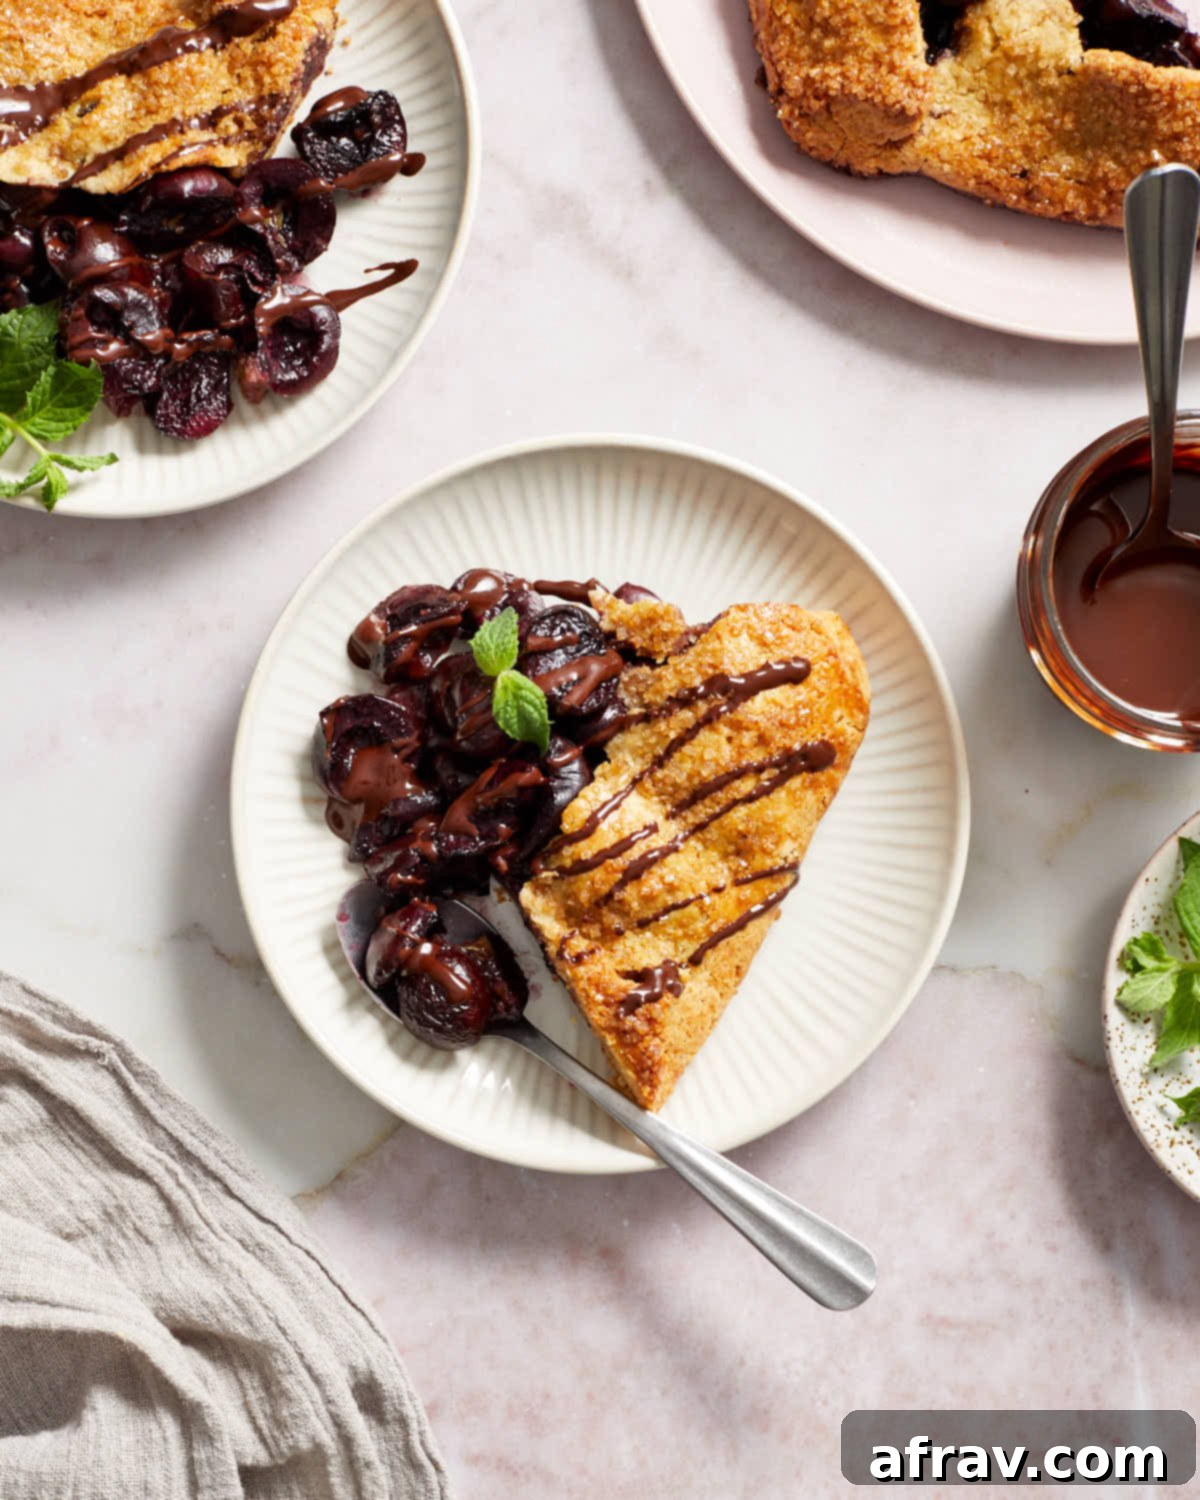
- For the optional chocolate drizzle, melt the chopped dark chocolate and coconut oil together in a small microwave-safe bowl. Microwave in 30-second intervals, stirring between each, until smooth and pourable.
- Slice the galette into 4 pieces, drizzle generously with the melted chocolate, and serve immediately. Enjoy this rustic, sweet, and satisfying gluten-free treat!
Storage Tips for Your Cherry Galette
This **gluten-free cherry galette** truly shines when served fresh, warm, and with its crust at its crispiest. However, if you find yourself with delightful leftovers, here’s how to properly store and enjoy them:
For short-term storage, you can keep any leftover galette covered at room temperature for 1-2 days. To extend its freshness, transfer the galette to an airtight container and store it in the refrigerator, where it will remain delicious for 4-5 days.
This galette is also suitable for freezing. Allow the baked galette to cool completely before wrapping it tightly in plastic wrap. Then, place it in a freezer-safe container or bag. It can be frozen for up to 3 months. When you’re ready to enjoy it, simply defrost the galette in the refrigerator overnight before reheating.
While leftovers can certainly be enjoyed cold, I highly recommend reheating them for the best experience. Place the galette back in the oven at 350°F (175°C) for 12-15 minutes, or until the filling is warmed through. Do note that while the flavors will remain fantastic, the crust may not regain its original crispness after refrigeration or freezing and reheating.
Frequently Asked Questions About Cherry Galettes
For this recipe, I used sweet Bing cherries, which are widely available during peak cherry season and offer a beautiful color and robust flavor. However, feel free to experiment with other fresh cherry varieties such as Rainier cherries (for a sweeter, milder taste), black cherries, or even tart sour cherries for a more tangy filling. Regardless of the type, always remember to pit them and cut them in half before preparing your filling.
Absolutely! While fresh cherries are always my preference for their vibrant texture and flavor, frozen cherries are a perfectly acceptable substitute, especially outside of cherry season. The key is proper preparation: first, let them thaw completely in the refrigerator. Then, thoroughly drain any excess liquid that has accumulated and gently blot the cherries dry with a paper towel. This prevents the filling from becoming too watery. Once prepped, you can proceed with making the filling as directed in the recipe.
Preventing a soggy bottom is crucial for a great galette, and there are two main strategies:
First, before adding the fruit filling, brush the rolled-out dough with an egg wash. This thin layer of egg creates a protective barrier, acting as a shield to prevent the delicious, juicy liquid from the cherry filling from soaking into and softening the dough beneath.
Second, the filling itself plays a vital role. Incorporating a thickener like tapioca flour (as used here) or cornstarch is essential. These starches absorb the juices released by the cherries as they bake, transforming them into a thick, glossy sauce rather than a watery liquid. A properly thickened filling will significantly reduce the risk of a soggy crust.
A perfectly baked galette will have a beautiful, deep golden brown and crispy crust. This visual cue is usually a strong indicator that it’s ready to be removed from the oven. To be absolutely sure, you can gently use a spatula to lift a small portion of the bottom of the galette. If the underside of the crust is also nicely browned, you can confidently take it out. The filling should also appear bubbly and slightly thickened.
Yes, partial preparation in advance is a great time-saver!
The galette dough is actually perfect for making a day or two ahead. Simply wrap the prepared dough disk tightly in plastic wrap and store it in the refrigerator. When you’re ready to bake, just remove it from the fridge, allow it to soften slightly at room temperature if too firm, and then proceed with rolling out the dough and assembling the galette.
You can also prepare the cherry filling a few hours in advance. Combine all the filling ingredients and store them in the fridge. Just be aware that the longer the cherries sit with the sugar, the more liquid they may release. Before adding the filling to your dough, you might need to gently drain off a small amount of excess liquid to ensure your crust remains crisp.
Precision in Measuring Ingredients
For your convenience and to cater to various kitchen setups, US cup measurements are provided in the recipe card for this recipe. However, for the utmost accuracy, particularly in baking where precision can significantly impact results, weight and volume measurements (grams and milliliters) are also included. When you see grams (g), it’s highly recommended to use a kitchen scale to weigh your ingredients. For milliliters (ml), a liquid measuring cup is ideal. Smaller quantities of ingredients are typically listed in teaspoons and tablespoons for ease of measurement.
Expert Tips for Working with Almond Flour Dough
Almond flour dough behaves a bit differently than traditional wheat flour doughs, but with these tips, you’ll find it a joy to work with:
- Don’t Skip the Chill: The chilling step for the dough is non-negotiable. It allows the flours to fully hydrate and the butter to firm up, resulting in a dough that is much less sticky and significantly easier to roll out without tearing. Aim for at least an hour.
- Hand-Press if Sticky: If you find the dough is resisting the rolling pin or starting to stick excessively, don’t force it. Instead, lightly flour your hands and gently press the dough out with your fingertips. Almond flour dough is quite pliable and responds well to this method.
- Embrace Imperfection (and Repair): This dough is incredibly forgiving. If it tears while you’re rolling it out or as you’re folding the edges around the filling, simply pinch the torn edges back together with your fingers. The rustic nature of a galette means these small repairs will blend right in and contribute to its charm.
- Chill if it Softens: If at any point during the assembly process the dough becomes too soft or difficult to handle (especially in a warm kitchen), simply transfer the entire galette (on its parchment paper) to the fridge for 10-15 minutes. This will firm it up, making it easier to finish assembling or handle before baking.
Key Recipe Success Tips for Your Cherry Galette
To ensure your gluten-free cherry galette turns out perfectly every time, keep these essential tips in mind:
- Accurate Flour Measurement: If you don’t have a kitchen scale to weigh your flours, make sure to use the “spoon and level” method with a dry measuring cup. Spoon the flour into the cup until it overflows, then level off the excess with the straight edge of a knife. Never scoop directly from the bag, as this compacts the flour and results in too much.
- Keep Butter Cold: The temperature of your butter is paramount for a flaky crust. Ensure your butter is very cold and cut into small cubes. If it gets too warm, the dough will be difficult to work with and the crust won’t achieve the desired flakiness.
- Tools for Butter: While a pastry cutter is ideal for incorporating cold butter into flour, you can also use a fork, your fingertips (working quickly to avoid warming the butter), or even a food processor (pulse just a few times). The goal is to leave small, pea-sized pieces of butter throughout the mixture, which create pockets of steam during baking for that buttery, flaky texture.
- Embrace the Ooze: Don’t be alarmed if some of the cherry filling oozes out of the galette as it bakes. This is completely normal for rustic, free-form pastries and only adds to its homemade appeal.
- Mint is Optional: The fresh mint adds a lovely, subtle flavor that complements the cherries and chocolate beautifully. However, if mint isn’t to your taste, feel free to omit it entirely. The galette will still be incredibly delicious.
- Don’t Skip Coarse Sugar: Sprinkling turbinado sugar (or a similar coarse sugar) on the crust edges before baking is highly recommended. It not only adds a beautiful sparkle but also contributes significantly to the crispiness and golden-brown perfection of the crust.
- Topping Versatility: The melted dark chocolate drizzle is a fantastic optional topping that elevates the galette. However, feel free to serve your galette as is, with a dusting of powdered sugar, or with a scoop of vanilla ice cream or dairy-free alternative for a classic pairing.
More Delicious Cherry Recipes to Explore
If you’re a fan of cherries, you’ll love these other delightful recipes:
- Almond Flour Cherry Pie Bars
- Cherry Chia Pudding
- Cherry Almond Crisp
- Baked French Toast Casserole with Cherries
- Cherry Chocolate Chip Nice Cream
If you try this **gluten-free cherry galette recipe**, I would absolutely love to hear your thoughts and feedback in the comments section below!
HUNGRY FOR MORE? Follow Crumb Top Baking on Instagram, Pinterest and Facebook!
Print

Cherry Galette with Almond Flour Crust
5 Stars
4 Stars
3 Stars
2 Stars
1 Star
5 from 13 reviews
- Author: Leanne
Prep Time: 20 minutes
Chill Time: 1 hour
Cook Time: 35 minutes
Total Time: 1 hour 55 minutes
Yield: 4 slices
Category: Dessert
Method: Bake
Cuisine: French
Diet: Gluten Free
Description
This Cherry Galette is decadent and rustic with an almond flour crust, sweet cherries and fresh mint. It’s also gluten-free, grain-free and dairy-free!
Ingredients
For the crust:
- 1 cup (104g) blanched almond flour
- 1/2 cup (70g) tapioca flour
- 2 tablespoons coconut sugar
- 1/4 cup (57g) plant-based unsalted butter, cold and cubed
- 1 large egg, whisked
For the filling:
- 2 cups (290g) fresh cherries, pitted and halved
- 2 tablespoons coconut sugar
- 1 tablespoon tapioca flour
- 1 teaspoon vanilla extract
- 1 teaspoon chopped fresh mint
For the topping:
- 1 egg, whisked (for the egg wash)
- 1 tablespoon turbinado sugar
- 1/4 cup (40g) plant-based dark chocolate, chopped
- 1/2 tablespoon coconut oil, virgin and cold-pressed
Instructions
Make the crust:
- In a medium-sized bowl, whisk together the almond flour, tapioca flour and coconut sugar.
- Using a pastry cutter, cut the butter into the flour mixture until it is incorporated. There shouldn’t be any large chunks of butter remaining, but small pieces (pea size) will help create a flakey crust.
- Add the egg and mix with a fork until a dough forms.
- Shape the dough into a ball and then flatten into a disk about 5 inches in diameter. Cover in plastic wrap and refrigerate for an hour.
Make the filling:
- In a small bowl, add the cherries, sugar, tapioca flour, vanilla and mint, and stir together until the flour is well incorporated. Store in the fridge until ready to use.
Assemble and bake the galette:
- Once the dough is chilled, preheat oven to 375F and place a sheet of parchment paper on your work surface. Roll out the dough on the parchment paper to form a 10-inch round.
- Brush the dough with a thin layer of egg wash and place the cherry mixture (including liquid) in the middle of the dough, leaving a 2-inch border.
- Fold the border around the cherries. If the dough is too sticky, use the parchment paper to help lift the dough and fold. If the dough tears, just pinch it together with your fingers.
- Brush the egg wash onto the edges of the dough (you won’t use all of the egg wash) and sprinkle on the turbinado sugar.
- Transfer the galette, along with the parchment paper, to a sheet pan. Bake for 30-35 minutes, or until the crust is a deep golden brown. Remove from oven and let cool slightly.
- In a small microwave safe bowl, add the chocolate and coconut oil, and microwave for two 30 second intervals, or until the chocolate is melted. Be sure to stir in between intervals.
- Cut the galette into 4 pieces, drizzle on the melted chocolate and serve immediately.
Notes
- If you don’t have a kitchen scale to weigh your flours, measure them by using the spoon and level method with a dry measuring cup.
- Make sure your butter is cold. Otherwise, the dough may get too soft to work with.
- If you don’t have a pastry cutter, you can use a fork, your fingers or a food processor. Just make sure some small pieces of butter remain throughout the dough.
- Don’t skip the step of chilling the dough as this makes the dough easier to roll out.
- If you find the dough starting to stick to the rolling pin as you’re rolling it out, you can start pressing it out using your hands.
- If the dough gets too soft while you’re assembling the galette, just pop the galette in the fridge for 10-15 minutes before baking it.
- It’s not uncommon for some of the filling to ooze out of galettes as they bake. Don’t worry about it!
- This galette has a hint of mint, but if you’re not a fan, you can just leave it out.
- The melted chocolate topping is optional. You can serve it as is or add a scoop of ice cream instead.
- The recipe for the dough was adapted from Wife Mama Foodie.
- Be sure to check out the other sections above the recipe card for more detailed advice and suggestions for making this recipe.
