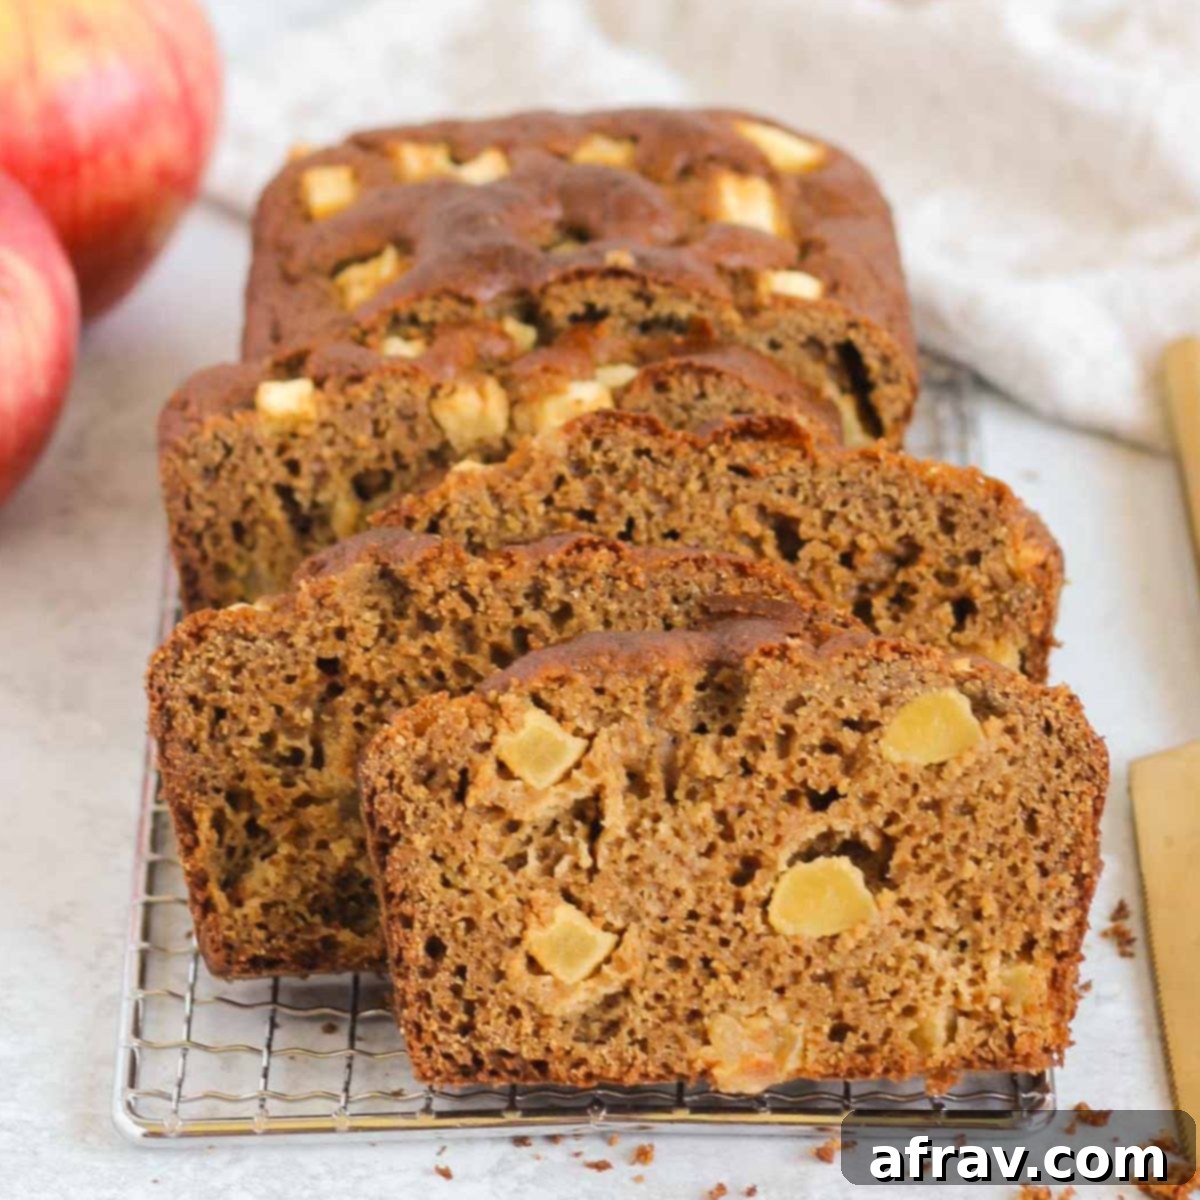
Healthy Gluten-Free Apple Cinnamon Bread: Your Ultimate Fall Baking Recipe
Embrace the delightful essence of autumn with this incredibly warm, cozy, and utterly delicious healthy apple cinnamon bread. This recipe is your perfect companion for chilly mornings or a comforting afternoon snack, bringing the quintessential flavors of fall right into your kitchen. Crafted with a thoughtful blend of almond flour and oat flour, and naturally sweetened to perfection, this sweet bread offers a guilt-free indulgence you’ll genuinely feel good about eating.
What makes this healthy apple bread truly remarkable is its simplicity and speed. You’ll be amazed at how quickly it comes together – requiring just 15 minutes of hands-on prep time before it’s ready for the oven. Say goodbye to complicated baking processes and hello to a fuss-free treat that’s both nutritious and bursting with flavor. Imagine your home filled with the inviting aroma of warm apples and fragrant cinnamon – it’s an experience that truly captures the spirit of the season.
If you’re a fan of healthier apple-based creations that delight the senses without compromising on nutrition, you’ll definitely want to explore more. Be sure to try my easy gluten-free apple blondies, scrumptious apple oat muffins, and the ever-popular wholesome apple crisp next. Each recipe promises clean ingredients and irresistible taste!
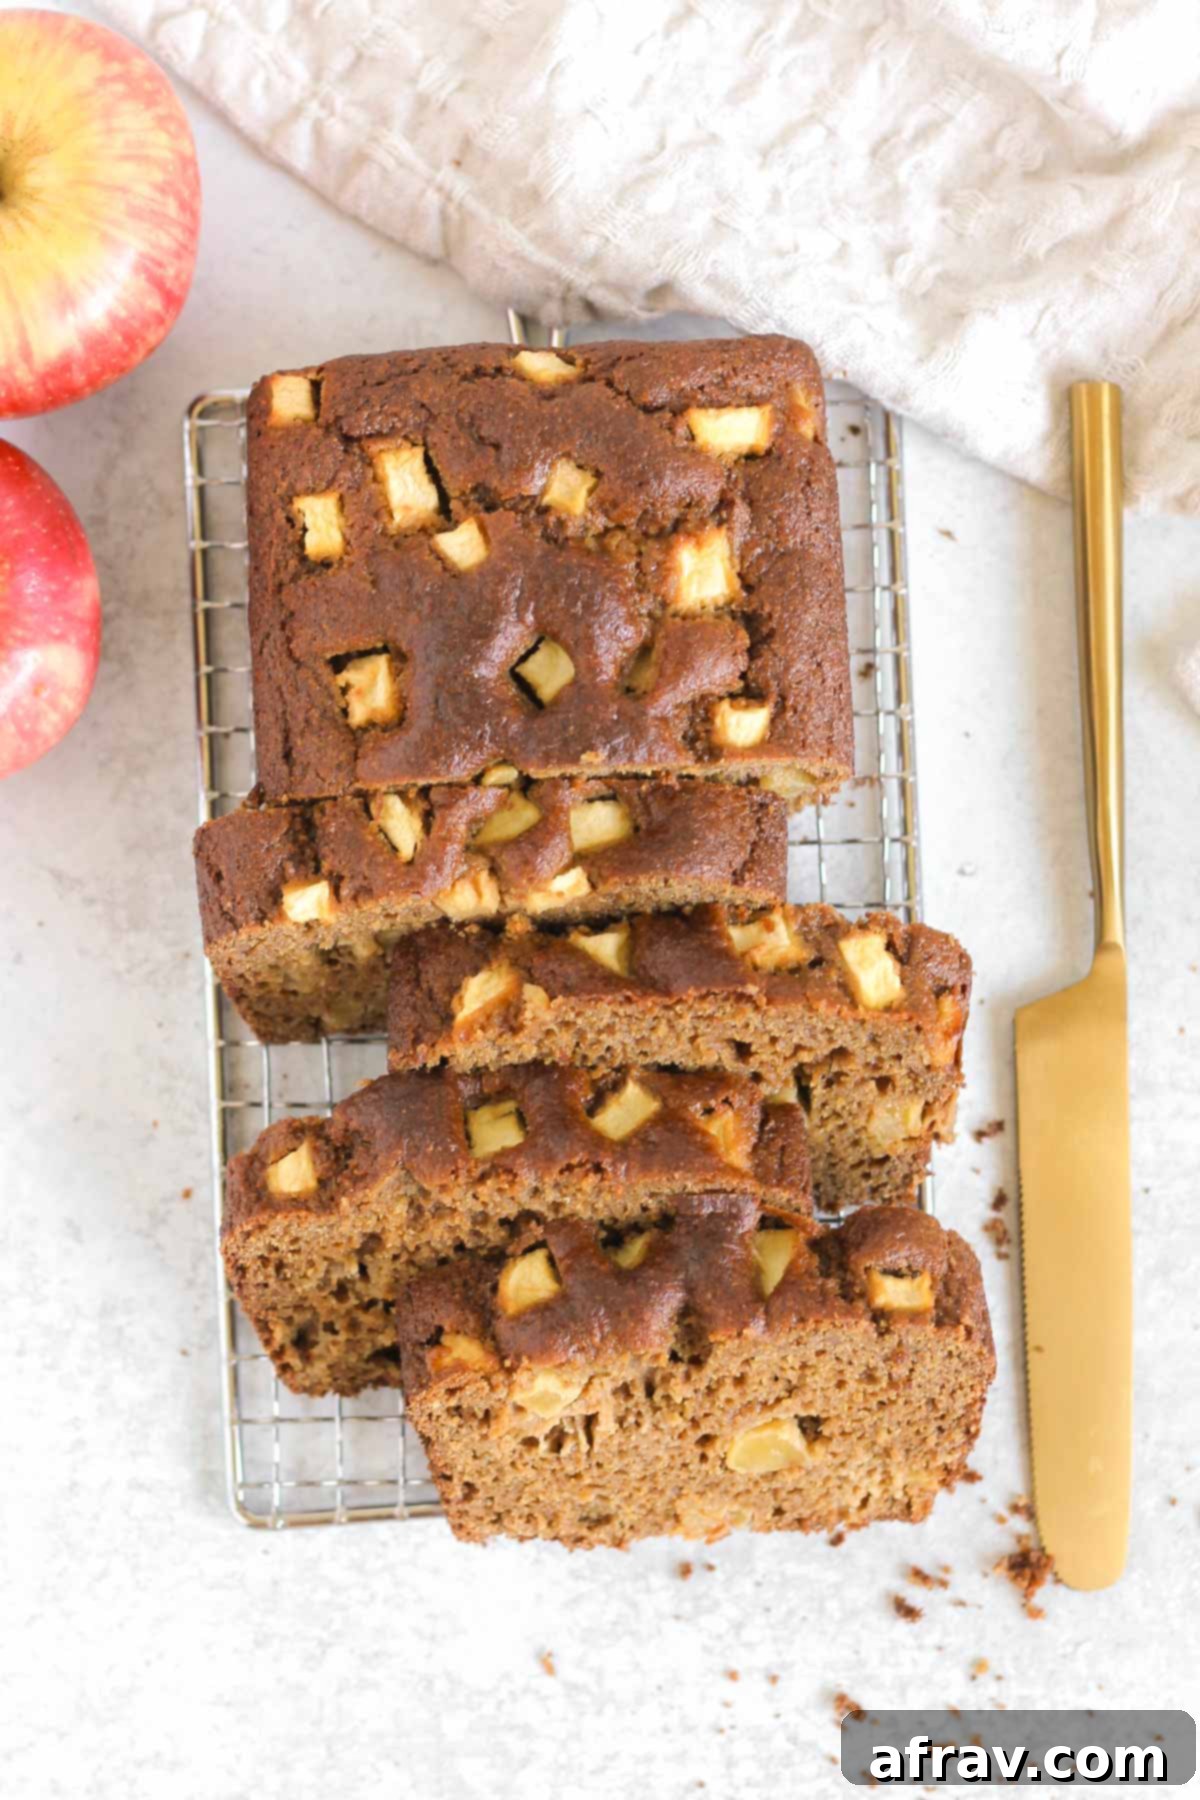
Why You’ll Absolutely Love This Healthy Apple Cinnamon Bread
This Healthy Apple Cinnamon Bread isn’t just another fall recipe; it’s a testament to how delicious and satisfying wholesome baking can be. Here are several compelling reasons why this recipe is about to become a staple in your kitchen:
- Effortlessly Easy & Quick: Forget about multiple bowls and complex steps. This recipe requires just one mixing bowl and a mere 15 minutes of active preparation. It’s perfect for busy weeknights or when you crave a homemade treat without spending hours in the kitchen. From mixing to baking, the process is streamlined for your convenience, ensuring a delightful outcome with minimal fuss.
- Wholly Gluten-Free with Clean Ingredients: We meticulously crafted this bread using a superb combination of finely ground almond flour and hearty oat flour. This blend not only ensures a perfectly moist and tender texture that rivals traditional recipes but also makes the bread entirely gluten-free. You can enjoy every slice knowing you’re nourishing your body with high-quality, unrefined ingredients, free from common allergens.
- Naturally Sweetened & Refined Sugar-Free: Indulge your sweet tooth without the guilt! We rely on the natural sweetness of unsweetened applesauce and a touch of coconut sugar, steering clear of any refined sugars. This approach results in a bread that’s delightfully sweet yet lower in sugar compared to many conventional apple bread recipes, making it a truly healthier option for you and your family.
- Oil-Free for Lighter Baking: Thanks to the clever inclusion of applesauce, this recipe eliminates the need for any added oils. Applesauce acts as a natural fat substitute, providing fantastic moisture and a subtle sweetness that contributes to a wonderfully tender crumb without increasing the fat content from oils. It’s a fantastic trick for healthier and lighter baking!
- Bursting with Cozy Fall Flavors: Every bite of this apple bread evokes the comforting embrace of autumn. Infused with warm spices like cinnamon and nutmeg, and generously packed with tender apple chunks, it truly “screams” warm apples and cinnamon! Just like our popular gluten-free apple blondies and apple cinnamon baked oatmeal, this bread is designed to fill your home with irresistible seasonal aromas and create a cozy atmosphere.
- Surprisingly High in Protein: For a sweet baked good, this apple cinnamon bread packs an impressive nutritional punch. Each satisfying slice contains approximately 6 grams of protein, contributing to a more filling and energy-sustaining snack or breakfast. It’s a wonderful bonus for those looking to incorporate more protein into their diet through delicious means, helping you feel fuller for longer.
This healthy apple cinnamon bread is undeniable proof that you can absolutely savor a delicious fall baked good made with genuine, wholesome food ingredients. We’re talking no refined flours, no harsh processed sugars, and absolutely no unhealthy oils. This recipe effortlessly checks all the boxes for a healthy fall baking masterpiece, delivering all the craveable, comforting flavors you associate with the season, all while being kind to your body.
As an added bonus, and a fantastic win for a baked good, each satisfying slice provides approximately 6 grams of protein. This makes it an excellent choice for a more sustaining breakfast or snack that helps keep you energized. If you appreciate the benefit of protein in your sweet treats, you’ll also adore my protein-packed banana muffins or this incredibly healthy chocolate protein banana bread, both designed to fuel your day deliciously.
Looking for something specific in this guide? Use the links below to jump directly to the section you need:
- Why You’ll Love This Recipe
- Detailed Ingredient Notes
- Optional Delicious Add-ins
- How to Bake Healthy Apple Cinnamon Bread
- Expert Tips for the Best Bread
- Storage and Freezing Tips
- Frequently Asked Questions
- More Apple Recipes to Explore
- Full Recipe Card
Detailed Ingredient Notes for the Perfect Apple Bread
Crafting the perfect healthy apple cinnamon bread begins with understanding your ingredients. While a full list is provided in the recipe card below, here are some essential notes to help you select and use the key components for optimal results and flavor:
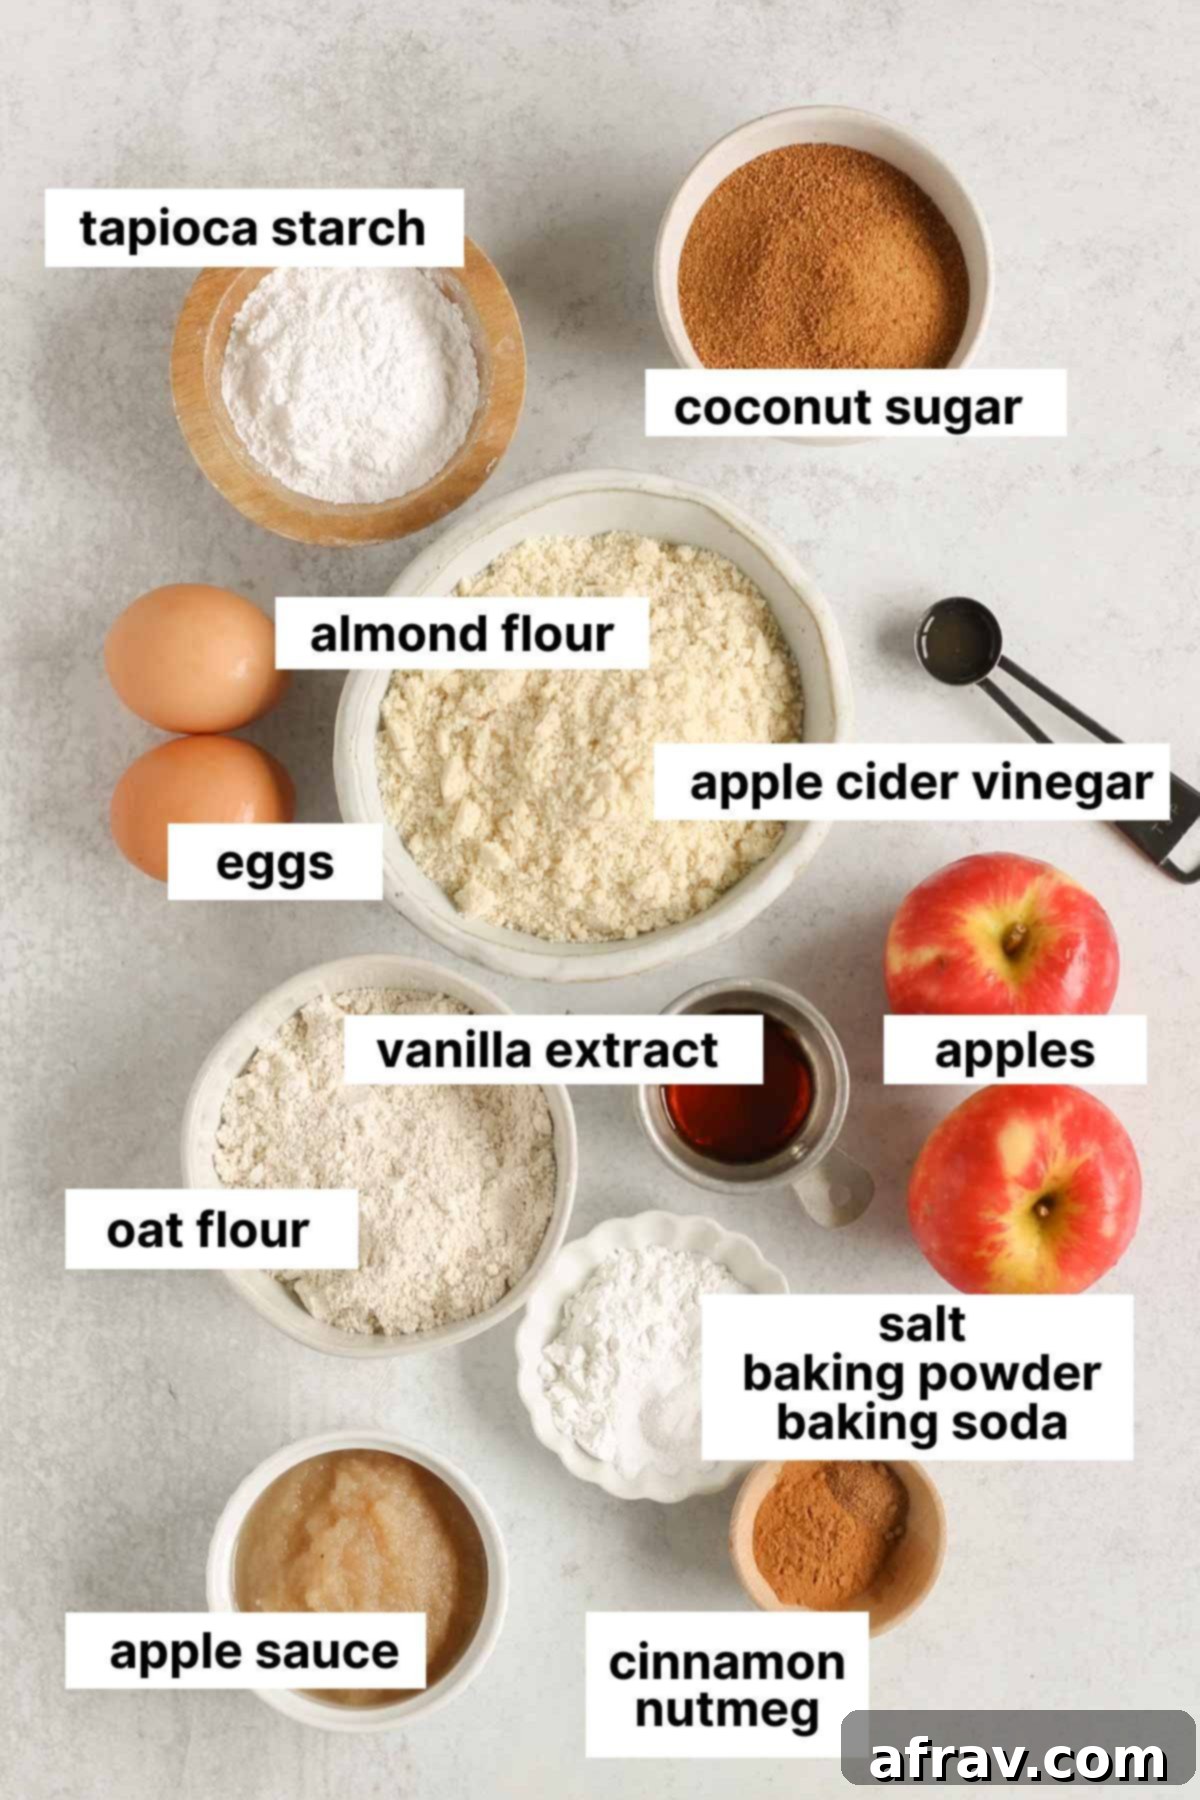
- Almond Flour: It’s crucial to use fine-ground almond flour, not almond meal. Almond flour, made from blanched, finely ground almonds, provides a light, tender crumb and absorbs moisture more effectively than coarser almond meal, which can result in a denser, tougher texture. This fine texture is key for a delicate bread.
- Oat Flour: This versatile gluten-free flour adds a wonderful chewiness and depth of flavor to the bread. If you are baking for someone with Celiac disease or a serious gluten sensitivity, always ensure you use certified gluten-free oat flour. While oats are naturally gluten-free, they are often processed in facilities that also handle wheat, leading to potential cross-contamination. For a budget-friendly and easy option: I highly recommend learning how to make your own oat flour at home – it’s incredibly simple and fresh!
- Tapioca Starch (or Tapioca Flour): This acts as a vital binder in gluten-free baking, helping to give the bread structure and a slightly chewy texture. It prevents the bread from becoming too crumbly, ensuring a cohesive and pleasant mouthfeel. It’s a key ingredient for achieving that perfect bread-like consistency with gluten-free flours.
- Baking Powder & Baking Soda: These are your essential leavening agents. Baking powder provides the initial lift, while baking soda reacts with the acidic components like applesauce and apple cider vinegar to create carbon dioxide, resulting in a tender, airy crumb and contributing to a beautiful golden-brown crust. Ensure both are fresh for the best possible rise and texture.
- Fine Sea Salt: A small amount of salt is indispensable in baking. It enhances all the other flavors in the bread, balancing the sweetness and making the warm apple and fragrant cinnamon notes truly pop. Don’t skip it!
- Ground Cinnamon & Nutmeg: These spices are the heart and soul of the “cinnamon bread” flavor profile, providing that unmistakable cozy fall taste and aroma. Use fresh, high-quality spices for the most aromatic and warm taste. You can adjust the amounts slightly to your personal preference, adding a little more cinnamon if you’re a big fan.
- Eggs (Room Temperature): Using room temperature eggs is a small but significant detail that greatly impacts the final texture of your baked goods. They emulsify much better with other ingredients, creating a smoother, more homogenous batter. This leads to a finer, lighter, and fluffier texture in your final bread. Cold eggs can cause the batter to seize up and result in a denser, less uniform loaf. Plan ahead and take them out of the fridge about 30 minutes before you start baking.
- Unsweetened Applesauce: This is a star ingredient in this recipe, serving multiple purposes. It naturally sweetens the bread, adds incredible moisture, and cleverly replaces the need for any added oils, contributing to a lighter, healthier loaf. Always make sure it’s unsweetened to maintain control over the total sugar content of your bread.
- Coconut Sugar: A fantastic natural sweetener with a delightful caramel-like flavor profile, coconut sugar is a less processed alternative to refined white sugar. It contributes to the beautiful golden-brown color of the bread and imparts a deep, rich sweetness without being overly sugary, making it a healthier choice.
- Pure Vanilla Extract: Vanilla is a powerful flavor enhancer that complements almost any sweet baked good. It boosts the overall flavor profile, adding a subtle warmth and richness that harmonizes beautifully with the apples and spices, elevating the entire experience.
- Apple Cider Vinegar: This acidic ingredient works in tandem with baking soda (a base) to create a chemical reaction that generates lift and tenderness in the bread. Don’t worry, you won’t taste the vinegar in the final product; its role is purely functional for leavening.
- Apples: For the best texture and flavor, I highly recommend using sweet, crisp apples such as Honeycrisp or Pink Lady. Their firm flesh holds up wonderfully during baking, preventing mushiness, and their natural sweetness contributes significantly to the bread’s overall deliciousness. If you have extra, they’re also fantastic for my quick air fryer apples. If you prefer a slightly tarter bread, crisp Granny Smith apples can also be a wonderful addition, or even a mix of sweet and tart varieties for more complexity.
Elevate Your Bread with Optional Add-ins
While this healthy apple cinnamon bread is absolutely perfect as is, sometimes a little something extra can take it to the next level. Feel free to experiment with these delicious additions to customize your loaf and make it uniquely yours:
- Unsweetened Craisins or Dried Cranberries: For a delightful burst of tart-sweet flavor and a festive seasonal touch, mix in about a half cup of unsweetened craisins or dried cranberries. They add a lovely chewiness that pairs wonderfully with the apples and cinnamon, creating an extra layer of texture and taste.
- Chopped Walnuts or Pecans: You can never go wrong by adding a handful of chopped nuts. Walnuts and pecans provide a fantastic crunch, healthy fats, and a rich, earthy flavor that complements the fruit and spices beautifully. About ½ cup to 1 cup would be ideal, folded in with the apples. They also add a nice nutritional boost.
- Unsweetened Shredded Coconut: If you enjoy a subtle tropical hint and extra texture, stir in some unsweetened shredded coconut. It adds a delicate chew and a touch of natural sweetness that beautifully rounds out the flavors, especially if you toast it lightly before adding.
- Shredded Carrots or Grated Zucchini: For an extra boost of hidden veggies and moisture, consider adding about a half cup of finely shredded carrots or finely grated zucchini. Both vegetables blend seamlessly into the bread, adding nutritional value and keeping the loaf incredibly moist. If using zucchini, remember to squeeze out any excess water first using a clean kitchen towel to prevent a soggy bread. And for all you zucchini lovers, don’t miss my irresistible gluten-free zucchini bread recipe!
How to Make This Delicious Healthy Apple Cinnamon Bread (Step-by-Step)
Baking this wholesome apple cinnamon bread is a straightforward process that yields incredibly rewarding results. Follow these simple steps to create your perfect loaf, filling your home with the most inviting aromas:
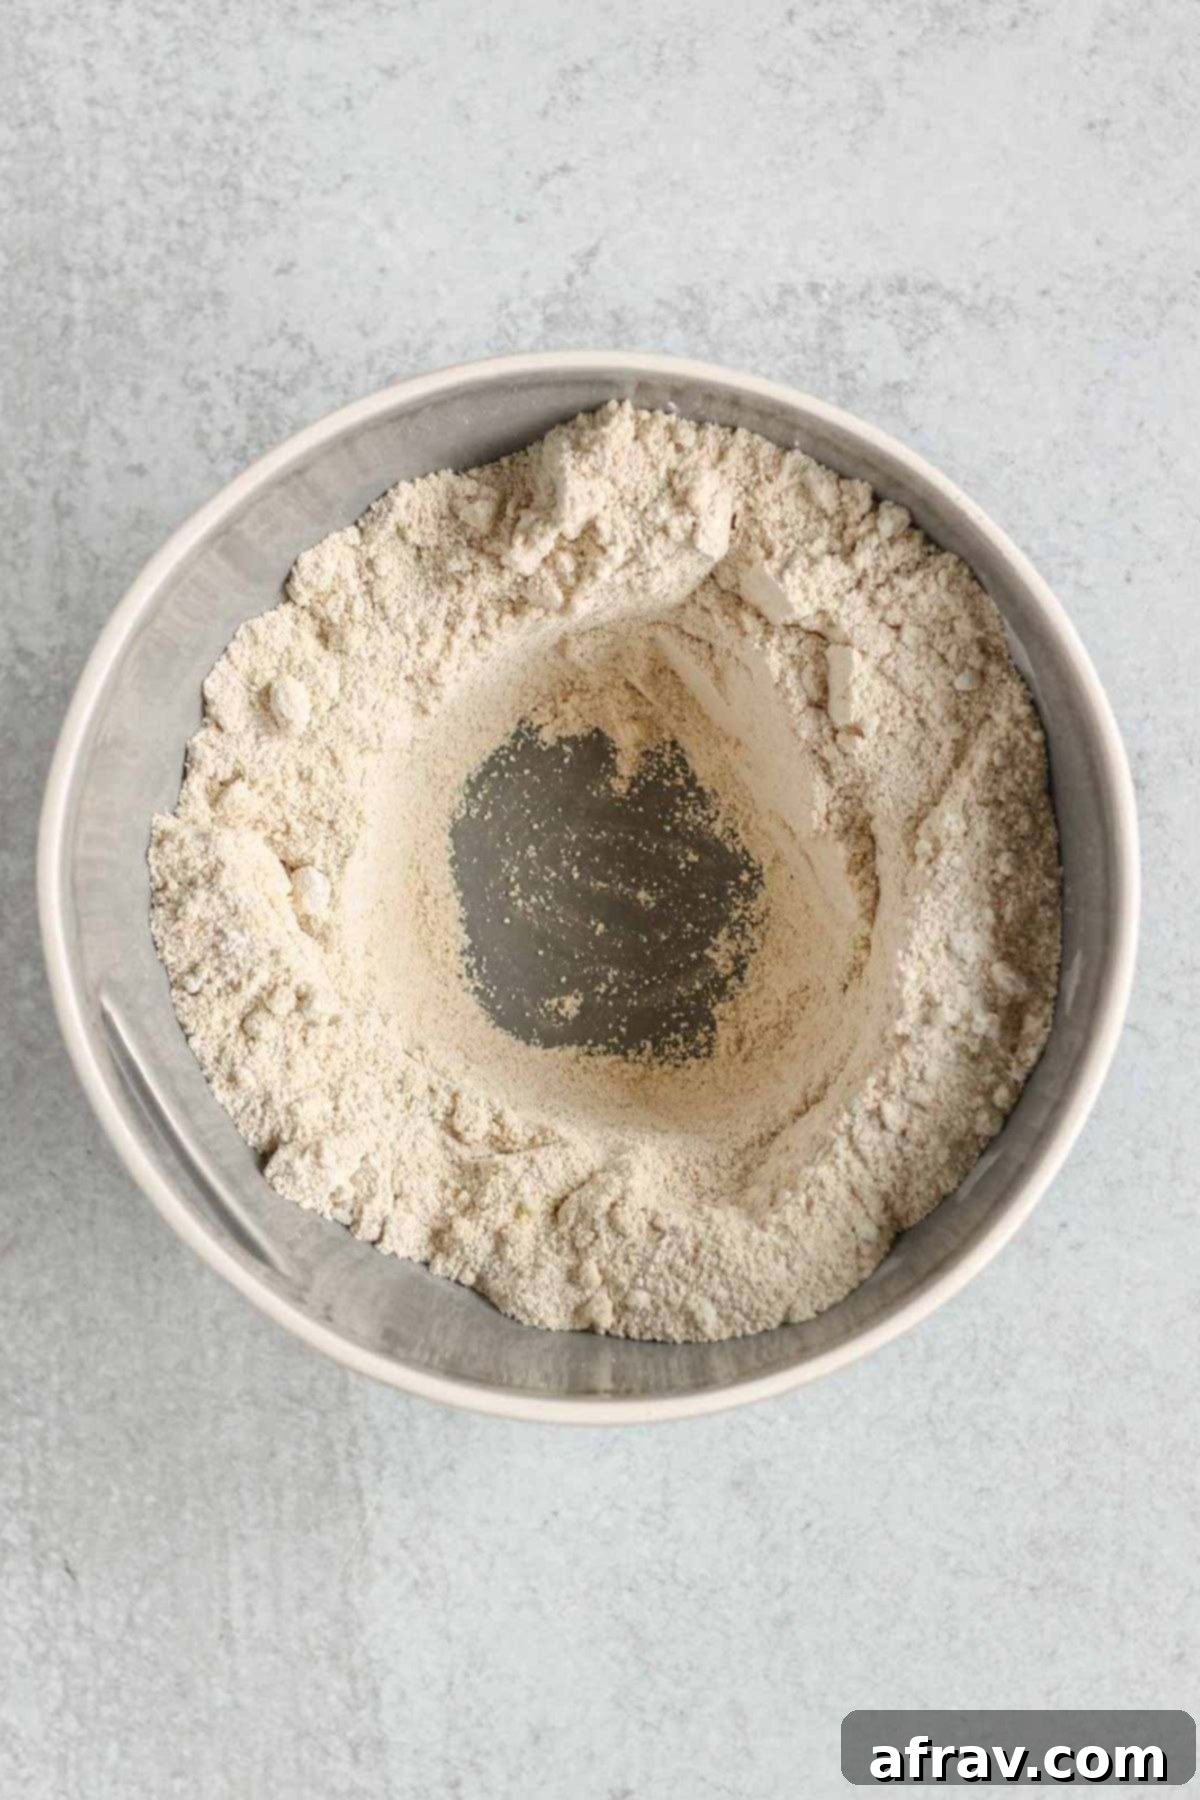
Step 1: Prepare Dry Ingredients. First, preheat your oven to 350°F (175°C) and prepare your loaf pan by lightly greasing it or lining it with parchment paper (leaving an overhang on the sides helps with easy removal). In a large mixing bowl, combine all your dry ingredients: almond flour, oat flour, tapioca starch, baking powder, baking soda, fine sea salt, ground cinnamon, and ground nutmeg. Whisk them thoroughly to ensure they are well combined and evenly distributed. This step is crucial for consistent leavening throughout the bread. Once mixed, create a noticeable well in the center of these dry ingredients, making space for the wet components.
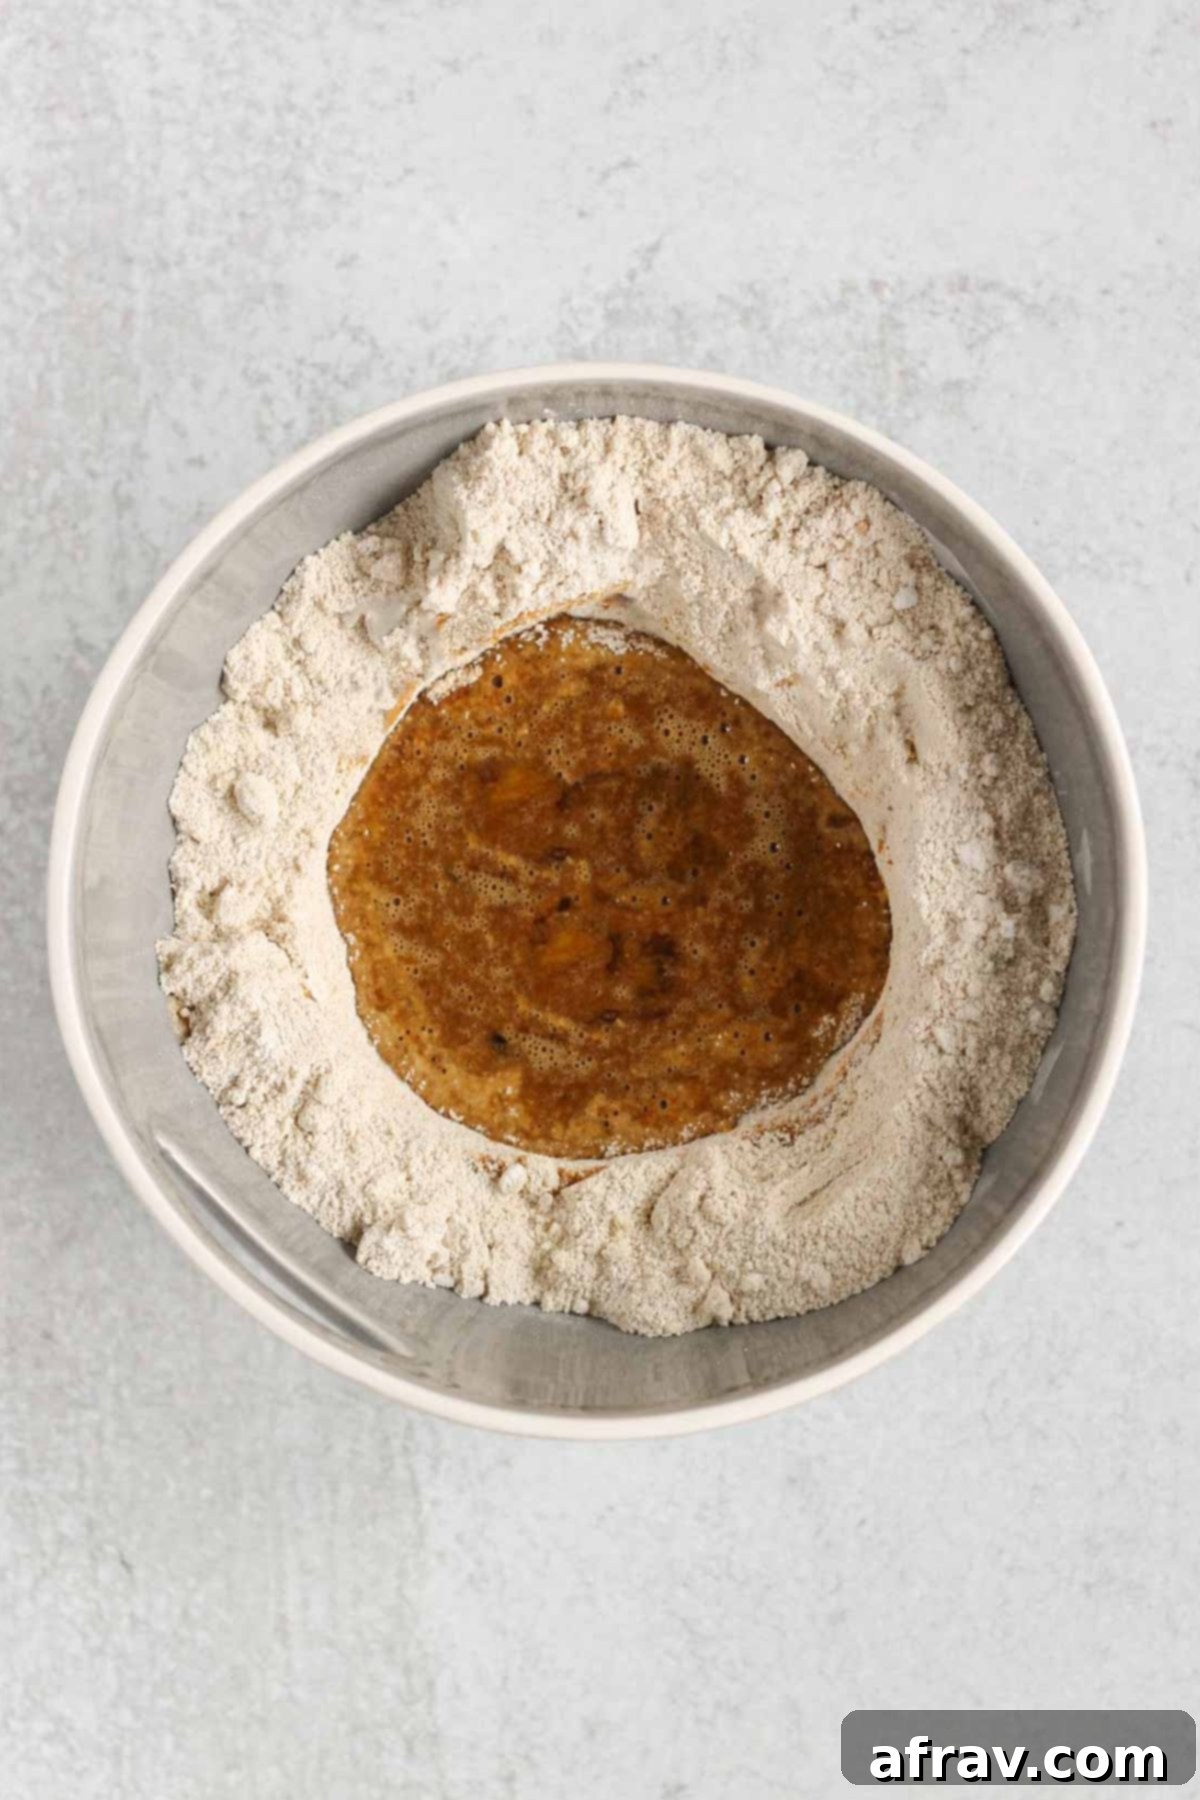
Step 2: Incorporate Wet Ingredients. Now, carefully pour all the wet ingredients – the room temperature eggs, unsweetened applesauce, coconut sugar, pure vanilla extract, and apple cider vinegar – directly into the well you created in the dry mixture. Using a whisk, gently combine only the wet ingredients together within the well first. This helps to ensure they are fully emulsified and incorporated before mixing them with the dry components, contributing to a smoother batter.
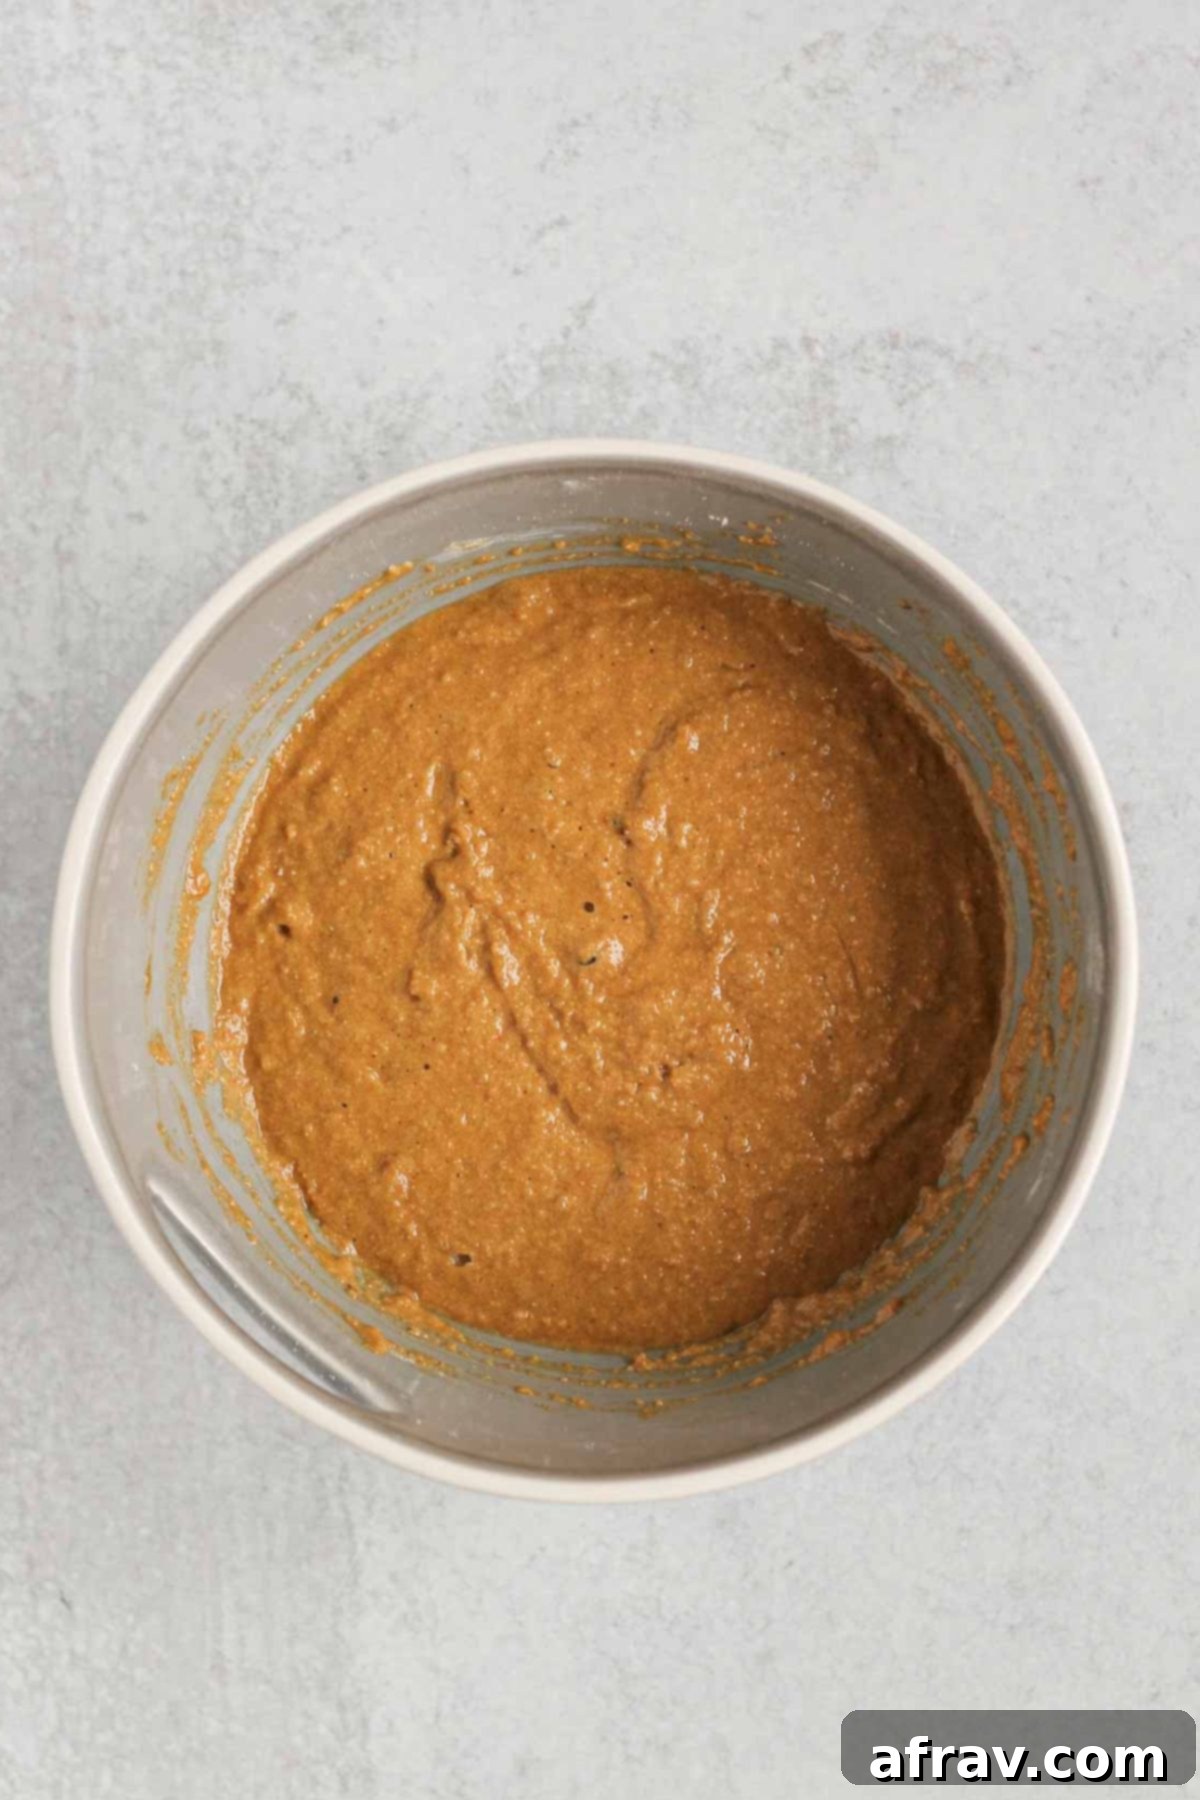
Step 3: Combine Batter. Next, using the whisk or a spatula, gradually mix the wet ingredients into the dry ingredients. Continue mixing until the batter is just combined and smooth, ensuring there are no visible pockets of dry flour remaining. Be careful not to overmix, as this can lead to a tougher bread, especially with gluten-free flours. A few small lumps are perfectly fine and will bake out.
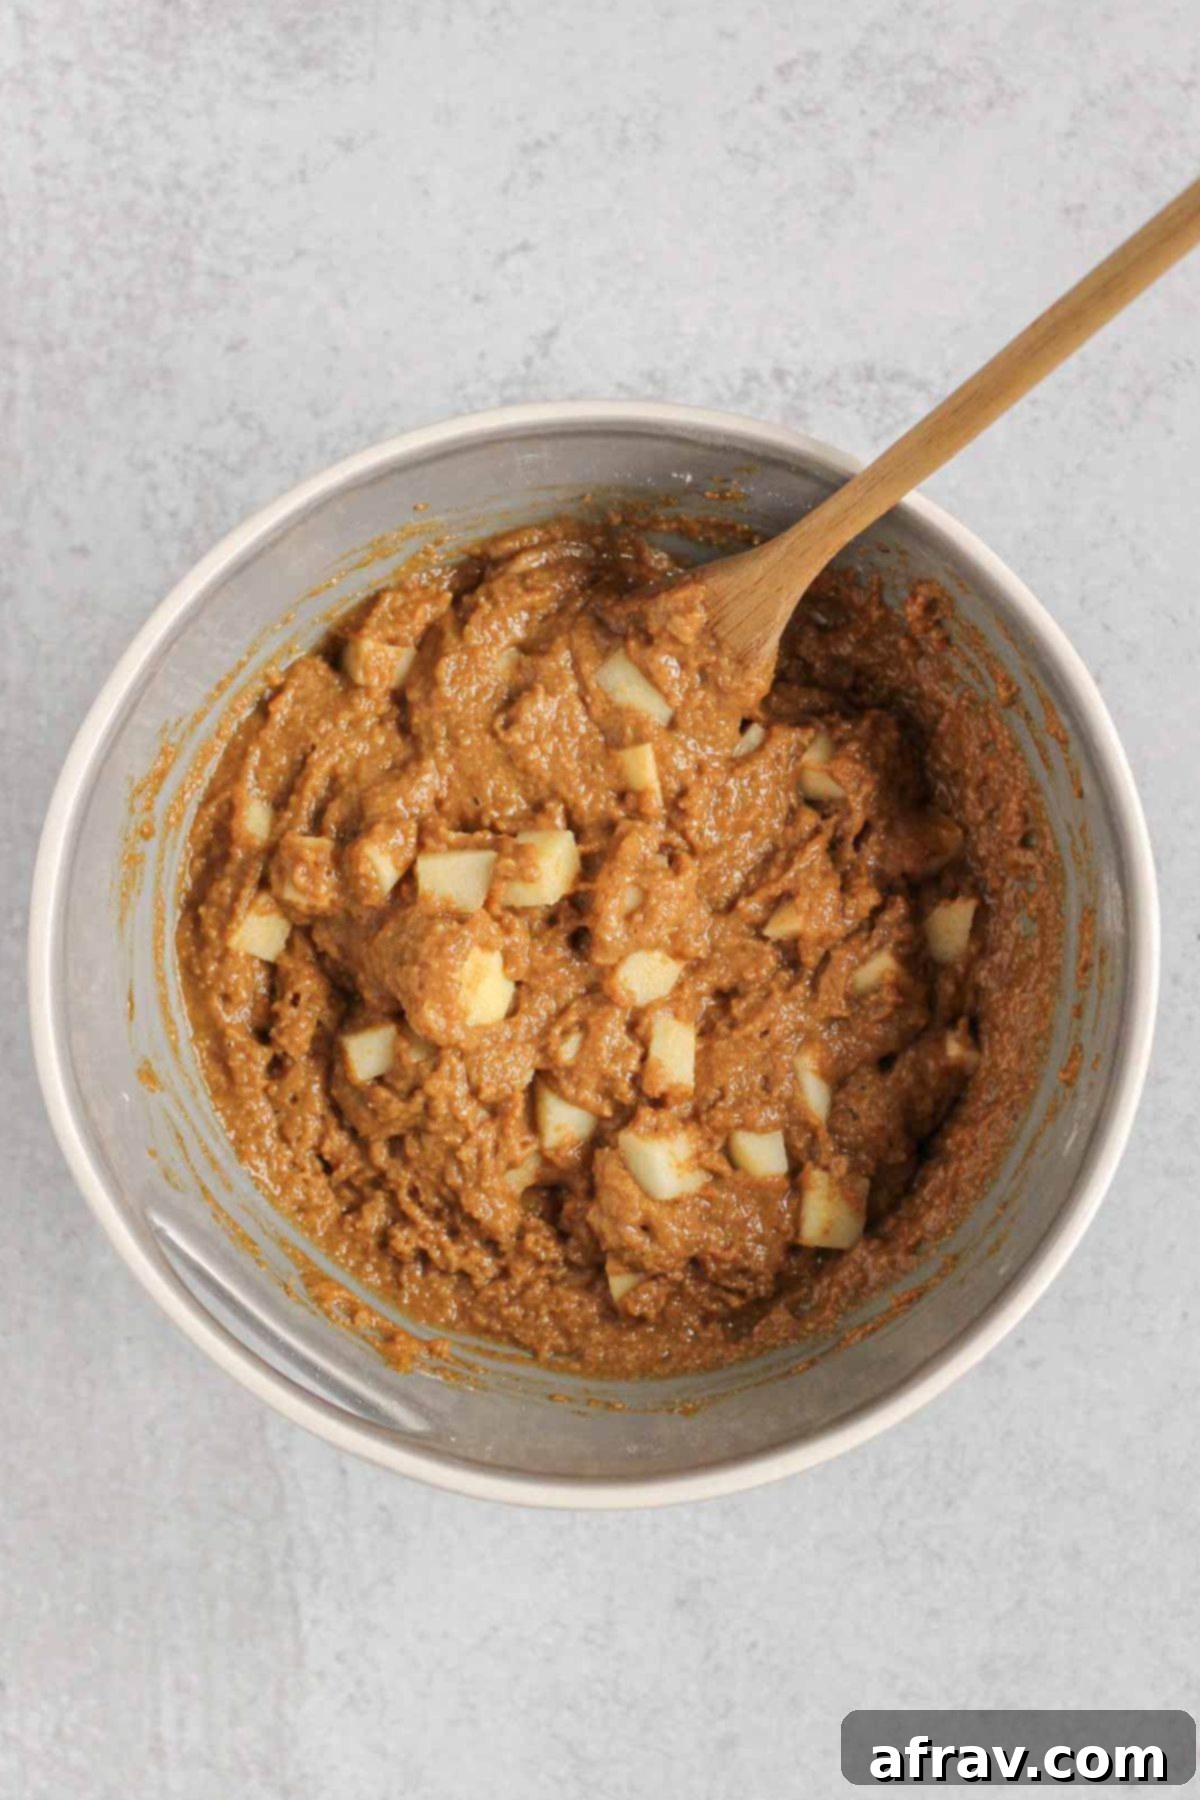
Step 4: Fold in Apples. Once your batter is ready, gently fold in the peeled and finely chopped apples. Use a spatula for this step to avoid mashing the apple pieces and to ensure they retain some texture. Distribute the apples evenly throughout the batter so every single slice of bread gets a delightful burst of apple goodness. If you’re using any optional add-ins like nuts or cranberries, this is the ideal time to fold them in as well.
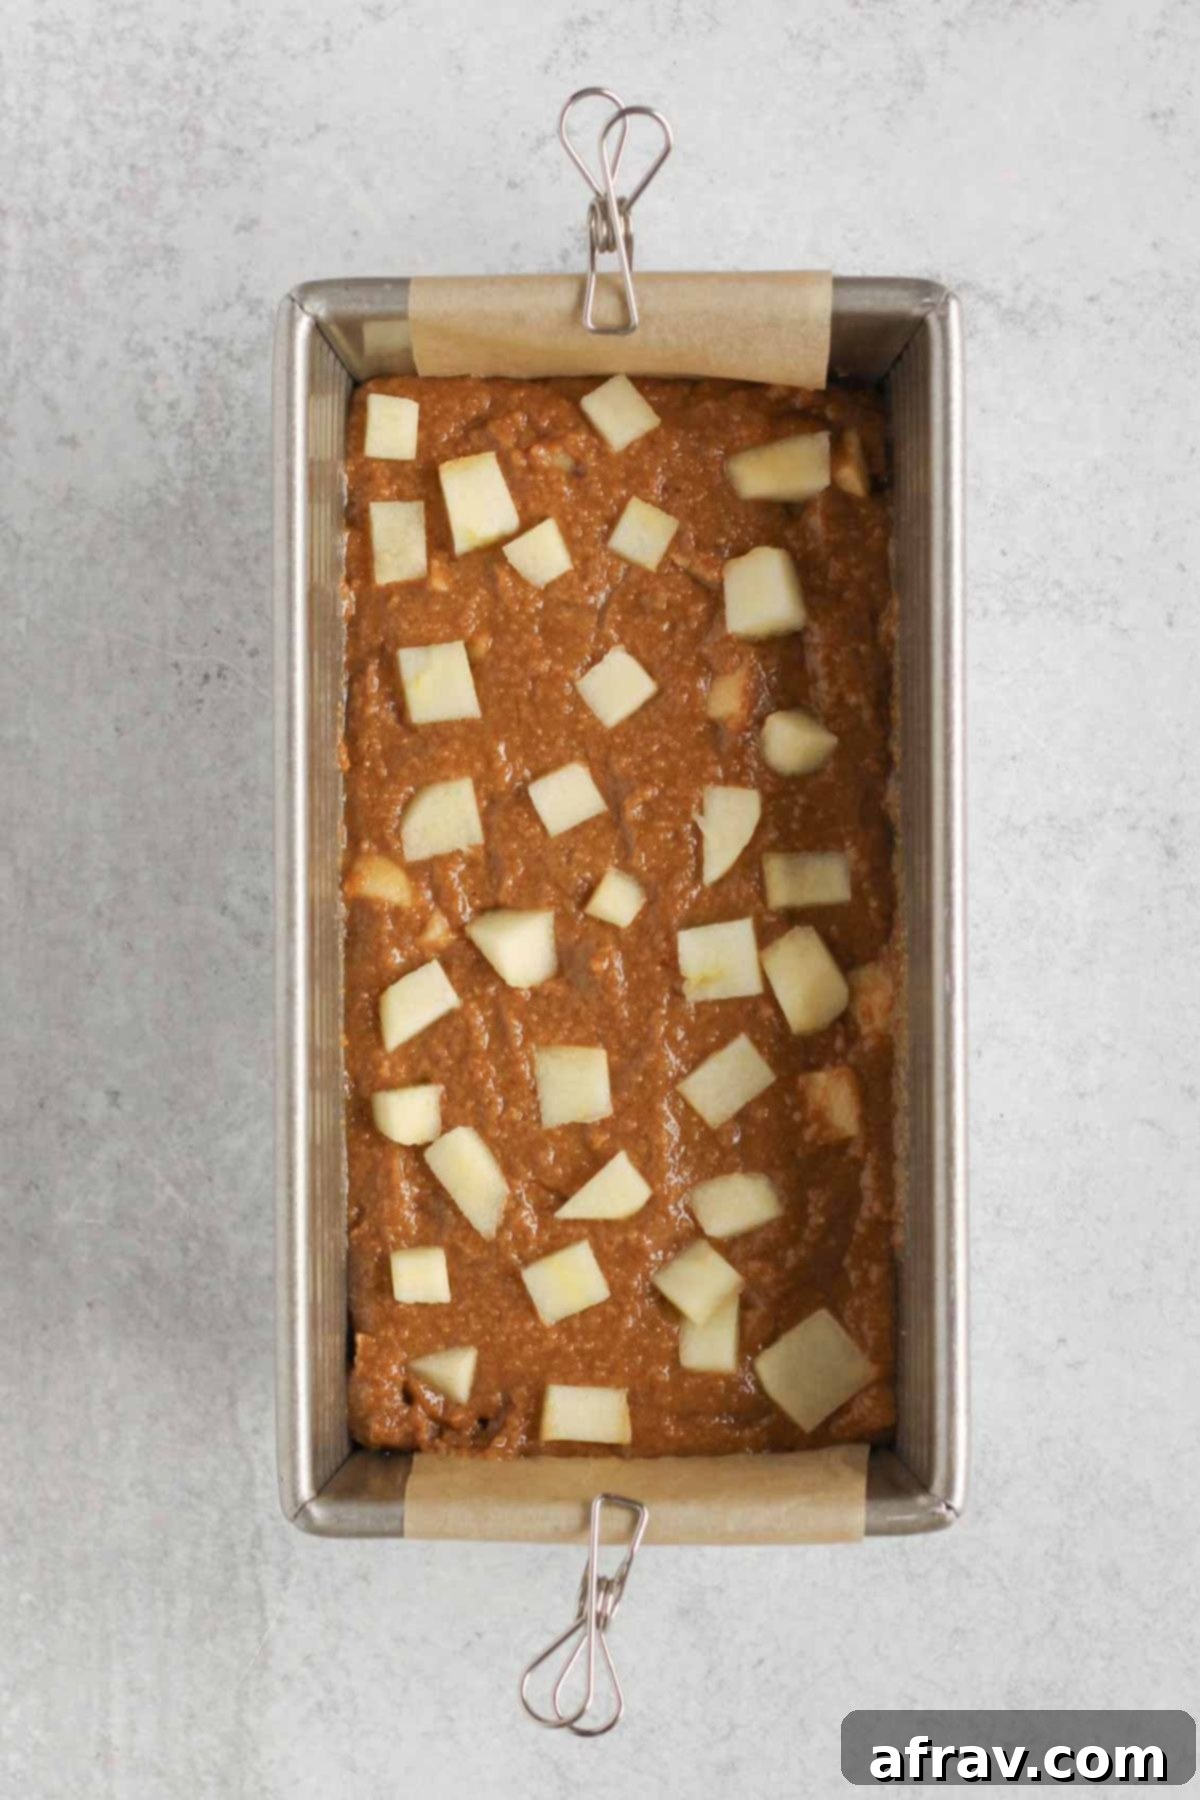
Step 5: Prepare for Baking & Rest. Pour the prepared batter evenly into your greased or parchment-lined 8.5″x4.5″ loaf pan. Spread the batter gently and uniformly to ensure it’s level, which promotes even baking. For an extra touch of visual appeal and flavor, you can sprinkle a few reserved chopped apple pieces on top of the batter. Now, here’s a crucial step for gluten-free baking: let the batter rest in the pan for at least 20 minutes before placing it in the oven. This resting period allows the almond and oat flours ample time to absorb moisture, which is key to preventing a dense, gummy, or soggy bread and achieving that wonderfully light, fluffy texture we all desire. Do not skip this!.
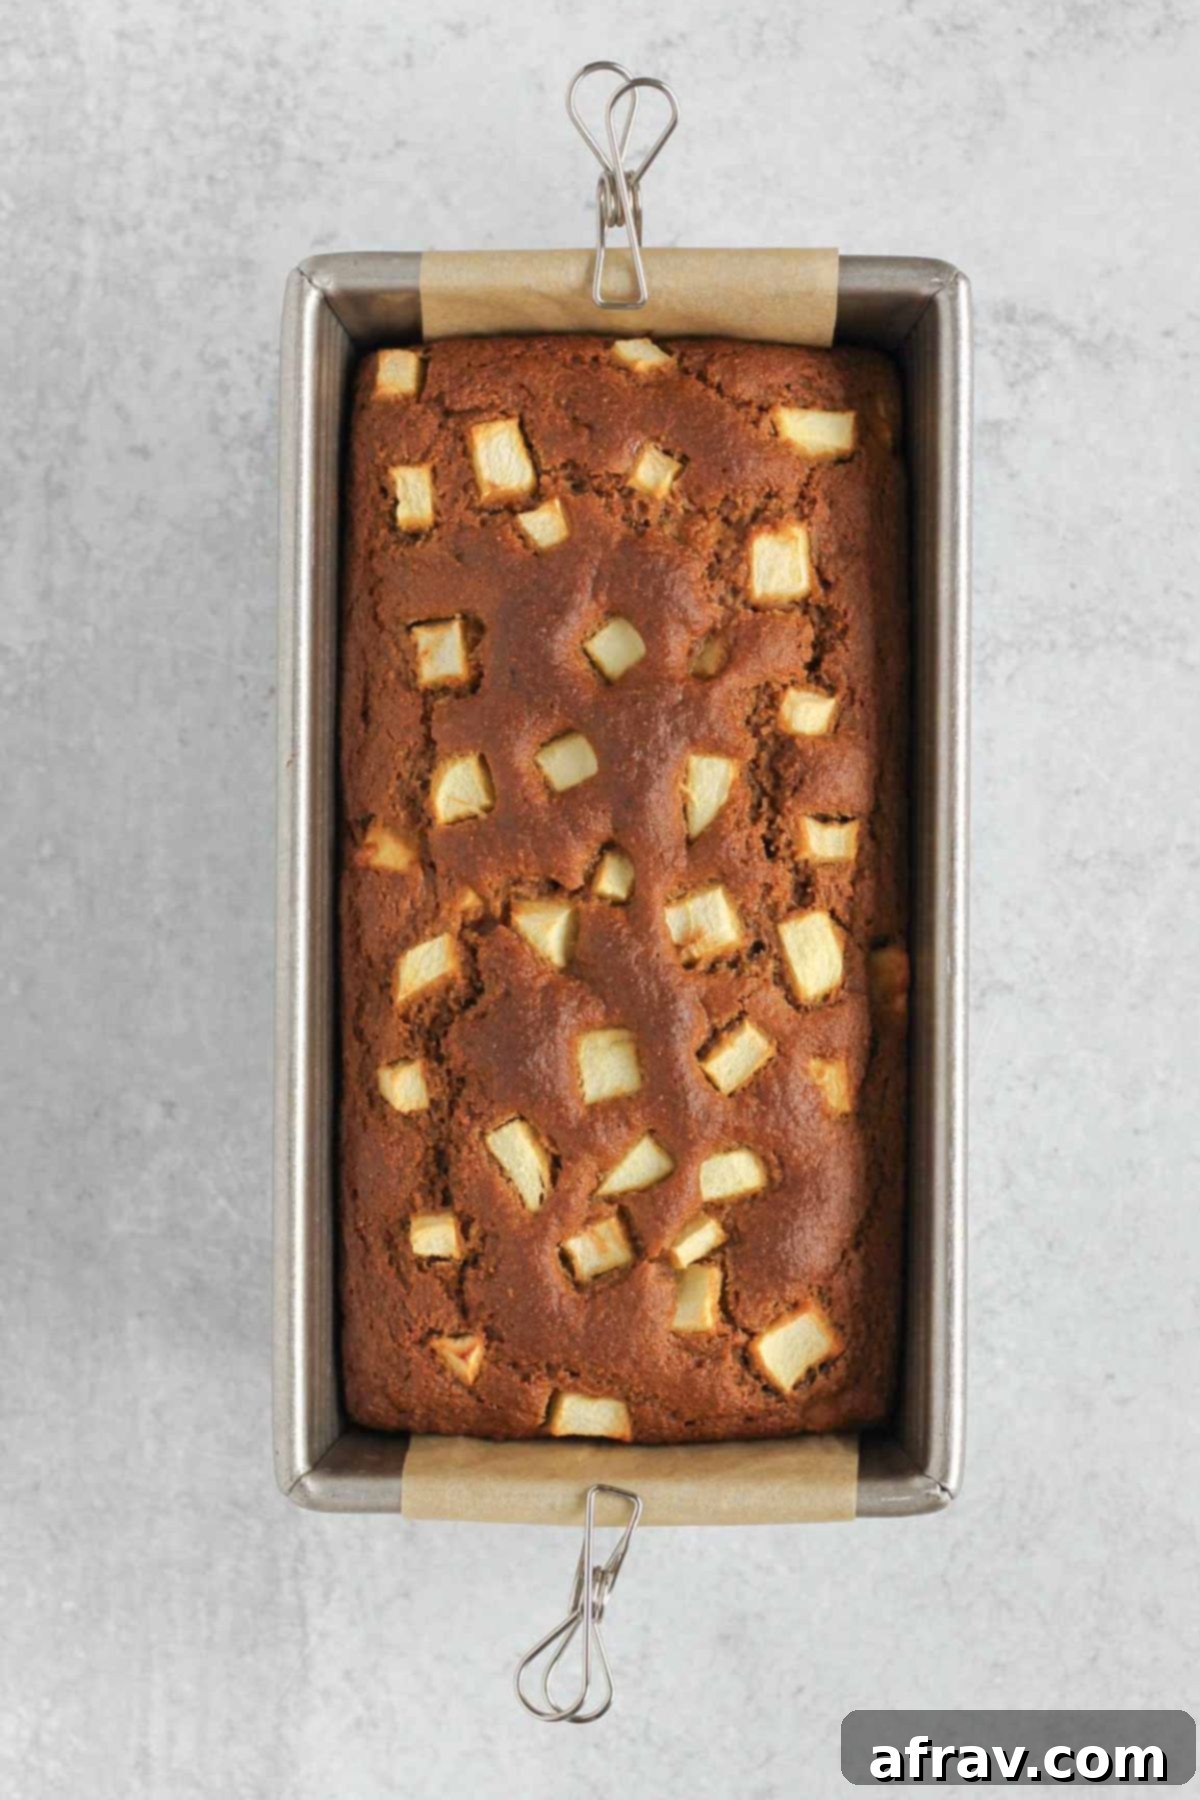
Step 6: Bake to Golden Perfection. Place the rested loaf pan into your preheated 350°F (175°C) oven and bake for approximately 45 minutes. Baking time can vary slightly depending on your oven’s calibration, so keep a watchful eye on it. The bread is done when a wooden skewer or toothpick inserted into the center comes out clean or with just a few moist crumbs attached. If you notice the top browning too quickly around the 35-minute mark, you can loosely tent the loaf with aluminum foil to prevent over-browning while allowing the inside to cook through. Once baked, allow the bread to cool in the pan for about 5-10 minutes before carefully transferring it to a wire rack to cool completely. This crucial cooling process is essential for the bread to set properly before slicing.
Expert Tips for Baking the Best Healthy Apple Cinnamon Bread
Achieving a perfectly moist, flavorful, and beautifully textured gluten-free apple bread is easy when you follow these insider tips and tricks:
- Always Use Room Temperature Eggs: This might seem like a small detail, but it makes a significant difference in baking, especially with gluten-free flours. Room temperature eggs mix much more evenly and thoroughly with the other ingredients, creating a smoother, more homogenous batter. This leads to a finer, lighter, and fluffier texture in your final bread. Cold eggs can cause the fat in the batter to seize up and result in a denser, less consistent loaf. Plan ahead and take them out of the fridge about 30 minutes before you start baking.
- Allow the Batter to Rest Before Baking: This is a crucial step for gluten-free quick breads that many overlook. Due to the unique structure of almond flour and oat flour, they require a bit more time to fully absorb moisture from the liquid ingredients. Letting the batter rest for 20 minutes in the loaf pan before it goes into the oven allows the flours to properly hydrate. This absorption process is key to preventing a gummy, soggy, or overly dense bread, resulting instead in a beautifully light, tender, and moist crumb. Do not skip this step for optimal results!
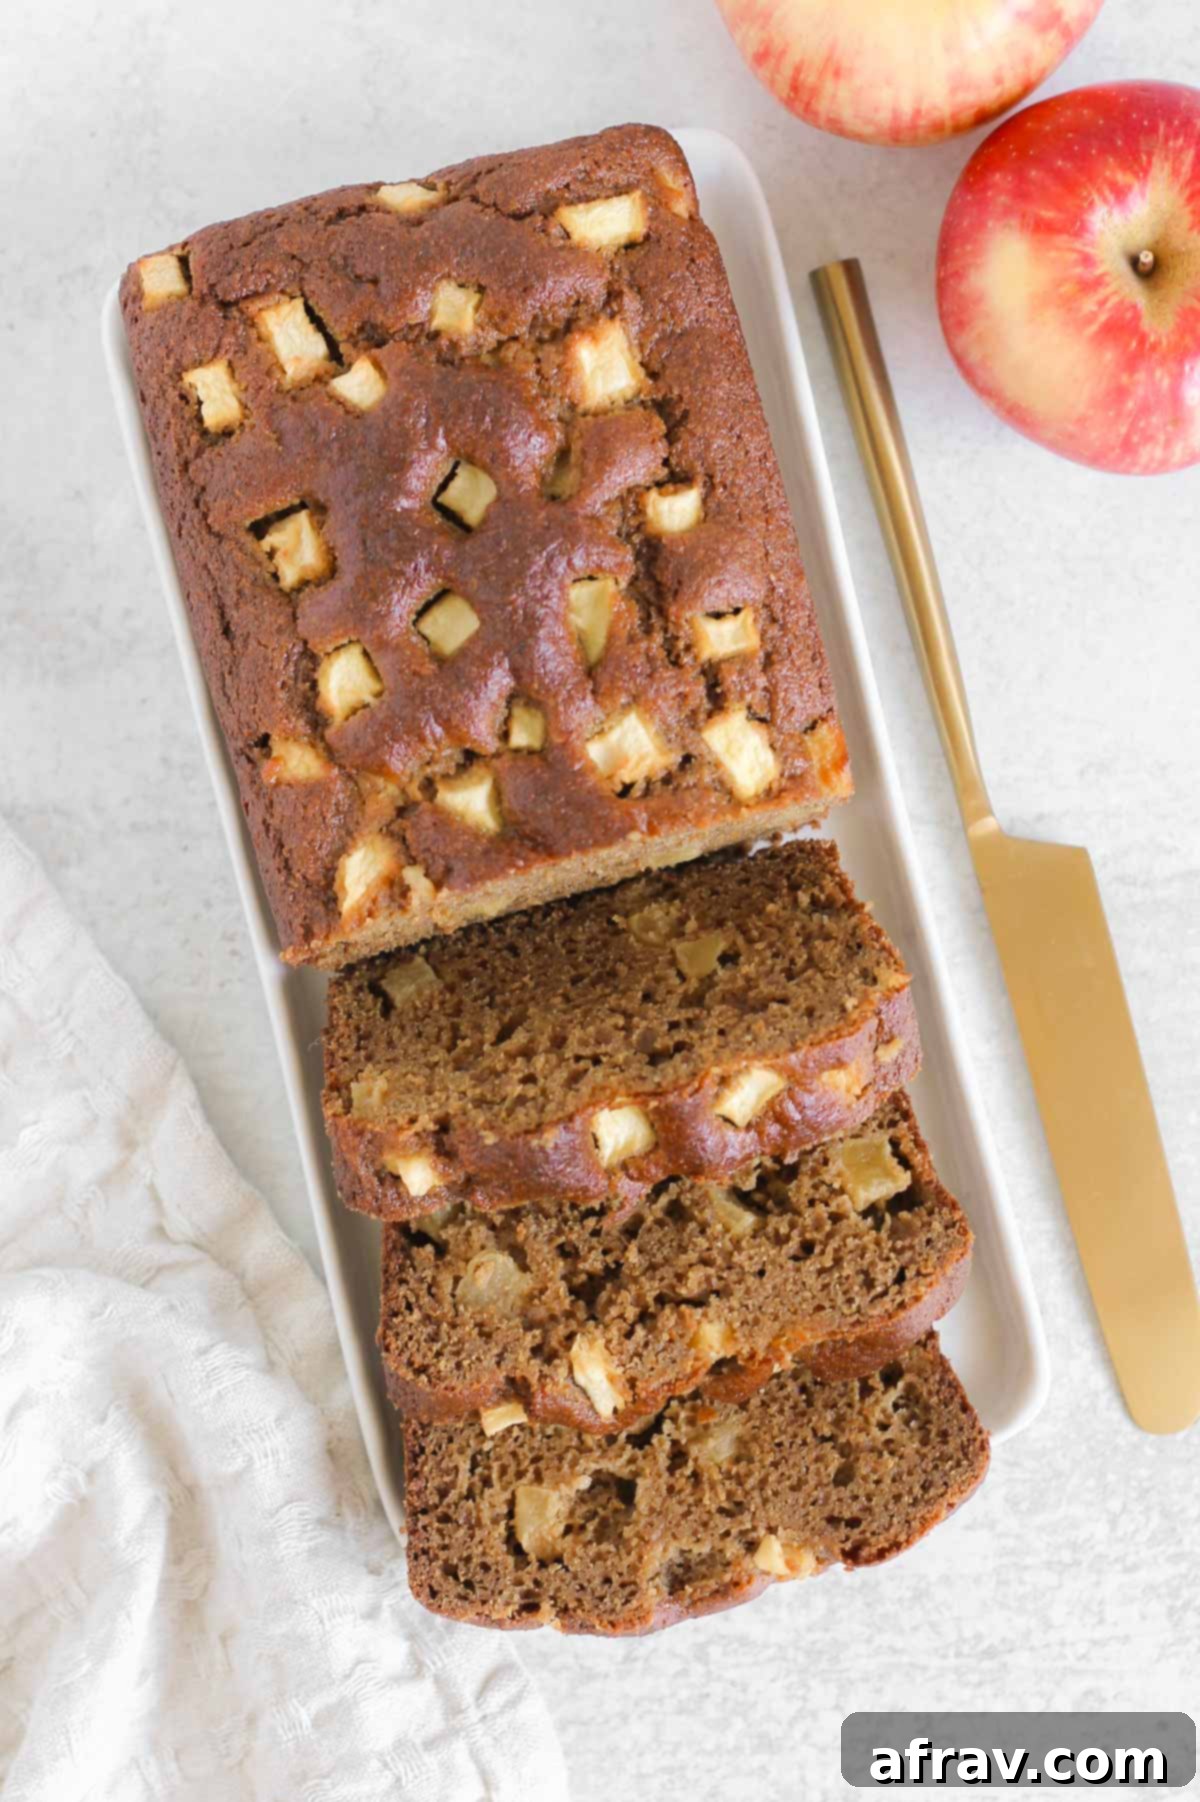
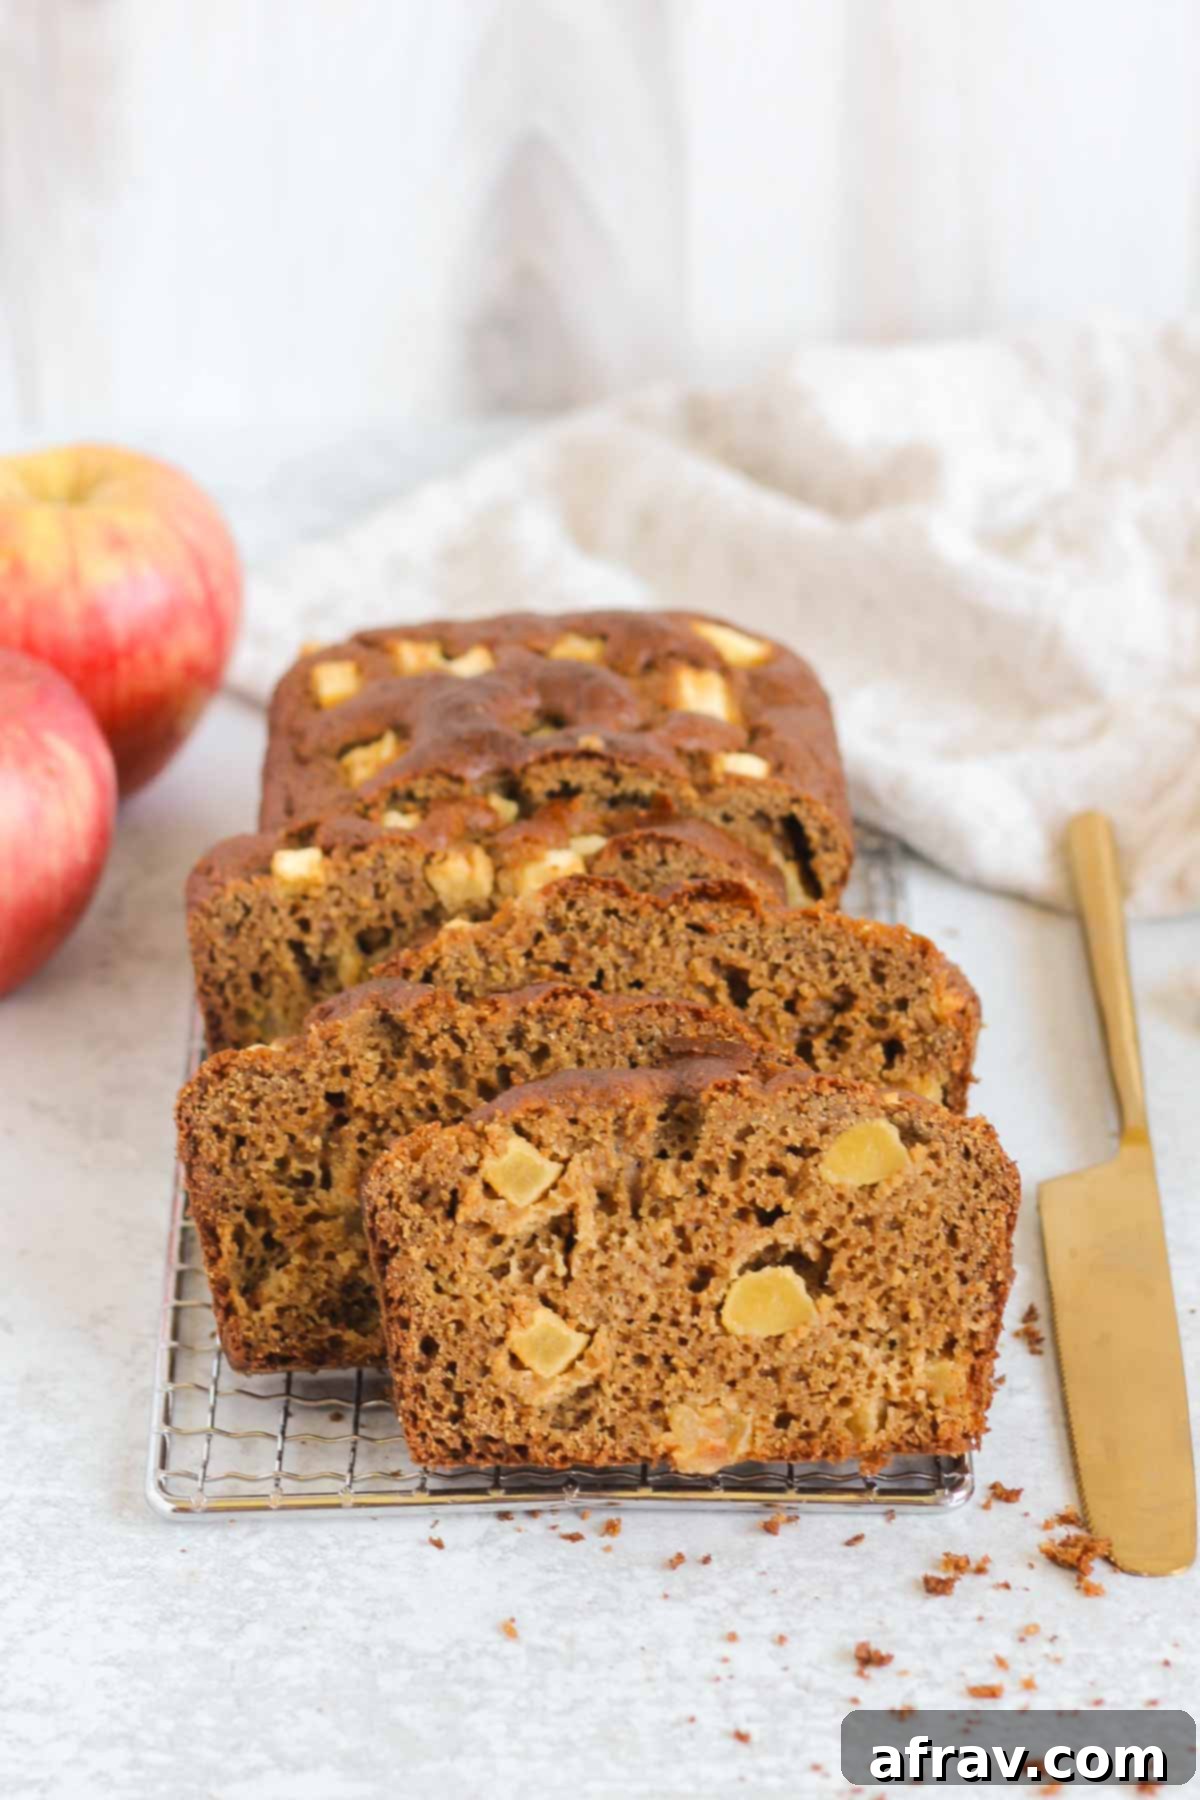
- Cool Completely Before Slicing: Patience is a virtue when it comes to quick breads, especially gluten-free ones. This bread will continue to set, firm up, and develop its final texture as it cools. Slicing into a warm loaf prematurely can lead to a crumbly or gooey texture, and the slices may not hold their shape as well. For that ideal light and fluffy texture and clean, neat slices, ensure the bread is fully cooled to room temperature before you reach for the knife. This usually takes at least 1-2 hours, or even longer depending on your kitchen’s temperature.
- Measure Flours Accurately: In gluten-free baking, precision is paramount. Using a kitchen scale to measure your flours by weight (grams) is always the most accurate method for consistent results. If you’re measuring by volume (cups), spoon the flour into your measuring cup and then level it off with a straight edge, rather than scooping directly from the bag, which can compact the flour and lead to adding too much.
- Don’t Overmix the Batter: Once you’ve added the wet ingredients to the dry, mix just until combined. Overmixing can develop any gluten present (even in gluten-free oats if not certified), or simply create a tougher, denser texture with alternative flours. A few small lumps are perfectly fine and will often disappear during baking.
How to Store Your Healthy Apple Cinnamon Bread for Optimal Freshness
Proper storage is key to enjoying your homemade healthy apple cinnamon bread for as long as possible. Here’s how to keep it fresh and delicious, whether for a few days or several months:
Storing at Room Temperature: After the bread has completely cooled to room temperature (this is very important to prevent condensation and sogginess, which can lead to mold), place it in an airtight container. A bread box, a sturdy container, or even wrapping it tightly in plastic wrap or foil will work perfectly. This healthy apple cinnamon bread will stay wonderfully fresh and moist on your kitchen counter for up to 3 days. For best quality and to preserve moisture, you might want to slice it only as you eat it.
Storing in the Refrigerator: If you want to extend the shelf life of your apple bread beyond a few days, storing it in the fridge is an excellent option. Once cooled, wrap individual slices or the entire loaf tightly in plastic wrap to prevent it from drying out, and then place it in an airtight container or a large resealable bag. In the refrigerator, it can stay fresh for up to a week. Simply warm a slice briefly in the microwave, toast it, or enjoy it chilled for a quick and satisfying treat.
Freezing for Long-Term Enjoyment: This apple bread freezes exceptionally well, making it perfect for meal prep or having a healthy snack on hand whenever a craving strikes. I highly recommend slicing the entire loaf into individual portions before freezing. This way, you can easily grab just one or two slices at a time without having to thaw the whole loaf. To freeze, arrange the slices in a single layer on a baking sheet and freeze until firm (this prevents them from sticking together). Then, transfer them to a freezer-safe airtight container or a high-quality freezer bag, like Stasher bags, which are my absolute favorite for storing quick bread slices in the freezer. It will remain fresh and delicious for up to 3 months. When ready to enjoy, simply thaw the bread slices at room temperature for about 30 minutes, or warm them slightly in the microwave or a toaster oven for a quick, comforting treat.
Frequently Asked Questions About Healthy Apple Cinnamon Bread
For superior flavor and texture in your apple bread, the best apples are those that are crisp and sweet. My top recommendations include Honeycrisp apples or Pink Lady apples, which retain their shape beautifully during baking and offer a delightful, balanced sweetness. If you prefer a slightly more tart flavor profile, crisp green apples like Granny Smith are also an excellent choice. For a more complex taste, you can even experiment with a harmonious combination of both sweet and tart varieties!
Absolutely, yes! This healthy apple cinnamon bread freezes wonderfully, making it perfect for convenient meal prep or ensuring you always have a healthy snack on hand. To freeze, allow the bread to cool completely to room temperature. Then, slice it into individual portions. For best results and to prevent sticking, you can place the slices in a single layer on a baking sheet and freeze until firm. Once frozen, transfer the slices to a freezer-safe airtight container or a resealable bag. It will stay fresh in the freezer for up to 3 months. Thaw individual slices at room temperature for about 30 minutes, or warm them gently in the microwave or a toaster oven when you’re ready to enjoy.
While I haven’t personally tested this specific recipe with an egg substitute, you can certainly try making it vegan by using flax eggs as an egg replacement. For two eggs, you would typically combine 2 tablespoons of ground flaxseed with 6 tablespoons of water and let it sit for about 5-10 minutes until it thickens to a gel-like consistency. Aside from the eggs, all other ingredients in this healthy apple cinnamon bread recipe are naturally vegan, so this substitution is the main change needed. Aquafaba or mashed banana might also work, but flax eggs are generally reliable for quick breads.
I do not recommend using solely almond flour or solely oat flour in this recipe. The specific combination of almond flour and oat flour is carefully balanced to achieve the perfect texture, moisture, and rise that you see in the final product. Almond flour provides a rich tenderness and moisture, while oat flour contributes a desirable chewiness and structural integrity. Substituting one for the other entirely would significantly alter the final consistency, potentially resulting in a crumbly or overly dense bread. If you have specific allergies or dietary concerns that prevent the use of almond flour, I suggest trying my apple cinnamon oatmeal muffins, which are designed specifically without almond flour and offer a wonderful alternative.
More Delicious Apple Recipes to Try
If you’ve fallen in love with the wholesome flavors of this healthy apple cinnamon bread, you’re in for a treat! Apples are incredibly versatile and nutritious, and here are some more of my favorite recipes that highlight their fresh, crisp goodness in delightful ways:
- Refreshing Apple Arugula Salad with Toasted Pecans
- Quick & Easy Air Fryer Apples
- Healthy Cashew Chicken Salad with Apples (Dairy-Free)
- Easy Gluten-Free Apple Blondies
If you make this amazing Healthy Apple Cinnamon Bread recipe, please let me know what you think! Your feedback is invaluable, and I would be incredibly grateful if you’d consider leaving a star rating and/or a comment below. Don’t forget to share a photo of your delicious creation on Instagram or Facebook and be sure to mention @CleanPlateMama and tag #CleanPlateMama so I can see your wonderful baking!
Eat Clean. Be Well!
-Sara
Healthy Apple Cinnamon Bread
Enjoy the warm and cozy flavors of fall with this healthy apple cinnamon bread. Made with almond flour, oat flour, and naturally sweetened, it’s a healthier sweet bread you can feel good about eating. It takes just 15 minutes of prep time to get it ready for the oven.
Print Recipe |
Pin Recipe |
Rate This Recipe
Course: Bread, Breakfast, Snack
Cuisine: American
Diet: Gluten Free, Refined Sugar-Free, Oil-Free
Prep Time: 15 minutes
Cook Time: 45 minutes
Rest Time: 20 minutes
Total Time: 1 hour 20 minutes
Servings: 10 slices
Author: Sara
Save This Recipe For Later!
We’ll email this post to you, so you can come back to it later. Plus, enjoy weekly clean eating recipes as a bonus.
Equipment
- 1 Large Mixing Bowl
- 1 8.5″x4.5″ Loaf Pan
- Whisk or Spatula
- Wire Cooling Rack
Ingredients
- 1 ⅓ cup almond flour
- ⅔ cup oat flour
- ⅔ cup tapioca starch (also called tapioca flour)
- 2 tsp. baking powder
- ½ tsp. baking soda
- ¼ tsp. fine sea salt
- 1 ½ tsp. ground cinnamon
- ¼ tsp. ground nutmeg
- 2 eggs, room temperature
- ½ cup unsweetened apple sauce
- ⅔ cup coconut sugar
- 1 tsp. pure vanilla extract
- ½ tsp. apple cider vinegar
- 1 cup peeled and chopped apples
Instructions
- Preheat your oven to 350°F (175°C). Lightly grease an 8.5″x4.5″ loaf pan, or line it with parchment paper, leaving an overhang on the sides for easy removal.
- In a large mixing bowl, thoroughly whisk together the almond flour, oat flour, tapioca starch, baking powder, baking soda, fine sea salt, ground cinnamon, and ground nutmeg until well combined.
- Create a well in the center of the dry ingredients. Add the room temperature eggs, unsweetened applesauce, coconut sugar, pure vanilla extract, and apple cider vinegar into the well. Whisk the wet ingredients together within the well first, then gradually mix them into the dry ingredients until just combined and smooth. Be careful not to overmix.
- Gently fold in the peeled and chopped apples using a spatula. Ensure the apple pieces are evenly distributed throughout the batter.
- Pour the batter into the prepared loaf pan and spread it evenly. If desired, sprinkle a few extra chopped apples on top for garnish. Allow the batter to rest in the pan for 20 minutes before baking. This crucial step helps the gluten-free flours absorb moisture, preventing a soggy bread and ensuring a light, fluffy texture.
- Bake in the preheated oven for 45 minutes, or until a wooden skewer or toothpick inserted into the center comes out clean. If the top starts to brown too much before it’s fully cooked (around the 35-minute mark), loosely tent the bread with a piece of aluminum foil.
- Let the bread cool in the loaf pan for 5-10 minutes before carefully lifting it out using the parchment paper overhang (if used) or by inverting it onto a wire cooling rack. Allow it to cool completely on the rack before slicing. This allows the internal structure to set fully for the best texture.
- Slice and savor this delicious, healthy fall treat!
Notes
- Loaf Pan Size: For this recipe, an 8.5″x4.5″ loaf pan is ideal. If you opt for a slightly larger 9″x5″ pan, you might need to slightly reduce the baking time and monitor for doneness.
- Apple Selection: Crisp, sweet apples like Honeycrisp or Pink Lady work best as they maintain their texture and add natural sweetness. A blend of sweet and tart is also excellent.
- Garnish: Feel free to reserve a small amount of chopped apples to sprinkle over the top of the batter before baking for a pretty finish.
- The “Rest” is Best: Don’t skip the 20-minute resting period for the batter in the pan. It’s vital for gluten-free flours to absorb moisture, leading to a perfectly light and fluffy texture.
- Patience for Perfection: Always let the bread cool completely on a wire rack before slicing. This allows the gluten-free flours to properly set, preventing crumbling and ensuring beautifully firm slices.
Nutrition Information (per slice)
Calories: 207kcal | Carbohydrates: 29g | Protein: 6g | Fat: 9g | Saturated Fat: 1g | Polyunsaturated Fat: 0.4g | Monounsaturated Fat: 1g | Trans Fat: 0.003g | Cholesterol: 33mg | Sodium: 255mg | Potassium: 71mg | Fiber: 3g | Sugar: 10g | Vitamin A: 60IU | Vitamin C: 1mg | Calcium: 108mg | Iron: 1mg
Tried this Recipe? Tag me Today!
Mention @CleanPlateMama or tag #CleanPlateMama on social media!
